Table of Contents
Advertisement
Quick Links
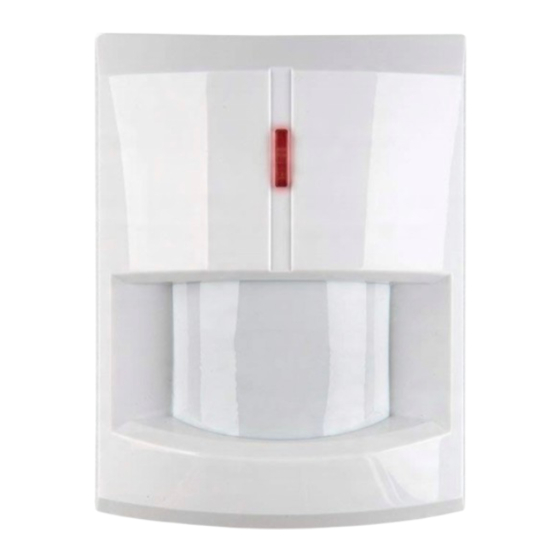
IR-S4/IR-P4*
Follow instruction in this document to setup and use the
accessory. For further setting and operation detail, please
visit Blaupunkt website
service.blaupunkt-security.com
manual.
Getting started
1. Pull out the battery insulator to activate battery. The
LED will flash for 30 seconds to indicate the PIR
detector is warming up.
2. For Q Series: Go to the Web Portal
https://eu.bphomeconnect.com/BP/
account credentials.
a) Put the Hub into learn-mode: Go to Settings → Device
and click on the "+" Add device button.
b) Press Learn Button (1) to learn-in the PIR detector.
EN | PIR Movement
When the panel receives the "learn signal", it will emit a
Detector (Pet-Immune*)
double beep tone and the web interface will display the
1. Learn Button & LED
device info.
Indicator
c) Check the box in front of the device info, then click OK
2. Battery Insulator
to add the device into the system.
3. Corner Fixing Knockout
d) Input the name of the device (e.g. IR Living Room) and
4. Surface Fixing Knockout
select the desired zone.
(Inside)
e) To change the attribute of the accessory click on the 3
dots on the right side of this accessory and select the
DE | PIR-
desired attribute (burglar, Entry, home omit) from the
Bewegungsmelder
attribute pull down menu.
(haustierkompatibel*)
1. Lern-/Testtaste / LED-
3. For SA series refer to panel manual to learn how to
Anzeige
register a device or download the manual at
2. Batterieisolator
service.blaupunkt-security.com
3. Aussparungen
Installation Location
Eckmontage
⚫
4. Aussparungen
Mount the PIR sensor at 1.9-2m height for best
Wandmontage (innen)
performance.
⚫
PIR sensor detection is most effective when the
FR | Détecteur de
intruder is moving across its field of view. Do not mount
mouvement
PIR sensor in a location that faces intruder directly
⚫
(compatible animaux*)
Do not mount the PIR sensor to look at door/window
1. Bouton / Voyant
protected by Door Contact.
⚫
2. Languette pile
Do not mount the PIR sensor directly exposed to
3. Pré-trous de fixation en
sunlight, or pointing at a window, or a heat source.
⚫
angle
Avoid mounting PIR near large metal objects
4. Pré-trous de fixation à plat
Installation
1. Remove the back cover and push through the
knockouts on the back (for example with a screwdriver)
where plastic is thinner. There are six possible
knockouts on the back of the device that can be pushed
though. If you mount the device in a corner, push
through the perforations on the side; if you mount the
device on a plane surface, push through the
perforations in the center.
2. Drill holes into the wall using the knockouts as template
3. Fix the IR-P4/IR-S4 base onto the wall with the screw
and plugs provided.
4. Place back the back cover onto the PIR detector.
NOTE: While alarm is on disarm mode in order to reduce
the power consumption and increase the battery life time
the PIR detector will be on sleep mode for 1 min after
detecting movement. While testing wait more than 1
minute without the PIR detecting movement to be sure the
device it's out of sleep mode.
For IR-P4 only: The pet immune feature will ignore pets
up to 25 kgs. For a correct pet immune detection do not
aim the motion detector at stairways or areas where a pet
can climb on.
Battery:
Radio:
868MHz
EN
to download the complete
and login with your
1 x AA 1,5V Alkaline battery (Pre-inserted)
Blaupunkt Competence Center Security
Security Brand Pro GmbH
Mondstrasse 2-4
85622 Feldkirchen, Germany
E-Mail: contact@blaupunkt-sc.com
www.blaupunkt.com/service
DE
Befolgen Sie die Anweisungen in dieser Schnellstartanleitung,
um das Zubehör einzurichten und zu nutzen. Weitere
Informationen zu den Einstellungen und zum Betrieb finden
Sie auf der Blaupunkt-Website service.blaupunkt-security.com,
um das vollständige Handbuch herunterzuladen.
Einlernen des IR-S4/IR-P4*
1. Ziehen Sie den Batterieisolator heraus, um die Batterie zu
aktivieren. Die LED blinkt 30 Sekunden lang, um anzuzeigen,
dass sich der PIR-Detektor aufwärmt.
2. Für die Q-Serie: Rufen Sie das Web Portal
https://eu.bphomeconnect.com/BP/ auf und melden Sie sich
mit Ihren Kontoanmeldeinformationen an.
a) Versetzen Sie das Hub in den Lernmodus: Gehen Sie zu
→
Einstellungen
Gerät und klicken Sie auf die Schaltfläche
„+" Gerät hinzufügen.
b) Drücken Sie die Learn-Taste (1), um den PIR-Detektor
einzulernen. Wenn das Panel das „Lernsignal" empfängt,
ertönt ein doppelter Piepton und das Web Portal zeigt die
Geräteinformationen an.
c) Aktivieren Sie das Kontrollkästchen vor den
Geräteinformationen und klicken Sie auf OK, um das Gerät
dem System hinzuzufügen.
d) Geben Sie den Namen des Geräts ein (z. B. PIR-Detektor
Wohnzimmer) und wählen Sie die gewünschte Zone aus.
e) Um das Attribut des Zubehörs zu ändern, klicken Sie auf die
3 Punkte auf der rechten Seite dieses Zubehörs und wählen
Sie das gewünschte Attribut (Einbruch, Eingang oder Zu
Hause) aus dem Attribute Menü aus.
Hinweis: Informationen zum Einlernen des PIR-Detektor in
das Panel der SA-Serie finden Sie in der
Bedienungsanleitung der SA-Serie. Dieses können sie
unter
service.blaupunkt-security.com
herunterladen.
Montageort
⚫
Für optimale Ergebnisse in 1,90 bis 2 m Höhe anbringen.
⚫
Der Bewegungsmelder erzielt die besten Ergebnisse,
wenn sich der Eindringling quer zum Erfassungsbereich
bewegt. Nicht so montieren, dass der Eindringling direkt
darauf zuläuft.
⚫
Den Bewegungsmelder nicht auf Türen/Fenster richten,
die durch Tür/Fenstersensoren geschützt sind.
⚫
Den
Bewegungsmelder
keiner
Sonneneinstrahlung aussetzen.
⚫
PIR-Bewegungsmelder nicht auf Fenster oder Hitzequelle
richten.
⚫
Nicht neben größeren Metall- gegenständen montieren.
Installation
1. Entfernen Sie die hintere Abdeckung und drücken Sie (z. B.
mit einem Schraubendreher) durch die Aussparungen auf der
Rückseite, an der Stelle, an der der Kunststoff dünner ist. Es
gibt sechs Aussparungen auf der Rückseite des Geräts. Wenn
Sie das Gerät in einer Ecke montieren, drücken Sie die
seitlichen Aussparungen durch. Wenn Sie das Gerät auf
einer ebenen Fläche montieren, drücken Sie durch die
Aussparungen in der Mitte.
2. Bohren Sie Löcher in die Wand, wobei Sie die
Aussparungen als Schablone verwenden.
3. Befestigen Sie die hintere Abdeckung des IR-P4
mit den mitgelieferten Schrauben und Dübeln an der Wand.
4. Setzen Sie die rückseitige Abdeckung wieder auf den IR-P4.
HINWEIS: Wenn das System unscharf geschalten ist befindet
sich der PIR-Detektor nach Erkennen einer Bewegung für 1
Minute im Ruhezustand, dies dient dazu den Stromverbrauch
zu reduzieren und die Lebensdauer der Batterie signifikant zu
verlängern. Warten Sie während des Tests mehr als 1 Minute,
ohne dass der PIR-Detektor eine Bewegung erkennt, um
sicherzustellen, dass sich das Gerät nicht im Ruhezustand
befindet.
Nur für den IR-P4: Der IR-P4 ignoriert Haustiere bis zu 25 kg.
Richten Sie den Bewegungsmelder nicht auf Fensterfronten,
Treppen oder auf Bereiche, auf welche ein Haustier klettern
kann.
Batterie:
1 x AA 1,5 V Alkalibatterie (werksseitig eingelegt)
Radio:
868MHz
Follow the instruction in this document to setup and use the accessory.
For further setting and operation details, please visit the Blaupunkt website
http://www.blaupunkt.com/service
to download the complete manual.
FR
Suivre les instructions de cette notice pour configurer et utiliser
le détecteur. Pour plus d'informations rendez-vous sur le site
http://service.blaupunkt-security.com
complète.
Démarrage
1. Retirez l'isolant de la batterie pour activer celle-ci.
2. Pour la série Q : Accédez au portail Web
https://eu.bphomeconnect.com/BP/
les informations d'identification de votre compte.
a) Mettez le hub en mode d'apprentissage: Allez dans
→
Paramètres
Appareil et cliquez sur le bouton «+» Ajouter
un appareil.
b) Appuyez sur le bouton d'apprentissage (1) pour reconnaitre
le détecteur IR. Lorsque le panneau reçoit le «signal
d'apprentissage», il émet un double bip et l'interface Web
affiche les informations relatives à l'appareil.
c) Cochez la case en regard des informations sur le
périphérique, puis cliquez sur OK pour ajouter le périphérique
au système.
d) Saisissez le nom du périphérique (par exemple, IR Salon) et
sélectionnez la zone souhaitée.
e) Pour modifier l'attribut de l'accessoire, cliquez sur les 3
points situés à droite de cet accessoire et sélectionnez
l'attribut souhaité (antivol, Entrée, domicile, omission) dans le
menu déroulant des attributs.
3. pour la série SA, pour savoir comment enregistrer le
détecteur, reportez-vous au manuel du panneau sur :
service.blaupunkt-security.com
Emplacement
⚫
Installer le détecteur à une hauteur comprise entre 1,90 et
2 m pour de meilleures performances.
⚫
La détection est plus efficace lorsque l'intrus se déplace à
travers le champ de vision du détecteur. Ne pas installer le
détecteur à un emplacement qui est directement orienté
vers le potentiel intrus.
⚫
Installer de préférence le détecteur dans un angle de mur
pour une meilleure
détection.
⚫
Ne pas installer le détecteur orienté vers une porte/fenêtre
protégée par un contact
d'ouverture.
⚫
Ne pas installer face au soleil.
⚫
Ne pas installer près d'une source de chaleur (fenêtre,
direkten
radiateur...).
⚫
à proximité d'objets métalliques
Ne
pas
installer
volumineux.
Installation
1. Retirez le capot arrière et poussez à travers les encoches à
l'arrière (par exemple avec un tournevis) là où le plastique est
plus mince. Il y a six emplacements possibles à l'arrière du
détecteur qui peuvent être enlevées. Si vous installez le
détecteur dans un coin, poussez les encoches latérales. Sinon,
en cas d'installation sur une surface plane, poussez les
encoches centrales.
2. Percer les trous dans le mur en utilisant les emplacements
de l'arrière du détecteur comme repère.
3. Visser la face arrière du détecteur à l'aide de la visserie fournie.
4. Refermer le détecteur.
NOTE : Lorsque l'alarme est désarmée, afin de réduire sa
consommation et ainsi augmenter la durée de vie de la batterie,
le détecteur PIR se mettra en veille 1 minute après avoir détecté
un mouvement. Lors de votre test, attendez plus d'une minute
sans que le PIR ne détecte un mouvement pour être sûr que le
détecteur n'est pas en mode veille.
Pour IR-P4 uniquement : La fonction d'immunité aux animaux,
ignore ceux-ci jusque 25Kg. Pour un fonctionnement correct, ne
placez pas le détecteur de mouvement dans une zone
comprenant des escaliers ou un endroit sur lequel un animal
peut sauter.
Pile:
1 x pile AA 1.5 alcaline (déjà insérée)
Radio:
868MHz
pour télécharger la notice
et connectez-vous avec
Advertisement
Table of Contents

Subscribe to Our Youtube Channel
Related Manuals for Blaupunkt IR-S4


Summary of Contents for Blaupunkt IR-S4
- Page 1 Aussparungen auf der Rückseite des Geräts. Wenn en cas d’installation sur une surface plane, poussez les 3. Fix the IR-P4/IR-S4 base onto the wall with the screw Sie das Gerät in einer Ecke montieren, drücken Sie die encoches centrales.
- Page 2 Blaupunkt Competence Center Security Follow the instruction in this document to setup and use the accessory. Security Brand Pro GmbH Mondstrasse 2-4 For further setting and operation details, please visit the Blaupunkt website 85622 Feldkirchen, Germany http://www.blaupunkt.com/service to download the complete manual.
- Page 3 At 868.3 MHz < 1 % per h Declaration of conformity: Hereby Security Brand Pro GmbH declares that the radio equipment type “IR-S4” complies with the directive 2014/53 / EU. The full text of the EU Declaration of Conformity is available at the following Internet address: www.blaupunkt.com/service...
- Page 4 Déclaration de conformité: La société Security Brand Pro GmbH déclare par la présente que le type d‘installation radio «IR-S4» est conforme à la directive 2014/53/UE. Le texte complet de la déclaration de conformité UE est disponible à l’adresse Internet suivante : www.blaupunkt.com/service...
- Page 5 Declaración de conformidad: Por la presente, Security Brand Pro GmbH declara que el tipo de equipo de radio "IR-S4" cumple con la directiva 2014/53 / EU. El texto completo de la Declaración de conformidad de la UE está disponible en la siguiente dirección de Internet: www.blaupunkt.com/service...
- Page 6 868.3 MHz < 1 % per h Conformiteitsverklaring: Hierbij verklaart Security Brand Pro GmbH dat de radioapparatuur van het type "IR-S4" voldoet aan de richtlijn 2014/53 / EU. De volledige tekst van de EU-conformiteitsverklaring is beschikbaar op het volgende internetadres: www.blaupunkt.com/service...
Need help?
Do you have a question about the IR-S4 and is the answer not in the manual?
Questions and answers