Advertisement
Quick Links
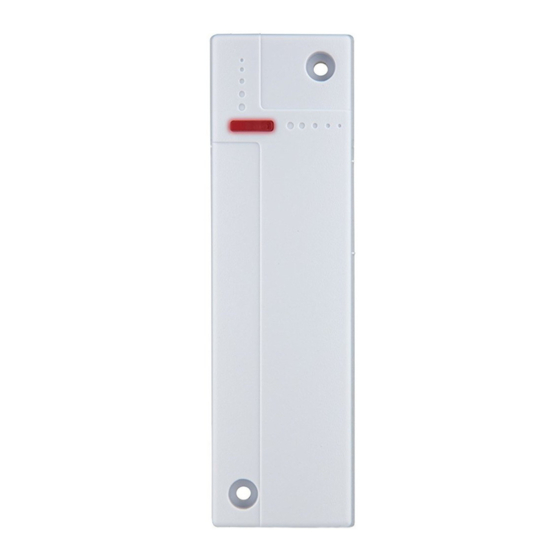
Door/Window and Shutter Detector with Wire Input (DC-S3)
P
a
r
t
s
D
e
s
c
r
i
p
t
i
o
n
P
a
r
t
s
D
e
s
c
r
i
p
t
i
o
n
1. LED indicator & Learn/Test Button
Press the button to transmit a learn/test code and enter Test
mode for 3 minutes. The LED will light up whenever the Detector
is activated under Test mode.
2. Mounting Holes (Covered by White Caps)
3. Wire Input Terminial 1
Connect the terminal to any Normal Close (N.C) device
4. Wire Input Terminial 2
Connect the terminal to Roller Shutter
5. Jumper Switches
For Jumper Switch functions, refer to later section "Jumper
Switch Setting".
6. Battery Insulator
7. Tamper Switch
8. Knockout for Extension Terminals
9. Rib-Mark
10. Magnet
P
a
c
k
a
g
e
C
o
n
t
e
n
t
P
a
c
k
a
g
e
C
o
n
t
e
n
t
1 x Door Contact
2 x wall plugs and screws
1 x adhesive pads
1 x 3V lithium battery (pre-installed)
.
L
e
a
r
n
L
e
a
r
n
Put the Control Panel into learning mode, then press the learn
button to transmit learn code. Please refer to Control Panel
manual to complete learn in process.
I
n
s
t
a
l
l
a
I
n
s
t
a
l
l
a
The Detector can be used either as a door/ window sensor or
transmitter for shutter or wired device, or all at the same time.
Choose the mounting location according to the Door Contact's
usage.
As a Door/window sensor: mount the main body on the
door/window frame, and the magnet on the door/window.
Mount as high as possible.
As a transmitter for shutter or wired device: mount close
to the device accordingly.
i
n
g
i
n
g
t
i
o
n
t
i
o
n
Do not mount on metallic surface.
1. Remove the white caps covering the 2 mounting holes.
2. Drill holes into the mounting location using the holes as
template.
3. Screw the sensor onto the wall or door/window frame with the
screws and plugs provided.
As a Door/ Window Sensor
4. Align the magnet with the Rib Mark on main body; screw the
magnet onto the door/window or apply with double-side
adhesive tape. The gap between the body and the magnet
should be no more than 15 mm.
Door/
Window
As a Transmitter
5. Break through the knockout at top of the cover
6. For general wired device: connect the wire from device to
Wire Input Terminal 1. Multiple wired devices can be
connected to single Door Contact as long as the devices form
a closed loop with the Detector (Figure A)
7. For roller shutter: connect the wire from roller shutter to Wire
Input Terminal 2. (Figure B)
Figure A
8. Replace the white caps.
Frame
Figure B
Advertisement

Related Manuals for Blaupunkt DC-S3


Summary of Contents for Blaupunkt DC-S3
- Page 1 Door/Window and Shutter Detector with Wire Input (DC-S3) Do not mount on metallic surface. 1. Remove the white caps covering the 2 mounting holes. 1. LED indicator & Learn/Test Button 2. Drill holes into the mounting location using the holes as Press the button to transmit a learn/test code and enter Test template.
- Page 2 After installation, the Detector will be activated under the following conditions: 1. When the door is opened and magnet moves away from the main body, the Reed Switch within the Detector will be activated. 2. When the Normal Close (N.C.) device connected to Wire Input Terminal 1 is activated (opened).
Need help?
Do you have a question about the DC-S3 and is the answer not in the manual?
Questions and answers