
Subscribe to Our Youtube Channel
Related Manuals for Argox PT-9 Series


Summary of Contents for Argox PT-9 Series
- Page 1 User’s Manual PT-9XXX-X-X Mobile Computer (WinCE 6.0 version) DOC NO. UM-P9005-01 Mar . 2010 Version 1.0...
- Page 2 Argox will not be liable in case modifications are made by the customer. In such case the standard repair charge will be applicable. The standard charge for repair will also be applicable in case no defect is found at all.
-
Page 3: Table Of Contents
Table of Contents INTRODUCTION......................1 1.1 A .................... 1 BOUT THIS ANUAL 1.2 U ................. 2 SER AND RODUCT AFETY ....................4 1.3 S PECIFICATIONS GETTING STARTED....................6 2.1 C .................... 6 HECK THE PACKAGE 2.1.1 Compact Package..................6 2.1.2 Cadle & Pistol grip Package (Optional) ............7 2.2 D ..................... - Page 4 4.3 S ......................38 CAN TEST ....................38 4.4 R EADING BARCODE ................39 4.5 B ARCODE READING PROBLEMS UTILITIES......................... 40 5.1 F ..................40 UNCTION ETTING 5.2 T & B ..................41 IMEOUT RIGHTNESS SOFTWARE APPLICATIONS ................. 42 6.1 I ..................
-
Page 5: Introduction
1. Introduction Congratulations on purchasing the PT-9XXX-X-X series (PT-90) , a Microsoft Windows ® Mobile Computer. Its special combination of features makes it perfect for use in a wide range of applications. These features as: Microsoft Windows CE. Net operating system ... -
Page 6: User And Product Safety
1.2 User and Product Safety Never use strong pressure on the screen or subject it to severe impact, as the LCD panel can crack and possibly cause personal injury. If the LCD panel is broken, never touch the liquid inside, for such contact can irritate the skin. ... - Page 7 To avoid malfunctions and to ensure years of trouble-free operation, pay attention to the following: General Use Do not expose the mobile computer to areas subject to extreme heat such as direct sunlight, near a heater, or in a car – or in areas that are very cold, humid, moist, or dusty.
-
Page 8: Specifications
1.3 Specifications Performance Windows Embedded CE 6.0 MARVELL PXA310 (806 MHz) 256MB RAM 256MB Display 3.5” Color TFT LCD with touch panel Resolution 240 x 320 Scanner Scanner system Laser scan engine Readable barcode Code 11, Code 39, Code 93, Code 128, Codabar, EAN-8, EAN- 13, Industrial 2/5, Interleaved 2/5, MSI plessey, UK plessey, Telepen, UPC-A, UPC-E, Matrix 2/5, UPC/EAN General, IATA 2/5, TRI-OPTIC and RSS... - Page 9 Sealed standard IP65 Agency Listing CE, FCC, BSMI, NCC, CCC, SRRC Win-CE AP MS Web Browser(Internet Explorer), Media Player, Microsoft WordPad, Remote Desktop Connection, Transcriber, Windows Explorer Developing Tools Argox SDK Microsoft Visual Studio for smart device programming User’s Manual...
-
Page 10: Getting Started
2. Getting Started This chapter describes the PT-90 physical characteristics, how to install and charge the batteries, how to remove and replace the strap assembly and how to start the PT-90 for the first time. 2.1 Check the package Carefully remove all protective material from around the PT-90 and save the shipping container for later storage and shipping. -
Page 11: Cadle & Pistol Grip Package (Optional)
Figure 2-2 Cradle Package Pistol Package pistol-grip Li-ion battery 4400mAH Figure 2-3 Pistol –grip Package Inspect the package contents for damage. If any item is missing or damaged, please contact the Argox Technical Support Center immediately. User’s Manual... -
Page 12: Detailed View
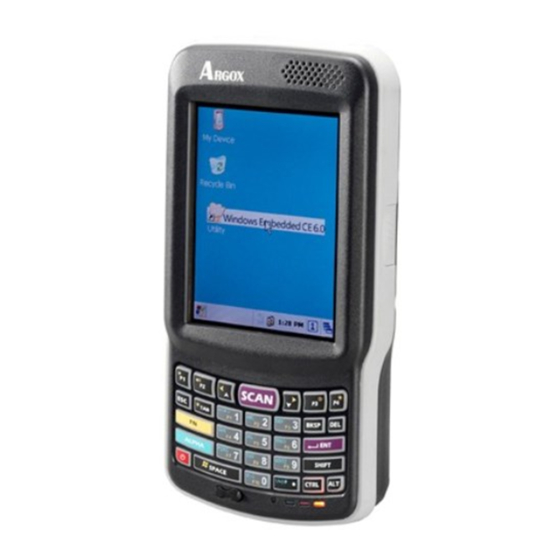
2.2 Detailed View The pictures below provide information on the PT-90’s various buttons, ports and other functions. 2.2.1 PT-90 Mobile Computer Dimensions of the PT-90 159 mm (L) * 80.8mm (W) * 36mm (H) Key pad Touch Screen Speaker Scan Button Scan Window Stylus Figure 2-4 The Front of the PT-90... -
Page 13: Cradle
2.2.2 Cradle Dimensions of the CRD-90 Cradle 147mm (L) x 112mm (W) x 83mm (H) Charging Power Figure 2-6 The Front of the CRD-90 1. Mobile Computer Slot Put the mobile computer in the cradle slot for data transmission or charging 2. -
Page 14: Installing, Replacing And Charging Batteries
Use the right charger for batteries. The rechargeable Li-polymer battery pack from Argox can be charged in the cradle when either it is in the mobile computer or alone in the charging slot in the back of the cradle. - Page 15 When the mobile computer is placed in the cradle, the rechargeable battery pack charges automatically. If you have a spare Argox battery pack, you can replace the empty battery pack with a full battery pack for continuous mobile computer operation. Put the empty battery pack in the charging slot of the cradle.
-
Page 16: Installing / Replacing The Battery Pack
2.3.1 Installing / Replacing the Battery Pack To remove and install the battery 1. Press and release the POWER button to suspend the mobile computer 2. If the Mobile Computer has a hand-strap, detach and loosen the hand-strap 3. Rotate the latches to the open position and remove the battery cover Figure 2-8 Installing / Replacing the Main Battery 4. -
Page 17: Charging The Battery Pack With Cradle
2.3.3 Charging the Battery Pack with Cradle a) Leaving the battery pack inside the Mobile computer Connect the power adaptor to a power source Plug in the connector of the power adapter to the Cradle Insert the Mobile computer into the Cradle Figure 2-10 Charging with Cradle Note: ... -
Page 18: Installing In A System
2.4 Installing in a System Notes: Exercise caution at all times when working with AC-powered equipment. Turn off your devices before installation. Because of the special pin-out of the connectors, use the cables supplied by the manufacturer. ... -
Page 19: Operation Of The Mobile Computer
3. Operation of the Mobile Computer 3.1 Keypad Description PT-90 keypad consists of 29 rubber keys including one SCAN key. Please refer to the picture below. 29-key 29-key plus Figure 3-1 Keypad Layout Key Define Function ALPHA Switches between the number input mode or the character input mode. Number input mode (default input mode) English lowercase letter (a~z) English capitalization (A~Z) -
Page 20: Function Key Description
3.2 Function Key Description The function key is specially designed for quick access (Hot-key) to some functions. The function key combines with other keys. Press function key once (function single mode). After press function key combination, function single mode switches to normal mode. ... -
Page 21: Install Micro Sd Card Into Pt-90
3.3 Install micro SD card into PT-90 1. Open the Micro SD slot cover with a screw driver. 2. Insert a correctly oriented Micro SD card. 3.Close the slot cover and fix two screws. If the micro SD card is inserted incorrectly, the micro SD card unit and its internal data Note: maybe damaged. -
Page 22: Configuring Pt-90 Settings
3.4 Configuring PT-90 Settings 3.4.1 Calibrating Touch Screen Alignment Pressing the Power key The PT-90 welcome screen appears. The Windows CE® screen appears shortly after. Figure 3-3 Logo Calibrating the PT-90 This screen can be accessed at any time by pressing the hot key FN and ESC key. -
Page 23: Adjusting Brightness
3.4.2 Adjusting Brightness You can use the following procedures to adjust display brightness to make it easier to read under different lighting conditions. Press the key and then press the key to adjust brightness for a lighter display. Press the key and then press the key to adjust brightness for a darker display. -
Page 24: Entering Information
3.5 Entering Information To enter information: Use the keypad Use the keyboard input panel (soft keyboard) to enter text. Scan bar code data into data fields. Use left /right side key Use Microsoft ActiveSync to synchronize or copy information from the host computer to the PT-90. -
Page 25: Power Management
3.6 Power Management 3.6.1 Power Status Indication Checking main and Backup Battery Status Enter “Power Properties” If the above mentioned Plug or Battery icon is displayed, double tap this icon to bring up the Power Properties screen. Or, select Settings → Control Panel from the Start menu and then double tap the Power icon to display Power Properties. - Page 26 Indicates the battery is very low. Stop operation and charge “Battery Very low” the PT-90 immediately. You must charge the battery when the Battery Very Low icon is displayed. If the Battery Very Low icons still show after charging, please contact Argox Technical Support. User’s Manual...
-
Page 27: Saving Battery Power
3.6.2 Saving Battery Power Automatic shut-down of the PT-90 The PT-90 enters idle mode when there is no task or if all tasks are waiting for input. In default setting, the PT-90 automatically turns itself off if idle for 9 (1+3+5) minutes and when there is no external charging power. -
Page 28: Suspend Mode
Timeout setting: Tap the check box off to always turn on backlight. Tap the check box on to toggle automatically turning backlight. Available timeout for battery power are 15 seconds, 30 seconds, 1 minute, 2 minutes and 5 minutes. Available timeout for AC power are 15 seconds, 30 seconds, 1 minute, 2 minutes, 5 minutes, 10 minutes, 15 minutes and 30 minutes. -
Page 29: Resume
Entering Suspend Mode: The following puts the PT-90 in suspend mode: Press key while the unit is on. The duration timer for Switch state to Suspend expires, which indicates that there has been no use for a specified of time. ... -
Page 30: Performing A Warm Boot
3.7.1 Performing a Warm Boot To perform a warm boot to correct the computer when an application stop responding to the system. The RAM will be reinitialized. Caution: To perform a warm boot: Press Reset button. Do not hold down any other keys or buttons. PT-90 initializes the logo screen appears for about a minute. -
Page 31: Flash Storage
for about a minute. 3.8 Flash Storage Flash memory is a re-writable location in which to store up to 256MB of programs and data files. The benefit of this feature is that files and programs saved in Flash Memory are unaffected by the PT-90’s power status. -
Page 32: Bluetooth Setting
3.9 Bluetooth Setting Please enable Bluetooth first like Figure 3-17 Figure 3-17 Enable Bluetooth After enable Bluetooth, please select Show BT like figure 3-18 Figure 3-18 Show BT On Bluetooth manager screen, select File New Connection like Figure 3-19 User’s Manual... - Page 33 Figure 3-19 Bluetooth Connection User’s Manual...
- Page 34 Bluetooth has four functions to choose like Figure 3-20 Figure 3-20 Bluetooth Explorer First function is Pair with remote device, after press next button. It will start to search devices. Select a device and press Pair button; it needs to enter Bluetooth PIN code like Figure 3-21.
- Page 35 Second function is Serial Port which communication with device via com port like Figure 3-23 Figure 3-23 Bluetooth Explorer After press Next button, it will start to search device like Figure3-24. Figure 3-24 Bluetooth Serial Port After press Connect button, it will appear a connection with SPP mode like Figure 3-25 Figure 3-25 Bluetooth Serial Port User’s Manual...
- Page 36 10. Third function is File Transfer like Figure 3-26 Figure 3-26 Bluetooth Explorer 11. After press Next button, it will start to search device and it needs to enter PIN code like Figure 3-27 Figure 3-27 Bluetooth File Transfer-1 12. After checking pin code with the connect device. PT90 will enter FTP mode like Figure 3-28 Figure 3-28 Bluetooth File Transfer-2 User’s Manual...
- Page 37 13. On Bluetooth manager screen, it will add a FTP connection like Figure 3-29 Figure 3-29 Bluetooth File Transfer-3 14. The latest function is ActiveSync connection. The function can connect with computer via ActiveSync like Figure 3-30 Figure 3-30 Bluetooth Explorer 15.
- Page 38 16. PT-90 will add a ActiveSync connection on Bluetooth manager screen. It will synchronize with computer like Figure 3-32 Figure 3-32 Bluetooth ActiveSync User’s Manual...
-
Page 39: Wlan Setting
3.10 WLAN Setting After enable WLAN setting, a POP window appears as below. Figure 3-33 Figure 3-33 WLAN setting If the above window doesn’t show, try to double click the Wireless icon on the screen bottom. Select new connection and press Connect button or double click the new connection, BU01-WPA for instance;... -
Page 40: Scanning
4. Scanning The PT-90 has an integrated laser scanner that reads all major bar code labels with excellent performance. The trigger key is located in the middle of the unit. There are also two side-keys to trigger scanner. Press trigger key to activate the laser scanner. 4.1 Scan Configuration When it is necessary to change the default barcode symbology for a different application, use Scan Configuration to change default symbology, place delimiter characters behind scanned...
Need help?
Do you have a question about the PT-9 Series and is the answer not in the manual?
Questions and answers