
Related Manuals for Argox PA-100 Series


Summary of Contents for Argox PA-100 Series
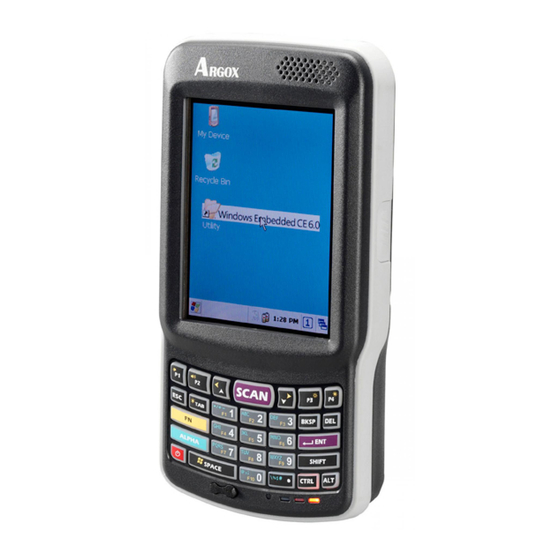
- Page 1 User’s Manual PA-100 Series Mobile Computer (WinCE 6.0 version) DOC NO. UM-P9005-01 Jan 2018 Version 1.1...
- Page 2 Argox will not be liable in case modifications are made by the customer. In such case the standard repair charge will be applicable. The standard charge for repair will also be applicable in case no defect is found at all.
- Page 3 FEDERAL COMMUNICATIONS COMMISSION INTERFERENCE STATEMENT This equipment has been tested and found to comply with the limits for a Class B digital device, pursuant to Part 15 of the FCC Rules. These limits are designed to provide reasonable protection against harmful interference in a residential installation. This equipment generates, uses and can radiate radio frequency energy and, if not installed and used in accordance with the instructions, may cause harmful interference to radio communications.
-
Page 4: Table Of Contents
HECK THE PACKAGE 2.1.1 Compact Package.................... 6 2.1.2 Cadle & Pistol grip Package (Optional) ............7 2.2 D ......................8 ETAILED 2.2.1 PA-100 SERIES Mobile Computer ..............8 2.2.2 Cradle ......................9 2.2.3 Ethernet Cradle ....................10 2.3 I ...........11 NSTALLING... - Page 5 OVERVIEW OF MICROSOFT WINDOWS CE 6.0 ...........50 8.1 M ......................50 INDOWS 8.2 T ........................52 ASKBAR 8.3 S PA-100 SERIES ................54 ETTING UP THE 8.3.1 Certificates .....................55 8.3.2 Date/Time .......................56 8.3.3 Dialing ......................57 8.3.4 Display ......................58 8.3.5 Hot Function Key ...................59 8.3.6 Input Panel .....................59 8.3.7 Internet Options .....................60...
- Page 6 9.3 M ................73 OBILE OMPUTER ROBLEMS 10. APPENDIX: UPDATING THE OS VIA MICRO SD CARD ........75 User’s Manual...
-
Page 7: Introduction
Chapter 3: Operating the Mobile computer – Describes customizing the PA-100 SERIES Chapter 4: Scanning Chapter 5: Useful Utilities Chapter 6: Software Applications Chapter 7: Communication – Describes using the PA-100 SERIES for different types of communication Chapter 8: Overview of Microsoft Windows CE 6.0 Chapter 9: Troubleshooting Chapter 10: Appendix User’s Manual... -
Page 8: User And Product Safety
Conditions exceeding IP65 standards could result in water or other contaminants entering the PA-100 SERIES. Use only the approved AC Adapter with the PA-100 SERIES. Use of an unapproved AC Adapter could result in electrical problems, or even cause a fire or an electrical shock to the user. - Page 9 [ENT] key, which can discharge your batteries or change settings you do not want changed. Using the Cradle Do not place any product other than the PA-100 SERIES mobile computer in the cradle. Maintenance There are no user-serviceable parts inside the mobile computer or the cradle. So do not try to take it apart.
-
Page 10: Specifications
1.3 Specifications Performance Windows Embedded CE 6.0 MARVELL PXA310 (806 MHz) 256MB RAM 256MB Display 3.5” Color TFT LCD with touch panel Resolution 240 x 320 Scanner Scanner system Laser scan engine / 2D scan engine Readable barcode Laser scan engine Code 11, Code 39, Code 93, Code 128, Codabar, EAN-8, EAN- 13, Interleaved 2/5, MSI Plessey, UPCA, UPCE, UPC/EAN, Discrete 2/5, Chinese 2/5 and GS1Data Bar... - Page 11 Sealed standard IP65 Agency Listing CE, FCC, BSMI, NCC, CCC, SRRC Win-CE AP MS Web Browser(Internet Explorer), Media Player, Microsoft WordPad, Remote Desktop Connection, Transcriber, Windows Explorer Developing Tools Argox SDK Microsoft Visual Studio for smart device programming User’s Manual...
-
Page 12: Getting Started
2. Getting Started This chapter describes the PA-100 SERIES physical characteristics, how to install and charge the batteries, how to remove and replace the strap assembly and how to start the PA-100 SERIES for the first time. 2.1 Check the package Carefully remove all protective material from around the PA-100 SERIES and save the shipping container for later storage and shipping. -
Page 13: Cadle & Pistol Grip Package (Optional)
Ethernet Cradle Package Power supply Ethernet Cradle EthernetCradle USB cable Figure 2-4 Ethernet Cradle Package Inspect the package contents for damage. If any item is missing or damaged, please contact the Argox Technical Support Center immediately. User’s Manual... -
Page 14: Detailed View
2.2 Detailed View The pictures below provide information on the PA-100 SERIES’s various buttons, ports and other functions. 2.2.1 PA-100 SERIES Mobile Computer Dimensions of the PA-100 SERIES 159 mm (L) * 80.8mm (W) * 36mm (H) Key pad Touch Screen... -
Page 15: Cradle
2.2.2 Cradle Dimensions of the CRD-90 Cradle 147mm (L) x 112mm (W) x 83mm (H) Charging Power Figure 2-7 The Front of the CRD-90 1. Mobile Computer Slot Put the mobile computer in the cradle slot for data transmission or charging 2. -
Page 16: Ethernet Cradle
2.2.3 Ethernet Cradle Dimensions of the CRD-90E Cradle 147mm (L) x 112mm (W) x 83mm (H) Charging Power Figure 2-9 The Front of the CRD-90E Mobile Computer Slot Put the mobile computer in the Ethernet cradle slot for data transmission or charging Power LED Indicator LED status Description... -
Page 17: Installing, Replacing And Charging Batteries
Use the right charger for batteries. The rechargeable Li-polymer battery pack from Argox can be charged in the cradle when either it is in the mobile computer or alone in the charging slot in the back of the cradle. - Page 18 When the mobile computer is placed in the cradle, the rechargeable battery pack charges automatically. If you have a spare Argox battery pack, you can replace the empty battery pack with a full battery pack for continuous mobile computer operation. Put the empty battery pack in the charging slot of the cradle.
-
Page 19: Installing / Replacing The Battery Pack
2.3.1 Installing / Replacing the Battery Pack To remove and install the battery 1. Press and release the POWER button to suspend the mobile computer 2. If the Mobile Computer has a hand-strap, detach and loosen the hand-strap 3. Rotate the latches to the open position and remove the battery cover Figure 2-11 Installing / Replacing the Main Battery 4. -
Page 20: Charging The Battery Pack With Cradle
Caution: Do not remove the Battery pack for too long from PA-100 SERIES once you have already fully-charged the Battery pack and the backup battery pack and have started to use the PA-100 SERIES. Otherwise data that is not saved will be lost. -
Page 21: Installing In A System
2.4 Installing in a System Notes: Exercise caution at all times when working with AC-powered equipment. Turn off your devices before installation. Because of the special pin-out of the connectors, use the cables supplied by the manufacturer. ... -
Page 22: Operation Of The Mobile Computer
3. Operation of the Mobile Computer 3.1 Keypad Description PA-100 SERIES keypad consists of 29 /44 rubber keys including one SCAN key. Please refer to the picture below. 29-key 29-key plus 44-key Figure 3-1 Keypad Layout Key Define Function Switches between the number input mode or the character input mode. -
Page 23: Function Key Description
3.2 Function Key Description The function key is specially designed for quick access (Hot-key) to some functions. The function key combines with other keys. Press function key once (function single mode). After press function key combination, function single mode switches to normal mode. ... -
Page 24: Install Micro Sd Card Into Pa-100 Series
3.3 Install micro SD card into PA-100 SERIES 1. Open the Micro SD slot cover with a screw driver. 2. Insert a correctly oriented Micro SD card. 3. Close the slot cover and fix two screws. Insert Micro SD card face side down... -
Page 25: Configuring Pa-100 Series Settings
3.4 Configuring PA-100 SERIES Settings 3.4.1 Calibrating Touch Screen Alignment Pressing the Power key PA-100 SERIES welcome screen appears. The Windows CE® screen appears shortly after. Figure 3-3 Logo Calibrating the PA-100 SERIES This screen can be accessed at any time by pressing the hot key FN and ESC key. -
Page 26: Adjusting Brightness
→Settings → Control Panel→Volume & Sounds 3.4.4 Using the Stylus The stylus is located next to hand-strap on the rear of the PA-100 SERIES as illustrated in Figure 2-4 The Front of the PA-100 SERIES ( ). The stylus functions the same as a mouse on a PC. -
Page 27: Entering Information
Use left /right side key Use Microsoft ActiveSync to synchronize or copy information from the host computer to the PA-100 SERIES. For more information on ActiveSync, refer to Chapter 7. 3.5.1 Entering Information Using a Keypad The alphanumeric keypads produce the 26-character alphabet (A-Z), number s (0-9), function keys and assorted characters. -
Page 28: Power Management
3.6 Power Management 3.6.1 Power Status Indication Checking main and Backup Battery Status Enter “Power Properties” If the above mentioned Plug or Battery icon is displayed, double tap this icon to bring up the Power Properties screen. Or, select Settings → Control Panel from the Start menu and then double tap the Power icon to display Power Properties. - Page 29 Indicates the battery is very low. Stop operation and charge “Battery Very low” the PA-100 SERIES immediately. You must charge the battery when the Battery Very Low icon is displayed. If the Battery Very Low icons still show after charging, please contact Argox Technical Support. User’s Manual...
-
Page 30: Saving Battery Power
Automatic shut-down of the PA-100 SERIES The PA-100 SERIES enters idle mode when there is no task or if all tasks are waiting for input. In default setting, the PA-100 SERIES automatically turns itself off if idle for 9 (1+3+5) minutes and when there is no external charging power. -
Page 31: Suspend Mode
3.6.3 Suspend Mode The PA-100 SERIES will go into suspend mode when it is idle for a period of time. Customize the idle duration using the Power control panel (refer to Figure Schemes Tab). Suspend mode appears just like you have turned the unit off. Press the key to suspend the PA-100 SERIES. -
Page 32: Resume
100 SERIES. 3.7 Resetting the PA-100 SERIES If the PA-100 SERIES stops responding to the system, you may need to rest it. There are three ways to reset - warm boot, cold boot and clean boot. A warm boot and cold boot restart the PA-100 SERIES, but all data that have not saved will get lost. -
Page 33: Performing A Warm Boot
PA-100 SERIES initializes the logo screen appears for about a minute. 3.7.2 Performing a Cold Boot A cold boot restarts the PA-100 SERIES and all un-saved data will get lost. Only perform a cold boot if a warm boot does not solve the problem. Caution: The RAM will be reinitialized. -
Page 34: Flash Storage
3.8.1 Flash Disk Location All storage disks are stored in Flash Disk in PA-100 SERIES Figure 3-15 My Device 3.8.2 Flash Disk Size The size of the Flash Disk varies depending on the size of the system firmware. -
Page 35: Bluetooth Setting
3.9 Bluetooth Setting Run program from Desktop→Utility→Bluetooth to enable Bluetooth like Figure 3-17 Figure 3-17 Enable Bluetooth After enable Bluetooth, please select Show BT like figure 3-18 Figure 3-18 Show BT On Bluetooth manager screen, select File New Connection like Figure 3-19 Figure 3-19 Bluetooth Connection User’s Manual... - Page 36 It will start to search devices. Select a device and press Pair button; it needs to enter Bluetooth PIN code like Figure 3-21. Figure 3-21 Bluetooth Pairing After PA-100 SERIES check pin code with device. PA-100 SERIES will appear a pop window and show Success message like Figure 3-22. Figure 3-22 Bluetooth Pairing-1...
- Page 37 Second function is Serial Port which communication with device via com port like Figure 3-23 Figure 3-23 Bluetooth Explorer After press Next button, it will start to search device like Figure3-24. Figure 3-24 Bluetooth Serial Port After press Connect button, it will appear a connection with SPP mode like Figure 3-25 Figure 3-25 Bluetooth Serial Port User’s Manual...
- Page 38 11. After press Next button, it will start to search device and it needs to enter PIN code like Figure 3-27 Figure 3-27 Bluetooth File Transfer-1 12. After checking pin code with the connect device. PA-100 SERIES will enter FTP mode like Figure 3-28 Figure 3-28 Bluetooth File Transfer-2...
- Page 39 13. On Bluetooth manager screen, it will add a FTP connection like Figure 3-29 Figure 3-29 Bluetooth File Transfer-3 14. The latest function is ActiveSync connection. The function can connect with computer via ActiveSync like Figure 3-30 Figure 3-30 Bluetooth Explorer 15.
- Page 40 16. PA-100 SERIES will add a ActiveSync connection on Bluetooth manager screen. It will synchronize with computer like Figure 3-32 Figure 3-32 Bluetooth ActiveSync User’s Manual...
-
Page 41: Wlan Setting
3.10 WLAN Setting SDCSD40N1 Double click on Wireless icon or tap Start→Program→Summitscu to open Summit Client Utility like Figure 3-33 3-33 IGURE OPEN Click Admin Login and input password “SUMMIT” to login like Figure 3-34 3-34 A IGURE DMIN OGIN In Profile Tab, press Scan to find access point. - Page 42 Create a new profile and input key if necessary. 3-36 C IGURE REATE A NEW PROFILE Press Commit to save the profile setting. 3-37 C IGURE OMMIT In Main tab, set Active Profile to RD02test. WiFi will start connection with RD02test. 3-38 A IGURE CTIVE...
-
Page 43: Ethernet Cradle
3.11 Ethernet Cradle Switch to LAN , connect the AC adapter and connect the RJ45 connector Put the mobile computer in the cradle slot for LAN connection like Figure 3-39 3-39 LAN CONNECTIO IGURE If AC adapter isn’t available, there exists a message for AC Power Required. Please connect AC adapter and press retry to establish LAN connection. -
Page 44: Scanning
4. Scanning The PA-100 SERIES has an integrated laser/2D scanner that reads all major bar code labels with excellent performance. The trigger key is located in the middle of the unit. There are also two side-keys to trigger scanner. Press trigger key to activate the laser/2D scanner. - Page 45 Figure 4-2 Laser Scan Configuration -1 2D Scanner Engine: Figure 4-3 2D Scan Configuration -1 Figure 4-4 2D Scan Configuration -2 Notes: 0~9, a~z, A~Z characters can add directly in prefix and suffix. Other characters should follow ASCII code table. For example, key-in “/x0d” in Suffix View char1 can add “Enter”.
- Page 46 Figure 4-5 2D Scan Configuration -3 After you change settings, press the OK button to configure, or press Restore Default to return to the scan default settings. User’s Manual...
-
Page 47: Scan Driver
4.2 Scan driver Scan driver lets you put data into Microsoft WordPad. Open scan driver and the scan module powers on the scanner. You can then scan barcode. To turn off the power, press Exit on the task bar. Figure 4-6 Scan Driver User’s Manual... -
Page 48: Scan Test
4.3 Scan test The PA-100 SERIES has a ScanTest.exe program that allows you to test the barcode scan function. Scan Test.exe is located in directory Desktop→Utility→ScanTest. This program shows barcode type and barcode data when pressing the Scan key. Figure 4-7 Scan Test 4.4 Reading barcode... -
Page 49: Barcode Reading Problems
The scanning sequence is defined by the user’s application. A typical sequence is: Point the mobile computer at the barcode and press the Trigger key Point the LED lightbeam at barcode as shown in the scan position illustration above. ... -
Page 50: Utilities
5. Utilities 5.1 Function Key Setting To assign your favorite application program or virtual key from F1 ~ F10 and P1~P4 hot keys. Function Key.exe is located in directory Desktop→Utility→Function_Key. Choose F1~F10 or P1~P4 from list. Tap Define to define application or virtual key. Tap Apply or OK to set function key setting. -
Page 51: Timeout & Brightness
5.2 Timeout & Brightness Timeout & Brightness setting is a tool for changing the LCD backlight and keypad LED. If you wish to save power use this program to change LCD backlight and keypad LED settings. This application supports battery power and external power settings. Figure 5-3 Timeout &... -
Page 52: Software Applications
WLAN to connect to an Internet server provider (ISP) or network. Figure 6-2 Internet Explorer 6.2 Media Player The PA-100 SERIES comes with Media Player for Windows CE installed. Open Media Player by selecting Start → Programs →Media Player from the desktop. -
Page 53: Microsoft Wordpad
6.3 Microsoft WordPad You can create and edit documents and templates in WordPad, using buttons and menu commands that are similar to those used in the desktop version of Microsoft Word. You can work with files Normal or Outline view. WordPad documents are usually saved as .pwd files, but you can also save documents in other file formats, such as .rtf... -
Page 54: Windows Explorer
6.6 Windows Explorer Windows Explorer works almost the same on your PDA as it does on your PC. See the topics below for information about the difference in Windows Explorer on your device. Figure 6-7 Windows Explorer User’s Manual... -
Page 55: Communication
7. Communication The Argox PA-100 SERIES lets you link to a host computer via RS-232 or USB port for data communication with cable or cradle. This chapter gives an overview of the PA-100 SERIES’s communication capabilities. 7.1 Microsoft ActiveSync Download and install Microsoft ActiveSync if you run Windows XP or Windows 2000 on your computer and you want to sync content between PA-100 SERIES and your computer. -
Page 56: Overview Of Microsoft Windows Ce 6.0
How to use a taskbar How to use settings 8.1 Main Windows When you turn on PA-100 SERIES, you will see the main Windows of Window CE 6.0, which is similar in appearance to Windows XP. The main window consists of a background screen and taskbar. - Page 57 Figure 8-3 Taskbar Start Icon Start icon is the starting point for the PA-100 SERIES program. If you point at the start menu with the stylus pen, you can see various menus including program, bookmark, document, setting, help, and operation. If you choose each menu, detailed executable programs appear as in the picture below.
-
Page 58: Taskbar
8.2 Taskbar Taskbar shows a variety of information including keying in characters, battery, network connection, status of running programs, etc. Open Taskbar and Start Menu setting by selecting Start → Settings → Taskbar and Start Menu from the desktop. There are Always on top, Auto hide and Show Clock setting in General tab. - Page 59 Figure 8-6 Transcriber Keyboard: When Keyboard input panel is running, you will see the icon located in the taskbar. Figure 8-7 Keyboard Input Panel Upper / lower case Selection: Press this icon to select upper and lower case letters. If you select upper case, capital letters and characters appear on the number key pad.
-
Page 60: Setting Up The Pa-100 Series
8.3 Setting up the PA-100 SERIES You can set up various configurations of the PA-100 SERIES such as Date/Time, Network, Display, Volume and Sounds, Power, System, etc. at the control panel. Figure 8-9 Setting up To Tap Start → Settings → Control Panel, the control panel window appears. In the View option in the menu, you can change the view mode into large icons, small icons, details or to arrange icons. -
Page 61: Certificates
8.3.1 Certificates Application programs use certificates to ensure reliability and safe communication. Figure 8-11 Certificates Authorized certificate providers issue certificates that are valid for a specified period. Windows CE manages several certificate storages. Select Go to Start → Settings → Control Panel. Double click a Certificates to run. -
Page 62: Date/Time
8.3.2 Date/Time This screen sets date, time, standard time zone. Figure 8-12 Date/Time Date/Time You can set standard time zone, year, day and time. Set as follows: Press the down arrow in the standard time zone until it reaches your location. If the previously set value is appropriate, move on to the following. -
Page 63: Dialing
8.3.3 Dialing Dialing Properties 1. In the When dialing from list, select the Location where you want to change settings. 2. To create a new location, select New. Enter the name of the location, and then select OK Enter or Edit the area code and local country code as needed. Figure 8-13 Dialing Properties -1 Figure 8-14 Dialing Properties -2 4. -
Page 64: Display
8.3.4 Display This screen lets you set the wallpaper image of the PA-100 SERIES, or change the color of the background screen. Call up the right button menu from desktop and select Properties and you can check the Display Properties window. -
Page 65: Hot Function Key
8.3.5 Hot Function Key Please refer to Function Key Setting above. 8.3.6 Input Panel You can set up the Input method and Options. Figure 8-16 Input Panel Properties Select keyboard and press Options. The Soft Keyboard Options window appears. Select the Size of the keys. To Use gestures for Space, Backspace, Shift and Enter, click the gestures check box. -
Page 66: Internet Options
8.3.7 Internet Options To use the Internet Options, make the following settings. General Click the General tab. Define your own start page and search page on the tab. It also can set the cache size. Click Delete Browsing History button, it can clear temporary internet files, cookies or history. -
Page 67: Keyboard
Security Under Security page, specify the security option for your browser. Figure 8-19 Internet Options-3 Privacy Under Privacy page, specify the cookies setting include of privacy level. Figure 8-20 Internet Options-4 8.3.8 Keyboard Repeat Tab To change the amount of time between taps before repetition starts, adjust the Repeat delay slider To change the repeat rate, adjust the Repeat rate slider. -
Page 68: Mouse
8.3.9 Mouse Double-click the checkerboard grid at a comfortable speed. Double-click the Test icon to test your setting. Tap OK to exit the Mouse properties. Figure 8-22 Mouse Properties 8.3.10 Network and Dial-up Connection You can directly link to the network via network (Ethernet, LAN) or phone (modern) connection. -
Page 69: Owner
8.3.11 Owner This function lets you set the PA-100 SERIES to display user information at start up, add information on the user, and set up a Network ID. Figure 8-24 Owner Properties Identification Enter information such as Name, Company, Address, company phone number, home phone number in the user information tab. -
Page 70: Password
8.3.12 Password You can set a password to keep unauthorized users from using the PA-100 SERIES. Figure 8-25 Password Properties To set up a password: Select the Password Setting tab. Enter the password in the password box. Re-enter the password in the password confirmation box. -
Page 71: Pc Connection
Select the connection mode. Click OK to save the setting. To connect the PA-100 SERIES to a desktop PC, you must have Microsoft ActiveSync 4.5 for Windows 2000/XP or Microsoft Mobile Device Center 6.1 for Windows Vista/7 on your desktop PC. -
Page 72: Power
8.3.14 Power Please refer to the previous section on Power Management. ( Page 21 8.3.15 Regional Settings Figure 8-27 Regional Setting Properties You can set up region, numbers, currency, time, and date. Select Go to Start → Settings → Control Panel. Open Regional Settings icon. -
Page 73: Remove Programs
8.3.16 Remove Programs Figure 8-28 Remove Programs To remove installed programs: Select Go to Start → Settings → Control Panel. Open the Remove Programs icon. Select the program and click Remove to uninstall program. Click Remove. User’s Manual... -
Page 74: Scan Configuration
8.3.17 Scan Configuration Please refer to the previous section on Scan Configuration. 8.3.18 Storage Manager The storage manager lets you manage storage device. DSK1: NAND FLASH only allows the users to check the store information. DSK2 shall be SD memory card. The storage manager allow SD memory card to format, dismount or make new partition. -
Page 75: Stylus
Double tap the bottom icon to test the double-tap sensitivity. If the bottom icon does not change, adjust the setting using the grid icon above. Calibration If the PA-100 SERIES screen does not respond properly, adjust the screen with the calibration function. To start Calibration: Select Go to Start →... -
Page 76: System
Figure 8-31 System Properties The memory of the PA-100 SERIES is used for storage and programs. Basic memory capacity is 256MB. You can see the size of the memory cache used for running programs or storing data. -
Page 77: System Information
8.3.21 System Information The System Information properties window displays system information such as Info, Memory and Clean boot. Info page contained in the window includes operating system data such as CPU, ROM, RAM, serial number (SN), hardware number (HW) and version details. Memory page display memory size such as RAM Program, ROM Storage, User application and Storage Card. - Page 78 Sounds To set the Sounds: Select go to Start → Settings → Control Panel. Open Volume & Sounds icon and select Sounds tab. Select an Event from the event list. Select a sound from the event sound list. To remove the sound from the selected event, choose (None). To save the changes in another scheme, select Save As in another name and name the sound scheme.
-
Page 79: Trouble Shooting
Argox for technical support: http://www.argox.com If the PA-100 SERIES mobile computer needs repair, please ensure that the label with the serial number is present. If sending the mobile computer or cradle back to your local supplier or Argox, please use the original package to minimize the chances of damage during shipping. - Page 80 Mobile computer will not shut off If the mobile computer is processing data, attach a charging cable to insure the battery isn’t depleted. If the mobile computer is connected to AC power, disconnect. Perform a warm boot – WARNING – Unsaved data will be lost. ...
- Page 81 10. Appendix: Updating the OS via Micro SD Card To upgrade or reinstall the PA-100 SERIES OS via Micro SD card, you need the P9XCE60R.bin, P9XUtility.cab and P9X2DUtility.cab file (available from Argox Technical Support): Note: Micro SD must be FAT32 format.
Need help?
Do you have a question about the PA-100 Series and is the answer not in the manual?
Questions and answers