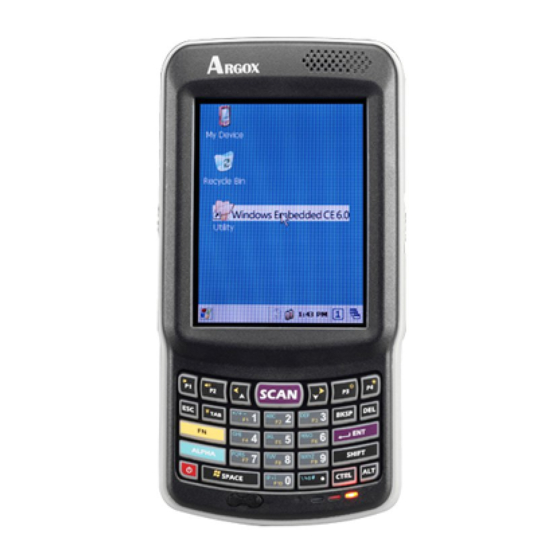
Argox PT-90 Series Manual
Hide thumbs
Also See for PT-90 Series:
- User manual (74 pages) ,
- User manual (89 pages) ,
- User manual (40 pages)
Table of Contents
Advertisement
Quick Links
Advertisement
Table of Contents

Related Manuals for Argox PT-90 Series


Summary of Contents for Argox PT-90 Series
- Page 1 PT-90 Series WLAN Guide Nov. 2010 Version 1.0...
-
Page 2: Table Of Contents
2.2.4 Performance Section ....................14 2.3 WLAN S .................... 15 ETTING XAMPLE CHAPTER 3 USING WLAN SETTING ..................17 3.1 M ........................18 INDOW 3.2 P ......................... 19 ROFILE INDOW 3.3 P ....................... 23 ERFORMANCE INDOW Doc. No. PT-90 Series WLAN Guide 2/24... -
Page 3: Chapter 1 Establishing Wlan Connection
( the larger the value the better ) detected will be displayed in the middle part of the screen. Ticking on the Access Point to be connected and select “Connect” ( please refer to Fig1.4 ). Doc. No. PT-90 Series WLAN Guide 3/24... - Page 4 Fig1.2 Wireless Information Fig1.3 Network setting Fig1.4 Access point selection Doc. No. PT-90 Series WLAN Guide 4/24...
- Page 5 When the AP configuration function been selected, all AP-related properties will be displayed, i.e. Encryption、Authentication、Network、Key index、EAP type and properties setting ( as shown in Fig1.5 ~ Fig1.8 ). Fig1.5 Access point property setting (1) Fig1.6 Access point property setting (2) Doc. No. PT-90 Series WLAN Guide 5/24...
- Page 6 As in Fig1.10, cancel “The key is provided automatically” then enter “Network Key ( or Password )” ( i.e. 1234567890abc ) and set “Key Index” to “1”; d. Ticking “OK” to establish the connection. Doc. No. PT-90 Series WLAN Guide 6/24...
- Page 7 Fig1.11 Access point property setting (7) Fig1.12 Access point property setting (8) If, by any chance, after several “Renew” and still no correct IP address can be acquired, please check AP and the network first. Doc. No. PT-90 Series WLAN Guide 7/24...
- Page 8 Double ticking on the Access Point will initiate the configuration function so all related features can be re-configured. c. If there is any problem found on the connection configuration, you can delete all feature configurations then re-configure all features. Doc. No. PT-90 Series WLAN Guide 8/24...
- Page 9 Fig1.14 Access point property setting (10) Fig1.15 Access point property setting (11) Fig1.16 Access point property setting (12) Doc. No. PT-90 Series WLAN Guide 9/24...
-
Page 10: Tcpip Setting
Fig1.19 ); 4. Second page can proceed DNS and WINS configurations ( as shown in Fig1.20 ). Fig1.17 TCPIP setting (1) Fig1.18 TCPIP setting (2) Fig1.19 TCPIP setting (3) Fig1.20 TCPIP setting (4) Doc. No. PT-90 Series WLAN Guide 10/24... -
Page 11: Wlan Tray Icon
The RSSI for the current AP is stronger than -81 dBm and weaker than -71. The RSSI for the current AP is stronger than -71 dBm and weaker than -67. The RSSI for the current AP is stronger than -67 dBm. Doc. No. PT-90 Series WLAN Guide 11/24... -
Page 12: Chapter 2 Using Wlan Setting File
[Network Section1] area, the sequence will with by left go to right (ex: Network=AP1,AP2, add AP1 first and then add AP2, If the initial value contains mistake, will skip this setting. Doc. No. PT-90 Series WLAN Guide 12/24... -
Page 13: Network Section
DHCP: 0/1, 0 is close DHCP, 1 is open DHCP. b. IP Address: IP setting. c. Subnet Mask: Subnet Mask setting. d. Default Gateway: Gateway setting. e. Primary DNS, Secordary DNS: DNS setting. f. Primary WINS, Secordary WINS: WINS setting. Doc. No. PT-90 Series WLAN Guide 13/24... -
Page 14: Performance Section
Connect_Threshold_RSSI: This value only work when connect threshold enable. If the AP’s RSSI is lower than this value, WLAN is disconnected automatically. If the AP’s RSSI is higher than this value, WLAN is connected automatically. Default is -80. Doc. No. PT-90 Series WLAN Guide 14/24... -
Page 15: Wlan Setting File Example
Disable WLAN when device startup, and add AP1,AP2 setting; AP1 is NAME1, wep, open, key index is 1, key is 12345, infrastructure net; AP2 is NAME2, disable, infrastructure net. [WLAN] AutoOn=0 Network=AP1,AP2 [AP1] SSID=NAME1 Encryption=wep Authentication=open Key=1/12345 [AP2] SSID=NAME2 Doc. No. PT-90 Series WLAN Guide 15/24... - Page 16 WLAN power mode set to normal mode, FAST_ROAMING_MODE, Max interval is 5000, Min interval is 2000, roam RSSI is 30. [WLAN] AutoOn=1 Network=AP1 [AP1] SSID=NAME1 Encryption=wep Authentication=open Key=1/0x3132333435 [TCPIP] DHCP=0 IP Address=192.168.11.2 Subnet Mask=192.168.11.1 Default Gateway=255.255.255.0 [PERFORMANCE] Power_Mode=0 Roaming_Mode=3 Roam_Max_Interval=5000 Roam_Min_Interval=2000 Roam_Diffressi_Threshold=30 Doc. No. PT-90 Series WLAN Guide 16/24...
-
Page 17: Chapter 3 Using Wlan Setting
(as shown Fig3.1). Press “Setting” button to enter WLAN setting (as shown Fig3.2). WLAN setting has three windows: Main, Profile and Performance. Each window is described in more detail in this chapter. Fig3.1 WLAN setting in network setting Fig3.2 WLAN Setting Doc. No. PT-90 Series WLAN Guide 17/24... -
Page 18: Main Window
WLAN setting file will be ignored. The active profile setting may include performance setting. When performance setting to be changed, it will warm reset automatically. After warm reset, the new performance setting will be applied. Doc. No. PT-90 Series WLAN Guide 18/24... -
Page 19: Profile Window
On the Profile window, three actions are available. Create a new profile by press “New” button. Give the profile a new name by press “Rename” button. Delete the profile by press “Delete” button. Fig3.5 Profile Window Doc. No. PT-90 Series WLAN Guide 19/24... - Page 20 Fig3.7 and Fig3.8. The “Rename” and “Delete” button only available when a profile is selected. Fig3.6 Select Profile(1) Fig3.7 Select Profile(2) Fig3.8 Select Profile(3) Doc. No. PT-90 Series WLAN Guide 20/24...
- Page 21 New: Create a new profile with specified WLAN.ini file. Given a profile name which is a string of up to 16 characters. (as shown in Fig3.9 ~ Fig3.12) Fig3.9 New Profile(1) Fig3.10 New Profile(2) Fig3.11 New Profile(3) Fig3.12 New Profile(4) Doc. No. PT-90 Series WLAN Guide 21/24...
- Page 22 Delete: Select a profile to be deleted and press “Delete” button (as shown in Fig3.15). There exists a delete profile dialog to be confirmed (as shown in Fig3.16). Fig3.15 Delete Profile(1) Fig3.16 Delete Profile(2) Doc. No. PT-90 Series WLAN Guide 22/24...
-
Page 23: Performance Window
Roaming RSSI Threshold: If the next AP's RSSI is higher than this value, roam to that Value: 40 , 35, 30, 25, 20, 15, 10 and 5 dBm Default: 15 dBm Connect Threshold: When this is checked, connect threshold enable. When this is Doc. No. PT-90 Series WLAN Guide 23/24... - Page 24 Commit: Press “Commit” button to set performance setting. When performance setting to be changed, There exists a warm reset dialog(as shown in Fig3.18). Press OK, PT90 will warm reset automatically after completing performance setting. PT90 will do nothing when press Cancel. Doc. No. PT-90 Series WLAN Guide 24/24...
Need help?
Do you have a question about the PT-90 Series and is the answer not in the manual?
Questions and answers