Table of Contents
Advertisement
Quick Links
Service
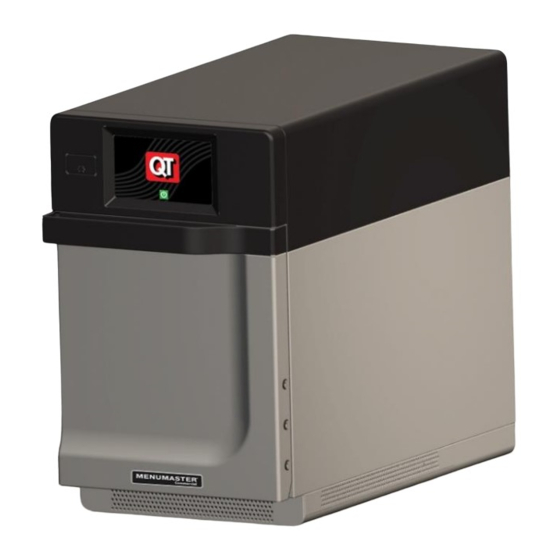
High Speed Combination Oven
Service Manual
This manual is to be used by qualified
service technicians only. ACP, Inc.
does not assume any responsibility for
property damage or personal injury for
improper service procedures done by
an unqualified person.
This Manual covers the MRX2QT High Speed
Combination Ovens equipped with Touch Screen
Controls. Refer to individual Service Manuals or
Technical Sheets for information on other specific
models.
MRX2QT
16400034
Rev.2
Sept 2017
Advertisement
Table of Contents

Related Manuals for ACP MRX2QT


Summary of Contents for ACP MRX2QT
- Page 1 This Manual covers the MRX2QT High Speed Combination Ovens equipped with Touch Screen Controls. Refer to individual Service Manuals or Technical Sheets for information on other specific models. Service MRX2QT High Speed Combination Oven Service Manual This manual is to be used by qualified service technicians only.
-
Page 2: Table Of Contents
TABLE OF CONTENTS IMPORTANT SAFETY INFORMATION…………………………………………………….1 Specifications........................5 Installation………………………………………………………………………………………6 Quick Start Reference Guide……………………………………………………………..7 Firmware Update Procedure………………………………………………………………...12 Care and Cleaning……………………………………………………………………………13 Oven Construction……………………………………………………………………………14 Component Testing Procedures…………………………………………………………….20 Interlock Switch Service……………………………………………………………………...22 Service Test Mode……………………………………………………………………………23 Error Code List………………………………………………………………………………..26 Microwave Power Test……………………………………………………………………….27 Control Board Wiring…………………………………………………………………………28 Wiring Diagrams / Schematics ………………………….......... …..29 http://services.acpsolutions.com SERVICE &... -
Page 3: Important Safety Information
IMPORTANT SAFETY INSTRUCTIONS Important Notices for Servicers and Consumers ACP will not be responsible for personal injury or property damage from improper service procedures. Pride and workmanship go into every product to provide our customers with quality products. It is possible, however, that during its lifetime a product may require service. Products... - Page 4 Service Manual. Do not and or any other local government requirements. reach into the equipment area while the unit is The maximum leakage level allowed by ACP energized. Make all connections for the test and is 4mw/cm check them for tightness before plugging the cord into the outlet.
- Page 5 Recognize this symbol as a SAFETY message WARNING When using electrical equipment, basic safety precautions should be followed to reduce the risk of burns, electrical shock, fire, or injury to persons including the following. 1. READ all instructions before using equipment. 9.
- Page 6 WARNING WARNING To avoid risk of fire in the oven cavity: Liquids such as water, coffee, or tea are able to be overheated beyond the boiling point without a. DO NOT overcook food. Carefully attend oven appearing to be boiling due to surface tension of the when paper, plastic, or other combustible liquid.
-
Page 7: Specifications
SPECIFICATIONS 208/240 VAC Power Source Voltage 30A, Single Phase, 3 Wire Grounded Automatic Voltage Sensing NEMA Plug Configuration 6-30 5650W, 28.4A Power Consumption 3070W Convection Heater Only 2000W Power Output – Microwave (IEC705) 20°F Minimum Temperature Rise (∆T) (11°C) 2450mhz Microwave Operating Frequency Temperature Range F/C 200F-520F/95C-270C... -
Page 8: Installation
INSTALLATION A. Allow at least 2in (5.1cm) of clearance around top of oven. Proper air flow around oven cools electrical components. With restricted air flow, oven may not operate properly and life of electrical parts is reduced. B. Do not remove back panel bumpers. They ensure proper clearance. -
Page 14: Firmware Update Procedure
After about two minutes the words “Update Complete” will appear and a green “Reboot” button will appear. Do not remove the USB/flash drive. Press the green button. Once the ACP logo and green power button appear, remove the flash drive and press the green power button. -
Page 15: Care And Cleaning
CARE AND CLEANING... -
Page 16: Oven Construction
OVEN CONSTRUCTION – CAVITY TOP FORCED-AIR PLATE 4 SCREWS TO REMOVE COOKING PLATE (MUST BE IN PLACE. ALLOWS AIR FLOW UNDER FOOD) - Page 17 OVEN CONSTRUCTION – ANTENNA BOX MICA COVER REMOVAL, AFTER FORCED AIR PLATE REMOVED LOOSEN 2 FRONT SCREWS AND REMOVE 2 BACK SECURING TABS CAREFULLY PRY MICA COVER OUT OF POSITION USING SECURING TAB. HELD IN WITH HIGH TEMP GASKETS ANTENNAS (From Inside Cavity)
- Page 18 OVEN CONSTRUCTION – RIGHT SIDE *POWER SUPPLY COOLING FAN RUN PRIMARY SWITCH MAGNETRON 1 BOARD +24VDC CAPACITORS DOOR COOLING FAN PLUGS *MECHANICAL LIMITER COOLING FANS (CAVITY THERMAL CUTOUT) CAPILLARY STYLE SECONDARY/MONITOR SWITCH ASSEMBLY TRANSFORMER 1 HINGE...
- Page 19 OVEN CONSTRUCTION – LEFT SIDE CAPACITOR MAIN CONTROL & DIODE ANTENNA MOTOR MAGNETRON 2 BOARD COOLING FANS HINGE FUSE & FUSE BLOCK...
- Page 20 OVEN CONSTRUCTION – BACK MAGNETRON 1 (RIGHT) CAVITY STEAM VENT TUBE ANTENNA CHAMBER EXHAUST AIR DUCT COOLING FAN RELAY CONVECTION FAN MOTOR AUTO TRANSFORMER & SNUBBER WIRING HARNESS PLUG INS CAVITY THERMAL CUTOUT MECHANICAL LIMITER RESET BUTTON TRANSFORMER (LEFT) TRIAC – COOLING FAN HV SYSTEM FUSES (2), TRIACS (2), &...
- Page 21 OVEN CONSTRUCTION – TOP FRONT OF OVEN MAIN CONTROL DOOR INTERLOCK SWITCH BOARD TEST PLUGS ANTENNA MOTOR *POWER SUPPLY & GEARS BOARD +24VDC CAPACITOR & DIODE *RTD (Resistive Thermal Device) MAGNETRON 2 Aka TEMP SENSOR EXHAUST PLENUM STEAM VENT TUBE...
-
Page 22: Component Testing Procedures
COMPONENT TESTING PROCEDURES Illustration Component Test Results Approximately: 230 to 0 (Com)………………………..38 Ω Auto Transformer 208 to 0 ………………………………...…. 35 Ω 120 to 0 (not used)……………….…... 25 Ω Capacitor, Cooling Fan Wire to Wire 1.5µf ± 5% 400V 50/60hz Motor Capacitor, High Voltage Terminal to Terminal... - Page 23 COMPONENT TESTING PROCEDURES Illustration Component Test Results With Line Voltage Applied: J1-1 (WH) to J1-3 (BK) ………………… Line Voltage AC Power Supply Board J2-1 (RD) to J2-5,6,&7………………… Approximately 24VDC DISCHARGE CAPACITORS! Wires Removed: Resistance: COM to 208 or 230……………...…….. <2Ω (Open to Ground) Power Transformer 5 to 6………………………………...………..
-
Page 24: Interlock Switch Service
INTERLOCK SWITCH SERVICE NOTE: THE PRIMARY DOOR SWITCH IS NOT ADJUSTABLE. TO REMOVE THE SECONDARY/MONITOR SWITCH ASSEMBLY: 1) OPEN THE DOOR 2) REMOVE THE 5/16in (10mm) SECURING NUT and SLIDE SWITCH ASSEMBLY OUT SECURING ADJUSTMENT SCREW TO REINSTALL AND PROPERLY REPLACE THE DOOR SWITCH ASSEMBLY: 1) WITH THE DOOR OPEN, SLIDE SWITCH BACK INTO SWITCH BRACKET AND TIGHTEN THE 5/16in (10mm) NUT. -
Page 25: Service Test Mode
SERVICE TEST MODE The Service Mode is a useful tool to aid in diagnosing any service issue. To access the oven’s service test mode, the PIN Code must be enabled. If the PIN Code is not enabled, enable it (See Below). To determine if the PIN CODE is enabled, press the blue menu icon. - Page 26 Once the Service Mode is initiated a menu of options and information is displayed. The menu screen can be navigated by swiping up or down if needed. Some components can be activated from this menu – See example of Magnetron 1 (Right Side) below, by touching start to start or stop to stop. Pressing the “back arrow”...
- Page 27 The current amperage being drawn by BOTH HV Both systems can be started and systems. Look for consistent readings with Both Magnetrons stopped by pressing the Start or Stop Convection Heater. These are protected by Fuses F3 icon & F4. Heater can be stopped and started The current amperage being drawn by the Convection Heater...
-
Page 28: Error Code List
ERROR CODES Code Description Corrective Action Invalid Display Firmware Update Firmware or Replace Touch Control Touch Screen Error Replace Touch Control Reset Touch Control. If continued failure Replace Wifi Error Touch Control Reset Touch Control. If continued failure Replace Wifi Error Touch Control Convect Temp Sensor (RTD)-Open Replace Temp Sensor (Top Left of Oven) -
Page 29: Microwave Power Test
MICROWAVE POWER TEST Power Test All ACP microwave oven power outputs are rated using the IEC705 standards. Using the IEC705 test method requires precision measurements and equipment that is not practical to be performed in the field. Using the test shown below will indicate if the oven performance is satisfactory. -
Page 30: Control Board Wiring
CONTROL BOARD WIRING... -
Page 31: Wiring Diagrams / Schematics
SCHEMATICS & DIAGRAMS... - Page 32 16400034 September 2017...
Need help?
Do you have a question about the MRX2QT and is the answer not in the manual?
Questions and answers