Table of Contents
Advertisement
Quick Links
Advertisement
Table of Contents

Subscribe to Our Youtube Channel
Related Manuals for Shark SLIM-LIGHT Lift-Away NV340UKR


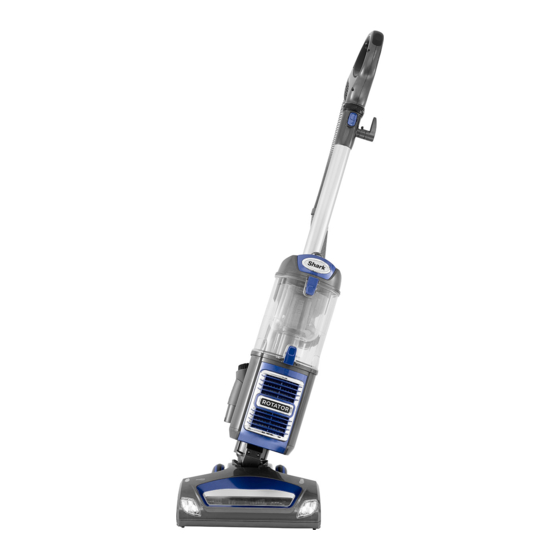
Summary of Contents for Shark SLIM-LIGHT Lift-Away NV340UKR
- Page 1 OWNER’S GUIDE NV340UKR ™ SLIM - LIGHT ™...
-
Page 2: Technical Specifications
Thank you for purchasing the Shark Rotator Slim Lift-Away Vac. For a list of what is included with this model, refer to inside flap of box. ® ™ ™ This Owner’s Guide is designed to help you get a complete understanding of your new vacuum cleaner. -
Page 3: Important Safeguards
READ ALL INSTRUCTIONS BEFORE USE IMPORTANT SAFEGUARDS When using an electrical appliance, basic safety precautions should GENERAL USE always be observed, including the following: 17 Use only as described in this manual. WARNING 18 DO NOT put any objects into openings. DO NOT use with any opening blocked; keep free of dust, lint, hair, and anything that may reduce air flow. - Page 4 ASSEMBLY Place the vacuum body onto floor nozzle. Insert the wand into top of the vacuum. Insert the handle into the top of the wand. Insert the hose into the hose connector. Insert the crevice tool and dusting brush into the accessory holder as shown. CLICK CLICK CLICK...
- Page 5 UPRIGHT Press POWER to clean bare floor surfaces, area rugs or areas above-floor. The brushroll will not spin in this mode. CLEANING Press POWER and BRUSHROLL to clean carpets. The brushroll indicator lights will illuminate GREEN. If there is a jam, the indicator light on floor nozzle will illuminate RED. Refer to MAINTENANCE (P12) for instructions on removing blockages.
- Page 6 LIFT-AWAY ™ Press LIFT-AWAY to lift the pod off the floor nozzle. CLEANING To clean with the hose, press the WAND or HANDLE release button, then lift the handle up. Use for portable cleaning on stairs or anywhere...
- Page 7 LIFT-AWAY ™ Attach the desired cleaning tool. Should you need to increase or decrease the amount of suction, refer to Helpful Tips (P10), SUCTION RELEASE. CLEANING Use the shoulder strap to facilitate cleaning while moving around. Use for portable NOTE: Select cleaning accessories are included with this model. Additional accessories are available for purchase. cleaning on stairs SHOULDER STRAP - XTRP340 or anywhere...
- Page 8 30 cm Crevice Tool Dusting Brush ACCESSORIES 3055FLI340 3050FC340 Crevice tools for accessing Accessory Bag Cleans hard surfaces and upholstery. hard to reach places. (not shown) 3053FLI340 NOTE: Select cleaning accessories are included. Others are available for purchase. For a list of what is included with this model, refer to inside flap of box.
- Page 9 ATTACHMENT & CLEANING PADS Use the Dust-Away ™ to clean dry bare floor surfaces. Do not use to clean damp floors or wet/sticky messes. Only use pads provided by Shark ® , which are designed to work with the Dust-Away attachment.
-
Page 10: Helpful Tips
HELPFUL TIPS SUCTION CONTROL This unit is equipped with a suction control collar to help with push and pull on high pile carpets, area rugs and to release suction when dusting delicate objects or drapery. Located at base of top handle, rotate the collar 90° to minimise suction. Be sure to close again for maximum suction. POWER BUTTONS The POWER button turns on suction only. -
Page 11: Maintenance
MAINTENANCE EMPTY THE DUST CUP Pull up on the dust cup release latch and lift the dustcup off the pod. Holding the dust cup over a garbage bag or can, press the bottom empty release latch. Press the top dust cup release latch to access the dust screen and remove built-up debris as required. Turn the dust cup over and empty the upper chamber by holding it by the handle on the side of the dust cup. -
Page 12: Bottom Of Floor Nozzle
MAINTENANCE CHECK FOR BLOCKAGES REMOVE AND INSPECT: HOSE AND TUBES Remove floor nozzle and extension wand and shine a flashlight up from the bottom to check for possible blockage. Remove dustcup and hose to check intake open- ing and hose elbow. BOTTOM OF FLOOR NOZZLE Using a coin, turn the locking screws to the unlock position and pull up to expose the airway. - Page 13 5. Allow the unit to cool for a minimum of 45 minutes. 6. Plug in the vacuum. 7. Restart the unit using either the POWER or POWER + BRUSHROLL buttons. Euro-Pro and Shark are registered trademarks of Euro-Pro Operating LLC. Rotator, Dust-Away and Lift-Away are trademarks of Euro-Pro Operating LLC.
- Page 14 NOTES...
-
Page 15: Warranty Terms And Conditions
® When you register your guarantee we’ll have your details to hand if we ever need to get in touch. You can also receive tips and advice on how to get the best out of your Shark vacuum and hear the ®... - Page 16 Euro-Pro Europe Limited 15 Mariner Court Calder Park Wakefield WF4 3FL Freephone 0800 862 0453 www.sharkclean.eu NV340UKR�31�IB�151201�2 Illustrations may differ from actual product. We are constantly striving to improve our products, therefore the specifications contained herein are Printed in China ©...
Need help?
Do you have a question about the SLIM-LIGHT Lift-Away NV340UKR and is the answer not in the manual?
Questions and answers