Advertisement
Quick Links
INSTRUCTION MANUAL
MANUEL D'INSTRUCTION
MANUAL DE INSTRUCCIONES
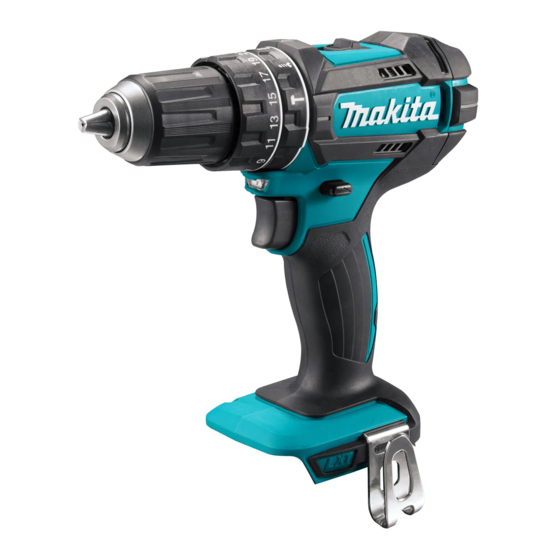
Cordless Hammer Driver Drill
Perceuse Percussion-Visseuse sans
Fil
Rotomartillo Atornillador
Inalámbrico
XPH01
XPH02
011491
IMPORTANT: Read Before Using.
IMPORTANT: Lire avant usage.
IMPORTANTE: Leer antes de usar.
1
Advertisement

Related Manuals for Makita XT704


Summary of Contents for Makita XT704
- Page 1 INSTRUCTION MANUAL MANUEL D'INSTRUCTION MANUAL DE INSTRUCCIONES Cordless Hammer Driver Drill Perceuse Percussion-Visseuse sans Rotomartillo Atornillador Inalámbrico XPH01 XPH02 011491 IMPORTANT: Read Before Using. IMPORTANT: Lire avant usage. IMPORTANTE: Leer antes de usar.
- Page 2 ENGLISH (Original instructions) SPECIFICATIONS Model XPH01 XPH02 Concrete 13 mm (1/2") 13 mm (1/2") Steel 13 mm (1/2") 13 mm (1/2") Capacities Wood 38 mm (1-1/2") 38 mm (1-1/2") Wood screw 10 mm x 89 mm (3/8" x 3-1/2") 6 mm x 75 mm (1/4" x 2-15/16") Machine screw M6 (1/4") M6 (1/4")
- Page 3 will reduce personal injuries. tool for operations different from those intended 12. Prevent unintentional starting. Ensure the could result in a hazardous situation. switch is in the off-position before connecting Battery tool use and care to power source and/or battery pack, picking 24.
- Page 4 Hold the tool firmly. Do not short the battery cartridge: Keep hands away from rotating parts. Do not touch the terminals with any Do not leave the tool running. Operate the tool conductive material. only when hand-held. Avoid storing battery cartridge in a Do not touch the bit or the workpiece container with other metal objects such as immediately after operation;...
- Page 5 This tool is equipped with an electric brake. If the tool (Lithium-ion battery with star marking) consistently fails to quickly stop after the switch trigger is released, have the tool serviced at a Makita service 1. Star marking center. Lighting up the front lamp 1.
- Page 6 Pull the switch trigger to light up the lamp. The lamp To change the speed, first switch off the tool and then keeps on lighting while the switch trigger is being pulled. slide the speed change lever to the "2" side for high The lamp goes out 10 -15 seconds after releasing the speed or "1"...
- Page 7 ASSEMBLY OPERATION CAUTION: CAUTION: Always be sure that the tool is switched off and the Always insert the battery cartridge all the way until it • • battery cartridge is removed before carrying out locks in place. If you can see the red part on the any work on the tool.
- Page 8 A stuck bit can be removed simply by setting the • Screwdriving operation reversing switch to reverse rotation in order to back out. However, the tool may back out abruptly if you do not hold it firmly. Always secure small workpieces in a vise or with a •...
- Page 9 Only use the accessories or attachments for their stated purposes. 1. Recessed part If you need any assistance for more details regarding 2. Spring these accessories, ask your local Makita Service Center. 3. Arm Drill bits • Tungsten-carbide tipped hammer bit •...
- Page 10 COMPLETE tool, freight prepaid, to one of Makita’s Factory or Authorized Service Centers. If inspection shows the trouble is caused by defective workmanship or material, Makita will repair (or at our option, replace) without charge. This Warranty does not apply where:...
- Page 11 FRANÇAIS (Mode d’emploi original) SPÉCIFICATIONS Modèle XPH01 XPH02 Béton 13 mm (1/2") 13 mm (1/2") Acier 13 mm (1/2") 13 mm (1/2") Capacités Bois 38 mm (1-1/2") 38 mm (1-1/2") Vis à bois 10 mm x 89 mm (3/8" x 3-1/2") 6 mm x 75 mm (1/4"...
- Page 12 sont moindres lorsqu'un cordon conçu pour Utilisation et entretien des outils électriques l'extérieur est utilisé. 17. Ne forcez pas l'outil électrique. Utilisez l'outil Si vous devez utiliser un outil électrique dans électrique adéquat suivant le type de travail à un endroit humide, utilisez une source effectuer.
- Page 13 25. N'utilisez un outil électrique qu'avec le tension et risqueraient de transmettre une bloc-piles conçu spécifiquement pour cet outil. décharge électrique à l'utilisateur. Il y a risque de blessure ou d'incendie si un autre Adoptez toujours une position de travail vous bloc-piles est utilisé.
- Page 14 ENC007-8 rechargez jamais batterie complètement chargée. CONSIGNES DE SÉCURITÉ La surcharge réduit la durée de service de la IMPORTANTES batterie. Rechargez la batterie à une température POUR LA BATTERIE ambiante comprise entre 10 ゚ C et 40 ゚ C (50 ゚ F - 104 ゚...
- Page 15 Cet outil est muni d’un frein électrique. Si la libération du levier de la gâchette ne permet jamais d’arrêter 1. Étoile promptement l’outil, faites-le réparer dans un centre de service après-vente Makita. Allumage de la lampe avant 1. Lampe 012128 Les batteries lithium-ion marquées d’une étoile sont...
- Page 16 "2" pour faire marcher l'outil à grande vitesse, ou sur un centre de service après-vente Makita. le côté "1" pour le faire marcher à vitesse réduite. Vérifiez que le levier de changement de vitesse est réglé sur la Inverseur bonne position avant de mettre l'outil en marche.
- Page 17 Réglage du couple de serrage Installation du crochet 1. Bague de 1. Rainure changement de 2. Crochet mode d'action 3. Vis 2. Bague de réglage 3. Graduation 4. Flèche 011496 011498 Le couple de serrage est réglable sur l'une ou l'autre de L'outil est équipé...
- Page 18 Placez la pointe de l'embout dans la tête de vis et Perçage avec martelage appliquez une pression sur l'outil. Faites démarrer l'outil à vitesse réduite puis augmentez graduellement la ATTENTION: vitesse. Relâchez la gâchette dès que l'engrenage Une force de torsion énorme et soudaine s'exerce •...
- Page 19 Pour maintenir la SÉCURITÉ et la FIABILITÉ du produit, les réparations, tout autre travail d'entretien ou de réglage doivent être effectués dans un centre de service Makita agréé ou un centre de service de l'usine Makita, exclusivement avec des pièces de rechange Makita. 011500...
- Page 20 Ces accessoires et fixations sont recommandés • testé avant sa sortie d’usine. Nous garantissons qu’il pour être utilisés avec l'outil Makita spécifié dans ce sera exempt de défaut de fabrication et de vice de manuel. L'utilisation de tout autre accessoire ou matériau pour une période d’UN AN à...
- Page 21 ESPAÑOL (Instrucciones originales) ESPECIFICACIONES Modelo XPH01 XPH02 Concreto 13 mm (1/2") 13 mm (1/2") Acero 13 mm (1/2") 13 mm (1/2") Capacidades Madera 38 mm (1-1/2") 38 mm (1-1/2") Tornillo para madera 10 mm x 89 mm (3/8" x 3-1/2") 6 mm x 75 mm (1/4"...
- Page 22 Cuando utilice una herramienta eléctrica en Mantenimiento y uso de la herramienta eléctrica exteriores, utilice un cable de extensión 17. No fuerce la herramienta eléctrica. Utilice la apropiado para uso en exteriores. La utilización herramienta eléctrica correcta para de un cable apropiado para uso en exteriores aplicación.
- Page 23 25. Utilice las herramientas eléctricas solamente piezas metálicas expuestas de la herramienta con las baterías designadas específicamente eléctrica se cargarán también de corriente y el para ellas. La utilización de cualquier otra batería operario puede recibir una descarga. puede crear un riesgo de heridas o incendio. Asegúrese siempre de que pisa sobre suelo 26.
- Page 24 ENC007-8 No cargue nunca un cartucho de batería que esté completamente cargado. INSTRUCCIONES IMPORTANTES La sobrecarga acortará la vida de servicio de DE SEGURIDAD la batería. Cargue el cartucho de batería a temperatura PARA CARTUCHO DE BATERÍA ambiente de 10 ゚ C - 40 ゚ C (50 ゚ F - 104 ゚ F). Si un cartucho de batería está...
- Page 25 Suelte el gatillo interruptor para parar. Freno eléctrico La herramienta está equipada con un freno eléctrico. Si la herramienta falla constantemente en detenerse tras soltar el gatillo interruptor, lleve la herramienta a mantenimiento a un centro de servicio Makita. 012128...
- Page 26 Iluminación de la lámpara delantera Cambio de velocidad 1. Palanca de 1. Lámpara cambio de velocidad 011495 011503 PRECAUCIÓN: PRECAUCIÓN: Ponga siempre la palanca de cambio de velocidad No mire a la luz ni vea la fuente de luz • •...
- Page 27 PRECAUCIÓN: Instalación del gancho Ponga siempre el anillo correctamente en la marca • del modo que desee. Si utiliza la herramienta con el 1. Ranura 2. Gancho anillo puesto a medias entre las marcas de modo, 3. Tornillo la herramienta podrá dañarse. Ajuste de la torsión de apriete 1.
- Page 28 Ponga la punta de atornillar sobre la cabeza del tornillo y Operación de taladrado con percusión aplique presión en la herramienta. Haga funcionar la herramienta despacio y después aumente la velocidad PRECAUCIÓN: gradualmente. Suelte el gatillo interruptor en cuanto el En el momento de comenzar a penetrar, cuando se •...
- Page 29 Para mantener la SEGURIDAD y FIABILIDAD del producto, las reparaciones, y cualquier otra tarea de mantenimiento o ajuste deberán ser realizadas en Centros de Servicio Autorizados por Makita, empleando siempre repuestos Makita. 011500 Levante la parte del brazo del resorte y luego colóquelo en la parte en relieve de la carcasa con un desarmador plano de eje delgado o similar.
- Page 30 Cada herramienta Makita es inspeccionada y probada recomendados para utilizarse con su herramienta exhaustivamente antes de salir de fábrica. Se Makita especificada en este manual. El empleo de garantiza que va a estar libre de defectos de mano de cualquier otro accesorio o aditamento puede obra y materiales por el periodo de UN AÑO a partir de...
- Page 32 Para reducir la exposición a estos productos químicos: trabaje en un área bien ventilada y póngase el equipo de seguridad indicado, tal como las máscaras contra polvo que están especialmente diseñadas para filtrar partículas microscópicas. Makita Corporation 3-11-8, Sumiyoshi-cho, Anjo, Aichi 446-8502 Japan www.makita.com...
- Page 33 INSTRUCTION MANUAL MANUEL D'INSTRUCTION MANUAL DE INSTRUCCIONES Cordless Impact Driver Tournevis à Chocs sans Fil Atornillador de Impacto Inalámbrico XDT11 IMPORTANT: Read Before Using. IMPORTANT : Lire avant usage. IMPORTANTE: Lea antes de usar.
- Page 34 ENGLISH (Original instructions) SPECIFICATIONS Model: XDT11 Fastening capacities Machine screw 4 mm - 8 mm (5/32" - 5/16") Standard bolt 5 mm - 16 mm (3/16" - 5/8") High tensile bolt 5 mm - 12 mm (3/16" - 1/2") No load speed (RPM) 0 - 2,900 /min Impacts per minute 0 - 3,500 /min...
- Page 35 Power tool use and care Cordless impact driver safety Do not force the power tool. Use the correct warnings power tool for your application. The correct power tool will do the job better and safer at the Hold power tool by insulated gripping sur- rate for which it was designed. faces, when performing an operation where Do not use the power tool if the switch does the fastener may contact hidden wiring.
- Page 36 Avoid storing battery cartridge in a con- tainer with other metal objects such as nails, coins, etc. Do not expose battery cartridge to water or rain. A battery short can cause a large current flow, overheating, possible burns and even a breakdown.
- Page 37 Low battery voltage: Switch action The remaining battery capacity is too low and the tool will not operate. In this situation, remove and recharge the battery. Indicating the remaining battery capacity Only for battery cartridges with "B" at the end of the model number 1.
- Page 38 Reversing switch action 1. Driver bit 2. Sleeve To install the driver bit, insert it into the sleeve as far as 1. Reversing switch lever it will go. CAUTION: Always check the direction of rotation before operation. CAUTION: Use the reversing switch only after the tool comes to a complete stop.
- Page 39 The hook is convenient for temporarily hanging the tool. Hold the tool firmly and place the point of the driver bit This can be installed on either side of the tool. To install in the screw head. Apply forward pressure to the tool to the hook, insert it into a groove in the tool housing on the extent that the bit will not slip off the screw and turn either side and then secure it with a screw.
- Page 40 3. Arm Check the tool while running and electric brake operation when releasing the switch trigger. If electric brake is not working well, ask Makita Authorized or Use pliers to remove the carbon brush caps of Factory Service Centers for repair.
- Page 41 COMPLETE tool, freight prepaid, to one of Makita’s Factory or Authorized Service Centers. If inspection shows the trouble is caused by defective workmanship or material, Makita will repair (or at our option, replace) without charge. This Warranty does not apply where: •...
- Page 42 FRANÇAIS (Mode d’emploi original) SPÉCIFICATIONS Modèle : XDT11 Capacités de serrage Vis de mécanique 4 mm - 8 mm (5/32" - 5/16") Boulon standard 5 mm - 16 mm (3/16" - 5/8") Boulon à haute résistance 5 mm - 12 mm (3/16" - 1/2") Vitesse à...
- Page 43 Évitez les démarrages accidentels. Assurez- Maintenez les outils tranchants bien aiguisés vous que l’interrupteur est en position d’arrêt et propres. Un outil tranchant dont l’entretien est avant de brancher l’outil à la prise de courant effectué correctement et dont les bords sont bien et/ou au bloc-piles, et avant de prendre ou aiguisés risquera moins de se coincer et sera plus de transporter l’outil.
- Page 44 être extrêmement chauds et vous brûler la Ne rangez pas l’outil ou la batterie dans peau. des emplacements où la température peut Gardez les mains éloignées des pièces en atteindre ou dépasser 50 °C (122 °F). rotation. Ne jetez pas la batterie au feu même si elle est sérieusement endommagée ou complètement CONSERVEZ CES épuisée.
- Page 45 Dans cette situation, libérez la gâchette et arrêtez l’activité qui entraîne une surcharge de l’outil. Ensuite, appuyez de nouveau sur la gâchette pour redémarrer. Si l’outil ne démarre pas, la batterie est en surchauffe. Dans cette situation, laissez refroidir la batterie avant d’appuyer de nouveau sur la gâchette.
- Page 46 Interrupteur Fonctionnement de l’inverseur 1. Gâchette 1. Levier inverseur ATTENTION : ATTENTION : Avant d’insérer la batterie dans Vérifiez toujours le sens de l’outil, vérifiez toujours que la gâchette fonc- rotation avant de mettre l’outil en marche. tionne bien et revient en position d’arrêt lorsque ATTENTION : N’actionnez l’inverseur qu’une libérée.
- Page 47 Utilisez uniquement l’embout-tournevis ou l’em- Installation du crochet bout-douille indiqué sur la figure. N’utilisez aucun autre embout-tournevis ou embout-douille. 1. Rainure 2. Crochet 3. Vis 1. Embout-tournevis 2. Manchon L’outil est équipé d’un crochet pratique qui permet de Pour installer l’embout-tournevis, insérez-le à fond dans le suspendre temporairement. Il s’installe d’un côté le manchon.
- Page 48 Lorsque la batterie est presque complètement Boulon standard déchargée, la tension tombe et le couple de ser- N•m rage diminue. (ft•lbs) M16(5/8") Embout-tournevis ou embout-douille (101) L’utilisation d’un embout-tournevis ou d’un embout-douille de mauvaise dimension entraînera (87) M14(9/16") une diminution du couple de serrage. M16(5/8") Boulon (72)
- Page 49 Pour maintenir la SÉCURITÉ et la FIABILITÉ du pro- duit, les réparations et tout autre travail d’entretien ou de réglage doivent être effectués dans un centre de service après-vente autorisé ou une usine Makita, exclusivement avec des pièces de rechange Makita. ACCESSOIRES EN 1.
- Page 50 Makita. S’il ressort de l’inspection que le problème est dû à un vice de fabrication ou de matériau, Makita répa- rera (ou remplacera, à son gré) l’outil gratuitement. Cette garantie ne s’applique pas dans les cas où : •...
- Page 51 ESPAÑOL (Instrucciones originales) ESPECIFICACIONES Modelo: XDT11 Capacidades de apriete Tornillo de máquina 4 mm - 8 mm (5/32" - 5/16") Tornillo estándar 5 mm - 16 mm (3/16" - 5/8") Tornillo de alta resistencia 5 mm - 12 mm (3/16" - 1/2") Velocidad sin carga (rpm) 0 - 2 900 r/min Impactos por minuto...
- Page 52 zapatos de seguridad antiderrapantes, casco por herramientas eléctricas con mantenimiento rígido y protección para oídos utilizado en las inadecuado. Mantenga las herramientas de corte limpias condiciones apropiadas reducirá el riesgo de lesiones. y filosas. Si recibe un mantenimiento adecuado Impida el encendido accidental. Asegúrese y tiene los bordes afilados, es probable que la de que el interruptor esté...
- Page 53 extremadamente calientes y provocarle una No guarde la herramienta ni el cartucho de quemadura. batería en lugares donde la temperatura pueda Mantenga las manos alejadas de las piezas alcanzar o exceder los 50°C (122°F). giratorias. Nunca incinere el cartucho de batería incluso en el caso de que esté...
- Page 54 Sobrecarga: La herramienta se está utilizando de una manera que causa que consuma una cantidad de corriente inusual- mente alta. En este caso, libere el gatillo interruptor en la herra- mienta y detenga la aplicación que causó que la herra- mienta se sobrecargara. Luego, vuelva a jalar el gatillo interruptor para reanudar el funcionamiento.
- Page 55 Accionamiento del interruptor de NOTA: Dependiendo de las condiciones de uso y la temperatura ambiente, la indicación podrá diferir inversión ligeramente de la capacidad real. Accionamiento del interruptor 1. Palanca del interruptor de inversión PRECAUCIÓN: 1. Gatillo interruptor Confirme siempre la dirección de rotación antes de la operación.
- Page 56 Instalación o extracción de la punta NOTA: Si la punta de destornillador no se encuentra insertada hasta el fondo en el mandril, éste no regre- de destornillador/punta de atornillar sará a su posición original y la punta de destornillador no quedará asegurada. En este caso, procure inser- tar la broca de nuevo siguiendo las instrucciones de arriba.
- Page 57 Cuando el cartucho de batería esté casi completa- Tornillo estándar mente descargado, caerá la tensión y se reducirá N•m la torsión de apriete. (ft•lbs) 16 mm(5/8") Punta de destornillador o punta de atornillar 140 N•m (101 ft•lbs) El no utilizar el tamaño correcto de punta de des- 120 N•m tornillador o punta de atornillar ocasionará...
- Page 58 Verifique la herramienta en funcionamiento y la operación del freno eléctrico cuando suelte el gatillo interruptor. Si el freno eléctrico no funciona bien, pida a su centro de servicio autorizado o de fábrica Makita que se lo repare. Para mantener la SEGURIDAD y FIABILIDAD del pro- ducto, las reparaciones, y cualquier otra tarea de man- tenimiento o ajuste deberán ser realizadas en centros...
- Page 59 Makita. Si la inspección muestra que el problema ha sido a causa de un defecto de mano de obra o material, Makita hará la reparación (o a su discreción, el reemplazo) sin ningún cargo. Esta garantía no aplica cuando: •...
- Page 60 Para reducir la exposición a estos productos químicos: trabaje en un área bien ventilada y póngase el equipo de seguridad indicado, tal como las máscaras contra polvo que están especialmente diseñadas para filtrar partículas microscópicas. Makita Corporation 3-11-8, Sumiyoshi-cho, 885432-947 Anjo, Aichi 446-8502 Japan...
- Page 61 INSTRUCTION MANUAL MANUEL D'INSTRUCTION MANUAL DE INSTRUCCIONES Cordless Circular Saw Scie Circulaire sans Fil Sierra Circular Inalámbrica XSS01 XSS02 006699 IMPORTANT: Read Before Using. IMPORTANT: Lire avant usage. IMPORTANTE: Leer antes de usar.
- Page 62 ENGLISH (Original instructions) SPECIFICATIONS Model XSS01 XSS02 Blade diameter 165 mm (6-1/2") at 90° 57 mm (2-1/4") Max. Cutting depth at 45° 40 mm (1-9/16") at 50° 36 mm (1-7/16") No load speed (RPM) 3,700 /min Overall length 347 mm (13-5/8") Net weight 3.2 kg (7.1 lbs) 3.5 kg (7.6 lbs)
- Page 63 14. Do not overreach. Keep proper footing and 26. When battery pack is not in use, keep it away balance at all times. This enables better control from other metal objects, like paper clips, of the power tool in unexpected situations. coins, keys, nails, screws or other small metal 15.
- Page 64 Hold the power tool by insulated gripping 12. Support large panels to minimise the risk of surfaces only, when performing an operation blade pinching and kickback. Large panels tend where the cutting tool may contact hidden to sag under their own weight. Supports must be wiring.
- Page 65 Additional safety warnings 23. Intended use This tool is intended to cut wood products only. Accumulated sawdust on the lower guard and hub from other materials may effect the proper closure of the lower guard which could lead to serious personal injury. 24.
- Page 66 ENC007-8 IMPORTANT SAFETY INSTRUCTIONS FOR BATTERY CARTRIDGE Before using battery cartridge, read all instructions and cautionary markings on (1) battery charger, (2) battery, and (3) product using battery. Do not disassemble battery cartridge. If operating time has become excessively shorter, stop operating immediately. It may result in a risk of overheating, possible burns 000029 and even an explosion.
- Page 67 Battery protection system FUNCTIONAL DESCRIPTION (Lithium-ion battery with star marking) CAUTION: 1. Star marking Always be sure that the tool is switched off and the • battery cartridge is removed before adjusting or checking function on the tool. Installing or removing battery cartridge 1.
- Page 68 This tool is equipped with an electric blade brake. If the 2. Cutting line tool consistently fails to quickly stop blade after switch trigger release, have tool serviced at a Makita service center. The blade brake system is not a substitute for lower guard.
-
Page 69: Inner Flange
Be sure the blade is installed with teeth pointing up • at the front of the tool. Use only the Makita wrench to install or remove the • blade. To remove the blade, press the shaft lock so that the blade cannot revolve and use the wrench to loosen the hex bolt clockwise. - Page 70 If the tool is operated continuously until the battery • MAINTENANCE cartridge has discharged, allow the tool to rest for 15 minutes before proceeding with a fresh battery. CAUTION: 1. Rear handle Always be sure that the tool is switched off and the •...
- Page 71 If electric brake is not working well, ask workmanship or material, Makita will repair (or at our your local Makita service center for repair. option, replace) without charge.
- Page 72 FRANÇAIS (Mode d’emploi original) SPÉCIFICATIONS Modèle XSS01 XSS02 Diamètre de la lame 165 mm (6-1/2") à 90° 57 mm (2-1/4") Profondeur de coupe max. à 45° 40 mm (1-9/16") à 50° 36 mm (1-7/16") Vitesse à vide (T/MIN) 3 700 /min Longueur totale 347 mm (13-5/8") Poids net...
- Page 73 Sécurité personnelle 19. Débranchez la fiche de la source d'alimentation 10. Restez alerte, attentif à vos mouvements et et/ou retirez le bloc-piles de l'outil électrique faites preuve de bon sens lorsque vous utilisez avant d'effectuer tout réglage, de changer un un outil électrique.
- Page 74 liquide pénètre dans vos yeux, il faut aussi contact avec un conducteur sous tension, les consulter un médecin. L'électrolyte qui s'échappe de pièces métalliques à découvert l'outil la batterie peut causer des irritations ou des brûlures. deviendraient également sous tension Réparation risqueraient de transmettre une décharge à...
- Page 75 la cause du coincement de la lame et prenez les 15. Soyez particulièrement prudent lors des mesures correctives pour éliminer le problème. coupes dans une cloison existante ou tout 11. Avant de faire redémarrer la scie dans la pièce, autre matériau dont l’arrière n'est pas visible. centrez la lame dans le trait de scie et La lame pourrait rencontrer un objet dur, ce qui assurez-vous que les dents de la lame ne...
- Page 76 rappel et libérez le protecteur inférieur dès que la lame pénètre dans le matériau. Pour toute autre opération de sciage, le protecteur inférieur devrait fonctionner automatiquement. 21. Assurez-vous toujours que le protecteur inférieur couvre bien la lame avant de déposer l'outil sur l'établi ou sur le sol.
- Page 77 31. N'appliquez jamais une pression latérale sur la Cessez immédiatement l'utilisation si le temps lame pour l'arrêter. de fonctionnement devient excessivement 32. N'utilisez aucune meule abrasive. court. Il y a risque de surchauffe, de brûlures, 33. N'utilisez que la lame dont le diamètre voire d'explosion.
- Page 78 Système de protection de la batterie DESCRIPTION DU (batterie lithium-ion marquée d’une étoile) FONCTIONNEMENT 1. Étoile ATTENTION: Assurez-vous toujours que l'outil est hors tension • et que sa batterie est retirée avant de l'ajuster ou de vérifier son fonctionnement. Installation ou retrait de la batterie 1.
- Page 79 45°. Tournez à fond le butoir en déverrouillage. Retournez l'outil à un centre de tournant dans le sens contraire des aiguilles d'une service après-vente Makita pour le faire réparer montre pour une coupe en biseau (0° - 45°) et tournez-le AVANT toute nouvelle utilisation.
- Page 80 INVERSE DES AIGUILLES D'UNE MONTRE. 006712 Lorsque vous désirez effectuer un travail de coupe plus propre, raccordez un aspirateur Makita à votre outil. Installez le raccord à poussières sur l'outil à l'aide de la vis. Raccordez ensuite le tuyau de l'aspirateur au...
- Page 81 Garde parallèle (règle de guidage) UTILISATION 1. Vis de serrage ATTENTION: 2. Garde parallèle (règle de Insérez toujours la batterie jusqu'au fond, jusqu'à • guidage) ce qu'elle verrouille en place. Si vous pouvez voir la partie rouge de la face supérieure du bouton, la batterie n'est parfaitement...
- Page 82 90 ゚ les réparations, tout autre travail d'entretien ou de réglage doivent être effectués dans un centre de service Makita agréé ou un centre de service de l'usine Makita, exclusivement avec des pièces de rechange Makita. 013978 ACCESSOIRES EN OPTION 1.
- Page 83 GARANTIE LIMITÉE D’UN AN MAKITA Politique de garantie Chaque outil Makita est inspecté rigoureusement et testé avant sa sortie d’usine. Nous garantissons qu’il sera exempt de défaut de fabrication et de vice de matériau pour une période d’UN AN à partir de la date de son achat initial.
- Page 84 ESPAÑOL (Instrucciones originales) ESPECIFICACIONES Modelo XSS01 XSS02 Diámetro del disco 165 mm (6-1/2") a 90° 57 mm (2-1/4") Profundidad de corte máxima a 45° 40 mm (1-9/16") a 50° 36 mm (1-7/16") Velocidad sin carga (r.p.m.) 3 700 r/min Longitud total 347 mm (13-5/8") Peso neto 3,2 kg (7,1 lbs)
- Page 85 circuito de falla en tierra (ICFT). El uso de un 19. Desconecte la clavija de la fuente de energía ICFT reduce el riesgo de descarga eléctrica. y/o la batería de la herramienta eléctrica antes Seguridad personal de realizar ajustes, cambiar accesorios o 10.
- Page 86 27. En condiciones abusivas, podrá escapar Sujete herramienta eléctrica líquido de la batería; evite tocarlo. Si lo toca superficies de sujeción aisladas solamente al accidentalmente, enjuague con agua. Si hay realizar una operación en la que la pieza contacto del líquido con los ojos, acuda por cortadora pueda entrar en contacto con cables ayuda médica.
- Page 87 inmóvil en el material hasta que el disco se corte. Si el ajuste del disco cambia durante el pare completamente. No intente nunca extraer corte, podrá ocasionar un atoramiento y retroceso el disco de la pieza de trabajo ni tirar de la brusco.
- Page 88 especiales como “cortes de cavidad” y “cortes compuestos.” Levante el protector inferior mediante el mango retráctil y cuando el disco entre en el material, debe soltar el protector inferior. Para todos los otros cortes con sierra, el protector inferior debe funcionar automáticamente.
- Page 89 31. No detenga el disco de la sierra mediante No desarme el cartucho de batería. presión lateral sobre el mismo. Si el tiempo de operación se ha acortado en 32. No use ningún disco abrasivo. exceso, deje de operar de inmediato. Podría 33.
- Page 90 Sistema de protección de batería DESCRIPCIÓN DEL (batería de ión de litio con marca de estrella) FUNCIONAMIENTO 1. Marca de estrella PRECAUCIÓN: Asegúrese siempre de que la herramienta esté • apagada y el cartucho de batería extraído antes de realizar cualquier ajuste o comprobación en la herramienta.
- Page 91 NUNCA utilice la herramienta si palanca firmemente. funciona con sólo pulsar el gatillo sin oprimir el botón de desbloqueo. Devuelva la herramienta a un centro de asistencia técnica de MAKITA ANTES de continuar utilizándola. NUNCA fije con cinta adhesiva ni impida el •...
- Page 92 Después quite el perno hexagonal, la brida envíe la herramienta al centro de servicio Makita para su exterior y el disco. reparación.
- Page 93 Si desea realizar una operación de corte limpio, conecte interruptor, espere hasta que el disco pare y después retire una aspiradora Makita a la herramienta. Instale la la herramienta. Realinee la herramienta en una nueva línea boquilla de polvo en la herramienta utilizando el tornillo.
- Page 94 (corte vertical) interruptor. Si el freno eléctrico no funciona bien, pida a su centro de servicio Makita local que se lo repare. Para modelo XSS02 Este ajuste ha sido hecho de fábrica. Pero en caso de 1.
- Page 95 COMPLETA, porte pagado con antelación, a una de las fábricas o centros de servicio autorizados Makita. Si la inspección muestra que el problema ha sido causado por mano de obra o material defectuoso, Makita la reparará (o a nuestra opción, reemplazará) sin cobrar.
- Page 96 Para reducir la exposición a estos productos químicos: trabaje en un área bien ventilada y póngase el equipo de seguridad indicado, tal como las máscaras contra polvo que están especialmente diseñadas para filtrar partículas microscópicas. Makita Corporation 3-11-8, Sumiyoshi-cho, Anjo, Aichi 446-8502 Japan www.makita.com...
- Page 97 INSTRUCTION MANUAL MANUAL DE INSTRUCCIONES Cordless Recipro Saw Sierra Recíproca Inalámbrica XRJ04 IMPORTANT: Read Before Using. IMPORTANTE: Lea antes de usar.
- Page 98 ENGLISH (Original instructions) SPECIFICATIONS Model: XRJ04 Length of stroke 32 mm (1-1/4″) Strokes per minute 0 - 2,800 /min Max. cutting capacities Pipe 130 mm (5-1/8″) Wood 255 mm (10″) Rated voltage D.C. 18 V Standard battery cartridge BL1815N, BL1820, BL1820B BL1830, BL1830B, BL1840, BL1840B, BL1850, BL1850B, BL1860B...
- Page 99 If devices are provided for the connection of Follow instruction for lubricating and chang- dust extraction and collection facilities, ensure ing accessories. these are connected and properly used. Use of Keep handles dry, clean and free from oil and dust collection can reduce dust-related hazards. grease.
- Page 100 The followings show the symbols used for tool. have been altered, may result in the battery bursting causing fires, personal injury and damage. It will volts also void the Makita warranty for the Makita tool and charger. direct current Tips for maintaining maximum...
- Page 101 To remove the battery cartridge, slide it from the tool Indicating the remaining battery while sliding the button on the front of the cartridge. capacity To install the battery cartridge, align the tongue on the battery cartridge with the groove in the housing and slip Only for battery cartridges with "B"...
- Page 102 A side. Electric brake This tool is equipped with an electric brake. If the tool consistently fails to quickly stop after the switch trigger is released, have the tool serviced at a Makita service center. ASSEMBLY CAUTION:...
- Page 103 1 minute. Check the tool while running and electric brake operation when releasing the switch trigger. If electric brake is not working well, ask your local Makita service center for repair. To maintain product SAFETY and RELIABILITY,...
- Page 104 COMPLETE tool, freight prepaid, to one of Makita’s Factory or Authorized Service Centers. If inspection shows the trouble is caused by defective workmanship or material, Makita will repair (or at our option, replace) without charge. This Warranty does not apply where: •...
- Page 105 ESPAÑOL (Instrucciones originales) ESPECIFICACIONES Modelo: XRJ04 Extensión de la carrera 32 mm (1-1/4″) Carreras por minuto 0 - 2 800 cpm Capacidad máxima de corte Tubo 130 mm (5-1/8″) Madera 255 mm (10″) Tensión nominal 18 V c.c. Cartucho de batería estándar BL1815N, BL1820, BL1820B BL1830, BL1830B, BL1840, BL1840B, BL1850, BL1850B,...
- Page 106 Use equipo de protección personal. Póngase eléctrica. Si la herramienta eléctrica está siempre protección para los ojos. El equipo dañada, haga que se la reparen antes de protector tal como máscara contra el polvo, zapa- utilizarla. Muchos accidentes son ocasionados tos de seguridad antiderrapantes, casco rígido y por herramientas eléctricas con mantenimiento protección para oídos utilizado en las condiciones...
- Page 107 Use siempre gafas de seguridad o protectoras. Instrucciones importantes de Los anteojos comunes o para el sol NO son seguridad para el cartucho de gafas de seguridad. batería Evite cortar clavos. Revise la pieza de trabajo y quite todos los clavos antes de utilizar la herramienta.
- Page 108 Makita, o de baterías alteradas, puede ocasio- nar que las baterías exploten causando un incendio, lesiones personales y daños. Asimismo, esto inva- lidará la garantía de Makita para la herramienta y el cargador Makita. Consejos para alargar al máximo la vida útil de la batería...
- Page 109 La herramienta está equipada con un freno eléctrico. Si la herramienta falla constantemente en detenerse tras Luces indicadoras Capacidad soltar el gatillo interruptor, lleve la herramienta a mante- restante nimiento a un centro de servicio Makita. Iluminadas Apagadas Parpadeando 75% a 100% MONTAJE 50% a 75% PRECAUCIÓN:...
- Page 110 Para instalar la segueta recíproca, asegúrese siempre de que la palanca de la abrazadera de la segueta (parte del manguito de la abrazadera de la segueta) esté en la posición liberada en la cubierta de aislamiento antes de insertar la segueta recíproca. Si la palanca de la abrazadera de la segueta se encuentra en la posición fija, gírela en la dirección de la flecha para que pueda ser trabada en la posición liberada...
- Page 111 Si el freno eléctrico no funciona bien, solicite o mantenimiento. a su centro de servicio Makita local que lo reparen. AVISO: Para mantener la SEGURIDAD y FIABILIDAD del pro- Nunca use gasolina, bencina, diluyente ducto, las reparaciones, y cualquier otra tarea de man- (tíner), alcohol o sustancias similares.
- Page 112 Makita. Si la inspección muestra que el problema ha sido a causa de un defecto de mano de obra o material, Makita hará la reparación (o a su discreción, el reemplazo) sin ningún cargo. Esta garantía no aplica cuando: •...
- Page 116 Para reducir la exposición a estos productos químicos: trabaje en un área bien ventilada y póngase el equipo de seguridad indicado, tal como las máscaras contra polvo que están especialmente diseñadas para filtrar partículas microscópicas. Makita Corporation 3-11-8, Sumiyoshi-cho, Anjo, Aichi 446-8502 Japan 885454A947...
- Page 117 INSTRUCTION MANUAL Cordless Angle Grinder XAG03 XAG04 015078 IMPORTANT: Read Before Using.
- Page 118 ENGLISH (Original instructions) SPECIFICATIONS Model XAG03 XAG04 Wheel diameter 115 mm (4-1/2") 125 mm (5") Max. wheel thickness 6 mm (1/4") 6 mm (1/4") Spindle thread 5/8" Rated speed (n) / No load speed (n 8,500 /min With battery cartridge BL1815N, BL1820 348 mm (13-3/4") Overall length With battery cartridge BL1830, BL1840, BL1850...
- Page 119 13. Remove any adjusting key or wrench before Battery tool use and care turning the power tool on. A wrench or a key 24. Recharge only with the charger specified by left attached to a rotating part of the power tool the manufacturer.
- Page 120 The outside diameter and the thickness of 12. Do not run the power tool while carrying it at your accessory must be within the capacity your side. Accidental contact with the spinning rating of your power tool. Incorrectly sized accessory could snag your clothing, pulling the accessories cannot be adequately guarded or accessory into your body.
- Page 121 Safety Warnings Specific for Grinding and Abrasive d) Do not restart the cutting operation in the Cutting-Off Operations: workpiece. Let the wheel reach full speed and a) Use only wheel types that are recommended carefully re-enter the cut. The wheel may bind, for your power tool and the specific guard walk up or kickback if the power tool is restarted in designed for the selected wheel.
- Page 122 ENC007-8 22. Do not leave the tool running. Operate the tool only when hand-held. IMPORTANT SAFETY 23. Do not touch the workpiece immediately after INSTRUCTIONS operation; it may be extremely hot and could burn your skin. FOR BATTERY CARTRIDGE 24. Observe the instructions of the manufacturer for correct mounting and use of wheels.
- Page 123 FUNCTIONAL DESCRIPTION 1. Slide switch CAUTION: Always be sure that the tool is switched off and the • battery cartridge is removed before adjusting or checking function on the tool. Installing or removing battery cartridge 015082 1. Button To start the tool, slide the slide switch toward the "I 2.
- Page 124 Releasing protection lock Automatic speed change function When the protection system works repeatedly, the tool is locked and the battery indicator shows the following state. 1. Mode indicator Battery indicator Blinking Protection lock works 015200 In this situation, the tool does not start even if turning the tool 015142 off and on.
-
Page 125: Lock Nut
For tool with locking screw type wheel guard Installing or removing wheel guard (For depressed center wheel, multi disc / 1. Wheel guard abrasive cut-off wheel, diamond wheel) 2. Bearing box 3. Screw WARNING: When using depressed center grinding • wheel/Multi-disc, wire wheel brush, cut-off wheel or diamond wheel, the wheel guard must be fitted on the tool so that the closed side of the guard... -
Page 126: Rubber Pad
Grinding and sanding operation Installing or removing abrasive disc (optional accessory) 1. Sanding lock nut 2. Abrasive disc 3. Rubber pad 015097 ALWAYS hold the tool firmly with one hand on housing 015092 and the other on the side handle. Turn the tool on and Mount the rubber pad onto the spindle. -
Page 127: Inner Flange
Operation with abrasive cut-off / diamond wheel (optional accessory) 1. Lock nut 2. Abrasive cut-off wheel/diamond wheel 3. Inner flange 4. Wheel guard for abrasive cut-off wheel/diamond wheel 010855 Remove the battery cartridge from the tool and place it upside down allowing easy access to spindle. Mount the inner flange and abrasive cut-off / diamond wheel onto the spindle. - Page 128 Continuing operation with a clogged dust cover may damage the tool. To maintain product SAFETY and RELIABILITY, repairs, any other maintenance or adjustment should be performed by Makita Authorized or Factory Service Centers, always using Makita replacement parts. 015094...
- Page 129 A diamond wheel and cut-off wheel are also available and should only be used with the appropriate optional guard for cutoff wheels. If you decide to use your Makita grinder with approved accessories which you purchase from your Makita distributor or factory service...
-
Page 130: Table Of Contents
115 mm (4-1/2") model 125 mm (5") model Grip 36 Wheel Guard (for grinding wheel) Inner flange 45 Inner flange 45 Depressed center wheel/Multi-disc Lock nut 5/8-45 Lock nut 5/8-45 Rubber pad 100 Rubber pad 115 Abrasive disc Sanding lock nut 5/8-48 Sanding lock nut 5/8-48 Wire wheel brush Wire cup brush... - Page 131 COMPLETE tool, freight prepaid, to one of Makita’s Factory or Authorized Service Centers. If inspection shows the trouble is caused by defective workmanship or material, Makita will repair (or at our option, replace) without charge. This Warranty does not apply where:...
- Page 132 Para reducir la exposición a estos productos químicos: trabaje en un área bien ventilada y póngase el equipo de seguridad indicado, tal como las máscaras contra polvo que están especialmente diseñadas para filtrar partículas microscópicas. Makita Corporation 3-11-8, Sumiyoshi-cho, Anjo, Aichi 446-8502 Japan www.makita.com...
- Page 133 GB Rechargeable Flashlight Instruction manual Lampe torche Manuel d’instructions Linterna recargable Manual de instrucciones DML145/DML185...
- Page 135 Symbols The following show the symbols used for the equipment. Be sure that you understand their meaning be-fore use. Symboles Les symboles utilisés pour l’appareil sont indiqués ci-dessous. Assurez-vous d’avoir bien compris leur signification avant l’utilisation. Símbolos Se utilizan los siguientes símbolos para el equipo. Asegúrese de que comprende su significado antes del uso. ❏...
- Page 136 3. A short-circuit can cause a large current flow, 15. If any problem develops, consult your nearest Makita overheating, possible burns and even a breakdown. Service Center or dealer. To maintain product safety...
- Page 137 • Do not use force when inserting the battery cartridge. If These accessories or attachments are recommended for the cartridge does not slide in easily, it is not being use with your Makita tool specified in this manual. The inserted correctly. use of any other accessories or attachments might present a risk of injury to persons.
- Page 138 15. Si un problème survient, consultez le Centre de service après-vente ou le revendeur Makita le plus (2) Ne touchez les bornes de batterie avec aucun près. Pour assurer la sûreté et la fiabilité du produit, matériau conducteur.
- Page 139 • Ampoules (2) • Bandoulière Appuyez sur l’interrupteur pour allumer l’ampoule. Pour • Divers types de batteries et chargeurs Makita l’éteindre, appuyez à nouveau sur l’interrupteur. authentiques. Le tableau suivant indique le temps de fonctionnement avec une charge unique.
- Page 140 Makita más cercano. Para mantener la seguridad y la 4. Nunca exponga el cartucho de la batería a llamas, fiabilidad, las reparaciones, mantenimientos o ajustes fuego o calor elevado.
- Page 141 De lo contrario, el cartucho puede desprenderse un centro de servicio técnico autorizado por Makita. accidentalmente de la herramienta y causar lesiones al operario o a alguna persona que se encuentre cerca.
- Page 144 Makita Corporation 3-11-8, Sumiyoshi-cho, Anjo, Aichi 446-8502 Japan www.makita.com 885246-944...
- Page 145 Radio Instruction manual Radio Manuel d’instructions Radio Manual de instrucciones XRM02...
- Page 149 ENGLISH (Original instructions) 5. Do not short the battery cartridge: (1) Do not touch the terminals with any conductive material. IMPORTANT SAFETY (2) Avoid storing battery cartridge in a container with INSTRUCTIONS other metal objects such as nails, coins, etc. (3) Do not expose battery cartridge to water or rain.
- Page 150 • Powered by both Makita battery pack and supplied power adaptor Explanation of general view (Fig. 1) Controls: 1. Power and Sleep timer 2. Band and Mono button 3. Radio alarm set 4. Buzzer alarm set 5. Preset stations 6. Scan tuning and Time set 7.
- Page 151 The following tables indicate the operating time on a single charge. AT SPEAKER OUTPUT= Battery Cartridge Voltage 50 mW + 50 mW 7.2 V 9.6 V 10.8 V 12 V 14.4 V 18 V unit: Hour BL7010 Approx. 7.0 PA09 PA12 PA14 PA18...
- Page 152 Note: 3. Press and release Scan button (long press Scan The battery pack can’t be charged via the supplied AC button more than 2 seconds will activate time setting), power adaptor. LCD display will flash Scan symbol and the radio will search and stop automatically when it finds a radio station.
- Page 153 Recall stations from preset The HWS alarm will sound for one hour until turning off by pressing the Power button. Press the Power button whilst memories the alarm is activated will cancel the alarm for 24 hours. 1. Press the Power button to turn on the radio. 1.
- Page 154 How to play other audios CAUTION: Unplug this apparatus before connecting other audios. • There are 2 AUX in sockets. AUX 1 is located on the front panel, and AUX 2 is located in the battery compartment. • Connect a stereo or mono source (i.e. iPod, MP3, or CD player) to either AUX 1 or AUX 2 by audio cord.
- Page 155 FRANÇAIS (Mode d’emploi original) 2. Ne démontez pas la batterie. 3. Cessez immédiatement l’utilisation si le temps de CONSIGNES DE SÉCURITÉ fonctionnement devient excessivement court. Il existe un risque de surchauffe, de brûlures, voire IMPORTANTES d’explosion. 4. Si un électrolyte pénètre dans vos yeux, rincez-les AVERTISSEMENT : avec de l’eau et consultez immédiatement un Lors de l’utilisation d’outils électriques, il faut toujours...
- Page 156 • Design dépouillé compatibles pour cette radio sont répertoriées dans le • Résistance à l’eau - IPX 4 tableau suivant. • Alimenté par des piles Makita ou l’adaptateur secteur fourni Descriptif (Fig. 1) Contrôles : 1. Mise en marche et fonction de sommeil 2.
- Page 157 Le tableau suivant indique le temps de fonctionnement par charge. À LA SORTIE DU HAUT-PARLEUR = Tension de la batterie 50 mW + 50 mW 7,2 V 9,6 V 10,8 V 12 V 14,4 V 18 V unité : heure BL7010 Environ 7,0 PA09...
- Page 158 Recherche automatique batterie sur l’écran sont les signes qu’il est nécessaire de changer de batteries. 1. Appuyer sur le bouton de mise en marche pour activer Remarque : la radio. Les batteries ne peuvent pas être rechargées à l’aide 2. Sélectionner la bande de fréquence en appuyant sur de l’adaptateur secteur fourni.
- Page 159 Stockage des stations de radio en présélectionnées. Appuyer sur le bouton pour finir le réglage. L’écran affiche mémoire présélectionnée 2. Quand l’heure de l’alarme radio et la station sont Il y a 5 mémoires présélectionnées sur chaque bande de réglées, appuyer sur le bouton de l’alarme radio fréquence.
- Page 160 Relâcher le bouton de mise en marche quand l’heure Fréquence FM 87,50 - 108 MHz sélectionnée apparaît à l’écran. Le symbole (0,1 MHz/pas) apparaît à l’écran et la radio se met en marche sur la AM (MW) 520 - 1 710 kHz dernière station sélectionnée.
- Page 161 ESPAÑOL (Instrucciones originales) el cargador de baterías, (2) la batería, y (3) el producto con el que se utiliza la batería. INSTRUCCIONES IMPORTANTES 2. No desarme el cartucho de batería. 3. Si el tiempo de uso del cartucho de batería se acorta DE SEGURIDAD demasiado, deje de usarlo inmediatamente.
- Page 162 • Grado de protección IPX 4 contra el agua paquete de baterías principal que alimentará la radio. • Alimentación tanto por paquete de baterías de Makita y Los paquetes de baterías adecuados para esta radio por adaptador de cable eléctrico incluido se listan en la tabla que se muestra a continuación.
- Page 163 La tabla a continuación indica el tiempo de operación en una sola carga. A NIVEL DE SALIDA DEL Voltaje del cartucho de batería ALTAVOZ= 50 mW + 50 mW 7,2 V 9,6 V 10,8 V 12 V 14,4 V 18 V unidad: Hora BL7010 Aprox.
- Page 164 Sintonía por exploración de que el paquete de baterías requiere ser reemplazado. 1. Presione el botón de encendido de la radio para Nota: encenderla. El paquete de baterías no puede recargarse mediante 2. Seleccione la banda de frecuencia requerida al el adaptador del cable eléctrico de CA.
- Page 165 4. Continúe girando la perilla de control de sintonía / 4. La pantalla mostrará la hora parpadeando, gire la volumen hasta que haya conseguido mostrar la perilla de control de sintonía / volumen para frecuencia deseada en la pantalla. seleccionar la hora y luego presione el botón 5.
- Page 166 presione el botón de ajuste de hora nuevamente • Hay 2 enchufes de entrada AUX. AUX 1 se ubica en el para completar el ajuste de la alarma de timbre HWS. panel delantero, y AUX 2 se encuentra en el 6.
- Page 168 Makita Corporation 3-11-8, Sumiyoshi-cho, Anjo, Aichi 446-8502 Japan www.makita.com XRM02(DMR102)-NA3-0914...
Need help?
Do you have a question about the XT704 and is the answer not in the manual?
Questions and answers