
Related Manuals for Makita NUEVO XT296ST


Summary of Contents for Makita NUEVO XT296ST
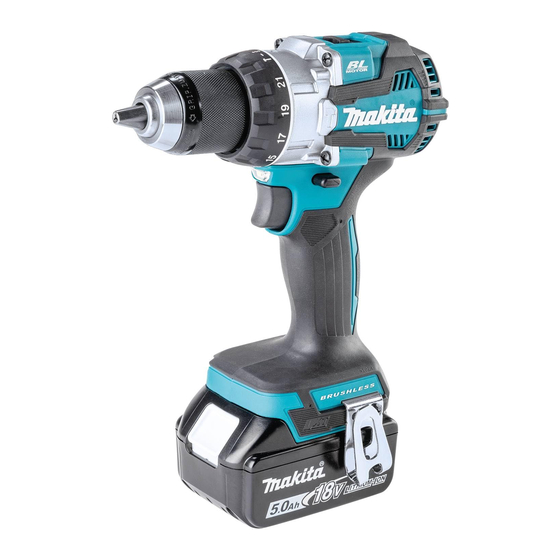
- Page 1 INSTRUCTION MANUAL MANUAL DE INSTRUCCIONES Cordless Hammer Driver Drill Rotomartillo Atornillador Inalámbrico XPH16 IMPORTANT: Read Before Using. IMPORTANTE: Lea antes de usar.
-
Page 2: Specifications
ENGLISH (Original instructions) SPECIFICATIONS Model: XPH16 Drilling capacities Masonry 16 mm (5/8") Steel 13 mm (1/2") Wood Auger bit: 38 mm (1-1/2") Self-feed bit: 51 mm (2”) Hole saw: 51 mm (2”) Fastening capacities Wood screw 10 mm x 90 mm (3/8" x 3-1/2") Machine screw M6 (1/4") No load speed (RPM) - Page 3 Do not abuse the cord. Never use the cord for Power tool use and care carrying, pulling or unplugging the power tool. Do not force the power tool. Use the correct Keep cord away from heat, oil, sharp edges power tool for your application. The correct or moving parts.
- Page 4 Do not use a battery pack or tool that is dam- Safety instructions when using long drill bits aged or modified. Damaged or modified batteries Never operate at higher speed than the max- may exhibit unpredictable behaviour resulting in imum speed rating of the drill bit. At higher fire, explosion or risk of injury.
-
Page 5: Tips For Maintaining Maximum Battery Life
Avoid storing battery cartridge in a con- causing fires, personal injury and damage. It will also tainer with other metal objects such as void the Makita warranty for the Makita tool and charger. nails, coins, etc. Do not expose battery cartridge to water Tips for maintaining maximum or rain. -
Page 6: Overload Protection
Press the check button on the battery cartridge to indi- If no improvement can be found by restoring protection cate the remaining battery capacity. The indicator lamps system, then contact your local Makita Service Center. light up for a few seconds. Switch action... -
Page 7: Electric Brake
Electric brake This tool is equipped with an electric brake. If the tool consistently fails to quickly stop after the switch trigger is released, have the tool serviced at a Makita service center. Lighting up the front lamp CAUTION: Do not look in the light or see the source of light directly. -
Page 8: Adjusting The Fastening Torque
This tool has three action modes. Adjusting ring Drilling mode (rotation only) You can select the action mode and adjust the fastening torque with the adjusting ring. Hammer drilling mode (rota- tion with hammering) Selecting the action mode 1 - 21 Screwdriving mode (rotation with clutch) Select the mode suitable for your work. Turn the adjust- ing ring and align the mark that you select with the arrow on the tool body. -
Page 9: Installing Hook
Adjustable depth rod ASSEMBLY Optional accessory CAUTION: Always be sure that the tool is switched off and the battery cartridge is removed before carrying out any work on the tool. Installing or removing driver bit/ drill bit Optional accessory Fig.11 ► 1 . -
Page 10: Operation
Using hole OPERATION WARNING: Never use the hanging hole for CAUTION: When the speed comes down unintended purpose, for instance, tethering the extremely, reduce the load or stop the tool to tool at high location. Bearing stress in a heavily avoid the tool damage. -
Page 11: Maintenance
Never use gasoline, benzine, thinner, alcohol or the like. Discoloration, deformation or cracks may result. To maintain product SAFETY and RELIABILITY, repairs, any other maintenance or adjustment should be performed by Makita Authorized or Factory Service Centers, always using Makita replacement parts. OPTIONAL ACCESSORIES Fig.17 ► 1 . Blow-out bulb... - Page 12 MAKITA LIMITED WARRANTY Please refer to the annexed warranty sheet for the most current warranty terms applicable to this product. If annexed warranty sheet is not available, refer to the warranty details set forth at below website for your respective country.
-
Page 13: Especificaciones
ESPAÑOL (Instrucciones originales) ESPECIFICACIONES Modelo: XPH16 Capacidades de taladrado Mampostería 16 mm (5/8") Acero 13 mm (1/2") Madera Broca de barrena: 38 mm (1-1/2″) Broca de autoalimentación: 51 mm (2″) Sierra perforadora: 51 mm (2″) Capacidades de fijación Tornillo para madera 10 mm x 90 mm (3/8" x 3-1/2") Tornillo de máquina 6 mm (1/4") Velocidad sin carga (RPM) Alta (2) 0 - 1 800 r/min Baja (1) - Page 14 Seguridad eléctrica Retire cualquier llave de ajuste o llave de apriete antes de encender la herramienta. Una Las clavijas de conexión de las herramientas llave de ajuste o llave de apriete que haya sido eléctricas deberán encajar perfectamente en la dejada puesta en una parte giratoria de la herra- toma de corriente. No modifique nunca la clavija mienta eléctrica puede ocasionar alguna lesión.
- Page 15 Dé mantenimiento a las herramientas eléctri- Siga todas las instrucciones para la carga y cas y los accesorios. Compruebe que no haya evite cargar la herramienta o la batería fuera piezas móviles desalineadas o estancadas, del rango de temperatura especificado en piezas rotas y cualquier otra condición que las instrucciones.
- Page 16 10. Asegúrese de que no haya cables eléctricos, Instrucciones importantes de tubos de agua, tubos de gas, etc. que pudieran seguridad para el cartucho de representar un peligro en caso de ser dañados por el uso de la herramienta. batería Instrucciones de seguridad cuando se utilicen Antes de utilizar el cartucho de batería, lea brocas largas...
-
Page 17: Descripción Del Funcionamiento
► 1 . Indicador rojo 2. Botón 3. Cartucho de batería lesiones personales y daños. Asimismo, esto inva- lidará la garantía de Makita para la herramienta y el Para quitar el cartucho de batería, deslícelo de la herra- cargador Makita. -
Page 18: Protección Contra Sobrecarga
Si no hay ninguna mejora al restaurar el sistema de NOTA: La primera luz indicadora (extrema izquierda) protección, comuníquese con su centro local de servi- parpadeará cuando el sistema de protección de cio Makita. batería esté en funcionamiento. 18 ESPAÑOL... - Page 19 La herramienta está equipada con un freno eléctrico. Si la herramienta falla constantemente en detenerse tras soltar el gatillo interruptor, lleve la herramienta a mante- nimiento a un centro de servicio Makita. Fig.5 Iluminación de la luz delantera ► 1 . Palanca del interruptor de inversión Esta herramienta cuenta con una palanca del interrup- PRECAUCIÓN:...
-
Page 20: Cambio De Velocidad
Cambio de velocidad Anillo de ajuste Usted puede seleccionar el modo de accionamiento y PRECAUCIÓN: Coloque siempre la palanca ajustar la torsión de apriete mediante el anillo de ajuste. de cambio de velocidad exactamente en la posi- ción correcta. Si usted utiliza la herramienta con la Selección del modo de palanca de cambio de velocidad puesta a medias accionamiento entre la posición “1”... -
Page 21: Montaje
Ajuste de la torsión de apriete Fig.8 ► 1 . Anillo de ajuste 2. Marca (graduación 1 - 21) 3. Flecha La torsión de apriete puede ajustarse en 21 niveles girando el anillo de ajuste. Alinee las graduaciones con la flecha en el cuerpo de la herramienta. Puede conseguir una fijación de torsión mínima en 1 y una torsión máxima en 21. Antes de la operación real, coloque un tornillo de prueba en el material o algún duplicado del material para determi- nar qué nivel de torsión se requiere para la aplicación particular. Graduación Tornillo de máquina 4 mm... - Page 22 Instalación de la empuñadura lateral Instalación del gancho (mango auxiliar) ADVERTENCIA: Utilice las piezas para col- Accesorio opcional gado/montado solo para los fines previstos; por ejemplo, colgar la herramienta en un cinturón de herramientas entre trabajos o intervalos de trabajo. ADVERTENCIA: Tenga cuidado de no sobre- cargar el gancho, ya que demasiada fuerza o una...
-
Page 23: Operación
Uso del orificio OPERACIÓN ADVERTENCIA: Nunca use el orificio para PRECAUCIÓN: Cuando la velocidad baje colgado para un propósito no previsto, por ejem- demasiado, reduzca la carga o detenga la herra- plo, atar la herramienta en un lugar alto. La carga mienta para evitar daños en ésta. -
Page 24: Mantenimiento
(tíner), alcohol o sustancias similares. Puede que esto ocasione grietas o descoloramiento. Para mantener la SEGURIDAD y FIABILIDAD del pro- ducto, las reparaciones, y cualquier otra tarea de man- tenimiento o ajuste deberán ser realizadas en centros de servicio autorizados o de fábrica Makita, empleando siempre repuestos Makita. 24 ESPAÑOL... -
Page 25: Accesorios Opcionales
PRECAUCIÓN: Estos accesorios o aditamen- tos están recomendados para utilizarse con su herramienta Makita especificada en este manual. El empleo de cualquier otro accesorio o aditamento puede conllevar el riesgo de lesiones personales. Utilice los accesorios o aditamentos solamente para su fin establecido. - Page 28 Para reducir la exposición a estos productos químicos: trabaje en un área bien ventilada y póngase el equipo de seguridad indicado, tal como las máscaras contra polvo que están especialmente diseñadas para filtrar partículas microscópicas. Makita Corporation 3-11-8, Sumiyoshi-cho, Anjo, Aichi 446-8502 Japan 885A00-942...
Need help?
Do you have a question about the NUEVO XT296ST and is the answer not in the manual?
Questions and answers