Advertisement
Available languages
Available languages
Quick Links
Advertisement

Related Manuals for Gorenje WHC623E14X-SA


Summary of Contents for Gorenje WHC623E14X-SA
- Page 1 OK-004/II /WHC623E14X-SA OK-004/II /WHC623E16X-SA OK-004/II /WHC923E16X-SA...
- Page 3 EN - COOKER HOOD عربي - شفاطات التھوية...
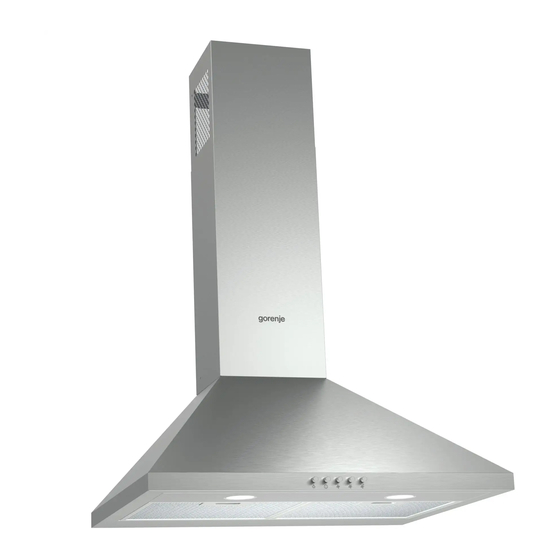
- Page 4 WHC623E14X WHC923E16X WHC623E16X...
- Page 5 10mm 10 cm 16 cm 8x40mm 4.5x50mm >1 cm >1 cm W -2 cm 220-240V 16 cm 50-60Hz W cm >5 cm >30 cm...
- Page 8 EN - COOKER HOOD Closely follow the instructions set out in this manual. All responsibility, for any eventual inconveniences, damages or fires caused by not complying with the instructions in this manual, is declined. The hood is conceived for the suction of cook- ing fumes and steam and is destined only for domestic use.
-
Page 9: Ducting Version
This appliance is marked according to the European directive 2002/96/EC on Waste Electrical and Electronic Equipment (WEEE). By ensuring this product is disposed of correctly, you will help prevent potential negative consequences for the environment and human health, which could otherwise be caused by inappropriate waste handling of this product. The symbol on the product, or on the documents accompanying the product, indicates that this appliance may not be treated as household waste. -
Page 10: Filter Version
Use a duct with as few elbows as possible (maximum elbow angle: 90°). Avoid drastic changes in the duct cross-section. Use a duct as smooth as possible inside. The duct must be made of certified material. Filter version One active charcoal filter is needed for this and can be obtained from your usual retailer. The filter removes the grease and smells from the extracted air before sending it back into the room through the upper outlet grid. -
Page 11: Operation
OPERATION Use the high suction speed in cases of concentrated kitchen vapours. It is recommended that the cooker hood suction is switched on for 5 minutes prior to cooking and to leave in operation during cooking and for another 15 minutes approximately after terminating cooking. - Page 12 استبدال اللمبة .LED الشفاط مزود بنظام إضاءة، يعتمد على تقنية اإلضاءة األمثل حيث تصل إلى 01 م ر اتLED توفر لمبة أطول عمر ا ً مقارنة مع .اللمبات التقليدية وتوفر 09 ٪ من استھالك الطاقة الكھربائية .لتغيير اللمبة، اتصل بخدمة ما بعد البيع...
- Page 13 .وغريھا)، قم بإ ز التھا واالحتفاظ بھا إن وجدت إذا كان باإلمكان، قم بتحريك وإ ز الة الخ ز ائن، املوجودة تحت وحول منطقة تثبيت الشفاط، وذلك لسھولة الوصول إىل الجدار/السقف الخلفي حيث سيتم تثبيت الشفاط. وإال .قم بحامية الخ ز انة وبقية األج ز اء، حيث سيتم الرتكيب. قم باختيار سطح مستو لتجميع الجھاز. قم بتغطية السطح بغطاء واقي وضع جميع أج ز اء الشفاط واملعدات داخله وباإلضافة...
- Page 14 EN 55014-1; CISPR 14-1; EN 55014-2; CISPR 14-2; EN/IEC 61000-3-2; EN/IEC 61000-3-3 :EMC )EM (التوافق مع مقترحات لالستخدام الصحيح، التي يمكن أن تقلل من التأثير على البيئة: قم بتشغيل الشفاط على الحد األدنى عند البدء بالطھي، واتركه يعمل لعدة دقائقON للطاقة بعد االنتھاء من الطھي. قم بزيادة السرعة فقط عندما يكون ھناك الكثير من الدخان والبخار، استخدم ...
- Page 15 عربي ل شفاطات التھوية اتبع بدقة التعليمات الواردة في ھذا الدليل. نحن نرفض أية مسؤولية ناتجة عن أية مشاكل أو أض ر ار أو ح ر ائق تلحق بالجھاز، نتيجة عدم االلت ز ام بالتعليمات الواردة في ھذا الدليل. تم تصميم الشفاط لشفط الدخان واألبخرة الناتجة أثناء الطھي، ومخصصة فقط لالستخدام .المنزلي...
Need help?
Do you have a question about the WHC623E14X-SA and is the answer not in the manual?
Questions and answers