Table of Contents
Advertisement
Quick Links
Advertisement
Table of Contents

Related Manuals for Samsung CJX-1050W Series


Summary of Contents for Samsung CJX-1050W Series
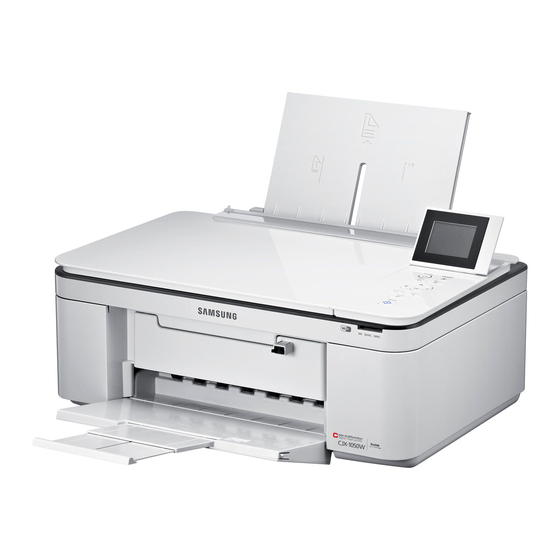
- Page 1 User Guide • Benutzerhandbuch Guide d’utilisation • Manuale per l’utente Guía del usuario Color Inkjet Multifunction CJX-1050W Series All-in-One Printers • All-in-One Drucker • Imprimantes multifonctions Stampanti multifunzione • Impresoras multifunción...
- Page 3 SAMSUNG CJX-1050W All-in-One Printer Your SAMSUNG All-in-One Printer combines ease-of-use and affordable inks to provide high-quality pictures and documents. Resources Support is available! Go to www.samsung.com/printer for: answers to questions ■ software upgrades ■ and more! ■ If you prefer, you can chat online, send us an e-mail, or call for technical support.
- Page 5 Contact SAMSUNG worldwide If you have any comments or questions regarding Samsung products, contact the Samsung customer care center. Country / Region Customer Care Center Web Site FRANCE 01 48 63 00 00 www.samsung.com/printer 01805 - SAMSUNG www.samsung.com/printer GERMANY (726-7864 € 0,14/min)
-
Page 6: Table Of Contents
Contents 1 Printer Overview ................1 Components ..................... 1 Control panel ................... 4 Print Manager Software ................6 Configuring printer settings ..............6 Paper ....................... 7 Paper types ......................8 Paper sizes ......................8 Loading paper ....................9 2 Networking Your Printer ..............13 Connecting to a wireless network ............ - Page 7 Contents 3 Basic Functions ................23 Printing ....................23 Printing documents ..................23 Printing pictures ....................26 Copying ....................38 Copying a document ..................38 Copying a photograph ..................43 Scanning ....................49 Before you begin scanning ................49 Scanning from the computer ................54 Scanning from the control panel ...............56 Ordering supplies ...................
- Page 8 Contents 5 Troubleshooting ................79 Basic troubleshooting ................79 Status lights ................... 83 Power light .....................83 Wi-Fi connectivity LED ..................84 6 Product and Safety Specifications ..........85 Specifications and features ..............85 Print performance ....................85 Photo printing features ..................85 Copy document features ...................86 Copy photo features ..................87 Scanning features .....................87 Paper input tray features ..................88...
- Page 9 Contents 7 Safety Information ...............97 Safety Information .................. 97 LCD Screen Safety ..................100 Ink Cartridge Safety ..................100 Declaration of Conformity (European countries) ........101 Correct Disposal of This Product (Waste Electrical & Electronic Equipment) ..........103 ENERGY STAR® Qualified ..............104...
-
Page 11: Printer Overview
Printer Overview This printer lets you print, copy, and scan pictures and documents. Components Left paper-edge guide Right paper-edge guide Paper guard Paper output tray Paper input tray Output tray extender... - Page 12 Printer Overview Scanner glass 10 Memory card slot Scanner lid 11 Wi-Fi connectivity LED Control panel...
- Page 13 Printer Overview 12 Access door 14 USB port 13 Printhead with ink cartridges installed 15 Power cord connection port...
-
Page 14: Control Panel
Printer Overview Control panel... - Page 15 Printer Overview Feature Description Displays pictures, messages, and menus; lifts for easy viewing Cancel button Stops the current operation and returns to the menu Menu button Displays the main menu Navigation buttons Used to navigate menus, scroll through pictures Zoom buttons Enlarge or reduce the size of the displayed picture Rotate button Changes the orientation of the displayed picture...
-
Page 16: Print Manager Software
Printer Overview Print Manager Software SAMSUNG Print Manager Software is installed with your SAMSUNG All-in-One Printer Software unless you chose otherwise during installation. The Print Manager icon will appear on your desktop. On a computer with WINDOWS Operating System (OS), you can use Print Manager Software to browse and edit pictures, print, copy, scan, order supplies, and configure your all-in-one printer from your computer. -
Page 17: Paper
Paper For the best photo printing results, use KODAK Photo Papers, which are optimized to work with SAMSUNG All-in-One Printers. For the best document printing results, use KODAK Document Papers or a paper with the COLORLOK Technology logo on the package. Use only paper that is designed for inkjet... -
Page 18: Paper Types
Printer Overview Paper types You can use: Plain paper — 16 to 24 lb / 60 to 90 gsm ■ Photo paper — up to 12 mils ■ Card stock — 110 lb / 200 gsm, max ■ Envelopes — most standard types ■... -
Page 19: Loading Paper
Printer Overview Loading paper Lift the input tray. Pull out the output tray until it is fully extended. - Page 20 Printer Overview Loading plain paper The input tray capacity is 100 sheets of plain paper. To load plain paper: Fan and stack the paper.
- Page 21 Printer Overview Make sure the left and right paper-edge guides are in the plain-paper position, then insert the paper into the input tray.
- Page 22 Printer Overview Loading photo paper The paper tray capacity is 20 sheets of photo paper. To load photo paper: Remove any plain paper from the tray. Insert the paper (short side first) into the input tray with the logo side facing toward the tray and the glossy side toward you.
-
Page 23: Networking Your Printer
Networking Your Printer This section explains how to configure your wireless network settings. Connecting to a wireless network To connect your printer to an 802.11b/g/n wireless (Wi-Fi) network, refer to the following information. Before you connect You need: a wireless router. ■... - Page 24 Networking Your Printer Connecting to a non-WPS wireless router To connect your printer to your wireless network, you need to know the network name, also called the Service Set Identifier (SSID). You can obtain your network name from the wireless router. If your network has security enabled, you also need to know the Security String (passphrase or password).
- Page 25 Networking Your Printer If there are more networks than can be shown on the LCD, a (page down) symbol appears in the bottom right of the display. If there are more networks than can be shown on the LCD, a (page down) symbol Press to select your network, then press OK...
- Page 26 Networking Your Printer The printer with a wireless connection is listed as the name of the printer plus a number (for example, Samsung CJX-1050W+0034). Connecting to a WPS wireless router If your router supports Wi-Fi Protected Setup (WPS), you can use WPS Connect. WPS lets you configure your printer for a wireless network by pressing buttons or entering a PIN.
- Page 27 Networking Your Printer KODAK ESP C315 All-in-One Printer Select one of two methods of connecting: 5. Select one of two methods of connecting: IMPORTANT: Before you press OK on the printer, make sure you know where the Before you press OK on the printer, make sure you know where the IMPORTANT: router’s push button is, or where to enter the generated PIN.
-
Page 28: Setting Up An Ip Address
Networking Your Printer The printer with a wireless connection is listed as the name of the printer plus a number (for example, Samsung CJX-1050W+0034). Setting up an IP address IMPORTANT: You should only need to set up an IP address for your printer if you are having a problem with connecting. -
Page 29: Viewing The Network Configuration
Networking Your Printer Select one of the following, then press OK: Dynamic (DHCP) ■ Manual (Static) ■ If you selected Manual (Static), you are prompted to enter an IP address, a Subnet Mask, a Gateway Address, and a DNS Server address. Press OK after each entry. Use the navigation buttons to enter each digit of the numbers. -
Page 30: Printing The Network Configuration
Networking Your Printer Authentication ■ Channel ■ Region ■ Radio (on/off) ■ MAC Address ■ If the printer is connected to your network, you will see the network name and the word CONNECTED. To scroll through the information, press When you are done, press OK. Printing the network configuration To print the current network configuration: Load plain paper into the printer. -
Page 31: Adding A Wireless Network Connection To A Usb-Connected Computer
Address is not 0.0.0.0. If you have not already done so, connect your printer to your wireless network. Select Start > All Programs > Samsung > Samsung Printer Setup Utility. If your wireless all-in-one printer (example: Samsung CJX-1050W+0034) is not ■... - Page 32 Networking Your Printer If your wireless all-in-one printer (example: Samsung CJX-1050W+0034) is listed: ■ Highlight the all-in-one printer that is connected to your network. Select Yes, my printer is listed, then click Next. When your printer is detected, driver installation begins.
-
Page 33: Basic Functions
Open the document. Select File > Print. In the Print window, select your SAMSUNG Printer. Choose the pages to print, number of copies, etc, then click OK (on a computer with WINDOWS OS) or Print (on a computer with MAC OS). - Page 34 Load paper into the paper input tray. Open the document you want to print, then select File > Print. In the Print dialog box, make sure that SAMSUNG CJX-1050W Series AiO is selected, then click Properties. Select the Layout tab.
- Page 35 Load paper into the paper tray. Open the document you want to print, then select File > Print. In the Print dialog box, make sure that SAMSUNG CJX-1050W is selected. In the Copies & Pages drop-down list, select Paper Handling.
-
Page 36: Printing Pictures
Basic Functions Printing pictures You can print pictures with your all-in-one printer from: A memory card inserted into the memory card slot. ■ An iPhone/iPod Touch. ■ You can also print pictures using Print Manager Software from your computer with WINDOWS OS. - Page 37 Basic Functions To print a picture from a memory card: Insert the memory card into the memory card slot. memory card slot to browse to the picture you want to print. Use the Zoom, Rotate, and Navigation buttons to edit your picture, as needed. Press OK to select your picture.
- Page 38 Basic Functions Viewing pictures on a memory card When you insert a memory card into the memory card slot on your printer, the pictures on the card appear on the LCD. Press to scroll through the pictures. If the printer is idle for more than two minutes, the LCD will revert to the status display. To view the pictures again, press any button, then press Finding pictures on a memory card Your printer can help you locate pictures on a memory card by the date the picture was...
- Page 39 Basic Functions Using default settings to print a picture To print a picture from a memory card using the factory default settings: Load photo paper (short side first) into the center of the input tray with the glossy side toward you (see Loading photo paper, page 12), and move the paper-edge guides until they touch the paper.
- Page 40 Basic Functions Insert the memory card into the memory card slot. memory card slot Press to display the picture you want to print. Press Start to begin printing. The printer prints one 4 x 6 in. / 10 x 15 cm picture. IMPORTANT: To prevent loss of data from your memory card, do not remove it from the printer while printing.
- Page 41 Basic Functions Changing the settings and printing pictures You can change the print photos options for an individual picture or group of pictures, or you can change the settings and save them as the default. To print a picture or pictures using settings other than the default settings: Load photo paper with the glossy side toward you (see Loading photo paper, page 12), and move the paper-edge guides until they touch the paper.
- Page 42 Basic Functions Repeat step 3 for each picture you want to print. Press Back for Print Photos Options. Press to select an option (see table below), then press to change the setting. Print Photos Option Settings Description View Photos Scroll through the pictures on the memory card;...
- Page 43 Basic Functions Print Photos Option Settings Description Color Color (default) Prints full color. Black & White Prints black and white (grayscale). Print Size 2 x 3 If the selected copy size is smaller than the paper in the paper tray, the 3.5 x 5 printer automatically arranges the 4 x 6 (default)
- Page 44 Basic Functions Print Photos Option Settings Description Photo Paper Quality Auto. (default) The printer detects photo paper in the paper tray and sets Best quality automatically. Scene Balance On (default) Adjusts the image brightness to correct for underexposure and reduces the variation in contrast in different areas of the picture.
- Page 45 Basic Functions Printing panoramic pictures To print a panoramic picture, load 4 x 12 in. / 10 x 31 cm paper, or US letter or A4 paper in the main paper tray. Insert the memory card into the memory card slot. memory card slot Press to select the panoramic picture you want to print, then press OK.
- Page 46 Basic Functions IMPORTANT: To prevent loss of data from your memory card, do not remove it from the printer while printing. Printing tagged pictures Some digital cameras let you tag (or “mark”) pictures on the memory card for printing. This creates a tag that is recognized by the printer. If you choose to print tagged pictures, they will be printed according to the default settings on your printer (unless otherwise specified by the tag from the camera).
- Page 47 Basic Functions Insert the memory card into the memory card slot. memory card slot When the “Print tagged images?” message appears, press Start.
-
Page 48: Copying
Basic Functions Copying You can copy documents and pictures with your all-in-one printer. The printer produces high–quality color or black-and-white copies on a variety of paper types. (see Paper types, page Copying a document You can copy a document using the default settings (see Resetting factory defaults, page 71), or you can adjust the quantity, size, quality, and brightness of your copies (see Save as Defaults, page... - Page 49 Basic Functions Close the lid. Press Menu. Press Start to begin copying Adjusting the settings and copying a document To copy a document using settings other than the default settings: Lift the scanner lid, and place the document face down in the right-front corner of the scanner glass.
- Page 50 Basic Functions Copy Document Settings Description Option Quantity 1 (default) to 99 The number of copies that print. Color Color (default) Prints full color. Black & White Prints black and white (grayscale). Copy Size Same Size The copy is the same size as the (default) original.
- Page 51 Basic Functions Copy Document Settings Description Option Plain Paper Quality Normal (default) Good quality output; prints faster than Best. Best The highest quality, but the slowest print speed; eliminates the banding effect that sometimes occurs when printing Draft or Normal. Draft The fastest print speed, but the lowest quality.
- Page 52 Basic Functions Changing the number of copies of a document To change the number of copies: Lift the scanner lid, and place the document face down in the right-front corner of the scanner glass. Close the lid. Press Menu. With Copy Document selected, press to select a number.
-
Page 53: Copying A Photograph
Basic Functions Darkening or lightening a copy To darken or lighten the copy: Lift the scanner lid, and place the document face down in the right-front corner of the scanner glass. Close the lid. Press Menu. With Copy Document selected, press OK. to select Brightness. - Page 54 Basic Functions Close the lid. Press Menu. to select Copy Photo. Press Press Start to begin copying. Adjusting the settings and copying a photograph To copy a photograph using settings other than the default settings: Lift the scanner lid, and place the photograph face down in the right-front corner of the scanner glass.
- Page 55 Basic Functions Copy Photo Option Settings Description Copy Size 2 x 3 The printer enlarges or reduces the original to make it the copy size you 3.5 x 5 select. 4 x 6 (default) If the selected copy size is smaller 4 x 7 than the paper in the paper tray, the printer automatically arranges the...
- Page 56 Basic Functions Copy Photo Option Settings Description Photo Paper Quality Auto. (default) The printer detects photo paper in the paper tray and sets Best quality automatically. Brightness Normal (default) Lightens or darkens the copy. Normal is no change from the -3 to +3 original;...
- Page 57 Basic Functions Changing the number of copies of a photograph To change the number of copies: Lift the scanner lid, and place the photograph face down in the right-front corner of the scanner glass. Close the lid. Press Menu. to select Copy Photo, then press OK. Press Make sure Quantity is selected.
- Page 58 Basic Functions Darkening or lightening a photograph To darken or lighten the copy: Lift the scanner lid, and place the photograph face down in the right-front corner of the scanner glass. Close the lid. Press Menu. to select Copy Photo, then press OK. Press to select Brightness.
-
Page 59: Scanning
Adjust the scan settings that the printer uses before you scan from the printer control panel. Open the Printer Tools window. On a computer with WINDOWS OS, select Start > All Programs > Samsung > ■ Samsung AiO Printer Tools. - Page 60 Basic Functions Under the Tools heading, select Printer Scan Settings. Adjust settings for scanning documents and pictures: To select a program that scanned images or documents will appear in when you scan from the printer control panel: Select the General tab. Under the Program List heading, click next to the currently selected program.
- Page 61 Basic Functions Setting Options Resolution (dpi) File Save Prompt for File Name and Location Automatically Save - specify: Base name; by default, scanned files are ■ names “scan1”, “scan2”, and so on. Location (folder) where the scanned files will ■ be saved To adjust settings for scanning pictures, select the Picture tab, then select an option for each setting:...
- Page 62 Basic Functions Setting Options Resolution (dpi) Quality When connected to a computer with WINDOWS Best for E-mail ■ Normal ■ High ■ Maximum ■ When connected to a computer with MAC OS, a slider bar with: Least ■ Medium ■ Best ■...
- Page 63 Basic Functions Setting Options Automatically Detect When selected, multiple pictures placed on the Pictures (when connected scanner glass are saved as separate files. to a computer with WINDOWS OS) or Auto Crop (when connected to a computer with MAC OS) File Save Prompt for File Name and Location Automatically Save - specify:...
-
Page 64: Scanning From The Computer
Basic Functions Scanning from the computer To scan a document or a picture on a computer: Lift the scanner lid, and place the document or picture face down on the glass. Close the scanner lid. Open Print Manager Software. On a computer with WINDOWS OS, double-click Scan Documents and Pictures, ■... - Page 65 Basic Functions Scanning multiple pictures when connected to a computer with WINDOWS OS To scan multiple pictures simultaneously, and save them as separate files: Lift the scanner lid, and place the pictures face down on the glass, leaving space between the pictures. Close the lid.
-
Page 66: Scanning From The Control Panel
Basic Functions Scanning from the control panel To scan a document or a picture from the control panel: Lift the scanner lid, and place the original document or picture face down in the right-front corner of the scanner glass. Close the lid. Press Menu. - Page 67 Basic Functions Scan Option Settings Description Scan To USB computer The scanned file is sent to the (default) USB-connected computer. Name of The scanned file is sent to the computer (only computer on the wireless or if a computer Ethernet network. is connected by wireless network)
-
Page 68: Ordering Supplies
Basic Functions Scan Option Settings Description Scan Dest. (Destination) File (default) Sends the scanned file in the format and to the destination on your computer that you designate (see Changing the scan settings for scanning from the control panel, page 49). -
Page 69: Maintaining Your Printer
For optimal performance, keep the printer connected to a computer that is powered on and has the Samsung Print Manager Software installed, or keep the printer powered on and connected to the Internet through a wireless network. -
Page 70: General Care And Cleaning
Maintaining Your Printer General care and cleaning CAUTION: Always disconnect the power to the printer before cleaning it. Do not use harsh or abrasive cleaners on any part of the printer. To clean the printer, wipe the outside with a clean, dry cloth. ■... - Page 71 Maintaining Your Printer To clean the scanner glass and document backing under the scanner lid: Turn off the printer and unplug it from the power outlet. Lift the scanner lid. Wipe the glass with a soft cloth or sponge, slightly moistened with a nonabrasive glass cleaner.
- Page 72 Maintaining Your Printer Dry the glass with a lint-free cloth. Gently clean the document backing with a soft cloth or sponge, slightly moistened with mild soap and warm water. Dry the document backing with a chamois or lint-free cloth. NOTE: If the document backing needs further cleaning, use isopropyl (rubbing) alcohol on a soft cloth, then wipe thoroughly with a cloth moistened with water to remove any residual alcohol.
-
Page 73: Replacing Ink Cartridges
Maintaining Your Printer Replacing ink cartridges Your printer uses both black and color ink cartridges. You can check the approximate ink levels on the LCD (see Checking ink levels, page 71). When an ink cartridge is out of ink, the printer LCD displays a message stating that the black or color ink cartridge needs replacing. - Page 74 Maintaining Your Printer The ink cartridges are located in the printhead. Color ink cartridge Black ink cartridge Printhead Pinch the tab on the ink cartridge.
- Page 75 Maintaining Your Printer Lift the ink cartridge out of the printhead. Remove the new ink cartridge from its bag. IMPORTANT: To prevent the printhead from drying out, insert the ink cartridge into the printhead immediately.
- Page 76 Maintaining Your Printer Remove the protective cap from the cartridge. Insert the ink cartridge into the printhead.
- Page 77 Maintaining Your Printer Press down on the ink cartridge tab until you hear a click. Close the printer access door.
-
Page 78: Updating The Software And Printer Firmware
To update the software: Make sure that your computer is connected to the Internet. Select Start > All Programs > Samsung > Samsung AiO Printer Tools. Under Printer Resources, click Check for Software Updates to check whether software updates are available. - Page 79 Make sure that Samsung CJX-1050W Series AiO - Connected appears in the lower left corner of the Printer Tools window. NOTE: If Samsung CJX-1050W Series AiO - Connected does not appear in the lower left corner, click Select, then click Refresh List and choose your printer from the list;...
-
Page 80: Updating If Your Printer Is Connected To A Computer With Mac Os
Maintaining Your Printer Updating if your printer is connected to a computer with MAC OS To update the software: Make sure that your computer is connected to the Internet. Open Print Manager Software. Select the Tools tab. Click Check for Softwate Updates. If there are software updates, follow the on-screen instructions for updating your software. -
Page 81: Monitoring And Adjusting Printer Performance
Maintaining Your Printer Monitoring and adjusting printer performance From the control panel, you can perform tasks to help keep the printer functioning well. Checking ink levels To check the ink levels: Press Menu. to select Maintenance, then press OK. Press With Check Ink Levels selected, press OK. -
Page 82: Replacing The Printhead
Maintaining Your Printer Replacing the printhead IMPORTANT: Replacing the printhead is not a regular maintenance procedure. Replace the printhead only if you receive a new printhead from Samsung. To replace the printhead: Make sure your printer is on. Lift the printer access door, and wait for the carriage to move to the access position. - Page 83 Maintaining Your Printer Remove both ink cartridges and set them aside. Unlatch the used printhead by lifting the button in the center of the carriage.
- Page 84 Maintaining Your Printer Lift the used printhead out of the carriage. Remove the new printhead from its bag. CAUTION: Do not touch the copper contacts on the pringhead, as doing so may damage the pringhead.
- Page 85 Maintaining Your Printer Remove the plastic protective cap. Copper contacts IMPORTANT: Be careful not to scratch or touch the copper contacts while inserting the printhead. Place the new printhead into the carriage.
- Page 86 Maintaining Your Printer Push firmly against the target label of the printhead until you hear a loud snap. Insert the black ink cartridge into the printhead.
- Page 87 Maintaining Your Printer Press down on the ink cartridge until you hear it click into position. Repeat steps 10 - 11 for the color ink cartridge. Close the printer access door. The printer detects the new printhead. Follow the instructions on the LCD to calibrate your printer.
-
Page 89: Troubleshooting
Troubleshooting Troubleshooting Basic troubleshooting Some problems can be resolved quickly by power cycling the printer: Turn off your printer. Wait five seconds. Turn on the printer. Use the following information to help troubleshoot problems with your printer. Problem Possible Solutions Printer does not Make sure you are using the power cord that came with your ■... - Page 90 Troubleshooting Problem Possible Solutions Printer not Check that the printer is plugged in and turned on. ■ detected If you are using a USB cable, check that: ■ – it is a USB 2.0 high-speed cable. – it is connected to the printer and computer. –...
- Page 91 Troubleshooting Problem Possible Solutions Wireless For wireless connectivity issues, go to connectivity Wireless Networking Setup Guide Carriage jam Open the printer access door and clear any obstructions. ■ Check that the printhead and ink cartridges are installed ■ correctly. (The printhead and ink cartridges are installed correctly when you hear them click into place.) Print quality For best results, use KODAK Paper or a paper with the...
- Page 92 ■ Make sure you do not overload the input paper tray. ■ If you cannot access the paper from the front, gently pull the ■ jammed paper up from the paper input tray. Error codes/ Go to messages http://www.samsung.com/uk/support/download/ supportDownloadMain.do...
-
Page 93: Status Lights
Troubleshooting Status lights The status lights indicate the condition of the printer. There are two status lights on the printer: one on the on/off button that indicates power, the other indicates Wi-Fi status. Power light Power light What it means The printer is turned off. -
Page 94: Wi-Fi Connectivity Led
Troubleshooting Wi-Fi connectivity LED Wi-Fi connec- What it means tivity LED The Wi-Fi radio is either turned off or is turned on but not connected to a wireless network. Blinks continu- The Wi-Fi radio is turned on, and the printer is searching for ously available wireless networks within range. -
Page 95: Product And Safety Specifications
Product and Safety Specifications The following specifications are subject to change without notice. Specifications and features Print performance ISO/IEC 24374 ESAT 7 ipm ISO/IEC 24374 ESAT 4.6 ipm Print technology Continuous-tone, thermal inkjet Print quality modes Draft, Normal, and Best on plain paper Photo quality mode on photo paper Photo printing features Quantity 1 to 99... -
Page 96: Copy Document Features
Product and Safety Specifications Print sizes 5 x 7 in. / 13 x 18 cm 8 x 10 in. / 20 x 25 cm US Letter - 8.5 x 11 in. / 22 x 28 cm A4 - 8.3 x 11.7 in. / 21 x 30 cm Quality Best, Normal, Draft modes on plain paper Photo quality mode on photo paper Auto-detect media Auto-detect plain paper and photo papers Optimize... -
Page 97: Copy Photo Features
Product and Safety Specifications Copy photo features Color Black-and-white or color Quantity 1 to 99 copies Copy sizes 2 x 3 in. / 5 x 8 cm 3.5 x 5 in. / 9 x 13 cm 4 x 6 in. / 10 x 15 cm 4 x 7 in. -
Page 98: Paper Input Tray Features
Product and Safety Specifications Functions Segmentation scanning Auto-destination Auto picture detection Paper input tray features Paper capacity 100 sheets of 20 lb plain paper 20 sheets of photo paper, up to 12 mil (290 gsm) 20 envelopes Tray size 4 x 6 in. to 8.5 x 14 in. / 10 x 15 cm to 22 x 36 cm Ink cartridges Ink life The number of pages may be affected by operating environment, printing interval, media type, and media size. - Page 99 Product and Safety Specifications A sample of 5% COVERAGE PATTERN (reduced to 33%) Stephen J. Singel Fabanda Sinpat Abarress Tendar, BSF URANGLE Funtres Solber Netener 30 November 2005 Johnathan Q. Maderia Inpert Mampem Abaress 2343 Stantin Dawer Lank Benhibe, SDF Mr.
-
Page 100: Connectivity
Product and Safety Specifications Connectivity Protocols supported USB 2.0 High Speed; DPOF Devices supported WINDOWS OS-based and MACINTOSH Computers, memory cards (SD, MS/Duo, MMC, SDHC) Image Formats supported Image printing supports JPEG (EXIF v2.2); does not support progressive JPEG format Number of USB ports One rear device port (high speed) Protocols supported USB 2.0 High Speed (for connection to computer only), DPOF (Tagged image printing) -
Page 101: Physical Specifications
Product and Safety Specifications Physical specifications Power Input: 100–240 V AC, 50–60 Hz The printer shall only be used with the provided certified external power supply. Manufacturer and model: Chicony Power Technology Co., Ltd, model A10-018N3A Output: 36 V DC at 0.5 A Dimensions 16.5. -
Page 102: System Requirements
Product and Safety Specifications System requirements Computer with WINDOWS OS Computer Minimum Operating system WINDOWS 7, VISTA, or XP (SP2 or later) CPU INTEL CELERON Processor Clock speed 1.2 GHz Memory 512 MB RAM Available hard disk space 500 MB available Interface USB 2.0 High Speed Removable drive CD-ROM Computer with MAC OS... -
Page 103: Paper Types Supported
Product and Safety Specifications Computer Minimum Interface USB 2.0 High Speed Removable drive CD-ROM Paper types supported Plain paper 16 to 24 lb (60 to 90 gsm) Photo paper Up to 12 mil (290 gsm) Card stock 110 lb index max (200 gsm) Envelopes 20 to 24 lb (75 to 90 gsm) Labels All commercially available inkjet varieties on 8.5 x 11 in. -
Page 104: Paper Sizes Supported
Product and Safety Specifications Paper sizes supported Plain paper A4 (8.3 x 11.7 in. / 21 x 30 cm) A5 (5.8 x 8.3 in. / 15 x 21 cm.) A6 (4.1 x 5.8 in. / 11 x 15 cm) B5 (6.9 x 9.8 in. / 18 x 25 cm) US Executive (7.3 x 10.5 in. - Page 105 Product and Safety Specifications Envelopes C5 (6.7 x 9 in. / 16 x 23 cm) C6 (4.5 x 6.4 in. / 11 x 16 cm) DL (designated long) (11 x 22 cm / 4.3 x 8.7 in.) US #7¾ (3.9 x 7.5 in. / 10 x 19 cm) US #9 (3.9 x 8.9 in.
-
Page 107: Safety Information
Safety Information Safety Information Safety Information SAMSUNG CJX-1050W All-in-One Printers are Class 1 LED Products. When using this machine, these basic safety precautions should always be followed to reduce risk of fire, electric shock, and injury to persons: Read and understand all instructions. - Page 108 Safety Information Your machine should never be placed on, near, or over a radiator, heater, air condi- tioner, or ventilation duct. Do not allow anything to rest on the power or telephone cords. Do not locate your machine where the cables may be damaged by people walking on them. Do not place the machine where the power or telephone cord may be bent.
- Page 109 Safety Information Adjust only those controls covered by the operating instructions. Improper adjustment of other controls may result in damage, and may require extensive work by a qualified service technician to restore the product to normal operation. Avoid using this fax machine during a lightning storm. There may be a remote risk of electric shock from lightning.
-
Page 110: Lcd Screen Safety
Use only a dry, soft cloth to clean the LCD screen. Do not use any liquid or chemical ■ cleaners. If the LCD screen is damaged, contact SAMSUNG immediately. If any of the solution ■ from the display gets on your hands, wash them thoroughly with soap and water. If the liquid crystal solution gets into your eyes, flush your eyes immediately with water. -
Page 111: Declaration Of Conformity (European Countries)
Safety Information Declaration of Conformity (European countries) Approvals and Certifications The CE marking applied to this product symbolises Samsung Electronics Co., Ltd. Declaration of Conformity with the following applicable 93/68/EEC Directives of the European Union as of the dates indicated: January 1, 1995: Council Directive 73/23/EEC Approximation of the Member States related to low voltage equipment. - Page 112 Safety Information German compliance statement CAUTION: This device is not intended for use in the direct field of view at visual display workplaces. To avoid incommoding reflections at visual display workplaces this device must not be placed in the direct field of view. CAUTION: Das Gerät ist nicht für die Benutzung im unmittelbaren Gesichtsfeld am Bildschir- marbeitsplatz vorgesehen.
-
Page 113: Correct Disposal Of This Product (Waste Electrical & Electronic Equipment)
Safety Information Correct Disposal of This Product (Waste Electrical & Electronic Equipment) (Applicable in the European Union and other European countries with separate collection systems) This marking shown on the product or its literature, indicates that it should not be disposed with other household wastes at the end of its working life. -
Page 114: Energy Star® Qualified
Increasing the delay time may result in reduced energy savings. ENERGY STAR and the ENERGY STAR mark are registered U.S. service marks. As an ENERGY STAR partner, SAMSUNG has determined that this product meets ENERGY STAR Guidelines for energy efficiency. For more information on the ENERGY STAR program, see www.energystar.gov. - Page 116 www.samsung.com/printer...
Need help?
Do you have a question about the CJX-1050W Series and is the answer not in the manual?
Questions and answers