
Related Manuals for Samsung CLX-3185


Summary of Contents for Samsung CLX-3185
- Page 1 CLX-318x Series Multi-Functional Printer User’s Guide imagine the possibilities Thank you for purchasing a Samsung product.
-
Page 2: Table Of Contents
contents Safety information Regulatory information About this user’s guide Features of your new product Machine overview (CLX-3185/CLX-3185N/CLX-3185WK) Front view Control panel overview (CLX-3185/CLX-3185N/CLX-3185WK) Machine overview (CLX-3185FN/CLX-3185FW) Front view Rear view Control panel overview (CLX-3185FN/CLX-3185FW) Understanding the Status LED Introducing the useful buttons Menu button Power button Print screen button (CLX-3185 only) - Page 3 Setting the paper size Setting the paper type Using the output support Introducing useful software program BASIC SETUP Samsung AnyWeb Print Samsung Easy Color Manager Printer driver features Printer driver Basic printing Canceling a print job Opening printing preferences Using a favorite setting...
- Page 4 Grouping addresses in Groups Address Book Using Address Book entries Searching Address Book for an entry Printing Address Book Using Samsung Scan and Fax Manager Set Scan Button tab Change Port tab Scanning with TWAIN-enabled software Scanning using the WIA driver...
- Page 5 Cleaning the machine Cleaning the outside Cleaning the inside Cleaning the scan unit Storing the toner cartridge Handling instructions Use of non-Samsung and refilled toner cartridge Estimated cartridge life Maintenance parts Checking replacables Tips for moving & storing your machine Redistributing toner...
-
Page 6: Copyright
This user’s guide is provided for information purposes only. All information included herein is subject to change without notice. Samsung Electronics is not responsible for any direct or indirect damages, arising from or related to use of this user’s guide. -
Page 7: Safety Information
safety information These warnings and precautions are included to prevent injury to you and others, and to prevent any potential damage to your machine. Be sure to read and understand all of these instructions before using the machine. Use common sense for operating any electrical appliance and whenever using your machine. Also, follow all warnings and instructions marked on the machine and in the accompanying literature. -
Page 8: Operating Method
If the machine gets overheated, it releases smoke, makes strange noises, or generates an odd odor, immediately turn off the power switch and unplug the machine. ► This could result in electric shock or fire. Caution During an electrical storm or for a period of non-operation, remove the power plug from the electrical outlet. -
Page 9: Installation / Moving
Installation / Moving Warning Do not place the machine in an area with dust, humidity or water leaks. ► This could result in electric shock or fire. Caution When moving the machine, turn the power off and disconnect all cords; then lift the machine with at least two people. -
Page 10: Supply Usage
► Otherwise, this could result in electric shock or fire. Do not remove any covers or guards that are fastened with screws. ► The machine should only be repaired by a Samsung service technician. Supply usage Caution Do not disassemble the toner cartridge. -
Page 11: Laser Safety Statement
During normal operation, this machine produces ozone. The ozone produced does not present a hazard to the operator. However, it is advisable that the machine be operated in a well ventilated area. If you need additional information about ozone, contact your local Samsung dealer. Regulatory information_ 1... -
Page 12: Mercury Safety
Mercury Safety Contains Mercury, Dispose According to Local, State or Federal Laws.(U.S.A. only) Power Saver This printer contains advanced energy conservation technology that reduces power consumption when it is not in active use. When the printer does not receive data for an extended period of time, power consumption is automatically lowered. ENERGY STAR and the ENERGY STAR mark are registered U.S. -
Page 13: Radio Frequency Emissions
Correct disposal of batteries in this product (Applicable in the European Union and other European countries with separate battery return systems.) This marking on the battery, manual or packaging indicates that the batteries in this product should not be disposed with other household waste at the end of their working life. -
Page 14: United States Of America
UNITED STATES OF AMERICA Federal Communications Commission (FCC) Intentional emitter per FCC Part 15 Low power, Radio LAN type devices (radio frequency (RF) wireless communication devices), operating in the 2.4 GHz/5 GHz Band, may be present (embedded) in your printer system. This section is only applicable if these devices are present. Refer to the system label to verify the presence of wireless devices. -
Page 15: Ringer Equivalence Number
Fax Branding The Telephone Consumer Protection Act of 1991 makes it unlawful for any person to use a computer or other electronic device to send any message via a telephone facsimile machine unless such message clearly contains in a margin at the top or bottom of each transmitted page or on the first page of the transmission the following information: 1. -
Page 16: Replacing The Fitted Plug (For Uk Only)
Hereby, Samsung Electronics declare that this product is in compliance with the essential requirements and other relevant provisions of: CLX-3185 Series: R&TTE Directive (1999/5/EC) The declaration of conformity may be consulted at www.samsung.com/printer, go to Support > Download center and enter your printer (MFP) name to browse the EuDoC. - Page 17 PBXs of the European countries: In the event of problems, you should contact the Euro QA Lab of Samsung Electronics Co., Ltd. in the first instance. The product has been tested against TBR21. To assist in the use and application of terminal equipment which complies with this standard, the European Telecommunication Standards Institute (ETSI) has issued an advisory document (EG 201 121) which contains notes and additional requirements to ensure network compatibility of TBR21 terminals.
-
Page 18: Openssl License
Regulatory Compliance Statements Wireless Guidance Low power, Radio LAN type devices (radio frequency (RF) wireless communication devices), operating in the 2.4 GHz/5 GHz Band, may be present (embedded) in your printer system. The following section is a general overview of considerations while operating a wireless device. Additional limitations, cautions, and concerns for specific countries are listed in the specific country sections (or country group sections). -
Page 19: Original Ssleay License
documentation and/or other materials provided with the distribution. 3. All advertising materials mentioning features or use of this software must display the following acknowledgment: "This product includes software developed by the OpenSSL Project for use in the OpenSSL Toolkit. (http://www.openssl.org/)" 4. - Page 20 China only Regulatory information_ 10...
- Page 21 Regulatory information_ 11...
-
Page 22: About This User's Guide
about this user’s guide This user’s guide provides information about basic understanding of the machine as well as detailed explanation on each step during actual usage. It is a valuable resource for both novice and professional users for the proper installation and use of the machine. -
Page 23: Finding More Information
This help provides you with information about the printer driver and instructions for setting up the options for printing (See "Using help" on page 3). Samsung website If you have Internet access, you can get help, support, machine drivers, manuals, and order information from the Samsung website, www.samsung.com/printer. Downloadable You can download useful software programs from the Samsung website. -
Page 24: Features Of Your New Product
features of your new product Your new machine is equipped with a number of special features that improve the quality of the documents you print. Special Features Print with excellent quality and speed • You can print with a full range of colors using cyan, magenta, yellow and black. -
Page 25: Features By Models
Features by Models The machine is designed to support all of your document needs from printing and copying to more advanced networking solutions for your business. Some features and optional goods may not be available depending on models or countries. The below table is a listing of the major features by each model. -
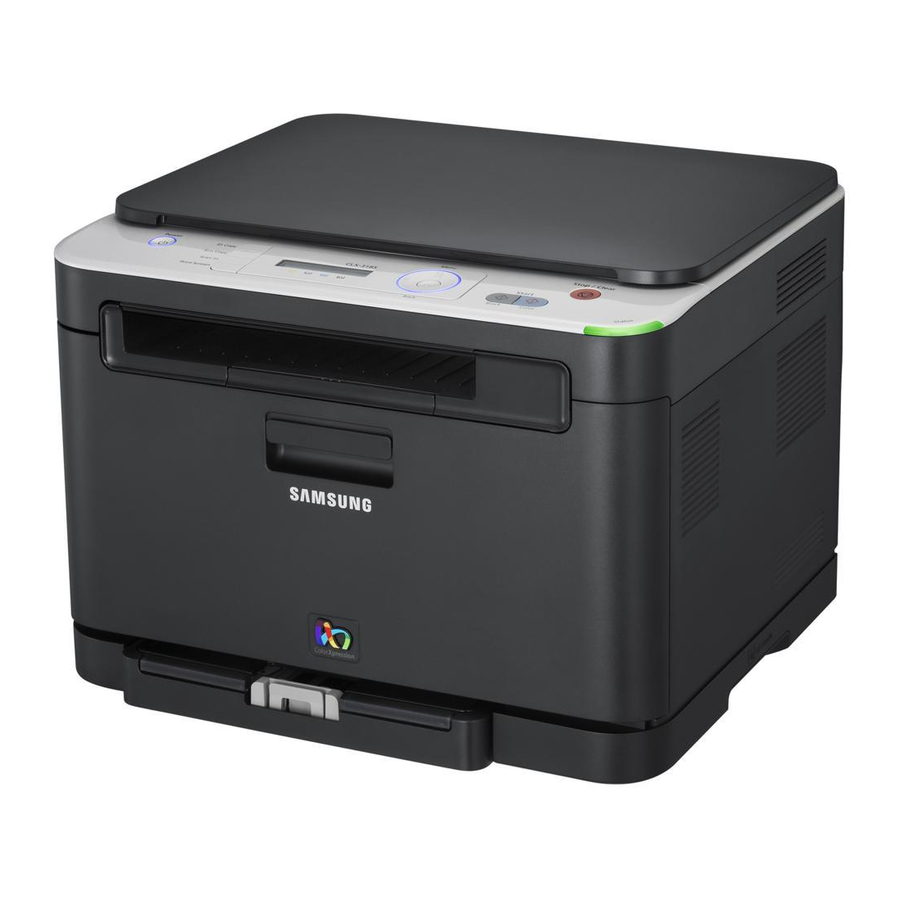
Page 26: Machine Overview (Clx-3185/Clx-3185N/Clx-3185Wk)
introduction This chapter gives you an overview of your machine. This chapter includes: • Machine overview (CLX-3185/CLX-3185N/CLX-3185WK) • Control panel overview (CLX-3185/CLX-3185N/CLX-3185WK) • Machine overview (CLX-3185FN/CLX-3185FW) • Control panel overview (CLX-3185FN/CLX-3185FW) Machine overview (CLX-3185/CLX-3185N/CLX-3185WK) Front view This illustration may differ from your machine depending on its model. Scanner lid Front door Output support... -
Page 27: Rear View
Rear view This illustration may differ from your machine depending on its model. Rear door handle USB port Rear door Network port Power cord receptacle a. CLX-3185N/CLX-3185WK only Introduction_ 2... -
Page 28: Control Panel Overview (Clx-3185/Clx-3185N/Clx-3185Wk)
Control panel overview (CLX-3185/CLX-3185N/CLX-3185WK) This control panel may differ from your machine depending on its model. Power Allows you to turn the power on and off (See "Power button" on page 8). Reduces toner consumption and paper usage (See "Eco Copy button (CLX-3185/CLX-3185N/CLX-3185FN only)" on Eco Copy page 8). -
Page 29: Machine Overview (Clx-3185Fn/Clx-3185Fw)
Machine overview (CLX-3185FN/CLX-3185FW) Front view This illustration may differ from your machine depending on its model. Document width guides Tray 1 Document feeder input tray Front door handle Document feeder output tray Front door USB port Document output tray Control panel Document feeder cover Toner cartridges Waste toner container... -
Page 30: Rear View
Rear view This illustration may differ from your machine depending on its model. Rear door handle Rear door Power cord receptacle USB port Network port Telephone line socket Extension telephone socket (EXT) Introduction_ 5... -
Page 31: Control Panel Overview (Clx-3185Fn/Clx-3185Fw)
Control panel overview (CLX-3185FN/CLX-3185FW) This control panel may differ from your machine depending on its model. Power Allows you to turn the power on and off (See "Power button" on page 8). Reduces toner consumption and paper usage (See "Eco Copy button (CLX-3185/CLX-3185N/CLX-3185FN only)" on Eco Copy (CLX-3185FN) page 8). - Page 32 Scan/Email Activates Scan mode. The toner colors shown below LCD display co-works with the display messages (See "Acknowledging the status of the Toner Color toner cartridge" on page 9). Allows you to directly print files stored on a USB memory device when it is inserted into the USB port on the front of your Direct USB (CLX-3185FN) machine (See "Using USB memory device (CLX-3185N/CLX-3185FN/CLX-3185WK/CLX-3185FW only)"...
-
Page 33: Understanding The Status Led
Samsung cannot guarantee a non-genuine Samsung toner cartridge's quality. Service or repair required as a result of using non-genuine Samsung toner cartridges will not be covered under the machine warranty. Check the message on the display. Follow the instructions in the message or refer to troubleshooting part (See "Understanding display... -
Page 34: Wps Button (Clx-3185Wk/Clx-3185Fw Only)
Samsung does not recommend using non-genuine Samsung toner cartridge such as refilled or remanufactured. Samsung cannot guarantee non-genuine Samsung toner cartridge's quality. Service or repair required as a result of using non-genuine Samsung toner cartridges will not be covered under the machine warranty. Introduction_ 9... -
Page 35: Setting Up The Hardware
If you are a Windows or Macintosh OS user, install the software from the supplied CD, or if you are a Linux OS user, download the software from the Samsung website (www.samsung.com/printer) and install on your computer. -
Page 36: System Requirements
: This program is the accompanying Windows-based software for your multifunctional machine. • Samsung Scan and Fax Manager: You can find out about Samsung Scan and Fax Manager program information and installed scan driver's condition. • Network PC Fax: You can send a fax from your computer without going to the machine. -
Page 37: Linux
Linux Item Requirements Operating Fedora 2~10 (32/ 64 bit) system OpenSuSE® 9.2, 9.3, 10.0, 10.1, 10.2, 10.3, 11.0, 11.1 (32/64 bit) SuSE Linux 9.1 (32 bit) Ubuntu 6.06, 6.10, 7.04, 7.10, 8.04, 8.10 (32/64 bit) Mandrake 10.0, 10.1 (32/64 bit) Mandriva 2005, 2006, 2007, 2008, 2009 (32/64 bit) Debian 3.1, 4.0, 5.0 (32/64 bit) Redhat®... -
Page 38: Installing The Unified Linux Driver
7. If the test page prints out correctly, click Yes. If not, click No to reprint it. 8. If you want to register your machine on Samsung website, click On-line Registration. If your machine is not connected yet to the computer, click How to connect?. -
Page 39: Installing The Smartpanel
You must log in as a super user (root) to install the machine software. If you are not a super user, ask your system administrator. 3.From the Samsung website, download and unpack the Unified Linux Driver package to your computer. 4.Click at the bottom of the desktop. -
Page 40: Setting Up A Client Computer
Devices and Printers. 4.Right-click on the printer icon. 5.For Windows XP/Server 2003/Server 2008/Vista, press Properties. For Windows 7/Server 2008 R2, from context menus, select the Printer properties. If Printer properties item has a ► mark, you can select other printer drivers connected with the selected printer. 6.Select the Sharing tab. -
Page 41: Network Setup
network setup (clx-3185n/clx-3185wk/clx-3185fn/clx-3185f w only) This chapter gives you step-by-step instructions for setting up the network connected machine and software. This chapter includes: • Network environment • Introducing useful network programs • Using a wired network Supported optional devices and features may differ according to your model. -
Page 42: Printing A Network Configuration Report
Starting the program 1.Connect your machine to the network with a network cable. 2.Turn on the machine. 3.From the Windows Start menu, select All Programs > Samsung Printers > SetIP > SetIP. 4.Click on the icon (third from left) in the SetIP window to open the TCP/IP configuration window. -
Page 43: Network Parameter Setting
SetIP program should be automatically installed during the printer driver installation. 1.Print the machine’s network configuration report to find your machine’s MAC address. 2.Open the /opt/Samsung/mfp/share/utils/. 3.Double-click the SetIPApplet.html file. 4.Click to open the TCP/IP configuration window. Network setup (CLX-3185N/CLX-3185WK/CLX-3185FN/CLX-3185FW only)_ 3 5.Enter the network card’s MAC address, IP address, subnet mask,... - Page 44 •The software CD should automatically run and an installation window appears. •If the installation window does not appear, click Start and then Run. Type X:\Setup.exe, replacing “X” with the letter which represents your CD-ROM drive. Click OK. •If you use Windows Vista, Windows 7 or Windows 2008 Server R2 click Start >...
-
Page 45: Macintosh
24. For Mac OS X 10.3, if Auto Select does not work properly, select Samsung in Printer Model and your machine name in Model Name. •For Mac OS X 10.4, if Auto Select does not work properly, select Samsung in Print Using and your machine name in Model. -
Page 46: Ipv6 Configuration
10.Select your machine and click Next. 11.Input the printer description and Next 12.When the add printer is done, click Finish 13.When the install is done, click Finish Add network Printer 1.Double-click the Unified Driver Configurator. 2.Click Add Printer… 3.The Add printer wizard window opens. Click Next. 4.Select Network printer and click the Search button. -
Page 47: Wireless Network Setup (Clx-3185Fw/Clx-3185Wk Only)
wireless network setup (clx-3185fw/clx-3185wk only) This chapter gives you step-by-step instructions for setting up the wireless network connected machine and software. This chapter includes: • Using a wireless network • Setting a wireless network with WPS button on the control panel •... -
Page 48: Installing A Wireless Network With Cables
Installing a wireless network with cables You can install a wireless network to connect to the machine with either a USB cable or a network cable. For most users, we recommend using a USB cable with the program provided in the supplied software CD. The following are two ways to install a wireless network with cables. -
Page 49: Setting A Wireless Network In Pin Mode
connect, the machine stops the wireless connection function if the machine fails to get the wireless connection. Try again to connect to the wireless network after solving the connection problem. Canceling a wireless network connection process in PBC mode To cancel the wireless network connection function when the machine is connecting to the access point (or wireless router) in PBC mode, press the WPS ( ) button on the control panel again. - Page 50 Otherwise, just click Next and go to step 16. 14.If the test page prints out correctly, click Yes. If not, click No to reprint it. 15.To register as a user of the machine in order to receive information from Samsung, click On-line Registration. 16.Click Finish.
-
Page 51: Installing The Machine On An Ad-Hoc Wireless Network (Windows)
7.After searching the wireless network, a list of wireless network your machine has searched appears. If you want to use the Samsung default ad-hoc setting, select the last wireless network on the list, which Network Name(SSID) is portthru and Signal is Printer Self Network. -
Page 52: Installing The Machine On A Wireless Network With An Access Point (Macintosh)
5.Double-click the MAC_Installer folder. 6.Double-click the Installer OS X icon. 7.Enter the password and click OK. 8.The Samsung Installer window opens. Click Continue. 9.Read the license agreement and click Continue. 10.Click Agree to agree to the license agreement. 11.Select Easy Install and click Install. Easy Install is recommended for most users. -
Page 53: Installing The Machine On An Ad-Hoc Wireless Network (Macintosh)
If you want to use the Samsung default ad-hoc setting, select the last wireless network on the list, which Network Name(SSID) is portthru and Link Quality is Printer Self Network. -
Page 54: Setting A Wireless Network With Network Cable
Starting the program 1.Connect your machine to the network with a network cable. 2.Turned on the machine. 3.From the Windows Start menu, select All Programs > Samsung 4.Click on the Wireless network setup (CLX-3185FW/CLX-3185WK only)_ 8 CD runs automatically, close that window. -
Page 55: Ip Setting Using Setip Program (Macintosh)
5.Enter the machine’s new information into the configuration window as follows. In a corporate intranet, you may need to have this information assigned by a network manager before proceeding. •MAC Address: Find the machine’s MAC address from the Network Configuration Report and enter it without the colons. For example, 00:15:99:29:51:A8 becomes 0015992951A8. -
Page 56: Resetting Factory Default Values
Completing the Installation After you have installed your Samsung wireless network printer, print another copy of the Network Configuration Report and keep it for future reference. You are now ready to use your new Samsung wireless printer on your network. Troubleshooting... -
Page 57: Solving Other Problems
• You cannot use infrastructure mode and Ad-hoc mode at the same time for Samsung wireless network machine. • The machine is within the range of the wireless network. For most networks, the machine should be within 30 meters (100 feet) of the wireless access point (or wireless router). -
Page 58: Basic Setup
basic setup After installation is complete, you may want to set the machine’s default settings. Refer to the next section if you would like to set or change values. This chapter gives you step-by-step instructions for setting up the machine. This chapter includes: •... -
Page 59: Changing The Default Mode (Clx-3185Fn/Clx-3185Fw Only)
3. Press the left/right arrow until Machine Setup appears and press OK. 4. Press the left/right arrow until Clock Mode appears and press OK. 5. Press the left/right arrow to select the 12-hour or 24-hour clock format and press OK. 6. -
Page 60: Correcting Numbers Or Names
Assigned numbers, letters, or characters T U V t u v 8 W X Y Z w x y z 9 & + - , 0 Correcting numbers or names If you make a mistake while entering a number or name, press the left/right arrow button to delete the last digit or character. -
Page 61: Setting Job Timeout
Setting job timeout You can set the time the machine waits before it restores the default copy settings if you do not start copying after changing them on the control panel. 1. Press Menu on the control panel. 2. Press the left/right arrow until System Setup appears and press OK. 3. -
Page 62: Media And Tray
media and tray This chapter provides information on how to load originals and print media into your machine. This chapter includes: • Loading originals • Selecting print media • Changing the tray size for print media • Loading paper in the tray Illustrations on this user’s guide may differ from your machine depending on its options or models. -
Page 63: Selecting Print Media
•Using print media that does not meet these specifications may cause problems or require repairs. Such repairs are not covered by Samsung’s warranty or service agreements. The amount of paper put into the tray may differ according to media type used (See "Print media specifications" on page 3). - Page 64 1. Pull the tray out of the machine. Open the paper cover and remove paper from the tray if necessary. 2. Pressing and unlatching the guide lock in the top of the tray, pull the tray out manually. 3. Place paper with the side you want to print facing up. 4.
-
Page 65: Loading Paper In The Tray
The tray is preset to Letter or A4 size, depending on your country. To change the size to A4 or Letter, you must adjust the lever and paper width guide properly. 1. Pull the tray out of the machine. Open the paper cover and remove paper from the tray if necessary. -
Page 66: Envelopes
• Archive: 70 to 90 g/m (19 to 24 lbs). If you need to keep the print-out for a long time, such as for archives, select this option. • Glossy Photo: 111 to 220 g/m (30 to 58 lbs) glossy photo paper. See "Print media specifications"... -
Page 67: Cardstock/Custom-Sized Paper
adhesive backing is designed for only a single pass through the machine. • Do not use labels that are separating from the backing sheet or are wrinkled, bubbled or otherwise damaged. CardStock/Custom-sized paper Postcards, cards and other custom-sized materials can be printed with your machine. - Page 68 The printed pages stack on the output support and it will help the printed pages to align. Media and tray_ 7...
-
Page 69: Introducing Useful Software Program
This tool helps you to screen-capture, preview, scrap and print the screen of Windows Internet Explorer more easily, than when you use the ordinary program. Click Start > All programs > Samsung Printers > Samsung AnyWeb Print > Download the latest version to link the website where the tool is available for the download. -
Page 70: Canceling A Print Job
Using a favorite setting The Presets option, which is visible on each preferences tab except for the Samsung tab, allows you to save the current preferences for future use. To save a Presets item, follow the steps below. 1. Change the settings as needed on each tab. -
Page 71: Using Help
Then a pop up window appears with information about that option's feature, which is provided from the driver. If you want to search information via a keyword, click the Samsung tab in the Printing Preferences window and enter a keyword in the input line of the Help option. -
Page 72: Using An Existing Watermark
3. From the Double-Sided Printing (Manual) section, select the binding option you want. •None •Long Edge: This option is the conventional layout used in bookbinding. •Short Edge: This option is the conventional layout used in calendars. 4. Click the Paper tab, select the Size, Source and Type. 5. -
Page 73: Using Overlay
Deleting a watermark 1.To change the print settings from your software application, access Printing Preferences (See "Opening printing preferences" on page 2). 2.Click the Advanced tab, select Edit from the Watermark drop-down list. The Edit Watermarks window appears. 3.Select the watermark you want to delete from the Current Watermarks list and click Delete. -
Page 74: Changing The Default Print Settings
Changing the default print settings 1. Click the Windows Start menu. 2. For Windows Server 2000, select Settings > Printers. •For Windows XP/Server 2003, select Printer and Faxes. •For Windows Server 2008/Vista, select Control Panel > Hardware and Sound > Printers. •For Windows 7, select Control Panel >... -
Page 75: Printer Features
•The setting options may differ depending on models or Macintosh OS versions. •The following pane may differ depending on your operating system or the application you are using. The following pane is the first pane you will see when you open the printer properties pane. -
Page 76: Printing Files
4. Change the print job properties using the following four tabs displayed at the top of the window. •General: This option allows you to change the paper size, the paper type, and the orientation of the documents. It enables the duplex feature, adds start and end banners, and changes the number of pages per sheet. -
Page 77: Basic Copying
copying This chapter gives you step-by-step instructions for copying documents. This chapter includes: • Basic copying • Changing the settings for each copy • Changing the default copy settings •The supported setting options may differ according to your model. Check your model name. •It could be printed different color with fluorescent color due to the property of scanner. -
Page 78: Changing The Default Copy Settings
order on the control panel. 2.Press the left/right arrow until Copy Feature appears and press OK. 3.Press the left/right arrow until Reduce/Enlarge appears and press 4.Press the left/right arrow until the size setting you want appears and press OK. 5.Press Stop/Clear to return to ready mode. To scale the copy by directly entering the scale rate 1.Depending on the model, the operating procedure may differ. -
Page 79: Poster Copying
2. Press the left/right arrow until Copy Feature appears and press OK. 3. Press the left/right arrow until Layout appears and press OK. 4. Press the left/right arrow until 2-Up or 4-Up appears and press OK to save the selection. 5. - Page 80 4. Press the left/right arrow until Copy Collation appears and press OK. 5. Press the left/right arrow until On appears and press OK to save the selection. •On: Prints output in sets to match the sequence of originals. •Off: Prints output sorted into stacks of individual pages. 6.
-
Page 81: Basic Scanning Method
(See "Scanning using the WIA driver" on page 6). Scanning originals and sending to your computer (Scan to PC) You can scan an image on the machine via the Samsung Scan and Fax Manager program that is installed in your USB- or network-connected computer. -
Page 82: For Network Connected Machine (Clx-3185N/Clx-3185Fn/Clx-3185Fw/Clx-3185Wk Only)
If you see Not Available message, check the port connection. 6. Select your registered computer ID, and enter the Password if necessary. •ID is the same ID as the registered Computer ID for Samsung Scan and Fax Manager. •Password is the 4 digit number registered Password for Samsung Scan and Fax Manager. -
Page 83: Changing The Settings For Each Scan Job
3. Press (Scan) on the control panel. 4. Press the left/right arrow until Scan to Email appears on the bottom line of the display and press OK. If you registered login ID (user name) and password on SyncThru™ Web Service, My Log in ID and Password appear. Enter the login ID and password to your machine. -
Page 84: Searching Sequentially Through Memory
The selected information prints out. Using Samsung Scan and Fax Manager If you have installed the printer driver, the Samsung Scan and Fax Manager program is installed too. For program information and the scanner’s status, start Samsung Scan and Fax Manager. With this program, you can change scan settings and add or delete the folders where scanned documents are saved in your computer. -
Page 85: Network Scanner
•IP or Host name: Enter in your machine’s IP address to detect your machine. Scan Assistant When you press Quick Scan in Samsung Scan and Fax Manager, the Scan Assistant window appears. Scan Assistant allows you to adjust scan settings and start the scanning process. -
Page 86: Scanning With Twain-Enabled Software
•Scan settings: The following scan options are available. -Image Type: Allows you to chose the proper color settings for image scanning. -Resolution: Allows you to choose the image resolution. -Document Size: Allows you to choose the proper size of the scanned image. -
Page 87: Windows 7
Scanner and Camera wizard. Windows 7 1. Make sure that the machine is connected to your computer and powered 2. Load originals face up into the document feeder, or place a single original face down on the scanner glass (See "Loading originals" on page 1). 3. -
Page 88: Adding Job Type Settings
3. Select the scanner on the list. If you use only one machine device and it is connected to the computer and turned on, your scanner appears on the list and is automatically selected. If you have two or more scanners connected to your computer, you can select any scanner to work at any time. - Page 89 Tools Name Save Saves the image. Undo Cancels your last action. Redo Restores the action you canceled. Scroll Allows you to scroll through the image. Crop Crops the selected image area. Zoom Out Zooms the image out. Zoom In Zooms the image in. Scale Allows you to scale the image size;...
-
Page 90: Faxing (Clx-3185Fn/Clx-3185Fw Only)
You can send and receive a fax from your computer without going to the machine. Sending a fax (Windows) To send a fax from your computer, the Samsung Network PC Fax program must be installed. This program will be installed when you installed the printer driver. -
Page 91: Sending A Fax In Your Machine
5. Press Color Start or Black Start on the control panel. The machine starts to scan and send a fax to destinations. •If you want to send fax directly from your computer, use Samsung Network PC Fax (See "Sending a fax (Windows)" on page 1). -
Page 92: Sending A Fax To Multiple Destinations
Sending a fax to multiple destinations You can use the Multiple Send feature, which allows you to send a fax to multiple locations. Originals are automatically stored in memory and sent to a remote station. After transmission, the originals are automatically erased from memory. -
Page 93: Receiving A Fax In Your Machine
6. Press the left/right arrow until Priority Send appears and press OK. 7. Enter the number of the receiving fax machine and press OK. You can press speed dial numbers or select group dial number using Address book button. For details, see "Setting up Address Book" on page 6. -
Page 94: Printing Received Faxes
answered as a fax call, and all other ringing patterns will be forwarded to the extension telephone or answering machine plugged into the EXT socket. You can easily suspend or change DRPD at any time. Before using the DRPD option, Distinctive Ring service must be installed on your telephone line by the telephone company. -
Page 95: Darkness
The resolution setting is applied to the current fax job. To change the default setting, see "Change Default" on page 2. Darkness You can select the degree of darkness of the original document. 1. Press (Fax) on the control panel. 2. -
Page 96: Searching Sequentially Through The Memory
Registering a speed dial number 1.Press (Fax) on the control panel. 2.Press Address Book on the control panel. 3.Press the left/right arrow until New & Edit appears and press OK. 4.Press the left/right arrow until Speed Dial appears and press OK. 5.Enter a speed dial number between 1 and 240 and press OK. -
Page 97: Printing Sent Fax Report Automatically
4.Press the left/right arrow until the number category you want appears and press OK. 5.Press the left/right arrow until ID appears and press OK. 6.Enter the first few letters of the name you want. 7.Press the left/right arrow until the name and number you want appears. -
Page 98: About Usb Memory
using usb memory device (clx-3185n/clx-3185fn/clx-3185wk/clx-3185f w only) This chapter explains how to use a USB memory device with your machine. This chapter includes: • About USB memory • Plugging in a USB memory device • Scanning to a USB memory device About USB memory USB memory devices are available with a variety of memory capacities to give you more room for storing documents, presentations, downloaded... -
Page 99: Customizing Scan To Usb
Your machine begins scanning the original, and then asks if you want to scan another page. 5. Press OK when Yes appears to scan more pages. Load another original to be scanned and press Color Start or Black Start. Regardless of the button you press, the color mode is decided as customized (See “"Customizing Scan to USB"... -
Page 100: Managing Usb Memory
8. Press OK when Yes appears to restore the backup file to the machine. 9. Press Stop/Clear to return to ready mode. Managing USB memory You can delete image files stored on a USB memory device one by one or all at once by reformatting the device. -
Page 101: Machine Status And Advanced Feature
machine status and advanced feature This chapter explains how to browse the current status of your machine, and the method of setting for the advanced machine setup. Read this chapter carefully in order to use your machine's diverse features. This chapter includes: •... -
Page 102: Change Default
Option Description Auto Reduction When receiving a fax containing pages as long as or longer than the paper loaded in the paper tray, the machine can reduce the size of the original to fit the size of the paper loaded in the machine. -
Page 103: Change Default
7. Repeat steps 4 through 6, as needed. 8. Press Stop/Clear to return to ready mode. Change Default Option Description Scan Size You can select the size of original. Copies You can enter the number of copies using the number keypad. Copy Collation You can set the machine to sort the copy job. -
Page 104: Network (Clx-3185N/Clx-3185Wk/Clx-3185Fn/Clx-3185Fw Only)
Option Description Scan Setup Restores all of the scan options to the factory default. System Setup Restores all of the system options to the factory default. Network Setup Restores all of the network options to the factory default. Address Book Clears all of the fax numbers entries stored in memory. - Page 105 Items Option Copy Setup Change Default Scan Size Copies Copy Collation Reduce/Enlarge Darkness Original Type Eco Copy Scan Feature USB Feature Scan Size Original Type Resolution Scan Color Scan Format E-mail Feature Scan Size Original Type Resolution Scan Color Scan Setup Change Default USB Default E-mail Default...
- Page 106 Items TCP/IP Network DHCP BOOTP Static TCP/IP (IPv6) IPv6 Activate DHCPv6 Config Ethernet Speed Auto 10M Half 10M Full 100M Half 100M Full Wireless WPS Setting WLAN Setting WLAN Default WLAN Signal Clear Setting Network Info. a. CLX-3185/CLX-3185N/CLX-3185FN only b. CLX-3185FN/CLX-3185FW only c.
-
Page 107: Information Tab
management tools This chapter introduces management tools provided to help you make full use of your machine. This chapter includes: • Introducing useful management tools • Using SyncThru™ Web Service (CLX-3185N/CLX-3185WK/CLX-3185FN/CLX-3185FW only) Supported optional devices and features may differ according to your model. -
Page 108: Maintenance Tab
Macintosh, Smart Panel is installed automatically when you install the machine software. For Linux, you can download Smart Panel from the Samsung website and install (See "Installing the SmartPanel" on page 5). To use this program, your computer has to meet the following system requirements: •Windows. -
Page 109: Changing The Smart Panel Program Settings
Opening the Unified Driver Configurator 1. Double-click the Unified Driver Configurator on the desktop. You can also click the Startup Menu icon and select Samsung Unified Driver > Unified Driver Configurator. 2. Click each button on the left to switch to the corresponding configuration window. -
Page 110: Printers Configuration Window
To use the on screen help, click Help. 3. After changing the configurations, click Exit to close the Unified Driver Configurator. Printers configuration window Printers configuration has the two tabs: Printers and Classes. Printers tab View the current system’s printer configuration by clicking on the machine icon button on the left side of the Unified Driver Configurator window. -
Page 111: Scanners Configuration
“consumer” applications to these devices via the single I/O port. The Unified Linux Driver package provides an appropriate port sharing mechanism that is used by Samsung printer and scanner drivers. The drivers talk to their devices via so-called machine ports. The current status of any machine port can be viewed via the Ports configuration. -
Page 112: Adjusting The Color Contrast
If you have moved the machine, it is strongly recommended to operate this menu manually. Finding the serial number When you call for service or register as a user on the Samsung website, the machine’s serial number by taking the following steps. 1. Press Menu on the control panel. - Page 113 4. Pull the waste toner container out of the machine using the handle. 5. Pull the imaging unit out of the machine using the groove on the front of the imaging unit. Do not touch the green surface of the drum located in the imaging unit.
-
Page 114: Cleaning The Scan Unit
Cleaning the scan unit Keeping the scan unit clean helps ensure the best possible copies. We suggest that you clean the scan unit at the start of each day and during the day as needed. The procedure may differ depending on your model. Check your model name. -
Page 115: Storing The Toner Cartridge
Use of non-Samsung and refilled toner cartridge Samsung Electronics does not recommend or approve the use of non-Samsung brand toner cartridges in your printer including generic, store brand, refilled or remanufactured toner cartridges. -
Page 116: Redistributing Toner
troubleshooting This chapter gives helpful information for what to do if you encounter an error. This chapter includes: • Redistributing toner • Tips for avoiding paper jams • Clearing original document jams (CLX-3185FN/CLX-3185FW only) Redistributing toner When the toner cartridge is near the end of its life, •... -
Page 117: Clearing Original Document Jams (Clx-3185Fn/Clx-3185Fw Only)
paper in the tray" on page 4). • Do not overload the tray. Ensure that the paper level is below the paper capacity mark on the inside of the tray. • Do not remove paper from the tray while your machine is printing. •... -
Page 118: In The Tray
Some messages may not appear on the display depending on options or models. To avoid tearing the paper, pull the jammed paper out slowly and carefully. Follow the instructions in the following sections to clear the jam. In the tray Click this link to open an animation about clearing a jam. -
Page 119: In The Paper Exit Area
3. Carefully remove the paper by pulling in the direction as shown below. Most of the jammed paper can be removed in this step. 4. Close the rear door. Printing automatically resumes. In the paper exit area Click this link to open an animation about clearing a jam. 1. -
Page 120: Understanding Display Messages
7. Carefully take the jammed paper out of the machine. 8. Lower down the scan unit gently and slowly until it completely closed. Make sure that it is securely latched. Be careful no to pinch your fingers! 9. Pull down the fuser lever. 10. - Page 121 Meaning Suggested solutions The toner cartridge is Install the corresponding not suitable for your toner cartridge with a machine. Samsung-genuine cartridge (See "Replacing the toner cartridge" on page 2). The waste toner Install the waste toner container is not container.
- Page 122 Using a cartridge ISO/IEC 19798. beyond this stage can result in printing quality issues (See "Replacing the toner cartridge" on page 2). Samsung does not recommend using non-genuine Samsung toner cartridge such as refilled or remanufactured. Samsung cannot...
-
Page 123: Solving Other Problems
• See "Fax problems" on page 15. button off and on. • See "Samsung Scan and Fax Manager Problem" on page 15. • See "Common Windows problems" on page 15. Remove received faxes. • See "Common Linux problems" on page 16. -
Page 124: Paper Feeding Problems
Condition Suggested solutions The machine is • Plug in the power cord and press not receiving the control panel. power, or the connection cable between the computer and the machine is not connected properly. • Disconnect the machine cable and reconnect it. -For Local Printing -For Network Printing (CLX-3185N/CLX-3185FN/CLX-3185FW... -
Page 125: Printing Problems
Printing problems Condition Possible cause The machine The machine is not Check the power cord does not print. receiving power. connections. Check the power switch and the power source. The machine is not Select your machine as your selected as the default machine in your default machine. -
Page 126: Printing Quality Problems
Condition Possible cause The machine The machine cable Disconnect the machine prints, but the is loose or cable and reconnect. Try a text is wrong, defective. print job that you have garbled or already printed successfully. incomplete. If possible, attach the cable and the machine to another computer and try a print job that you know works. - Page 127 Condition Suggested Solutions Toner specks • The paper may not meet specification, for example, the paper may be too moist or rough (See "Selecting print media" on page 2). • The paper path may need cleaning (See "Cleaning the inside" on page 1). Dropouts If faded areas, generally rounded, occur randomly on the page:...
- Page 128 Condition Suggested Solutions Toner particles are The toner might not adhere properly to this type of around bold paper. characters or • Change the printer option and try again. pictures Go to the Printing Preferences, click the Paper tab, and set the paper type to Recycled.
-
Page 129: Copying Problems
Condition Suggested Solutions Curl If the printed paper is curled or paper does not feed into the machine: • Turn over the stack of paper in the tray. Also try rotating the paper 180° in the tray. • Change the printer option and try again. Go to printer properties, click Paper tab and set type to Thin Paper (See "Opening printing preferences"... -
Page 130: Fax Problems
"Setting the paper size and other pages, with a type" on page 6. small strip of text at the top Samsung Scan and Fax Manager Problem Condition Samsung Scan and Check your system requirements. Samsung Fax Manager does Scan and Fax Manager works in Windows and not work. -
Page 131: Common Linux Problems
Condition Suggested solutions “Fail To Print”, “A These messages may appear during printing. printer timeout error Just keep waiting until the machine finishes occurred” messages printing. If the message appears in standby appear. mode or after printing has been completed, check the connection and/or whether an error has occurred. -
Page 132: Common Macintosh Problems
condition Suggested solutions I cannot scan via Check if Gimp Front-end has Xsane: Device Gimp Front-end. dialog on the Acquire menu. If not, you should install Xsane plug-in for Gimp on the your computer. You can find Xsane plug-in package for Gimp on Linux distribution CD or Gimp home page. -
Page 133: How To Purchase
How to purchase To order Samsung-authorized supplies, accessories and maintenance parts, contact your local Samsung dealer or the retailer where you purchased your machine. You can also visit www.samsung.com/supplies, and then select your country/region to obtain the information on calling for service. -
Page 134: Checking Replaceable's Lifespan
Checking replaceable’s lifespan If you experience frequent paper jams or printing problems, check the number of pages the machine has printed. Replace the corresponding parts, if necessary. 1. Press Menu on the control panel. 2. Press the left/right arrow until System Setup appears and press OK. 3. -
Page 135: Replacing The Imaging Unit
If toner gets on your clothing, wipe it off with a dry cloth and wash it in cold water. Hot water sets toner into fabric. 8. Make sure that the color of the toner cartridge matches the color slot and then grasp the handles on the toner cartridge. -
Page 136: Replacing The Waste Toner Container
7. Holding the groove on the front of the imaging unit, push imaging unit in to the machine. 8. Insert the waste toner container into position and then push it to make sure that it is firmly seated in place. 9. - Page 137 6. Insert the new container into position and then push it to make sure that it is firmly seated in place. 7. Close the front door firmly. If the front door is not completely closed, the machine will not operate. Please, make sure all toner cartridges are installed properly.
-
Page 138: Hardware Specifications
• Hardware specifications • Environmental specifications • Electrical specifications • Print media specifications The specification values are listed below: specifications are subject to change without notice. See www.samsung.com/printer for possible changes in information. Hardware specifications Item Dimensions Height Depth Width... -
Page 139: Electrical Specifications
Electrical specifications Power requirements are based on the country/region where the device is sold. Do not convert operating voltages. Doing so might damage the device and void the product warranty. Item 110 volt models Power rating 220 volt models Power consumption Average operating mode Ready mode Power save mode... -
Page 140: Print Media Specifications
Print media specifications Type Size Plain paper Letter Legal US Folio Oficio JIS B5 ISO B5 Executive Envelope Envelope Monarch Envelope 6 3/4 Envelope No. 10 Envelope No. 9 Envelope DL Envelope C5 Envelope C6 Thick paper Refer to the Plain paper section Thin paper Refer to the Plain... -
Page 141: Contact Samsung Worldwide
If you have any comments or questions regarding Samsung products, contact the Samsung customer care center. Country/Regio Customer Care Center ARGENTINE 0800-333-3733 ARMENIA 0-800-05-555 AUSTRALIA 1300 362 603 AUSTRIA 0810-SAMSUNG (7267864, € 0.07/min) AZERBAIJAN 088-55-55-555 BAHRAIN 8000-4726... - Page 142 VENEZUELA VIETNAM www.samsung.com www.samsung.com www.samsung.com www.samsung.com www.samsung.ru www.samsung.com www.samsung.com www.samsung.com www.samsung.com www.samsung.com www.samsung.com www.samsung.com www.samsung.com www.samsung.com www.samsung.com www.samsung.com www.samsung.com www.samsung.com www.samsung.ua www.samsung.com/ua_ru Contact SAMSUNG worldwide_ 2 Customer Care Center Web Site 8-10-800-500-55-500 www.samsung.com/kz_ru 0-800-100-5303 www.samsung.com 1 800 588 889 www.samsung.com...
-
Page 143: Control Panel
glossary The following glossary helps you get familiar with the product by understanding the terminologies commonly used with printing as well as mentioned in this user’s guide. 802.11 802.11 is a set of standards for wireless local area network (WLAN) communication, developed by the IEEE LAN/MAN Standards Committee (IEEE 802). -
Page 144: Fuser Unit
DIMM Dual Inline Memory Module (DIMM), a small circuit board that holds memory. DIMM stores all the data within the machine like printing data, received fax data. DLNA The Digital Living Network Alliance (DLNA) is a standard that allows devices on a home network to share information with each other across the network. -
Page 145: Mac Address
IEEE The Institute of Electrical and Electronics Engineers (IEEE) is an international non-profit, professional organization for the advancement of technology related to electricity. IEEE 1284 The 1284 parallel port standard was developed by the Institute of Electrical and Electronics Engineers (IEEE). The term "1284-B" refers to a specific connector type on the end of the parallel cable that attaches to the peripheral (for example, a printer). -
Page 146: Print Media
Modem A device that modulates a carrier signal to encode digital information, and also demodulates such a carrier signal to decode transmitted information. Modified Read (MR) is a compression method recommended by ITU-T T.4. MR encodes the first scanned line using MH. The next line is compared to the first, the differences determined, and then the differences are encoded and transmitted. -
Page 147: Toner Cartridge
SMTP Simple Mail Transfer Protocol (SMTP) is the standard for e-mail transmissions across the Internet. SMTP is a relatively simple, text-based protocol, where one or more recipients of a message are specified, and then the message text is transferred. It is a client-server protocol, where the client transmits an email message to the server. - Page 148 index address book answering machine/fax authentication printing a report 3 back 3, 6 booklet printing booklets buttons eco copy 8 menu 3, 6, 8 power 8 print screen 8 start (black) 3, 6 start (color) 3, 6 stop/clear 3, 6 WPS (CLX-3185FW only) 3, 7 changing clock mode cleaning...
-
Page 149: System Requirements 2 2
receiving a fax in memory 5 receiving in Ans/Fax mode 4 receiving in Tel mode 4 receiving with an extension telephone 4 redialing the last number 2 sending 2 sending a priority fax 3 setting the fax header 2 speed dial 6 features machine features 1 power saving feature 3... - Page 150 create 5 delete 5 print 5 placing a machine adjusting the altitude 1 spacing 1 poster power button 3, 6 power off button 8 power saver using power save mode 3 print media card stock 6 envelope 5 glossy paper 6 guidelines 2 labels 5 letterhead paper 6...
- Page 151 4 ordering 1 SyncThru Web Service general information 1 toner cartridge estimated life 4 handling instructions 4 non-Samsung and refilled 4 redistributing toner 1 storing 4 toner color 3, 7 tray adjusting the width and length 2...
Need help?
Do you have a question about the CLX-3185 and is the answer not in the manual?
Questions and answers
CLX-3185FW No power at all. Unit is totally bricked. Power source and cable are good. All Service Manual solutions do not help. Previously unit was completely trouble free and reliable. Home printing only, very light usage. Possible internal power supply or capacitor(s) on unit M/B? Instructions to disassemble housing to get to internals mentioned needed.
If the Samsung CLX-3185FW shows no power and may have internal power supply issues, follow these troubleshooting steps:
1. Check Power Connection: Ensure the power cord is securely plugged into both the machine and a working AC power outlet.
2. Confirm Power Source: Verify that the outlet provides power by testing it with another device.
3. Power Button: Press the power button to see if the machine turns on. For CLX-3185FW, it should turn on automatically when connected to power.
4. Power Save Mode: The machine might be in power save mode. Check if the power button LED is on blue.
5. Power Off Mode: If the machine is in power off mode, power consumption should be less than 0.45 W. Try unplugging and replugging the power cord.
6. Internal Power Supply: If all steps above fail, the internal power supply may be faulty. In this case, the device may require servicing or replacement of internal components.
This answer is automatically generated
OU SE TROUVE L ENDROI POUR CHANGER LA PILE