
Related Manuals for Makita XTP02


Summary of Contents for Makita XTP02
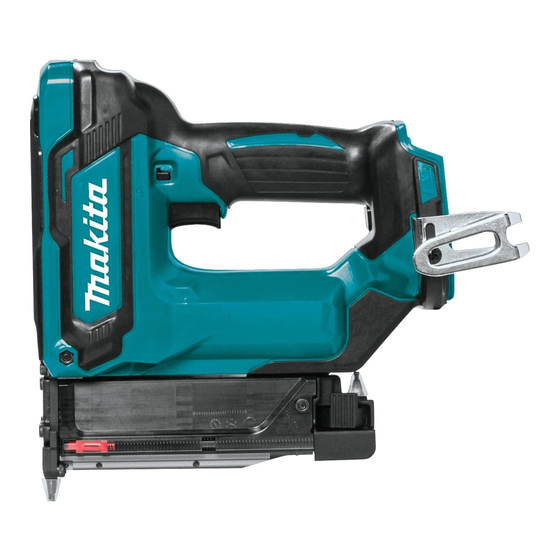
- Page 1 INSTRUCTION MANUAL MANUAL DE INSTRUCCIONES Cordless Pin Nailer Clavadora Inalámbrica XTP02 IMPORTANT: Read Before Using. IMPORTANTE: Lea antes de usar.
-
Page 2: Specifications
ENGLISH (Original instructions) SPECIFICATIONS Model: XTP02 Pin nail size ø0.6 mm (0.024″) x 15, 18, 19, 25, 30, 35 mm (5/8, 11/16, 3/4, 1, 1-3/16, 1-3/8″) Pin nail magazine capacity 100 pcs. Dimensions without hook (L x W x H) 257 mm (10-1/8″) x 79 mm (3-1/8″) x 226 mm (8-7/8″) - Page 3 If devices are provided for the connection of Follow instruction for lubricating and chang- dust extraction and collection facilities, ensure ing accessories. these are connected and properly used. Use of Keep handles dry, clean and free from oil and dust collection can reduce dust-related hazards. grease.
- Page 4 It will Symbols also void the Makita warranty for the Makita tool and charger. The followings show the symbols used for tool. Tips for maintaining maximum...
-
Page 5: Functional Description
Overload protection FUNCTIONAL When the tool/battery is operated in a manner that DESCRIPTION causes it to draw an abnormally high current, the tool automatically stops without any indication. In this sit- uation, turn the tool off and stop the application that CAUTION: Always be sure that the tool is caused the tool to become overloaded. - Page 6 Trigger-lock button Indicator lamps Remaining capacity CAUTION: Before installing the battery car- Lighted Blinking tridge into the tool, always check to see that the Charge the switch trigger actuates properly and returns to battery. the "OFF" position when released. The battery CAUTION: When not operating the tool, may have...
- Page 7 ASSEMBLY CAUTION: Always make sure that your fingers are not placed on the switch trigger or the contact element and the battery cartridge is removed before carrying out any work on the pin nailer. Loading the pin nailer CAUTION: Always make sure that the battery cartridge is removed before loading the pin nailer.
-
Page 8: Operation
After loading pin nails, push back the magazine in place until it clicks. To remove pin nails, follow the installation procedures in reverse. Nose adapter CAUTION: Always make sure that your fingers are not placed on the switch trigger or the contact element and the battery cartridge is removed before installing the nose adapter. - Page 9 Test safety systems for possible fault before operation as follows. Unload pin nails from the tool and keep the maga- zine opened. Install the battery cartridge and release the trigger lock. Only pull the switch trigger without touching the contact element against the material. Only touch the contact element against the mate- rial without pulling the switch trigger.
-
Page 10: Optional Accessories
COMPLETE tool, freight prepaid, to one of Makita’s Factory or Authorized Service Centers. If inspection shows the trouble is caused by defective workmanship or material, Makita will repair (or at our MAINTENANCE option, replace) without charge. This Warranty does not apply where: •... -
Page 11: Especificaciones
ESPAÑOL (Instrucciones originales) ESPECIFICACIONES Modelo: XTP02 Tamaño del clavo delgado ø0,6 mm (0,024″) x 15, 18, 19, 25, 30, 35 mm (5/8, 11/16, 3/4, 1, 1-3/16, 1-3/8″) Capacidad del cartucho de clavos delgados 100 pzas. Dimensiones sin el gancho (La x An x Al) 257 mm (10-1/8″) x 79 mm (3-1/8″) x 226 mm (8-7/8″) - Page 12 Seguridad personal Realice el mantenimiento a las herramientas eléc- tricas. Compruebe que no haya partes móviles Manténgase alerta, preste atención a lo que desalineadas o estancadas, piezas rotas y cualquier está haciendo y utilice su sentido común otra condición que pueda afectar al funcionamiento cuando opere una herramienta eléctrica.
- Page 13 18. Detenga las operaciones de clavado de inme- Desconecte la herramienta de la fuente de alimentación cuando el clavo se atasque en la diato si nota algo malo o fuera de lo común herramienta. Al extraer algún clavo que se haya con la herramienta.
-
Page 14: Descripción Del Funcionamiento
Asimismo, esto inva- tera del cartucho. lidará la garantía de Makita para la herramienta y el Para colocar el cartucho de batería, alinee la lengüeta cargador Makita. -
Page 15: Protección Contra Sobrecarga
Oprima el botón de verificación en el cartucho de la Sistema de protección para la batería para que indique la capacidad restante de la herramienta/batería batería. Las luces indicadoras se iluminarán por algu- nos segundos. La herramienta está equipada con un sistema de pro- Luces indicadoras Capacidad tección de la herramienta/batería. - Page 16 El botón de bloqueo del gatillo interruptor es proporcionado Estado del indicador de batería Capacidad para evitar que el gatillo interruptor sea jalado accidentalmente. restante de la Para jalar el gatillo interruptor, presione el botón de batería bloqueo del gatillo interruptor desde el lado A. Encendido Apagado Parpadeando...
-
Page 17: Montaje
Alinee la punta de los clavos delgados con las ranuras en la parte inferior del cartucho y empuje toda la pieza de los clavos delgados hacia la guía de cla- vado. (Tenga cuidado de colocar los clavos delgados en la dirección correcta.) ►... -
Page 18: Operación
Almacenamiento de la llave hexagonal Cuando no la utilice, guarde la llave hexagonal tal como se muestra en la ilustración para evitar que se pierda. ► 1. Hendidura 2. Protuberancia 3. Adaptador de boquilla 4. Soporte Gancho ► 1. Llave hexagonal PRECAUCIÓN: No cuelgue el gancho del cinturón. - Page 19 Si la herramienta opera en los casos 3 y 4 anteriores, los sistemas de seguridad están defectuosos. Deje de usar la herramienta de inmediato y comuníquese con el centro de servicio de su localidad. Clavado de clavos delgados ADVERTENCIA: Mantenga el elemento de contacto colocado firmemente sobre el material hasta que el clavo delgado se haya clavado por completo.
-
Page 20: Accesorios Opcionales
► 1. Cubierta de la guía de clavado 2. Tornillo de mano de obra o material, Makita hará la reparación 3. Cubierta superior de contacto (o a su discreción, el reemplazo) sin ningún cargo. - Page 21 EN NINGÚN CASO MAKITA SE HARÁ RESPONSABLE DE NINGÚN DAÑO INDIRECTO, INCIDENTAL, O DERIVADO DE LA VENTA O USO DEL PRODUCTO. ESTE DESCARGO DE RESPONSABILIDAD APLICA DURANTE Y DESPUÉS DEL PLAZO DE ESTA GARANTÍA. MAKITA RENUNCIA A LA RESPONSABILIDAD POR CUALQUIER GARANTÍA IMPLÍCITA, INCLUYENDO...
- Page 24 Para reducir la exposición a estos productos químicos: trabaje en un área bien ventilada y póngase el equipo de seguridad indicado, tal como las máscaras contra polvo que están especialmente diseñadas para filtrar partículas microscópicas. Makita Corporation 3-11-8, Sumiyoshi-cho, Anjo, Aichi 446-8502 Japan 885545A944...
Need help?
Do you have a question about the XTP02 and is the answer not in the manual?
Questions and answers
How do you load the nails