
Subscribe to Our Youtube Channel
Related Manuals for YASKAWA 67K-PNL0


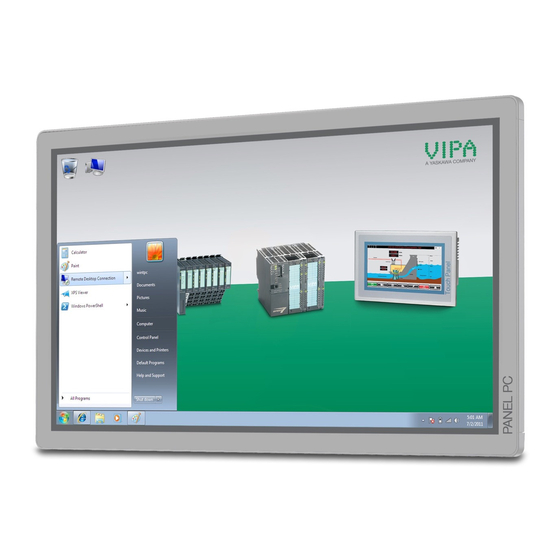
Summary of Contents for YASKAWA 67K-PNL0
- Page 1 VIPA HMI PPC | 67K-PNL0 | Manual HB160 | PPC | 67K-PNL0 | en | 20-20 Panel PC - PPC010 ES...
- Page 2 YASKAWA Europe GmbH Ohmstraße 4 91074 Herzogenaurach Tel.: +49 9132 744 0 Fax: +49 9132 744 186 Email: info@yaskawa.eu.com Internet: www.yaskawa.eu.com 67K-PNL0_000_PPC010ES,5,EN - © 2020...
-
Page 3: Table Of Contents
5.1 Basic rules for the EMC-equitable assembly of installations......51 5.2 EMC-equitable assembly................54 5.3 EMC-equitable cabling................... 55 5.4 Special precautions providing high noise immunity........58 5.5 Checklist for the EMC-compliant installation of controllers......59 HB160 | PPC | 67K-PNL0 | en | 20-20... -
Page 4: General
This material is protected by copyright laws. It may not be reproduced, distributed, or altered in any fashion by any entity (either internal or external to YASKAWA) except in accordance with applicable agreements, contracts or licensing, without the express written consent of YASKAWA and the business management owner of the material. -
Page 5: About This Manual
Tel.: +49 6196 569 500 (hotline) Email: support@yaskawa.eu.com 1.2 About this manual Objective and contents This manual describes the VIPA Panel PC 67K-PNL0-..It contains a description of the structure, project engineering and deployment. This manual is relevant for: Product Order number... -
Page 6: Safety Information
Installation and hardware modifications only by properly trained per- sonnel. – The national rules and regulations of the respective country must be satisfied (installation, safety, EMC ...) Disposal National rules and regulations apply to the disposal of the unit! HB160 | PPC | 67K-PNL0 | en | 20-20... -
Page 7: Hardware Description
Instruments must be grounded. Modifying electrostatic sensitive modules you should only use soldering irons with grounded tips. CAUTION! Personnel and instruments should be grounded when working on electro- static sensitive modules. HB160 | PPC | 67K-PNL0 | en | 20-20... -
Page 8: Properties
Easy mounting via integrated pivoted lever Protection class IP65 (frontal) Order data Type Order number Description PPC010 ES 67K-PNL0-... 10.1'' TFT color, 2x RS232/RS422/RS485, 4x USB-A, 2x Ethernet RJ45, VGA, Audio out HB160 | PPC | 67K-PNL0 | en | 20-20... -
Page 9: Structure
RJ45 jack for Ethernet communication LAN 2 RJ45 jack for Ethernet communication LAN 1 3.5mm Audio Line out 10 Power switch (pushbutton) 11 Slot for CFast storage media 12 Display with touch sensitive area (touch screen) HB160 | PPC | 67K-PNL0 | en | 20-20... - Page 10 During operation the Panel PC switches to the sleep mode by briefly pushing the power switch. By pushing the power switch again the sleep mode is switched off. HB160 | PPC | 67K-PNL0 | en | 20-20...
-
Page 11: Interfaces
VIPA HMI Hardware description Structure > Interfaces 2.3.2 Interfaces HB160 | PPC | 67K-PNL0 | en | 20-20... - Page 12 RS485 interface Logical conditions as voltage difference between 2 twisted lines Serial bus connection half-duplex two-wire operation Line length: 250m at 115.2kbit/s ... 1200m at 19.2kbit/s Data transfer rate up to 115.2kbit/s HB160 | PPC | 67K-PNL0 | en | 20-20...
- Page 13 VIPA HMI Hardware description Structure > Interfaces HB160 | PPC | 67K-PNL0 | en | 20-20...
-
Page 14: Memory Management
At the back of the Panel PC there is a card slot for a memory card. At this slot you can plug storage modules of the type CFast 2.0 - 600 MB/s (6GBit/s) - SATA protocol - not hot-swap compatible. HB160 | PPC | 67K-PNL0 | en | 20-20... -
Page 15: Dimensions
Prior to removing the CFast card, make sure the unit's power is off and disconnected from the power supply. 2.4 Dimensions Installation dimensions For the installation of the Panel PC in control cabinets and desks the following dimen- sions are necessary: HB160 | PPC | 67K-PNL0 | en | 20-20... - Page 16 The material thickness of the installation cut-out is 3 ... 12mm £ 0.5mm – The deviation from the plane for the panel cut-out is £ 120µm (fric- – Permissible surface roughness in the area of the seal: tion coefficient 120) HB160 | PPC | 67K-PNL0 | en | 20-20...
-
Page 17: General Data
EN 61131-2 Degree of pollution 2 Mechanical Oscillation EN 60068-2-6 1g, 9Hz ... 150Hz Shock EN 60068-2-27 15g, 11ms Mounting conditions Mounting place In the control cabinet Mounting position Horizontal and vertical HB160 | PPC | 67K-PNL0 | en | 20-20... -
Page 18: Technical Data
Intel Atom Dualcore 1.86 GHz Operating system Windows embedded Standard 7 User software Movicon 11 Win Standard Work memory 2 GB User memory 16 GB Available memory (user data) 7 GB SD/MMC Slot HB160 | PPC | 67K-PNL0 | en | 20-20... - Page 19 Line out, stereo jack 3.5 mm Technical data power supply Power supply (rated value) DC 24 V Power supply (permitted range) DC 20.4...28.8 V Reverse polarity protection ü Current consumption (no-load operation) 1.2 A HB160 | PPC | 67K-PNL0 | en | 20-20...
- Page 20 12 mm Net weight 4 kg Weight including accessories Gross weight Environmental conditions Operating temperature 0 °C to 50 °C Storage temperature -20 °C to 75 °C Certifications UL certification KC certification HB160 | PPC | 67K-PNL0 | en | 20-20...
-
Page 21: Pnl0-Jx
10 s Operating controls Touchscreen PCAP Touch function Dual Touch Keyboard external via USB Mouse external via USB Interfaces MPI, PROFIBUS-DP MPI, PROFIBUS-DP connector Serial, COM1 RS232 / RS422 / RS485 HB160 | PPC | 67K-PNL0 | en | 20-20... - Page 22 Protection class NEMA front side Protection class NEMA back side Dimensions Front panel 308 mm x 223 mm x 6.7 mm Rear panel 292 mm x 207 mm x 54.2 mm Installation cut-out HB160 | PPC | 67K-PNL0 | en | 20-20...
- Page 23 12 mm Net weight 4 kg Weight including accessories Gross weight Environmental conditions Operating temperature 0 °C to 50 °C Storage temperature -20 °C to 75 °C Certifications UL certification KC certification HB160 | PPC | 67K-PNL0 | en | 20-20...
-
Page 24: Deployment Panel Pc
Push the Panel PC [3] from the front side into the front panel cutting [1] until it touches the panel with the seal [2]. Rotate the pivoted lever 90 degrees to the outside [4]. Screw the screws with the crosstip screwdriver [5]. HB160 | PPC | 67K-PNL0 | en | 20-20... -
Page 25: Installation Of The Cfast Card
Push the CFast card to remove the card. Reinstall the cover plate. CAUTION! Prior to removing the CFast card, make sure the unit's power is off and disconnected from the power supply. HB160 | PPC | 67K-PNL0 | en | 20-20... -
Page 26: Commissioning
You will find the file and a detailed description of the firmware update on www.vipa.com under "Service / Support" in the download area. Firmware update with In the "Startup Manager", run the Firmware update of your Panel PCs via the [Info/ Startup Manager Update] button. HB160 | PPC | 67K-PNL0 | en | 20-20... -
Page 27: Startup-Manager
4GB) is necessary. The new image file for your Panel PC should be on the USB stick. You will find the file and a detailed description of the firmware update on www.vipa.com under "Service / Support" in the download area. HB160 | PPC | 67K-PNL0 | en | 20-20... - Page 28 Via ‘Program Start’ with [+] you can add programmes, which have to start automati- cally. Select ‘Start’ and assign a name for the program. Upload your program with [...]. You can optionally set parameters. Exit with [Finish]. HB160 | PPC | 67K-PNL0 | en | 20-20...
- Page 29 è VipaStartup’. These can be adjusted accordingly. Exit Ò The Startup-Manager will be closed by [Exit] and the system returns to the Windows screen. Back With [Back] you get back to the start screen of the Startup-Manager. HB160 | PPC | 67K-PNL0 | en | 20-20...
-
Page 30: Connection To A Plc System
During operation your operating device communicates with the according PLC and reacts to the application courses in the PLC according to the configured processes. Via dialogues configured before, process values may be monitored graphically, altered and evaluated. HB160 | PPC | 67K-PNL0 | en | 20-20... -
Page 31: Operating System Windows Embedded Standard 7
[X] button for exiting the dialog. Exit WES7 (shut down) Don't turn off the Panel PC with the power switch. Always exit WES7 via "Shut down". HB160 | PPC | 67K-PNL0 | en | 20-20... -
Page 32: Structure
Software keyboard This button displays a keyboard at the screen. Keyboard layout If you’ve connected a keyboard you may choose the requested language layout via this button. HB160 | PPC | 67K-PNL0 | en | 20-20... - Page 33 At the moment the following keyboards are implemented: Software Keyboard The button allows you to select the normal software keyboard. Expanded Software Key- Via ‘Tools è Show expanded keyboard’ you may open the expanded keyboard. board HB160 | PPC | 67K-PNL0 | en | 20-20...
- Page 34 If the user needs to enter name and password to use the Panel PC, the procedure is as follow: Type "cmd" under ‘Start è Run’. In the next window type "control userpasswords2". HB160 | PPC | 67K-PNL0 | en | 20-20...
- Page 35 [Apply]. A new dialog window opens asking you to enter the log-in data. Select here your ‘User Name’ and enter the corresponding ‘password’ . Confirm with [OK]. HB160 | PPC | 67K-PNL0 | en | 20-20...
- Page 36 To disable the Enhanced Write Filters select Commit and disable live under ‘Pending command’ . Please note that a status change of the Enhanced Write Filter will only take effect after a restart of the system. HB160 | PPC | 67K-PNL0 | en | 20-20...
-
Page 37: Bios Setup
Powering on the computer and immediately pressing [Del] allows you to enter Setup. Selection boot medium Powering on the computer and immediately pressing [F7] allows you, as long as the loading screen is shown, to change to the boot medium selection. HB160 | PPC | 67K-PNL0 | en | 20-20... -
Page 38: Main
Security - Security settings Save and Exit - Save and exit 4.2 Main The Main menu is the first screen that you will see when you enter the BIOS setup utility. HB160 | PPC | 67K-PNL0 | en | 20-20... -
Page 39: Advanced
Enables or disables the boot option for legacy network devices connected to LAN1 or OpROM LAN2. Disabled - Starts no PXE OpROM Enabled - Starts the PXE OpROM, to be able to boot about PXE HB160 | PPC | 67K-PNL0 | en | 20-20... - Page 40 Disabled - (default) All of the CPUID functions are supported. Enabled - Limit the return value to 3 or less than 3. Submenu "IDE Configura- This section is used to configure the IDE devices. tion" HB160 | PPC | 67K-PNL0 | en | 20-20...
- Page 41 Interface). AHCI allows the storage driver to enable the advanced serial ATA features which will increase storage performance. Submenu "USB Configura- This section is used to configure USB devices, such as keyboard, mouse and hub. tion" HB160 | PPC | 67K-PNL0 | en | 20-20...
- Page 42 This field is used to configure the mode of serial port 0 as RS232 (default), RS422, Mode RS485 or RS485 AUTO. Submenu "Serial Port 1 This section is used to configure serial port 1. Configuration" HB160 | PPC | 67K-PNL0 | en | 20-20...
- Page 43 Enables or disables the terminal resistor for RS422 and RS485. Disabled - Terminal resistor not activated Enabled - (default) Terminal resistor activated H/W Monitor This section ‘PC Health Status’ is used to configure the hardware temperature and vol- tages. HB160 | PPC | 67K-PNL0 | en | 20-20...
-
Page 44: Chipset
Setting incorrect field values may cause the system to malfunction. Host Bridge Display the memory information. Ò Ò Submenu "Intel IGD Con- This section is used to configure the Intel IGD graphic configuration. figuration" HB160 | PPC | 67K-PNL0 | en | 20-20... - Page 45 Please configure this option only when changing the panel, otherwise the display may not work. Backlight Dimming Con- The options are ‘Tact Switch’ , ‘Manual’ and ‘Light Sensor’ . The default setting is trol Select ‘Manual’ and the Backlight option below will be configurable. HB160 | PPC | 67K-PNL0 | en | 20-20...
- Page 46 Power Off - The system’s power is off. You must press the power button to Power On the system. Power On - (default) The system will automatically Power On. Beep Enables or disables ‘Beep’ . HB160 | PPC | 67K-PNL0 | en | 20-20...
-
Page 47: Boot
Allows Option ROMs to trap Interrupt 19 when enabled. Boot Option Priorities Adjust the boot sequence of the system. Hard Drive BBS Priorities Sets the order of the legacy devices in this group. HB160 | PPC | 67K-PNL0 | en | 20-20... -
Page 48: Security
3 characters and should be maximal 20 characters long. User Password Select this to reconfigure the user’s password. Your password must contain at least 3 characters and should be maximal 20 characters long. HB160 | PPC | 67K-PNL0 | en | 20-20... -
Page 49: Save And Exit
[Yes] to discard all changes made and restore the previously saved set- tings. Restore Defaults To restore the BIOS to default settings, select this field then press [Enter]. A dialog box will appear. Confirm by selecting [Yes]. HB160 | PPC | 67K-PNL0 | en | 20-20... - Page 50 To bypass the boot sequence from the boot option list and boot from a particular device, select the desired device and press [Enter]. Launch EFI Shell from file- To launch EFI shell from a filesystem device, select this field and press [Enter]. system device HB160 | PPC | 67K-PNL0 | en | 20-20...
-
Page 51: Installation Guidelines
Pulsed devices (Net influence from occurs, when two current circuits have transducers and foreign net a common line. devices) Starting motors Different potential of component cubicles with common current supply Static discharges HB160 | PPC | 67K-PNL0 | en | 20-20... - Page 52 Always lay your high voltage lines and signal respectively data lines in separate channels or bundles. – Route the signal and data lines as near as possible beside ground areas (e.g. suspension bars, metal rails, tin cabinet). HB160 | PPC | 67K-PNL0 | en | 20-20...
- Page 53 Connect installation parts and cabinets with your PLC in star topology with the isolation/protected earth conductor system. So you avoid ground loops. – If there are potential differences between installation parts and cabinets, lay suffi- ciently dimensioned potential compensation lines. HB160 | PPC | 67K-PNL0 | en | 20-20...
-
Page 54: Emc-Equitable Assembly
Moveable grounding parts (e.g. cubicle doors) have to be connected via flexible ground strips. The ground strips should be short and have a large surface, because the surface is decisive for the diversion of high frequency interferences. HB160 | PPC | 67K-PNL0 | en | 20-20... -
Page 55: Emc-Equitable Cabling
Wherever possible, exterior cabling should be installed on metallic cable trays. A galvanic buildings connection must be provided for joints between cable trays. You must abide by the appli- cable lightning protection and grounding regulations when installing exterior cables. HB160 | PPC | 67K-PNL0 | en | 20-20... - Page 56 Install these protective elements at the location where the cables enter the building. Any lightning protection system must be based on an individual assess- ment of the entire plant. For questions please contact YASKAWA Europe GmbH. Equipotential bonding Potential differences can occur between different sections when controllers and periph-...
- Page 57 Attach the screens to the screening rail directly at the point where the cables enter the enclosure. The screening conductor must be continued to the module without interruption, however, it must not be connected to the module! HB160 | PPC | 67K-PNL0 | en | 20-20...
-
Page 58: Special Precautions Providing High Noise Immunity
Suppression of fluores- cent lamps in cubicles Fluorescent lamp Screen above the lamp Screened cable Switch with metallic cover Line filter or screened power cable HB160 | PPC | 67K-PNL0 | en | 20-20... -
Page 59: Checklist For The Emc-Compliant Installation Of Controllers
Have the screens been connected by means of large-surface and low-impedance cable clamps? Cable screens grounded both-sided where possible? Inductors Have the coils of contactors controlled by means of contacts been connected to snubber networks? HB160 | PPC | 67K-PNL0 | en | 20-20...
Need help?
Do you have a question about the 67K-PNL0 and is the answer not in the manual?
Questions and answers