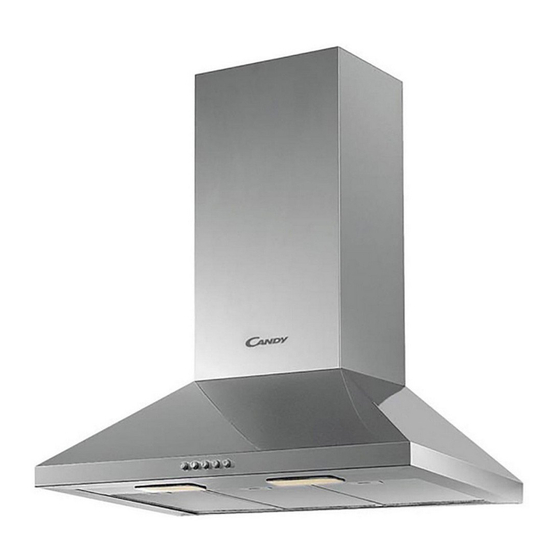
Candy CCE116/1X Installation And User Manual
Hide thumbs
Also See for CCE116/1X:
- Instruction manual (26 pages) ,
- Installation and user manual (197 pages)
Table of Contents
Advertisement
Quick Links
CROATIAN
CZECH
ENGLISH
FRENCH
GERMAN
GREEK
ITALIAN
POLISH
PORTOGUESE
ROMANIAN
SLOVENIAN
SPANISH
DUTCH
UPUTE ZA UGRADNJU I UPORABU
NÁVOD K POUŽITÍ A INSTALACI
INSTALLATION AND USER'S MANUAL
NOTICE D'INSTALLATION ET D'UTILISATION
BEDIENUNGS- &
INSTALLATIONSANLEITUNG
ΟΔΗΓΙΕΣ ΧΡΗΣΕΩΣ
MANUALE D'ISTRUZIONE
INSTRUKCJA OBSŁUGI I MONTAŻU
MANUAL DE INSTALAÇÃO E UTILIZAÇÃO
MANUAL DE UTILIZARE SI INSTALARE
NAVODILA ZA PRIKLJUČITEV IN UPORABO
INSTALACIÓN Y MANUAL DEL USUARIO
GEBRUIKSAANWIJZING
Advertisement
Table of Contents

Summary of Contents for Candy CCE116/1X
- Page 1 CROATIAN UPUTE ZA UGRADNJU I UPORABU CZECH NÁVOD K POUŽITÍ A INSTALACI ENGLISH INSTALLATION AND USER’S MANUAL FRENCH NOTICE D’INSTALLATION ET D’UTILISATION BEDIENUNGS- & GERMAN INSTALLATIONSANLEITUNG GREEK ΟΔΗΓΙΕΣ ΧΡΗΣΕΩΣ ITALIAN MANUALE D’ISTRUZIONE POLISH INSTRUKCJA OBSŁUGI I MONTAŻU PORTOGUESE MANUAL DE INSTALAÇÃO E UTILIZAÇÃO ROMANIAN MANUAL DE UTILIZARE SI INSTALARE SLOVENIAN...
-
Page 2: Table Of Contents
INSTALLATION AND USER’S MANUAL CONTENT INTRODUCTION SAFETY PRECAUTION SPECIFICATION INSTALLATION (VENT OUTSIDE) INSTALLATION (VENT INSIDE) DESCRIPTION OF COMPONENTS OPERATION MAINTENANCE TROBULESHOOTING CONFORMITY WITH DIRECTIVES ENVIRONMENTAL PROTECTION... -
Page 3: Introduction
INTRODUCTION Thank you for choosing this cooker hood. This instruction manual is designed to provide you with all required instructions related to the installation, use and maintenance of the appliance. In order to operate the unit correctly and safety, please read this instruction manual carefully before installation and usage. - Page 4 Do not flambé under the range hood. CAUTION: Accessible parts may become hot when used with cooking appliance Electrical Shock Hazard Only plug this unit into a properly earthed outlet. If in doubt seek advice from a suitably qualified engineer. Failure to follow these instructions can result in death, fire, or electrical shock.
- Page 5 Standard Installation Accessories List Spec. Illustration Picture Casing Upper Chimney Lower Chimney Lower chimney bracket Upper chimney bracket Hanging Board φ8 rawl plugs φ8×φ6 white color Screws ST4.0×30 φ7.2screws ST4.0×8...
-
Page 6: Installation (Vent Outside)
INSTALLATION (wall mounting) If you have an outlet to the outside, your cooker hood can be connected as below picture by means of an extraction duct (enamel, aluminum, flexible pipe or inflammable material with an interior diameter of 150mm) Before installation, turn the unit off and unplug it from the outlet. The cooker hood should be placed at a distance of 65~75cm above the cooking plane for best effect. - Page 7 For inclined panel Model eed to drill 2x8mm extra holes & fixing screws & screw plugs before installation. Voor schuine modellen...
- Page 8 Leave up the cooker hood and hang onto the wall bracket hook. Cooker hook Wall bracket Fix the one-way-valve to the air outlet of the cooker hood. Then, attached the exhaust pipe onto the one-way-valve as shown below. Exhaust pipe Cooker hood...
- Page 9 Place the glass in appropriate position on the top the cooker hood. Fix with 4 screws and washer. In order to avoid the glass cracking, please do not tighten the screws too strongly. By Put the inner chimney into outer chimney .Then pulling out the inner chimney upwards.
- Page 10 Drill 2 x 8mm holes to accommodate the plate II. Screw and tighten the plate II onto the wall with 2 screws provided. Assembly the chimney onto the unit and fix it with 2 screws. Plate II Screw 4mm x 8mm Wall plug Screw (4mm x 30mm)
-
Page 11: Installation (Vent Inside)
INSTALLATION (VENT INSIDE) If you do not have an outlet to the outside, exhaust pipe is not required and the installation is similar to the one show in section “INSTALLATION (VENT OUTSIDE)”. Activated carbon filter can be used to trap odors. In order to install the activated carbon filter, the grease filter should be detached first. -
Page 12: Description Of Components
DESCRIPTION OF COMPONENTS OPERATION Low Speed button It’s used for Ventilation on the kitchen. It is suitable for simmering and cooking which do not make much steam. Medium Speed button Airflow speed is ideally for ventilation in standard cooking operation. High Speed button When high density of smoke or steam produced, press high-speed button for highest effective ventilation. - Page 13 On/Off button It’s used for turning on/off the fan. Speed plus button For increasing the speed of the fan Speed decrease button For decreasing the speed of the fan. Light button Digital display Fan speed display:"1" for Low speed, "2" for Medium speed, "3"...
-
Page 14: Maintenance
MAINTENANCE Before cleaning switch the unit off and pull out the plug. I. Regular Cleaning Use a soft cloth moistened with hand-warm mildly soapy water or household cleaning detergent. Never use metal pads, chemical, abrasive material or stiff brush to clean the unit. II. -
Page 15: Trobuleshooting
Refit the hood glass and fasten the glass screws. Make sure the screws are fully tightened. TROBULESHOOTING Fault Cause Solution Light on, but The fan blade is Switch off the unit and repair by fan does not jammed. qualified service personnel only. work The motor is damaged. -
Page 16: Environmental Protection
ENVIRONMENTAL PROTECTION Waste electrical products should not be disposed of with household waste. Please recycle where facilities exist. Check with your Local Authority or retailer for recycling advice. This appliance is marked according to the European directive 2012/19/EU on Waste Electrical and Electronic Equipment (WEEE). By ensuring this product is disposed of correctly, you will help prevent potential negative consequences for the environment and human health, which could otherwise be caused by inappropriate waste handling of this...


Need help?
Do you have a question about the CCE116/1X and is the answer not in the manual?
Questions and answers