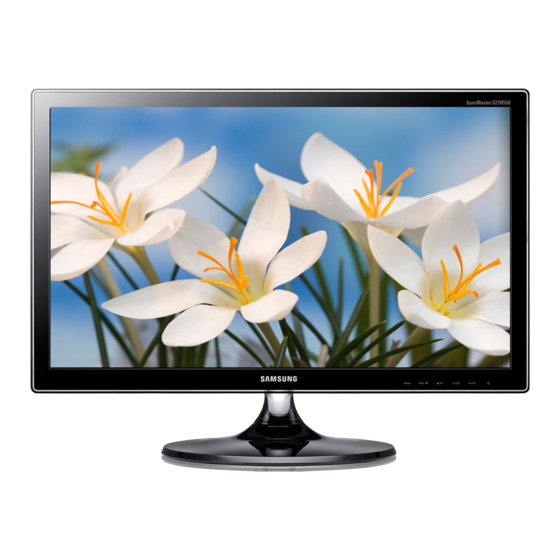
Samsung SyncMaster 5 Series User Manual

Samsung SyncMaster 5 Series User Manual

Led mfm tv
Hide thumbs Also See for SyncMaster 5 Series:
Table of Contents

Advertisement

Quick Links

LED TV MONITOR
(MFM TV)
user manual
Thank you for purchasing this Samsung product.
To receive more complete service, please register
your product at
www.samsung.com/register
Model _____________ Serial No. _____________

Advertisement

Table of Contents
loading

Summary of Contents for Samsung SyncMaster 5 Series

  • Page 1 LED TV MONITOR (MFM TV) user manual Thank you for purchasing this Samsung product. To receive more complete service, please register your product at www.samsung.com/register Model _____________ Serial No. _____________...
  • Page 2 The reception quality of TV may be affected due to differences in broadcasting method between the countries. Please check the TV performance in the local SAMSUNG Authorized Dealer, or the Samsung Call Centre whether it can be improved by reconfiguring TV setting or not.
  • Page 3: Table Of Contents

    Contents Getting Started Basic Features for the TV y Safety Precautions ............ 5 y Using the INFO button (Now & Next guide) ..... 40 y Providing Proper Ventilation for Your Product ..12 y Using the Channel Menu ......... 40 y List of Features ............
  • Page 4 Advanced Features Other Information y Smart Hub .............. 94 y Troubleshooting ............ 164 y Using Samsung Apps ........... 105 y Supported Subtitle and AllShare Play file formats .. 175 y Search ..............108 y Analogue Channel Teletext Feature ....... 178 y Your Video ............
  • Page 5: Getting Started

    Getting Started Getting Started Safety Precautions Icons used for safety precautions Failing to follow the precautions marked with this sign may result in a serious injury or WARNING even a fatality. Failing to follow the precautions marked with this sign may result in a personal injury CAUTION or property damage.
  • Page 6 Getting Started Caution Avoid unplugging the power plug Make sure to use only the power while the product is operating. cord supplied by our company. In addition, do not use the power • Otherwise, it may damage the cord of another electric appliance. product due to electric shock.
  • Page 7 If the product is installed in a location where the operating conditions vary considerably, a serious quality problem may SAMSUNG occur due to the surrounding environment. In this case, install the product only after consulting one of our service engineers about the matter.
  • Page 8 Getting Started Cleaning Related Warning Before cleaning the product, unplug When cleaning the product, do the power cord. not spray water directly over the product parts. • Otherwise, it may result in electric shock or fi re. • Make sure that water does not enter the product.
  • Page 9 Getting Started If the product generates a strange Avoid letting children hang or climb noise, a burning smell, or smoke, onto the product. unplug the power plug immediately • Otherwise, it may result in the and contact a service centre. product falling and this may •...
  • Page 10 Getting Started Avoid placing a liquid container Do not press down hard on the such as a vase, fl owerpot, product. The product may become beverage, cosmetics or drugs, or a deformed or damaged. metal object over the product. • If water or substances enter the product, turn the power off, unplug the power cord and contact a service centre.
  • Page 11 Getting Started Avoid placing a heavy object over When using headphones or the product. earphones, do not turn the volume too high. • Otherwise, it may result in a problem with the product or • Having the sound too loud may injury.
  • Page 12: Providing Proper Ventilation For Your Product

    Play: Lets you access, view, or play photos, videos, or music located on USB devices, digital cameras, cell • phones, and PCs. PCs and cell phones can be accessed wirelessly, through your wireless network. • Anynet+ (HDMI-CEC): Allows you to control all connected Samsung devices that support Anynet+ with your Samsung product’s remote. English - 12...
  • Page 13: Accessories And Cables

    Getting Started Accessories and Cables ✎ Please make sure the following items are included with your product. If any items are missing, contact your dealer. ✎ The items’ colours and shapes may vary depending on the model. ✎ Make sure that there are no accessories hidden behind or under packing materials after you open the box. [CAUTION] INSERT SECURELY LEST SHOULD BE DETACHED IN SET •...
  • Page 14: Using The Control Panel

    Getting Started Using the Control Panel ✎ The product colour and shape may vary depending on the model. Control Panel Toggles between all the available input sources. In the on-screen menu, use this button SOURCEE as you would use the button on the remote control.
  • Page 15: Using Smart Hub

    PCs. PCs and cell phones can be accessed wirelessly, through your wireless network. Smart Hub also provides an easy-to-use gateway to a host of on-line media and entertainment including apps from the Samsung Apps store, streaming videos and movies, kids sites, and more. ✎ To access...
  • Page 16: The Standard Remote Control

    Getting Started The Standard Remote Control Installing batteries (Battery size: AAA) Match the polarity of the batteries to the symbols in the battery compartment. ✎ NOTE • Install the batteries so that the polarity of the batteries (+/-) matches the illustration in the battery compartment. Use the remote control within 23 feet of the product.
  • Page 17: The Standard Remote Control Buttons

    Getting Started The Standard Remote Control Buttons ✎ This remote control has Braille points on the Power, Channel, and Volume buttons and can be used by visually impaired persons. Turns the product on and off. Displays and selects the available SOURCE video sources.
  • Page 18: How To Navigate Menus

    Getting Started How to Navigate Menus PRE-CH Your product’s Main and Tools menus contains functions that let you control the product’s features. For example, in the Main menu you can change the size and configuration of the picture, its brightness, its contrast and so on. There are also functions that let you control the product’s sound, channel configuration, energy use, and a host of other features.
  • Page 19: Connecting The Power Cord And The Aerial Or Cable Connection

    Getting Started Connecting the Power Cord and the Aerial or Cable Connection VHF/UHF Aerial Cable Aerial Cable (Not Supplied) Power Input ✎ Plug the power cord into a wall outlet only after you have made all other connections. ✎ If you are connecting your product to a cable or satellite box using HDMI, Component, or Composite connections, you do not need to connect the ANT IN jack to an aerial or a cable connection.
  • Page 20: Configuring The Basic Settings In Initial Setup

    See page 19 for instructions. ✎ If you want to configure a network connection, make sure you’ve connected the Samsung Wireless LAN Adapter or a LAN cable to your TV. See pages 65 and 66 for instructions.
  • Page 21 Getting Started Wireless Network 1. The product searches for and then displays all the wireless networks within range. When done, it displays a list of the networks. In the list of networks, move the Highlight to select a network, and then select Next. If the selected network requires a Security Key, the Security Key screen appears.
  • Page 22 Getting Started Software Upgrade: When Network Settings is complete, your product will check for a new software Update the software version automatically. If new software is available, the product downloads and to the latest version installs the new software. When the download is complete, select Next. ✎...
  • Page 23 Getting Started Clock: Set the Clock Select Auto or Manual, and then select Next. Auto If you selected Auto, the product will automatically download the correct time from a digital channel. The Time Zone screen will appear. Select your Time Zone, and then select Next.
  • Page 24: Connections

    Connections Connections Connecting to AV Devices (Blu-ray Players, DVD Players, etc.) Using an HDMI Cable for an HD connection (up to 1080p, HD digital signals) For the best quality HD picture, we recommend using an HDMI connection. Use with DVD players, Blu-ray players, HD cable boxes, and HD Set-Top-Box satellite receivers. HDMI OUT HDMI Cable (Not Supplied) ✎...
  • Page 25 Connections Using a Component Cable (up to 1080p HD signals) or an Audio/Video Cable (480i analog signals only) Use with DVD players, Blu-ray players, cable boxes, STB satellite receivers, VCRs. Audio Cable Video Cable (Not Supplied) (Not Supplied) Audio Cable Component Cable (Not Supplied) (Not Supplied)
  • Page 26: Connecting To Audio Devices

    Connections Connecting to Audio Devices Using an Optical (Digital) Cable and a Headphone Cable Connection Use with Digital Audio Systems, Amplifiers, and Home Theatres. Headphone Cable (Not Supplied) Optical Cable (Not Supplied) OPTICAL ✎ Headphones H: You can connect your headphones to the headphone output jack on your product. While the headphones are connected, the sound from the built-in speakers will be disabled.
  • Page 27: The Service Cable Connection

    Connections The Service Cable Connection The SERVICE connection is for service only. Connecting to a PC Using an HDMI Cable or an HDMI to DVI Cable or a D-sub Cable Connection ✎ Your PC may not support an HDMI connection. ✎...
  • Page 28 Connections Display Modes (HDMI/DVI Input) The optimal PC display resolution for this product is 1920 x 1080 @ 60 Hz. We very strongly recommend you set the video output of your computer to the optimal resolution. You can also select one of the standard resolutions listed in the table below and the product will be automatically adjust to the resolution you choose.
  • Page 29: Changing The Input Source

    Connections Changing the Input Source Source → Source ™ When you are watching product and you want to watch a movie on your DVD player or Blu-ray player or switch to your cable box or STB satellite receiver, you need to change the Source. Ext.
  • Page 30 Connections WiDi Connection 1. From the Source screen, select Intel® WiDi. 2. On your desktop, launch Intel ® WiDi ( ✎ As soon as the Programme starts, it searches for available adapters. 3. Select the correct adapter for the Programme and press "Connect". ✎...
  • Page 31 Connections How to Use Edit Name Edit Name lets you associate a device name to an input source. To access Edit Name, open the Tools menu when the Source list is displayed. The following selections appear under Edit Name: Cable STB Satellite STB PVR STB AV Receiver...
  • Page 32: Basic Features For The Monitor

    • Standard Suitable for a normal environment. • Entertain Sharpens the picture. Suitable for games. Samsung MagicAngle Menu → Picture → Samsung MagicAngle MagicAngle lets you view optimal screen quality from almost any viewing position. By setting an appropriate value for each position, you can view a high quality picture, whether you are viewing the screen from an angle below, above, or on the side of the product.
  • Page 33: Adjusting Picture Settings

    Basic Features for the Monitor Adjusting Picture Settings Backlight → → Menu Picture Backlight Adjusts the brightness of the screen by adjusting the brightness of the individual pixels. Contrast → → Menu Picture Contrast Increases or decreases the contrast between dark and light areas of the picture. Brightness →...
  • Page 34: Changing The Picture Size

    Basic Features for the Monitor Changing the Picture Size Screen Adjustment → → Menu Picture Screen Adjustment Using this function, you can make change to various picture size and aspect ratio options. Picture Size • If you have a cable box or satellite receiver, it may have its own set of screen sizes as well. However, we highly recommend you use your products 16:9 mode most of the time.
  • Page 35: Calibrating The Screen Display

    ✎ However, the same basic information will apply in most cases. (If not, contact your computer manufacturer or Samsung Dealer.) 1. Click “Control Panel” on the Windows start menu. 2. Click “Appearance and Themes” in the “Control Panel” window. A display dialog box appears.
  • Page 36: Changing The Picture Options

    / B-Gain: Adjusts each Colour’s (red, green, blue) brightness. Reset: Resets the White Balance to its default settings. • Gamma Adjusts the primary Colour intensity. ✎ Available only when the Samsung MagicAngle is set to Off. Picture Options → → Menu Picture Picture Options Using this function, you can configure additional picture settings to suit your preference.
  • Page 37: Changing The Preset Sound Mode

    Basic Features for the Monitor Changing the Preset Sound Mode Sound Mode → → Menu Sound Sound Mode Sound modes apply preset adjustments to the sound. ✎ Speaker Select is set to External Speaker, the Sound Mode is disabled. • Standard Selects the normal sound mode.
  • Page 38: Adjusting Sound Settings

    Basic Features for the Monitor Adjusting Sound Settings Sound Effect → → Menu Sound Sound Effect ✎ Speaker Select is set to External Speaker, the Sound Effect is disabled. ✎ Available only when the Sound Mode is set to Standard. •...
  • Page 39 Basic Features for the Monitor Speaker Settings Menu → Sound → Speaker Settings • Speaker Select If you are listening to the sound track of a broadcast or movie through an external receiver, you may hear a sound echo caused by the difference in decoding speed between the product’s speakers and the speakers attached to your audio receiver.
  • Page 40: Basic Features For The Tv

    Basic Features for the TV Basic Features for the TV Using the INFO button (Now & Next guide) The display identifies the current channel and the status of certain audio-video settings. The Now & Next guide shows daily TV programme information for each channel according to the broadcasting time. •...
  • Page 41 Basic Features for the TV Shows radio channels. Data/Other • Shows data channels and other channels. • Analogue Shows analogue channels. Favourites 1 – Favourites 5 • Shows all favourite channels, in up to five groups. Each group has separate channels. ✎...
  • Page 42 Basic Features for the TV Using the Tools menu with the Channel • Edit Favourites Lets you assign channels you watch frequently to a favourite group and remove channels from a favourite group. You access Edit Favourites on the Tools menu.
  • Page 43 Basic Features for the TV To delete a channel from a Category list on the Channel screen, follow these steps: 1. If you want to delete a channel, select a category of the channel. 2. Select a channel in the category list. A mark appears to the left of the channel.
  • Page 44 Basic Features for the TV Using the coloured and function buttons with the Edit Favourites • When the highlight located in the All, you can use these options: – Add selected channels to the favourites group. – Change favourites Change the favourites group. Each time you select using your remote, a favourites group will be changed.
  • Page 45 Basic Features for the TV To remove a channel from the list of favourites, follow these steps: 1. Select the favourites group category. 2. Select a channel in the selected favourites group. A mark appears to the left of the channel. ✎...
  • Page 46 Basic Features for the TV Schedule Manager ™→ Schedule Manager Using this function, you can set the product to display a desired channel automatically on a day and at a time of your choice. ✎ You must set the current time first using the Time →...
  • Page 47 Basic Features for the TV To use the Schedule Recording, follow these steps: (Digital channels only) Allows you to make a reservation to record a programme scheduled for broadcast. Set the current time first to use this function. 1. Select Schedule Manager.
  • Page 48 Basic Features for the TV Display Icons Used in the Channel List screens : An analog channel. : A reserved Programme. : A locked channel. Using the Schedule Viewing in Channel List (digital channels only) You can use the Schedule Viewing Channel List to schedule a digital channel Programme for viewing.
  • Page 49: Memorizing Channels

    Basic Features for the TV Memorizing Channels Aerial → → Menu Channel Aerial Before your product can memorize the available channels, you must select your Product signal source, (using an aerial) or Cable. Select or Cable. After you have selected the signal source, go on to the Auto Tuning function.
  • Page 50 Basic Features for the TV • Others Ordering (Depending on the country) If you select this menu you will find others channels ordering directly organized from private national televisions. ✎ Available only when the aerial source is set to Air. •...
  • Page 51 Basic Features for the TV Manual Tuning → → Menu Channel Manual Tuning Scans for a channel manually and stores in the TV. ✎ If a channel is locked using the Channel Lock function, the PIN input window appears. ✎ This function may not be supported depending on the region.
  • Page 52: Other Features

    Menu Channel Guide Type (Depending on the country) You can select a different type of Guide. • Samsung: Uses the guide programme by provided Samsung. • Rovi On Screen: Uses the guide programme provided by Rovi International Solutions. ✎ ROVI EPG initial setting time can take a while depending on the region or broadcast environment.
  • Page 53: Changing The Preset Picture Mode

    Natural • Suitable for reducing eye strain. • Movie Darkens the screen, making it less glary. Suitable for watching movies in a darkened room. Samsung MagicAngle → → Menu Picture Samsung MagicAngle MagicAngle lets you view optimal screen quality from almost any viewing position. By setting an appropriate value for each position, you can view a high quality picture, whether you are viewing the screen from an angle below, above, or on the side of the product.
  • Page 54: Adjusting Picture Settings

    Basic Features for the TV Adjusting Picture Settings Backlight → → Menu Picture Backlight Adjusts the brightness of the screen by adjusting the brightness of the individual pixels. Contrast → → Menu Picture Contrast Increases or decreases the contrast between dark and light areas of the picture. Brightness →...
  • Page 55: Changing The Picture Size

    Basic Features for the TV Changing the Picture Size Screen Adjustment → → Menu Picture Screen Adjustment Using this function, you can make change to various picture size and aspect ratio options. Picture Size • Your cable box / satellite receiver may have its own set of screen sizes as well. However, we highly recommend you use 16:9 mode most of the time.
  • Page 56 Basic Features for the TV Picture Sizes available by Input Source: – ATV, EXT, AV: Auto Wide, 16:9, Wide Zoom, Zoom, – DTV (576i/p, 720p): Auto Wide, 16:9, Wide Zoom, Zoom, – DTV (1080i, 1080p): Auto Wide, 16:9, Wide Zoom, Zoom, 4:3, Screen Fit –...
  • Page 57: Changing The Picture Options

    Controls the white balance in 10 point intervals by adjusting the red, green, and blue brightness. ✎ Available when the Picture Mode is set to Movie and when the Samsung MagicAngle is set to Off. ✎ Some external devices may not support this function. Gamma • Adjusts the primary colour intensity.
  • Page 58 Basic Features for the TV • Expert Pattern Use the Expert Pattern function to calibrate the picture. If the OSD menu disappears or a menu other than the Picture menu is opened, the product saves the calibration and the Expert Pattern screen disappears.
  • Page 59 Basic Features for the TV Picture Options → → Menu Picture Picture Options Using this function, you can configure additional picture settings to suit your preference. ✎ When your product is connected to a PC, you can only make changes to Colour Tone.
  • Page 60: Changing The Preset Sound Mode

    Basic Features for the TV Changing the Preset Sound Mode Sound Mode → → Menu Sound Sound Mode Sound modes apply preset adjustments to the sound. ✎ Speaker Select is set to External Speaker, the Sound Mode is disabled. • Standard Selects the normal sound mode.
  • Page 61: Adjusting Sound Settings

    Basic Features for the TV Adjusting Sound Settings Sound Effect → → Menu Sound Sound Effect ✎ Speaker Select is set to External Speaker, the Sound Effect is disabled. ✎ Available only when the Sound Mode is set to Standard. •...
  • Page 62 Basic Features for the TV Broadcast Audio Options → → Menu Sound Broadcast Audio Options • Audio Language (Digital channels only) Change the default value for audio languages. ✎ The available language may differ depending on the broadcast. • Audio Format (Digital channels only) When sound is emitted from both the main speaker and the audio receiver, a sound echo may occur due to the decoding speed difference between the main speaker and the audio receiver.
  • Page 63 Basic Features for the TV Additional Settings → → Menu Sound Additional Settings • DTV Audio Level (Digital channels only) This function allows you to reduce the disparity of a voice signal (which is one of the signals received during a digital TV broadcast) to a desired level.
  • Page 64 Basic Features for the TV Speaker Settings → → Menu Sound Speaker Settings • Speaker Select If you are listening to the sound track of a broadcast or movie through an external receiver, you may hear a sound echo caused by the difference in decoding speed between the product’s speakers and the speakers attached to your audio receiver.
  • Page 65: Network Features

    Network Features Network Features Connecting to the Network The Wired Network Connection There are three main ways to connect your product to your network using cable, depending on your network setup. They are illustrated below: – You can attach your product to your LAN by connecting the LAN port on the back of your product to an external modem using a LAN cable.
  • Page 66 Samsung’s Wireless LAN adapter is sold separately and is offered by select retailers, Ecommerce sites and Samsungparts.com. Samsung’s Wireless LAN adapter supports the IEEE 802.11a/b/g and n communication protocols. Samsung recommends using IEEE 802.11n. When you play video over a network connection, the video may not play smoothly.
  • Page 67 ✎ If you select the Pure High-throughput (Greenfield) 802.11n mode and the Encryption type is set to WEP or TKIP on your AP or wireless router, Samsung products will not support a connection in compliance with new Wi-Fi certification specifications.
  • Page 68: Setting Up A Wired Network

    Network Features Setting up a Wired Network Network Settings → → Menu Network Network Settings Set the wired or wireless network connection to use various Internet services such as Smart Hub, AllShare Play perform software upgrades. Automatic Wired Network Setup You can configure your product's wired network connection automatically when connecting your product to a network that supports DHCP.
  • Page 69 Network Features Manual Wired Network Setup You can configure your product's wired network connection manually when connecting your product to a network that requires a Static IP address. Getting the Network Connection Values To view the Network connection values on Windows XP computers, follow these steps: 1.
  • Page 70 Network Features Network Status → → Menu Network Network Status You can check the current network and Internet status. If the wired network connection failed... • No network cable found. Check if your network cable is plugged in. If it is connected, make sure that the router is turned on. If it is on, try turning if off and on again.
  • Page 71: Setting Up The Wireless Network

    Network Features Setting up the Wireless Network Network Settings → → Menu Network Network Settings Set the wired or wireless network connection to use various Internet services such as Smart Hub, AllShare Play perform software upgrades. Automatic Wireless Network Setup Most wireless networks have an optional security system that requires devices that access the network to transmit an encrypted security code called an Access or Security Key.
  • Page 72 Network Features Manual Wireless Network Setup You can configure your product's wireless network connection manually when connecting your product to a network that requires a Static IP address or if the automatic connection process has failed. Getting the Network Connection Values To view the Network connection values on most Windows computers, follow these steps: 1.
  • Page 73 Network Features WPS(PBC) Network Setup If your router has a WPS(PBC) button, you can configure your product's wireless network connection using the WPS(PBC) button more easily. To set up your product's wireless network connection using WPS(PBC), follow these steps: → →...
  • Page 74 Network Features Network Status → → Menu Network Network Status You can check the current network and Internet status. When the wireless network connection failed • Wireless network connection failed. No wireless router selected. Go to Network Settings to select your router. •...
  • Page 75: Managing The Network Devices

    Network Features Managing the Network Devices Wi-Fi Direct → → Menu Network Wi-Fi Direct Set to connect the product to wireless mobile devices. Using this function, you can connect wireless mobile devices to your product directly without a router. ✎ To use this function, your mobile device should be supported by the Wi-Fi Direct.
  • Page 76 Network Features Soft AP → → Menu Network Soft AP Using this function, you can connect the product to your mobile devices if your mobile device does not support Wi-Fi Direct. Soft AP screen lets you set the options for connecting Wi-Fi devices. Soft AP •...
  • Page 77 A keyboard appears on the screen. Key in a name for your product manually using your remote control. For example, if you want to change the name to Samsung Monitor, select each character using your remote. When done, select Done.
  • Page 78: Preference Features

    Preference Features Preference Features Setting the Time Time → → Menu System Time ✎ The time you set will appear when you press the INFO` button. Clock • Set the clock to use the various timer features of the product. ✎...
  • Page 79 Preference Features • On Timer On Timer so that your product turns on automatically at a time and on a day of your choosing. You can set up three separate On Timer configurations. (On Timer On Timer On Timer 3) and select the source of the content the product plays when it turns on: an air or cable channel, a USB device, or a set-top box connected to one of the product's inputs (HDMI1, AV, etc.).
  • Page 80: Economical Solutions

    Preference Features Economical Solutions Eco Solution → → Menu System Eco Solution • Energy Saving Lets you adjusts the brightness of the product in order to reduce power consumption. If you select Picture Off, the screen is turned off, but the sound remains on. Press any button except the volume button to turn on the screen. •...
  • Page 81: Blocking Programmes

    Preference Features Blocking Programmes Security → → Menu System Security Using this function, you can configure programme related security options. Every time you access the Security functions, the PIN screen will appear and you must enter that PIN. The PIN screen closes and the Security menu appears.
  • Page 82: Picture In Picture (Pip)

    Preference Features Picture In Picture (PIP) → → Menu System You can watch a Programme whose signal has passed through the product’s tuner and watch video from one external video source simultaneously. For example, if you have a cable box connected to the Cable In jack, you can use PIP to watch Programmes from the cable box and a movie from a Blu-ray player attached to the HDMI In jack.
  • Page 83: Using The Product With A Keyboard And A Mouse

    Preference Features Using the Product with a Keyboard and a Mouse Device Manager → → Menu System Device Manager Using this function, you can set up a keyboard or mouse to use with the product. You can view your device lists and adjust keyboard or mouse settings in this menu.
  • Page 84 Preference Features • Mouse settings Lets you use a USB or Bluetooth mouse with your product. If you want to use a USB mouse, connect it to the USB port. If you want to use a Bluetooth mouse, connect it using the Bluetooth function. You can use a mouse in the TV's menu in the same way you use a mouse on your PC.
  • Page 85: Other Features

    Preference Features Other Features Language → → Menu System Language • Menu Language Set the menu language. • Teletext Language Set a desired language for teletext. ✎ English is the default in cases where the selected language is unavailable in the broadcast. Preferred Language •...
  • Page 86 Preference Features Digital Text (Available only in U.K) If the programme broadcasts with digital text, this feature is enabled. MHEG (Multimedia and Hypermedia Information Coding Experts Group): An International standard for data encoding systems used in multimedia and hypermedia. This is at a higher level than the MPEG system which includes data-linking hypermedia such as still images, character service, animation, graphic and video files as well as multimedia data.
  • Page 87 Movie automatically. • BD Wise Provides the optimal picture quality for Samsung DVD, Blu-ray and Home Theatre products which support Wise. When the BD Wise is set to On, the picture mode is automatically changed to the optimal resolution.
  • Page 88 → Menu System Anynet+ (HDMI-CEC) Allows you to control all connected Samsung devices that support anynet+ with your Samsung product’s remote. For details on set up options, refer to the “Anynet+ (HDMI-CEC)” instructions. (page 161) DivX® Video On Demand Menu →...
  • Page 89: Support Menu

    Yes: Select if you can hear sound from only one speaker or from neither speaker during the sound test. There may be a problem with the product. Contact Samsung’s Call Centre for assistance. No: Select if you can hear sound from the speakers. There may be a problem with your external equipment.
  • Page 90 Preference Features • Reset Reset all setting to factory defaults except for your network settings. To reset your product to default setting, follow these steps: → → Reset) 1. Go to the Reset menu. (Support Self Diagnosis 2. The PIN input screen appears. Enter the four digit security PIN using your remote. 3.
  • Page 91 By USB To upgrade the By USB, follow these steps: 1. Visit www.samsung.com. 2. Download the latest USB software upgrade exe archive to your computer. 3. Extracts the exe archive to your computer. You should have a single folder with the same name as the exe file.
  • Page 92 Preference Features • Alternative Software Alternative Software option lets you upgrade using a file the product downloaded earlier, but you decided not to install immediately, or a file downloaded by the product in Standby Mode (See Standby Mode Upgrade in the next section).
  • Page 93 → Remote Management The Call Centre will access your Remote Management lets our Call Centre access and control your Samsung Product remotely to troubleshoot a problem. Use Remote Management only when you have a problem, and contact our Call Centre first, before you activate Remote Management. You can find the current number of our Call Centre on the Support page at www.samsung.com under Contact support.
  • Page 94: Smart Hub

    ™ Notice Œ Samsung Electronics takes no legal responsibility for any interruption of the Smart Hub service caused by the service provider for any reason. Œ Application services may be provided in English only and the contents available may vary, depending on your area.
  • Page 95 Advanced Features To start Smart Hub for the first time, follow these steps: 1. Press the button. ™ 2. The Smart Hub screen appears. In a few cases, the Country screen appears immediately after. 3. If the Country screen has appeared, select your country using your remote. ✎...
  • Page 96 Advanced Features Using the Keypads and Keyboards A number of Smart Hub applications display a numeric keypad or a QWERTY keyboard so you can enter account names, passwords, and other data. In most applications, you can toggle between the numeric keypad and the QWERTY keyboard by selecting the button.
  • Page 97 Advanced Features Using the QWERTY Keypad You can use this Screen Keypad in a several Smart Hub applications in same way as a keyboard. Using the coloured and function buttons with the QWERTY Keypad Delete All • Delete all inputted character. •...
  • Page 98 If you have existing accounts with any of the listed providers, you can associate the provider account and the provider account password with your Samsung account. Registration makes it easier to access the providers web site. For registration instructions, go to Step 2 in...
  • Page 99 You can change the background image on the Smart Hub home screen. • Account Manager Lets you register your service provider accounts, delete or deactivate your Samsung Account. For more information about Account Manager, see "Configuring Smart Hub with Settings" in this section.
  • Page 100 Smart Hub screen, some of the functions listed below may not appear. Login Logout • Log in or log out to your Samsung account. • Wallpaper You can change a background image on the Smart Hub home screen. Move •...
  • Page 101 Advanced Features • New Folder New Folder function lets you create and name new folders. You can move applications into the folders you have created. To use the New Folder function, follow these steps: 1. Open the Tools menu using your remote. 2.
  • Page 102 Advanced Features To use the Lock function, follow these steps: 1. Select an application, and then open the Tools menu using your remote. 2. Select Lock. The Security window appears. 3. Enter your password. 4. A confirming message screen appears. Select OK. The message screen closes and a lock symbol appears to left of the application.
  • Page 103 Samsung account. If you associate the account, you will be able to log onto the account through Smart Hub easily, without entering your account name or password.
  • Page 104 Advanced Features • Service Manager Auto Ticker: You can set Auto Ticker to come on when the product powers. ✎ The Ticker application provides useful News, Weather, and Stock Market information. Before you can set the Auto Ticker on, you must download the Ticker application into Smart Hub.
  • Page 105: Using Samsung Apps

    Samsung Apps ™ Samsung Apps is a store from which you can download applications to use on Samsung TV/AV equipment. You can enjoy a variety of contents such as videos, music, photos, games, useful information etc. using the downloaded applications.
  • Page 106 Advanced Features Using Samsung Apps by category The following categories are available: Most Popular • Displays the most popular applications for users. • Videos Includes apps that provide video media such as movies, product shows and short length videos. •...
  • Page 107 2. Enter a keyword you want to search using your remote. 3. When done, select at the bottom of the keyboard. 4. Wait until the search result screen displays. After Samsung Apps displays the results, you can select an application you want in the search result screen. ✎...
  • Page 108: Search

    Advanced Features Search → Search ™ (May not be available, depending on your country.) Easily search for and access content from diverse sources (e.g. applications, Your Video, AllShare Play) 1. On the Smart Hub, select Search at the top of the screen or press the Search button on your remote. 2.
  • Page 109 Advanced Features Using the Tools menu with Search • General Settings Keyword recommendation: Turns the Keyword Recommendation function on or off. Search area: Sets a search scope. The default is allowed all application. To customize a search area follow these steps: 1.
  • Page 110: Your Video

    To go to a vendor's web site, you must have that vendor's app installed in Smart Hub. To install apps, access Samsung Apps on the main Smart Hub screen. 7. You can search for a particular movie. To search, select with your remote.
  • Page 111 Advanced Features Using the Function and Colored Buttons on the Search Tab • Login Logout To logi n to your Smart Hub account or log out. • Search To search for movies or videos (Steps 7 and 8). My Page •...
  • Page 112 Advanced Features Using the Your Video Genre Tab When you start Your Video, the Your Video screen displays the Search tab. You can also display the Genres which sorts movies and videos by genre. 1. On the Your Video Search tab, move the highlight to the bottom of the screen, and then select Genres.
  • Page 113 Advanced Features Using My Page My Page displays your My Video Bookmarks, Likes/shares (if you have a Facebook or Twitter account registered in Smart Hub), and lets you establish certain Preferences. When the T My Page icon is displayed at the bottom of a screen, select or press Tools.
  • Page 114: Family Story

    Advanced Features Family Story → Family Story ™ Family Story feature allows you to share photos, messages, and events with your family. • Create Group If you are starting Family Story for the first time among your family members, you can create a group and invite members.
  • Page 115 5. Select Phone number or Samsung account ID. The keypad screen re-appears. 6. Enter member's phone number or samsung account ID using your remote. When done, select Done. 7. When done, select Done. ✎ If you want to add more members, select Member, and repeat the Step 3 and 7.
  • Page 116 Advanced Features Creating an Album You can upload pictures from a USB device and create a picture album which other group members can view and add To create a picture album, follow these steps: 1. Attach a USB device containing the pictures you want to upload to the picture album to your product. 2.
  • Page 117 Advanced Features Editing a Picture The Edit function lets you add a memo to a picture or add the picture to an event. To edit a picture, follow these steps: 1. On the Cover Story screen, highlight and select the strip of photos on the bottom left. The Story of the Day screen appears.
  • Page 118 Advanced Features Deleting a Memo To delete a memo, follow these steps: 1. On the Cover Story screen, highlight and select the memos on the right side of the screen. The Story of the Day screen appears. 2. Highlight and select the memo you want to delete. 3.
  • Page 119 Advanced Features Creating an Event You can create a record of an event, such as a birthday party or a wedding, with pictures, that all group members can see. You can also create a record for a future event. To create an event, follow these steps: 1.
  • Page 120 Advanced Features 14. To add photos, highlight and select the button. The File Browser appears. 15. Highlight and select the USB device. The device opens, displaying either folders or picture files. 16. If picture files are displayed, highlight and select each file you want to upload. A check appears on each file. 17.
  • Page 121 Advanced Features Editing an Event To edit an event, follow these steps: 1. On the Cover Story screen, highlight and select the events on the bottom right side of the screen. The Story of the Day screen appears. 2. Highlight and select the event you want to edit. 3.
  • Page 122 Advanced Features Viewing Individual Pictures 1. On the Cover Story screen, highlight and select the strip of photos on the bottom right. The Story of the Day screen appears displaying the individual photos. 2. Highlight and select a photo. The individual photo is displayed. •...
  • Page 123 Advanced Features The Tools Menu Functions Tools Menu appears on most of the Family Story screens. This section provides a run down of all the Tools Menu functions by screen. Tools Menu Functions on the Cover Story Screen Group Members: Lists the current group members and the current prospective members with invitations. groups: Lists the groups you are a member of.
  • Page 124: Fitness

    Advanced Features Fitness → Fitness ™ The Fitness application provided by Smart Hub lets you track and manage a fitness and exercise programme you create. ✎ To use Fitness, you should be logged in the Smart Hub. Read these notes before exercising... ✎...
  • Page 125 Fitness displays a number of exercise videos and programs you can use to help you reach your fitness goals. Each of these videos and programs must be downloaded from Samsung Apps. Videos labeled VOD (Video on Demand) are part of a group of free exercise videos. We suggest you download those first.
  • Page 126: Kids

    You can edit the contents list. For more detailed information, refer to "My choice" in this section. ✎ Most of the content must be downloaded from Samsung apps. To download, follow the directions on the screen. When the download is complete, press RETURNR repeatedly until the Kids app reappears. Start the contents or app by highlighting and then selecting it.
  • Page 127 ✎ When you select an application or contents, if the application or contents has not been installed on the product, the product displays the corresponding download screen from the Samsung Apps screen. To use Browse all, follow these steps: 1. On the Browse all screen, select a character.
  • Page 128 Advanced Features To present a sticker to your kids, follow these steps: 1. On the Parents screen, select Present Stickers. The Present Stickers screen appears. 2. Select a sticker you want to present. A pop-up message appears. 3. Select Yes. 4.
  • Page 129: Web Browser

    Advanced Features Web Browser → Web Browser ™ (May not be available, depending on your country.) Using this function provided by the Smart Hub, you can surf the Internet on your product. 1. On the Smart Hub screen, select Browser. The Web Browser screen appears.
  • Page 130 Advanced Features Using the Control Panel with Web Browser Web Browser has a series of icons across the top of the screen which provide a number of useful functions. With these icons, you can easily use the Browser. The icons are described below, starting with the icon on the far left of the screen.
  • Page 131 Advanced Features • History Displays the History screen. You can select a web page to visit in the History list. You can also sort by Date, Name, Times Visited. To sort, select Sort. When you select Enter URL, you can enter in a new URL address directly using your remote or mouse.
  • Page 132 Advanced Features Configuring the Web Browser Using Options Move the cursor to the top of the screen, and then select the Options icon. Reading Tools • Provides an easy-to-read page by enlarging the main text. Reading Tools is not available for all pages. •...
  • Page 133 Advanced Features • Web Browser Settings You can configure Web Browser options. Set as homepage: You can set the home page. – Most visited: Set the most frequently visited URL as the home page. – Current Page: Sets the current page as the home page. –...
  • Page 134 [Legal Statement] Due to the various capabilities of products featuring the Samsung Smart Hub - Content Service, as well as limitations in the available content, certain features, applications, and services may not be available on all devices or in all territories.
  • Page 135: Allshare Play

    Advanced Features AllShare Play → AllShare Play ™ View or play photos, music, and movie files located on a USB Mass Storage Class (MSC) device, a PC, or a DLNA device (a cell phone, for example) on your product. ✎ To view content on a USB device, you must plug the device into a USB port on the product.
  • Page 136 Œ Before connecting your device to the product, please back up your files to prevent them from damage or loss of data. SAMSUNG is not responsible for any data file damage or data loss. Œ Connect a USB HDD to the dedicated USB (HDD 5V 1A) port.
  • Page 137 Advanced Features File system and formats Œ The USB function might not work properly with unlicenced multimedia files. Œ MTP (Media Transfer Protocol) is not supported. Œ The file system supports FAT16, FAT32 and NTFS. AllShare Play supports only the Sequential jpeg format. It does not support the Progressive jpeg format. Œ...
  • Page 138 Advanced Features The following AllShare Play functions are not supported when you are playing media from a PC connected through a network: ✎ Background Music Background Music Setting functions. ✎ Sorting files by preference in the Photos, Music, and Videos folders.
  • Page 139: My List (In Allshare Play)

    Advanced Features My list (In AllShare Play) → AllShare Play → My list ™ Using this function, you can access content easily and quickly. • Recently played Displays the videos, photos or music file list of recently played. If you have a file you want to play again, use this category.
  • Page 140 Advanced Features Creating the Playlist 1. On the AllShare Play main screen, select Videos, Photos, or Music on the left side of the screen. 2. On the right side of the screen, highlight and select the device that has the files you want in the playlist. AllShare Play displays the folders and/or files on the device.
  • Page 141 Advanced Features To add files a playlist, follow these steps: 1. On the AllShare Play main screen, select Videos, Photos, or Music on the left side of the screen. ✎ You must select the kind of content that is already in the playlist. For example, if you want to add files to a music playlist, you must select Music.
  • Page 142: Videos (In Allshare Play)

    Advanced Features Videos (In AllShare Play) → AllShare Play → Videos ™ You can play video files saved on USB device and/or your PC. ✎ For more information about the subtitle formats and codec formats, refer to "Supported Subtitle and AllShare Play file formats"...
  • Page 143 Hub. – Login Logout You can login to or logout of your Samsung Account. – Add to Playlist Lets you create playlists. When you create playlists, you can play a series of videos that you want to watch easily and quickly.
  • Page 144 Advanced Features – Picture Mode Lets you change the Picture Mode. – Sound Mode You can change the Sound Mode. – Audio Language You can listen to the video in one of supported languages. The function is enabled only when you play stream- type files which support multiple audio formats.
  • Page 145 Advanced Features Send your video files Lets you send your video files with your Family Story or send files to other devices. ✎ To use Send, you must be logged in to Smart Hub. An example: Sending with your Family Story 1.
  • Page 146: Photos (In Allshare Play)

    Advanced Features Photos (In AllShare Play) → AllShare Play → Photos ™ Viewing a Photo (or slide show) ✎ For more information about the supported image file formats, refer to "Supported Subtitle and AllShare Play file formats" in the Other Information section. 1.
  • Page 147 Advanced Features Using the Tools menu with Photos • To use the Tools menu with photos, you must first highlight a photo file on the file list screen. After you have highlighted a photo on the file list screen, you can use the following options in the Tools menu: –...
  • Page 148 Advanced Features – Background Music Setting You can set and select background music when watching a photo file or slide show. – Picture Mode You can change the Picture Mode. – Sound Mode You can change the Sound Mode. ✎ Available only when Background Music is set to on.
  • Page 149 Advanced Features Send your photos Lets you send your photos with your Family Story account or to other devices ✎ To use Send, you must be logged in to Smart Hub. 1. For example, suppose that you want to send with your Family Story.
  • Page 150: Music (In Allshare Play)

    Advanced Features Music (In AllShare Play) → AllShare Play → Music ™ Playing Music ✎ For more information about the supported music file formats, refer to "Supported Subtitle and AllShare Play file formats" in the Other Information section. 1. On the AllShare Play screen, press the arrow button to select Music.
  • Page 151 Advanced Features Using the Tools menu with Music • To use the Tools menu with Music, you must first highlight a music file on the file list screen. After you have highlighted a music file on the file list screen, you can use the following options in the Tools menu: –...
  • Page 152 Advanced Features Using View with Music files ✎ When you use the AllShare Play function with Family Story, Facebook or Picasa rather than a USB device, View not supported. 1. To sort files in the file lists, select using your remote. The View screen appears.
  • Page 153: Recorded Tv Product (In Allshare Play)

    ✎ Before formatting your device to the product, please back up your files to prevent them from damage or loss of data. SAMSUNG is not responsible for any data file damage or data loss. To record a current broadcasting programme Allows you to record a programme currently being broadcasted.
  • Page 154 Advanced Features Playback control button with Recorded TV • †, … Each time you select † … using your remote, the playback speed change as follows. († † † † † † † … … … … … … … •...
  • Page 155 Advanced Features – Lock/Unlock To enable or disable the lock. – Device Management On the device can scan and format. • The following functions are available only in selected content item. – Rename Change the name of the content. – Information Displays detailed information about the selected file.
  • Page 156: Timeshift

    Advanced Features Timeshift Using the Timeshift function If you missed a live broadcast, you can see from the recorded broadcast using this feature. 1. When you watch a broadcast programme, select using your remote to start the Timeshift function. ∂ 2.
  • Page 157 Advanced Features • For the Timeshift operation, the USB device requires 1.5GB of free space. • The Schedule Recording function requires 100MB of free space on the USB device. • If the free space of the USB device decreases to less than 50MB while a Schedule Recording is operating, the Schedule Recording...
  • Page 158: Using The Dlna Function

    Compatibility with various subtitle formats (SRT, SMI, SUB, TXT, TTXT) – Search with file names – And many others ✎ To use the original DLNA functions of Samsung fully, it is recommended that you use the AllShare Play software provided in your product. AllShare Settings Menu → Network →...
  • Page 159 Advanced Features To play the media contents of the devices connected to DLNA function, follow these steps: 1. On the AllShare Play screen, select the kind of content you want to play: Videos, Photos, Music. 2. On the right side of the screen, select DLNA. The product displays the list of devices connected using the DLNA function.
  • Page 160: Using The Mhl Function

    Advanced Features Using the MHL function You can enjoy videos, photos and music files on your product when connecting it with a mobile device that supports Mobile High-Definition Link (MHL) function. ✎ To use the MHL function, you need an MHL-certified mobile device. You can check if your mobile device is MHL certified on the device manufacturer's website.
  • Page 161: Anynet+ (Hdmi-Cec)

    Anynet+ is a function that enables you to control all connected Samsung devices that support Anynet+ with your Samsung TV’s remote. The Anynet+ system can be used only with Samsung devices that have the Anynet+ feature. To be sure your Samsung device has this feature, check if there is an Anynet+ logo on it.
  • Page 162 Advanced Features Anynet+ (HDMI-CEC) Menu The Anynet+ menu changes depending on the type and status of the Anynet+ devices connected to the product. View TV • Change from Anynet+ mode to product broadcast mode. • Device List Shows the Anynet+ device list. •...
  • Page 163 Advanced Features Switching between Anynet+ Devices 1. Open the Tools menu using your remote, and then select Anynet+ (HDMI-CEC). 2. Select Device List. The Device List screen appears. ✎ If you cannot find a device you want, select Refresh to refresh the list. 3.
  • Page 164: Troubleshooting

    Pb jack on the product, the red Pr jack on the source to the red Pr jack on the product. Screen Brightness If you find that the colours on your Samsung product are correct but just a little too dark or bright, try adjusting the following settings in the Picture option in the Main menu: •...
  • Page 165 Press the power on button on the product or remote and the light should blink about 5 times before the product turns on. If you find that you are having trouble powering on your Samsung television, there are a number of things to check before making a call to the service department.
  • Page 166 Other Information Issues Solutions and Explanations PC Connection Mode Not Supported Set your PC’s output resolution so it matches a resolution supported by the product. message appears. “PC” is always shown on the This is normal. “PC” is always shown in the source list, regardless of whether a PC is source list, even if a PC is not connected.
  • Page 167 Other Information Issues Solutions and Explanations There is a dotted line on the If the Picture Size is set to Screen Fit, change it to 16:9. edge of the screen. Change the cable/satellite box resolution. The picture is black and white. If you are using an AV composite input, connect the video cable (yellow) to the Green jack of Component on the product When changing channels, the If the product is connected to a cable box, try to reset the box.
  • Page 168 Other Information Issues Solutions and Explanations Network Connection The wireless network Make sure the product is connected to a wireless IP sharer (router). connection failed. Software Upgrade over the Network Status Network menu to confirm the connection. network fails. If you have latest Software (SW) version, SW upgrade will not proceed. Others Purple/green rolling horizontal Remove the left and right audio connections from the Set-Top box.
  • Page 169 ✎ To keep your product in optimum condition, upgrade to the latest firmware on the Samsung web site by USB (samsung.com → Support → Downloads). The product won’t turn on. Make sure the AC power cord is securely plugged in to the wall outlet and the product.
  • Page 170 Other Information Issues Solutions and Explanations Intel ® WiDi Connection Unable to establish a WiDi It is recommended using the laptop within a 3m radius of the product. connection. You may encounter a connection failure or scrambled screen in a multiple router environment such as an office.
  • Page 171 Other Information Issues Solutions and Explanations If the product is too far away It is recommended maintaining the ideal distance between them. from the laptop computer, the playback performance of the product will deteriorate accordingly. How can I access the If the product supports 1080p HD video but your laptop computer does not, you can extended video feature in WiDi still play a 1080p HD video on the product.
  • Page 172 Other Information Issues Solutions and Explanations MHL Connection How can I change the size of The product only supports Screen Fit when you using MHL function. MHL? MHL charging seems slow. The monitor supports 500mA for charging purposes (MHL 1.1). If the mobile device is on, charging the product fully takes more time due to battery consumption.
  • Page 173 Some functions and pictures shown in this manual are available on specific models only. ✎ To keep your product in optimum condition, upgrade to the latest firmware on the Samsung web site by USB (samsung.com → Support → Downloads). English - 173...
  • Page 174 (Compatible format: Netscape-bookmarkfile- 1) 21. When you import or export the bookmark, the folder tree is not included. 22. If you import the bookmark file to a Computer from a product, the bookmark file will be saved in “Samsung SmartTV Bookmark” folder.
  • Page 175: Supported Subtitle And Allshare Play File Formats

    Other Information Supported Subtitle and AllShare Play file formats Subtitle External – MPEG-4 timed text (.ttxt) – SAMI (.smi) – SubRip (.srt) – SubViewer (.sub) – Micro DVD (.sub or .txt) – SubStation Alpha (.ssa) – Advanced SubStation Alpha (.ass) –...
  • Page 176 Other Information Supported music file formats File Extension Type Codec Comments *.mp3 MPEG1 Audio Layer 3 *.m4a *.mpa MPEG4 *.aac *.3ga The Seek (jump) function is not supported. *.flac FLAC FLAC Supports up to 2 channel *.ogg Vorbis Supports up to 2 channel WMA 10 Pro supports up to 5.1 channel.
  • Page 177 Other Information Other Restriction ✎ Video content will not play, or not play correctly, if there is an error in the content or the container. ✎ Sound or video may not work if the contents have a standard bit rate/frame rate above the compatible Frame/sec listed in the table above.
  • Page 178: Analogue Channel Teletext Feature

    Other Information Analogue Channel Teletext Feature The index page of the Teletext service gives you information on how to use the service. For Teletext information to be displayed correctly, channel reception must be stable. Otherwise, information may be missing or some pages may not be displayed.
  • Page 179: Installing The Wall Mount

    We do not advice you to do it yourself. Samsung Electronics is not responsible for any damage to the product or injury to yourself or others if you elect to install the TV on your own.
  • Page 180: Anti-Theft Kensington Lock

    Refer to the manual provided with the Kensington Lock for additional information on proper use. The Kensington Lock is not supplied by Samsung. ✎ Please find a “K” icon on the rear of the product. The Kensington slot is beside the “K”...
  • Page 181: Connecting To A Common Interface Slot (Your Product Viewing Card Slot)

    Other Information Connecting to a COMMON INTERFACE slot (Your product viewing Card Slot) Using the “CI or CI+ CARD” To watch paid channels, the “CI or CI+ CARD” must be inserted. • If you don’t insert the “CI or CI+ CARD”, some channels will display the message “Scrambled Signal”.
  • Page 182: Assembling The Cables

    Other Information Assembling the Cables Use the Cable Holder to hide the cables behind the stand. ✎ The colour and the appearance may differ depending on the product, and the specifications are subject to change without prior notice to improve the performance. Storage and Maintenance If a sticker was attached to the product screen, some debris can remain after you remove the sticker.
  • Page 183: Licence

    Other Information Licence TheatreSound HD, SRS and symbol are trademarks of SRS Labs, Inc. TheatreSound HD technology is incorporated under licence form SRS Lab, Inc. Manufactured under licence from Dolby Laboratories. Dolby and the double-D symbol are trademarks of Dolby Laboratories. Manufactured under licence under U.S.
  • Page 184: Specifications

    Other Information Specifications Temperature : 10°C~ 40°C Operating Humidity : 10 % ~ 80 %, non-condensing Environmental considerations Temperature : -20°C ~ 45°C Storage Humidity : 5 % ~ 95 %, non-condensing Tilt -1° (±1°) ~ 20° (±1°) Analogue: B/G, D/K, L, I (Depending on your country selection) TV System Digital: DVB-T(550EW, 551EW)/DVB-T2(550EX, 551EX)/DVB-C Analogue: PAL, SECAM, NTSC-4.43, NTSC-3.58, PAL60...
  • Page 185: Index

    Colour Space Anti-theft Kensington Lock Colour Tone HDMI Black Level Anynet+ (HDMI-CEC) Configuring the Smart Hub with Settings Audio Delay 38, 63 Contact Samsung Audio Format 38, 62 Keyboard Options Contrast 33, 54 Automatic Wired Network Kids Setup Create your profile...
  • Page 186 WPS(PBC) Network Setup Reset Sound 39, 64 RGB Only Mode The Wired Network Connection Your Video The Wireless Network Connection Samsung Apps Numbers Time Samsung MagicAngle 10p White Balance Tint (G/R) Schedule Manager 15, 46 To create a family group...
  • Page 187 Contact SAMSUNG WORLDWIDE If you have any questions or comments relating to Samsung products, please contact the SAMSUNG customer care centre. Country Customer Care Centre Web Site ALBANIA 42 27 5755 AUSTRIA 0810 - SAMSUNG (7267864, € 0.07/min) www.samsung.com BELGIUM 02-201-24-18 www.samsung.com/be (Dutch)

This manual is also suitable for:

Syncmaster tb550Syncmaster tb551Syncmaster t27b551ew

Table of Contents