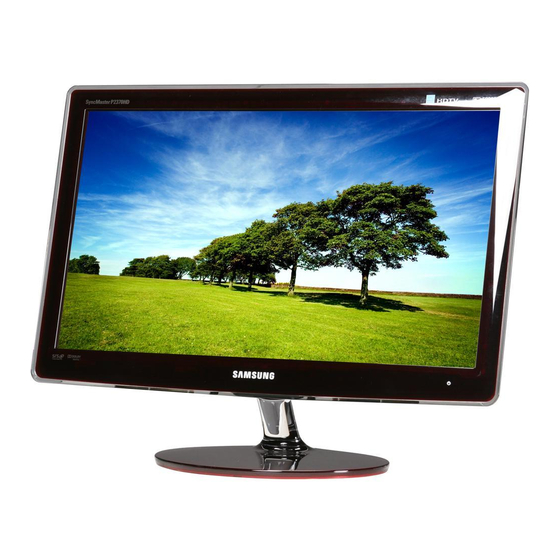
Samsung P2370HD - Full 1080p HDTV LCD Monitor User Manual
User manual (user manual) (ver.1.0) (english, spanish)
Hide thumbs
Also See for P2370HD - Full 1080p HDTV LCD Monitor:
- User manual (72 pages) ,
- Manual del usuario (66 pages) ,
- Quick start manual (53 pages)
Table of Contents
Advertisement
Available languages
Available languages
Quick Links
Contact SAMSUNG WORLDWIDE
If you have any questions or comments relating to Samsung products, please contact the SAMSUNG customer
care center.
Contacte con SAMSUNG WORLDWIDE
Si tiene cualquier comentario o pregunta referentes a los productos Samsung, póngase en contacto con el centro
de atención al cliente de SAMSUNG.
Customer Care
Country
Center
1-800-
U.S.A
SAMSUNG
www.samsung.com/us
(726-7864)
1-800-
CANADA
SAMSUNG
www.samsung.com/ca
(726-7864)
Web Site
Address
Samsung Electronics America, Inc.
105 Challenger Road Ridgefield Park, NJ
07660-0511
Samsung Electronics Canada Inc.,
Customer Service 55 Standish Court
Mississauga, Ontario L5R 4B2 Canada
Samsung Electronique Canada Inc.,
Service à la Clientèle 55 Standish Court
Mississauga, Ontario L5R 4B2 Canada
BN68-02280C-04
SyncMaster P2370HD P2570HD
LCD TV MONITOR
user manual
imagine the possibilities
Thank you for purchasing this Samsung product.
To receive more complete service, please
register your product at
www.samsung.com/register
Model
Serial No
For more information on the operating procedures,
refer to the CD manual
.
.
Advertisement
Chapters
Table of Contents
Troubleshooting

Related Manuals for Samsung P2370HD - Full 1080p HDTV LCD Monitor


Summary of Contents for Samsung P2370HD - Full 1080p HDTV LCD Monitor
-
Page 1: User Manual
If you have any questions or comments relating to Samsung products, please contact the SAMSUNG customer care center. Contacte con SAMSUNG WORLDWIDE Si tiene cualquier comentario o pregunta referentes a los productos Samsung, póngase en contacto con el centro de atención al cliente de SAMSUNG. Customer Care... - Page 2 Displaying still images from Video games and PC for longer than a certain period of time may produce partial after-images. To prevent this effect, reduce the ‘brightness’ and ‘contrast’ when displaying still images. © 2009 Samsung Electronics Co., Ltd. All rights reserved.
-
Page 3: Table Of Contents
CONTENTS GENERAL INFORMATION PICTURE CONTROL ■ Accessories ..........2 ■ Configuring the Picture Menu (TV / AV / ■ Viewing the Control Panel ......2 Component / HDMI )........15 ■ Viewing the Connection Panel ..... 3 ■ Using Your TV as a Computer (PC) Display .. -
Page 4: General Information
GENERAL INFORMATION Accessories ¦ Please make sure the following items are included with your LCD TV. If any items are missing, contact your dealer. Remote Control & Batteries (AAA x 2) (Not available in all locations) / Power Cord / Cleaning Cloth / User Manual (CD, Book) / Quick Setup Guide / Warranty Card (Not available in all locations) / Cable holding ring / Stand Body / Stand Base The items color and shape may vary depending on the model. -
Page 5: Viewing The Connection Panel
Viewing the Connection Panel ¦ [TV Rear Panel] HDMI/PC DVI-D IN /DVI-D PC IN AUDIO IN ANT IN HDMI IN DIGITAL AUDIO OUT (OPTICAL) - AUDIO - VIDEO SERVICE AV IN The product color and shape may vary depending on the model. 1 DVI-D IN –... -
Page 6: Remote Control
Remote Control ¦ You can use the remote control up to a distance of about 23 feet from the TV. The performance of the remote control may be affected by bright light. The product color an shape may vary depending on the model. 1 POWER:Turns the TV on and @ TV: Selects the TV mode off. -
Page 7: Connections
CONNECTIONS Connecting VHF and UHF Antennas ¦ If your antenna has a set of leads that look like the diagram to the right, see ‘Antennas with 300 Ω Flat Twin Leads’ below. If your antenna has one lead that looks like the diagram to the right, see ‘Antennas with 75 Ω... -
Page 8: Connecting Cable Tv
Connecting Cable TV ¦ To connect to a cable TV system, follow the instructions below. ANT IN Cable without a Cable Box Plug the incoming cable into the ANT IN terminal on the back of the TV. Because this TV is cable-ready, you do not need a cable box to view unscrambled cable channels. -
Page 9: Connecting A Dvd / Blu-Ray Player / Satellite Receiver (Set-Top Box) Via Hdmi
Connecting a DVD / Blu-Ray player / Satellite receiver (Set-Top Box) via HDMI ¦ This connection can only be made if there is an HDMI Output connector on the external device. DVD / Blu-Ray player / Satellite receiver (Set-Top Box) Rear Panel TV Rear Panel HDMI/PC HDMI/PC... -
Page 10: Connecting A Dvd / Blu-Ray Player / Satellite Receiver (Set-Top Box) Via Dvi
Connecting a DVD / Blu-Ray player / Satellite receiver (Set-Top Box) via DVI ¦ This connection can only be made if there is a DVI Output connector on the external device. TV Rear Panel DVD / Blu-Ray player / HDMI/PC DVI-D IN DVI-D IN /DVI-D... -
Page 11: Connecting A Digital Audio System
Connecting a Digital Audio System ¦ The rear panel jacks on your TV make it easy to connect a Digital Audio System (Home theater/ Receiver) to your TV. TV Rear Panel Digital Audio System HDMI/PC HDMI/PC DVI-D IN DVI-D IN /DVI-D /DVI-D PC IN... - Page 12 Using the DVI Cable TV Rear Panel HDMI/PC DVI-D IN /DVI-D PC IN AUDIO IN ANT IN HDMI/PC DVI-D IN DVI-D IN /DVI-D PC IN AUDIO IN ANT IN ANT IN HDMI IN DIGITAL AUDIO OUT (OPTICAL) - AUDIO - VIDEO SERVICE AV IN...
-
Page 13: Operation
OPERATION Turning the TV On and Off ¦ Press the POWER P button on the remote control. You can also use the P button on the TV. Plug & Play Feature ¦ When the TV is initially powered on, basic settings proceed automatically Plug &... -
Page 14: Channel Control
1. Press the MENU button to display the menu. Press the ▲ or ▼ button to select “Setup”, then press the E button. 2. Press the E button again to select “Plug & Play”. For further details on setting up options. CHANNEL CONTROL The “... -
Page 15: Managing Channels
Managing Channels ¦ Using this menu, you can add / delete or set favorite channels and use the program guide for digital broadcasts. All Channels „ ♥ TV #8 Shows all currently available channels. Added Channels „ 13-1 ♥ TV #3 Alice’s Adventures in Wonderland Shows all added channels. -
Page 16: Channel List Option Menu (In Programmed)
The ♥ symbol will be displayed and the channel will be set as a favorite. All favorite channels will be shown in the Favorite menu. Timer Viewing „ If you reserve a program you want to watch, the channel is automatically switched to the reserved channel in the Channel List;... -
Page 17: Picture Control
PICTURE CONTROL Configuring the Picture Menu (TV / AV / Component / HDMI ) ¦ Mode ❑ You can select the type of picture which best corresponds to Mode : Standard ► your viewing requirements. Backlight Dynamic „ Contrast : 95 Selects the picture for increased definition in a bright room. Brightness : 45 Sharpness : 50... - Page 18 Zoom2 U Move 16:9 Zoom1 U Move 16:9 Zoom1 Zoom2 Wide Fit U Move Screen Fit Wide Fit Screen Fit Temporary image retention may occur when viewing a static image on the set for more than two hours. After selecting “ Zoom1”, “Zoom2”...
-
Page 19: Using Your Tv As A Computer (Pc) Display
However, even if your actual screens look different, the same basic set-up information will apply in almost all cases. (If not, contact your computer manufacturer or Samsung Dealer.) 1. First, click on ‘Control Panel’ on the Windows start menu. -
Page 20: Setting Up The Tv With Your Pc
Setting up the TV with your PC ¦ Preset: Press the SOURCE button to select PC mode. MagicBright : Entertain / Internet / Text / Dynamic Contrast / Custom ❑ MagicBright is a feature providing optimum viewing Brightness : 45 environment depending on the contents of the image you Sharpness : 50... - Page 21 Size: 16:9 / 4:3 „ O Alternately, you can press the P.SIZE button on the remote control repeatedly to change the picture size. 16:9 : Sets the picture to 16:9 wide mode. 4:3 : Sets the picture to 4:3 normal mode. Reset : Reset Picture Mode / Cancel ❑...
-
Page 22: Sound Control
SOUND CONTROL Configuring the Sound Menu ¦ Mode → Standard / Music / Movie / Clear Voice / ❑ Custom Mode : Custom ► You can select a sound mode to suit your personal preferences. Equalizer SRS TruSurround HD : Off Equalizer ❑ Preferred Language : English The sound settings can be adjusted to suit your personal Multi-Track Sound... -
Page 23: Setup
Speaker Select ❑ Used to listen to the sound of the TV Speakers. When you watch TV with it connecting to a Home theater, turn the TV speakers off so you can listen to sound from the Home theater’s (external) speakers. External Speaker: Used to listen to the sound of the External (Home Theater) Speakers. - Page 24 ● Clock Set You can set the current time manually. This function is only available when “ Clock Mode” is set to “Manual”. You can set the month, day, year, hour and minute directly by pressing the number buttons on the remote control.
- Page 25 V-Chip ❑ The V-Chip feature automatically locks out programs that are deemed inappropriate for children. The user must enter a PIN (personal ID number) before any of the V-Chip restrictions are set up or changed. N V-Chip” function is not available in HDMI, Component or PC mode. “...
- Page 26 The V-Chip will automatically block any category that is ‘More restrictive’. For example, if you block G category, then PG, 14+ and 18+ will automatically be blocked also. Canadian French „ ● : General ● 8 ans+ : Programming generally considered acceptable for children 8 years and over to watch on their own.
- Page 27 How to Reset the TV after the V-Chip Blocks a Channel (“Emergency Escape”) Received Rating: TV-14/NL If the TV is tuned to a restricted channel, the V-Chip will block it. The screen will go blank and the following message will appear: This channel is blocked by a Parental Lock.
-
Page 28: Input / Support
You can turn on/off the LED on the front of monitor according to the situation. Use it for saving power or when the LED dazzles your eyes. Light Level ❑ Use to adjust the light level i.e., the brightness of the light. Melody → Off / Low / Medium / High ❑... -
Page 29: Configuring The Support Menu
ANT IN ● : If during the sound test you can hear sound only from one speaker or not at all, select yes. There may be a problem with the TV. Contact Samsung’s call center for assistance. COMPONENT IN ●... -
Page 30: Anynet
VIDEO AV IN The Anynet + system can be used only with Samsung devices that have the Anynet + feature. To be sure your Samsung device has this feature, check if there is an Anynet + logo on it. To connect to a TV... - Page 31 To connect to Home Theater DIGITAL AUDIO OUT (OPTICAL) HDMI IN Home Theater Anynet + Device HDMI 1.3 Cable Optical Cable HDMI 1.3 Cable 1. Connect the HDMI IN jack on the TV and the HDMI OUT jack of the corresponding Anynet + device using an HDMI cable.
-
Page 32: Setting Up Anynet
Setting Up Anynet ¦ Press the TOOLS button to display the Tools menu. You can also display Anynet + menu by selecting Tools → Anynet + Anynet (HDMI-CEC) ► (HDMI-CEC). Setup ❑ + (HDMI-CEC) → Off / On Anynet „ To use the Anynet + Function, Anynet + (HDMI-CEC) must be set to On. - Page 33 Anynet + Menu The Anynet + menu changes depending on the type and status of the Anynet + devices connected to the TV. Anynet + Menu Description Anynet + mode changes to TV broadcast mode. View TV Shows the Anynet + device list. Device List Shows the connected device menus.
-
Page 34: Troubleshooting For Anynet
Troubleshooting for Anynet ¦ Problem Possible Solution Anynet + does not work. + device. The Anynet + system ● Check if the device is an Anynet supports Anynet + devices only. ● Connect only one receiver (home theater). + device power cord is properly connected. ●... -
Page 35: Appendix
APPENDIx Troubleshooting ¦ If the TV seems to have a problem, first try this list of possible problems and solutions. If none of these troubleshooting tips apply, call Samsung customer service at 1-800-SAMSUNG. Problem Possible Solution Poor picture. Try another channel. / Adjust the antenna. / Check all wire connections. - Page 36 Problem Possible Solution Ghosting on picture. This is sometimes caused by compatibility issues with your cable box. Try connecting Component cables instead. Screen is black and power indicator On your computer check: Power, Signal Cable. light blinks steadily. The TV is using its power management system. Move the computer's mouse or press any key on the keyboard.
-
Page 37: Wall Mount Kit Specifications (Vesa)
Samsung is not liable for these kinds of accidents. Samsung is not liable for product damage or personal injury when a non-VESA or non-specified wall mount is used or the consumer fails to follow the product installation instructions. -
Page 38: Specifications
Specifications ¦ Model Name P2370HD P2570HD Screen Size 23 inches 24.6 inches Diagonal (58 cm) (62 cm) 509.76 mm(H) x 286.74 mm(V) 543.46 mm (H) X 305.69 mm (V) ( 21.40 inches X 12.04 inches) Display area ( 20.06 inches X 11.29 inches) 0.2655 mm(H) x 0.2655 mm(V) 0.283 mm (H) X 0.283 mm (V) Pixel Pitch... - Page 39 This page is intentionally left blank.
- Page 40 Tenga cuidado en la selección y duración de los formatos de televisión utilizados para la visualización. La garantía limitada de Samsung no cubre el envejecimiento desigual de la LCD como resultado de la selección y uso de formatos, así como otras imágenes retenidas.
- Page 41 CONTENIDO INFORMACIóN GENERAL CONTROL DE LA IMAGEN ■ Accesorios ........... 2 ■ Control de la imagen(TV / AV / Componente ■ Aspecto general del panel de control ..2 / HDMI ) ............. 15 ■ Aspecto general del panel de conexiones ..
-
Page 42: Información General
INFORMACIóN GENERAL Accesorios ¦ Compruebe que las opciones siguientes se incluyen con su TV LCD. Si falta alguna opción, póngase en contacto con el proveedor. Mando a distancia & Pilas (AAA x 2) (No disponible en todos los lugares) / Cable de alimentación / Paño de limpieza / Manual del usuario (CD, libro) / Guía de configuración rápida / Tarjeta de garantía (No disponible en todos los lugares) / Anillo de sujeción del cable / Cuerpo del soporte / Base del soporte... -
Page 43: Aspecto General Del Panel De Conexiones
Aspecto general del panel de conexiones ¦ [Panel posterior del TV] HDMI/PC /DVI-D DVI-D IN PC IN AUDIO IN ANT IN HDMI IN DIGITAL AUDIO OUT (OPTICAL) - AUDIO - VIDEO SERVICE AV IN El color y la forma del producto pueden variar según el modelo. 1 DVI-D IN –... -
Page 44: Mando A Distancia
Mando a distancia ¦ Puede utilizar el mando a una distancia del televisor de hasta 21 metros. El exceso de luz puede influir en el rendimiento del mando a distancia. El color y la forma del producto pueden variar según el modelo. 1 POWER:Enciende o apaga el ! MTS:Pulse para elegir programas mono, estéreo... -
Page 45: Conexiones
CONExIONES Conexión de antenas de VHF y UHF ¦ Si su antena tiene un conjunto de cables con este aspecto, consulte ‘Antenas de par de cables planos de 300 Ω’ a continuación. Si la antena tiene un cable como el que se muestra en el diagrama de la derecha, consulte “Antenas con cables coaxiales de 75 ohmios”. -
Page 46: Conexión De Tv Por Cable
Conexión de TV por cable ¦ Para conectar a un sistema de TV por cable, siga estas ANT IN instrucciones. TV por cable sin decodificador Conecte el cable de entrada en el terminal de la antena ANT IN de la parte posterior del TV. Dado que el TV está... -
Page 47: Conexión De Un Reproductor De Dvd O Receptores De Televisión Por Cable / Satélite (Decodificadores) A Través De Hdmi
Conexión de un reproductor de DVD o receptores de televisión por cable / satélite (decodificadores) a través de HDMI ¦ Solo es aplicable si hay un conector de salida de HDMI en el dispositivo externo. DVD o receptores de televisión por cable / [Satellite receiver (Set-top Box) Panel posterior del TV rear Panel HDMI/PC HDMI/PC DVI-D IN DVI-D IN /DVI-D /DVI-D PC IN... -
Page 48: Conexión De Un Reproductor De Dvd O Receptores De Televisión Por Cable / Satélite (Decodificadores) A Través De Dvi
Conexión de un reproductor de DVD o receptores de televisión por cable / satélite (decodificadores) a través de DVI ¦ Solo es aplicable si hay un conector de salida de DVI en el dispositivo externo. Panel posterior del TV DVD o receptores de HDMI/PC DVI-D IN DVI-D IN /DVI-D PC IN PC IN AUDIO IN televisión por cable / ANT IN ANT IN satélite (decodificador) -
Page 49: Conexión De Un Sistema De Audio Digital
Conexión de un sistema de audio digital ¦ Los terminales del panel posterior del televisor facilitan la conexión de un sistema de audio digital (Home Cinema/receptor) al televisor. Panel posterior del TV HDMI/PC HDMI/PC Sistema de audio digital DVI-D IN DVI-D IN /DVI-D /DVI-D... - Page 50 Uso del cable DVI Panel posterior del TV HDMI/PC DVI-D IN /DVI-D PC IN AUDIO IN ANT IN HDMI/PC /DVI-D DVI-D IN DVI-D IN PC IN AUDIO IN ANT IN ANT IN HDMI IN DIGITAL AUDIO OUT (OPTICAL) - AUDIO - VIDEO HDMI IN HDMI IN...
-
Page 51: Funcionamiento
FUNCIONAMIENTO Encendido o apagado del TV ¦ Pulse el botón POWER P del mando a distancia. También puede usar el botón P del televisor. Función Plug & Play ¦ Cuando se enciende el televisor por primera vez, se configuran seguidos y automáticamente dos ajustes básicos del usuario. -
Page 52: Control De Los Canales
1. Pulse el botón MENU para ver el menú. Pulse el botón ▲ o ▼ para seleccionar Configuración y, a continuación, pulse el botón E. 2. Pulse de nuevo el botón E para seleccionar Plug & Play. La función Plug & Play está disponible sólo en el modo TV. CONTROL DE LOS CANALES Configuración del menú de canales ¦... -
Page 53: Gestión De Los Canales
Gestión de los canales ¦ Con este menú puede agregar y borrar los canales o configurarlos como favoritos y usar la guía de programas de las Aire emisoras digitales. Aire ♥ TV #8 Todos los canales „ Aire Muestra todos los canales disponibles actualmente. Aire Canales agregados „... -
Page 54: Menús De Opciones De La Lista De Canales (En Grabación Con Temporizador)
Pulse el botón TOOLS para ver el menú Herramientas. También puede añadir (o borrar) canales favoritos seleccionando Herramientas → Agregar a Favoritos (o Borrar de Favoritos). Se mostrará el símbolo ♥ y el canal se configurará como favorito. Todos los canales favoritos se mostrarán en el menú Favoritos. - Page 55 CONTROL DE LA IMAGEN Control de la imagen(TV / AV / Componente / HDMI ) ¦ Modo ❑ Puede seleccionar el tipo de imagen que mejor cumpla sus Modo : Normal ► requisitos de visualización. Luz de fondo Dinámico „ Contraste : 95 Selecciona la visualización con una definición mejorada, en Brillo...
- Page 56 ● 4:3 : Establece la imagen en modo normal 4:3. ● Ajuste a pantalla: Use esta función para ver toda la imagen sin cortes cuando se reciban señales de HDMI (720p/1080i/1080p), Componente (1080i/1080p) o DTV (1080i). 16:9 Zoom1 U Mover Zoom2 U Mover 16:9 Zoom1...
-
Page 57: Uso Del Televisor Como Una Pantalla De Ordenador (Pc)
(En caso contrario, póngase en contacto con el fabricante del ordenador o con el distribuidor de Samsung.) 1. Primero, haga clic en ‘Panel de control’ en el menú Inicio de Windows. -
Page 58: Ajuste Del Televisor Con El Ordenador
Ajuste del televisor con el ordenador ¦ Preselección: Pulse el botón SOURCE para seleccionar el modo PC. MagicBright : Ocio / Internet / Texto / Contraste dinám. / Personal. ❑ MagicBright es una función que proporciona un entorno Brillo : 45 de visualización óptimo, dependiendo del contenido de la Definición : 50... - Page 59 O Alternativo, pulse el botón P.SIZE del mando a distancia de forma repetida para seleccionar uno de los ajustes de tamaño de imagen. 16:9 : Establece la imagen en modo panorámico 16:9. 4:3 : Establece la imagen en modo normal 4:3. Reinicio de la imagen → Reinic.
-
Page 60: Control De Sonido
CONTROL DE SONIDO Configuración del menú de sonido ¦ Modo → Normal / música / Cine / Voz clara / Favorito ❑ Puede seleccionar un modo de sonido que se adapte a sus Modo : Favorito ► preferencias personales. Ecualizador Ecualizador ❑ Trusurround SRS HD : Apagado Es posible ajustar los parámetros del sonido según sus Idioma preferido : Inglés preferencias personales. -
Page 61: Configuración
Altavoz externo: Utiliza los altavoces externos (Home Cinema) para la salida del sonido. „ Altavoz de TV: Utiliza los altavoces del TV para la salida del sonido. „ Si selecciona Altavoz externo en el menú Seleccionar altavoz, se limita la configuración del sonido. - Page 62 ● Zona Tiempo Seleccione la zona horaria. Esta función sólo está disponible si Modo Reloj está configurado como Auto. ● Horario de Verano (Horario de verano) → Apagado/Encendido/Auto Activa o desactiva la función del horario de verano. Esta función sólo está disponible si Modo Reloj está configurado como Auto. Temporizador „...
- Page 63 V-Chip ❑ La función V-Chip bloquea automáticamente la programación que se considera inadecuada para los niños. El usuario debe escribir un número PIN (número de identificación personal) antes de establecer o cambiar las restricciones de V-Chip. La función V-Chip no está disponible en los modos HDMI, Componente o PC. El código PIN predeterminado para un televisor nuevo es ‘0-0-0-0’.
- Page 64 ● : La programación contiene temas y contenidos que puede que no sean adecuados para menores de 14 años. ● : Programación para adultos. El V-Chip bloqueará automáticamente cualquier categoría que sea ‘More restrictive’. Por ejemplo, si bloquea la categoría G, también se bloquearán automáticamente PG, 14+ y 18+. Francés Canadiense „...
- Page 65 Cómo reiniciar el televisor cuando el V-Chip bloquea un canal (Escape de emergencia) Si el televisor sintoniza un canal restringido, el V-Chip lo Clasificación recibida : TV-14/NL bloqueará. La pantalla quedará en blanco y aparecerá el Canal bloqueado por el Control Paterno. Introduzca PIN para siguiente mensaje: desbloquear.
-
Page 66: Entrada / Soporte Técnico
Efecto de luz → Apagado / Encendido ❑ Puede encender o apagar el LED del frontal del monitor según la situación. Utilice esta función para ahorrar energía o cuando el LED le deslumbre. Nivel de luz ❑ Use esta función para ajustar el nivel de luz (el brillo de la luz). Melodía → Apagado/Bajo/Medio/Alto ❑... -
Page 67: Configuración Del Menú De Ayuda
COMPONENT IN COMPONENT IN Actualización del software ❑ Samsung puede ofrecer actualizaciones para el firmware del HDMI IN HDMI IN - AUDIO - - AUDIO - televisor en el futuro. Póngase en contacto con el centro de... -
Page 68: Anynet
Conexión de dispositivos Anynet ¦ HDMI IN - AUDIO - Anynet + es una función que permite controlar con el mando a distancia del televisor Samsung todos DIGITAL AUDIO OUT los dispositivos de Samsung conectados que sean compatibles con Anynet + . - Page 69 Para conectar al sistema Home Cinema DIGITAL AUDIO OUT (OPTICAL) HDMI IN Home Cinema Dispositivo Anynet + Cable HDMI 1.3 Cable óptico Cable HDMI 1.3 1. Conecte los terminales HDMI IN del televisor y el terminal HDMI OUT del dispositivo Anynet + correspondiente mediante un cable HDMI.
-
Page 70: Configuración De Anynet
Configuración de Anynet ¦ Pulse el botón TOOLS para ver el menú Herramientas. También puede mostrar el menú Anynet + seleccionando Herramientas → Anynet + (HDMI-CEC). Anynet (HDMI-CEC) ► Configuración ❑ + (HDMI-CEC) → Apagado/Encendido Anynet „ Para usar la función Anynet + , Anynet + (HDMI-CEC) debe estar activado. - Page 71 Menú Anynet + El menú Anynet + cambia según el tipo y el estado de los dispositivos Anynet + conectados al televisor. Menú Anynet + Descripción El modo Anynet + cambia al modo de emisión de TV. Ver TV Muestra la lista de dispositivos de Anynet + . Lista Disp.
-
Page 72: Solución De Problemas De Anynet
Solución de problemas de Anynet ¦ Problema Posible Solución Anynet + no funciona. + . El sistema ● Compruebe si el dispositivo es un dispositivo Anynet Anynet + sólo admite dispositivos Anynet + . ● Conecte sólo un receptor (sistema Home Cinema). ●... -
Page 73: Apéndice
Si cree que el televisor tiene un problema, compruebe primero esta lista de posibles problemas y soluciones.Si ninguno de los consejos funciona, póngase en contacto con el centro de atención al cliente de Samsung o llame al 1-800-SAMSUNG (726-7864). Problema Posible Solución... - Page 74 Problema Posible Solución Los subtítulos para sordos no Cuando se usa un decodificador de cable o satélite, la opción de los subtítulos para funcionan. sordos se debe configurar en el decodificador, no en el televisor. Las imágenes se ven con nieve. Quizás se necesite actualizar el firmware.
-
Page 75: Especificaciones Del Equipo De Montaje En La Pared (Vesa)
No use tornillos que no cumplan las especificaciones de tornillos estándar VESA. No apriete excesivamente los tornillos, ya que podría dañar el producto o provocar la caída de éste con riesgo de causar lesiones personales. Samsung no se hace responsable de este tipo de accidentes. -
Page 76: Especificaciones
Especificaciones ¦ Nombre del modelo P2370HD P2570HD Tamaño de pantalla 23 pulg 24,6 pulg Diagonal (58 cm) (62 cm) Área de visualización 509,76 mm(H) x 286,74 mm(V) 543,46 mm (H) X 305,69 mm (V) Separación entre píxeles 0,2655 mm(H) x 0,2655 mm(V) 0,283 mm (H) X 0,283 mm (V) Color de la pantalla 16,7M... - Page 77 Bu sayfa bilerek boş bırakılmıştır.
- Page 78 Bu sayfa bilerek boş bırakılmıştır.
- Page 79 Bu sayfa bilerek boş bırakılmıştır.
Need help?
Do you have a question about the P2370HD - Full 1080p HDTV LCD Monitor and is the answer not in the manual?
Questions and answers