
Subscribe to Our Youtube Channel
Related Manuals for Elmo TT-X1


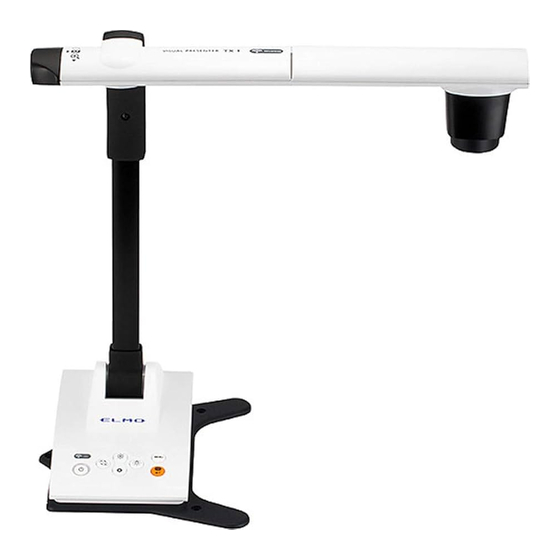
Summary of Contents for Elmo TT-X1
- Page 1 INSTRUCTION MANUAL VISUAL PRESENTER TT-X1 (previously TX-1 and TT-TX1) Please read this instruction manual carefully before using this product.
-
Page 2: Important Safeguards
IMPORTANT SAFEGUARDS Please read all precautions and warnings before using the product. The information is provided to ensure proper operation of this product and will prevent you or others from personal injury or loss of assets. Review the following symbols so that you understand them before reading the rest of the manual. - Page 3 Warning If for any reason smoke comes out of the product, or you notice any unusual odors or sounds, immediately turn off the power switch on the product and then unplug the power plug from the outlet. Continuing to use the product while it is operating unusually could result in a fire or electric shock.
- Page 4 Do not spill water or insert any foreign objects into this product. This could result in a fire or electric shock. Do not use this product in rainy weather, during a snowfall, on the coast, or on a water front. Do not place any heavy objects on the power cable or the AC adapter.
- Page 5 Attention Whenever moving the product, turn off the power switch on the product and then unplug the power plug from the outlet. Move after checking that the external connection cable is disconnected. Otherwise, the cable could be damaged and result in a fire or electric shock. For safety reasons, if this product is not used for a long time, be sure to unplug the power plug from the outlet.
-
Page 6: Before You Use
BEFORE YOU USE ■ Be sure to use the power cable or the AC adapter supplied with the product. Do not use them with other products. ■ Be sure to use the AC adapter applicable to your local power specifications. If the product was sold in Japan, use the AC adapter sold with the product with 100 VAC and 50 or 60 Hz. - Page 7 ■ Do not point the lens directly to the sun. It could degrade the imaging capability. ■ Do not look directly into the LED light. If you look directly into it at close range, your eyes may be injured. ■ If this product is used for longer than the warranty period, its performance and quality may deteriorate due to the lifetime of its parts.
- Page 8 ■ It is prohibited under copyright law to use or copy any part or the whole of this document without our prior written consent. ■ ELMO shall not be liable for any claim for damage or loss of earnings or any claim raised by a third person due to the use, malfunction or repair of this product.
-
Page 9: Handling Precautions
HANDLING PRECAUTIONS The followings are special precautions against mishandling of the product, which may cause serious damages to the product. Pay close attention to them. ②Carrying the product ①Installation Do not place the product on an unstable place or Carry the product by holding the lower slanted surface. -
Page 10: Table Of Contents
■ TABLE OF CONTENTS IMPORTANT SAFEGUARDS ·················································································· 2 BEFORE YOU USE ······························································································ 6 HANDLING PRECAUTIONS ··················································································· 9 ■ TABLE OF CONTENTS ··············································································· 10 ➊ PREPARATION ························································································· 12 ➋ BASIC OPERATIONS ················································································ 13 2-1 DOCUMENT CAMERA·················································································· 13 ■PART NAMES ····························································································· 13 ■OPERATING PANEL ····················································································... - Page 11 3-2 ABOUT WiFi FUNCTION ··············································································· 32 3-3 CONNECTING VIA WiFi ················································································ 33 ➍ ABOUT IMAGE MATE 4 ············································································· 34 4-1 INSTALLING IMAGE MATE 4 ········································································· 34 ■INSTALLATION PROCEDURE ······································································· 34 4-2 USING IMAGE MATE 4 ················································································· 35 ■HOW TO SELECT THE CAMERA ··································································· 35 ■MENU WINDOW OF IMAGE MATE 4 ······························································...
-
Page 12: ➊ Preparation
1 ➊ PREPARATION The items below are included with this product. If any item is missing, contact the dealer from whom you purchased this product. ① ② ③ AC adapter P.19 AC adapter P.19 (For Japan/ North America only) (For Europe only) ④... -
Page 13: ➋ Basic Operations
➋ BASIC OPERATIONS DOCUMENT CAMERA ■PART NAMES Operation of the main unit: P.17 ① ② ③ ⑤ ④ Name ① AF button P.22 ② Zoom dial P.21 ③ LED lighting P.24 ④ Operating panel P.14 ⑤ Rear panel P.15... -
Page 14: Operating Panel
■OPERATING PANEL ⑥ ⑧ ② ④ ⑤ ③ ① ⑦ Mark Name of function Detail of function To turn the power ON/OFF. Power Power ON :LED turns blue ① Power OFF :LED turns red MENU To show/hide the menu on the screen. ②... -
Page 15: Rear Panel And Cable Connection
■REAR PANEL AND CABLE CONNECTION ⑤ ① ② ③ ④ Mark Function ① DC IN 5V To connect the supplied DC power cable. ② USB To connect to a computer via the supplied USB cable. To output digital images. ③ HDMI OUT (HDMI cable is not supplied with this product.)... - Page 16 ② To connect to a computer via the USB cable Connect the supplied USB cable to the USB terminal on the rear panel. Caution Use the supplied USB cable (gray) to connect the TX-1 to a computer. ③ To connect to a device with an HDMI input terminal Connect a commercially available HDMI cable to the HDMI OUT terminal on the rear panel.
-
Page 17: Moving Parts Of The Tx-1
■ MOVING PARTS OF THE TX-1 The camera head of the TX-1 can be moved as shown below. 90° ◆Movable range 180° 64.5° 90° 90° 90° ※Depending on the position of the camera head or the installation place of the TX-1, stable operation may not be possible. -
Page 18: Supplied Accessories
SUPPLIED ACCESSORIES ■IMAGE MATE 4 Image Mate 4 (the controlling software for the TX-1) can be downloaded from Elmo official website. For details of the downloading procedure, refer to “4-1 INSTALLING IMAGE MATE 4” P.34 The following operations can be performed by using Image Mate 4: ・Capture a still image from a live video stream from the TX-1 and save it to your computer... -
Page 19: Shooting Images
SHOOTING IMAGES ■ SETTING UP THE TX-1 Connect the power cable (black) and the AC adapter. Connect the video cable (connected to a projector or monitor) and the AC adapter to the TX-1 respectively. Then connect the power cable (black) to the outlet and setup the TX-1 as shown below. 1. -
Page 20: Turning The Power On/Off
CONNECTING THE POWER CABLE Connect the power cable (black) and the AC adapter. Connect the AC adapter to the DC IN 5V terminal in the rear panel of the TX-1 as shown in the connection diagram above. Then connect the power cable (black) to the outlet. CAUTION Before connecting the TX-1 to other devices, be sure to turn off the power of all the devices. -
Page 21: Adjusting The Size
■ ADJUSTING THE SIZE The display range of the document can be adjusted by rotating the zoom dial. ZOOM-IN : The object can be shown in large size. ZOOM-OUT : The object can be shown in small size. ZOOM-OUT(Shrink) ZOOM-IN(Enlarge) ZOOM-IN ZOOM-OUT Note... -
Page 22: Af(Auto Focus
■AF(AUTO FOCUS) The auto focus works once when the AF button on the operating panel is pressed in One-Push Auto Focus mode. P.27 The auto focus can also be performed by pressing the AF button in the camera head. AF button... -
Page 23: Adjusting The Brightness
■ ADJUSTING THE BRIGHTNESS Press the [ ] button on the operating panel to adjust the image brightness. When the OSD menu is not displayed Brightness+ :The brightness of the image is increased. Brightness- :The brightness of the image is decreased. ※When the OSD menu is displayed, these buttons are used to move the cursor and the brightness adjustment cannot be performed. -
Page 24: Turning The Led On/Off
■TURNING THE LED ON/OFF The LED lighting can be turned ON/OFF by pressing the LED lighting button. LED lighting button CAUTION • To take shots of people, turn the LED lighting OFF. • Make sure that the light from the LED lighting does not shine directly into your eyes. •... -
Page 25: Changing The Output Destination
■CHANGING THE OUTPUT DESTINATION The output destination of the video signal can be changed by the following procedure: MENU ]>[ Settings ]>[ [ ] Output settings Auto :[ MENU ]>[ Settings ]>[ ]>[ Auto ] Output settings →The TX-1 automatically selects the output destination. HDMI:[... -
Page 26: Changing The Settings
CHANGING THE SETTINGS Various settings for the TX-1 can be changed through the OSD menu (characters and icons). ■HOW TO CHANGE THE SETTINGS ①Press the [ ] button on the operating panel to display the OSD menu, and then use the ] buttons to move the cursor to the icon you want to operate or set. -
Page 27: Descriptions Of Each Menu
■ DESCRIPTIONS OF EACH MENU MAIN UNIT [FIRST LAYER] Icon Name Function Camera control To display the setting menu for the camera image. Settings To display the setting menu for various functions. Information To display the setting details. CAMERA CONTROL [SECOND LAYER] Icon Name Selection Item... - Page 28 [SECOND LAYER] SETTINGS Icon Name Selection Factory Function Item Setting To reduce fluorescent light flickering 50Hz Europe/Others due to the power supply frequency. Select the same value as used for the Flickerless 60Hz Japan/U.S power supply frequency. Return ✓ To ON/OFF the digital zoom. Digital zoom Return To automatically change the output...
- Page 29 [SECOND LAYER] INFORMATION Name Description Model TX-1 To display the model name of the camera. Serial ******* To display the serial number of the camera. number Camera FW : *.*.* Version MainFPGA : ******* To display the firmware version of the camera. HeadFPGA :...
-
Page 30: ➌ Advanced Operations
OS or the software. ※Image Mate 4 (the controlling software for the TX-1) and its instruction manual can be downloaded from Elmo official website. For details of Image Mate 4, refer to “➍ ABOUT IMAGE MATE 4”... - Page 31 CAUTION ・ Do not connect/disconnect the USB cable while the TX-1 is in operation. It could cause malfunction. ・ We recommend using the supplied USB cable or commercially available USB 2.0 compliant USB cable. ・ It may take some time to display the image when the video streaming is started or resolution is changed.
-
Page 32: About Wifi Function
ABOUT WiFi FUNCTION The TX-1 is equipped with the WiFi function. The following WiFi modes are available: ・Access Point mode : The TX-1 can be directly connected to a computer in an environment where there is no wireless LAN network. ・Station mode :... -
Page 33: Connecting Via Wifi
CONNECTING VIA WiFi This section explains how to connect the TX-1 to a computer via WiFi. ①Connecting the TX-1 directly to a computer via WiFi using the Access Point mode ②Connecting the TX-1 to a computer through the ICB or third party’s wireless system using the Station mode ①Connecting the TX-1 directly to a computer via WiFi using the Access Point mode 1.Open the WiFi settings of your computer and select the SSID of the TX-1. -
Page 34: ➍ About Image Mate 4
Image Mate 4, and the menu items. For further details, refer to the instruction manual of Image Mate 4. INSTALLING IMAGE MATE 4 ■INSTALLATION PROCEDURE 1.Access the following Elmo official website. http://www.elmousa.com/TX-1 http://elmoeurope.com/en/html/download/02.php 2.Select “Image Mate 4”. -
Page 35: Using Image Mate 4
USING IMAGE MATE 4 Run Image Mate 4 [ ], installed to your computer in the step “4-1 INSTALLING IMAGE MATE 4”. Select the desired camera to display by the following procedure ※The camera will not be recognized when it is not turned on. Turn on the camera. ※The layout (camera type) of the camera selection window is different between when the TX-1 is connected to a computer via the USB cable and when it is connected to a computer via WiFi. -
Page 36: Menu Window Of Image Mate 4
CAUTION If the TX-1 is turned off while WiFi is connected, the TX-1 will automatically reconnect to the same camera when it is started next time. ■MENU WINDOW OF IMAGE MATE 4 This instruction manual briefly explains the feature of Image Mate 4. For details, refer to the instruction manual of Image Mate 4. - Page 37 To pause the image. Click this icon again to resume the Freeze image. Rotate Images To rotate the image by 180°. Live settings To set the resolution, frame rate and image quality. Camera To display a list of connected cameras. Select the camera selection to display.
-
Page 38: ➎ About The Setting Tool
➎ ABOUT THE SETTING TOOL This instruction manual briefly explains downloading / installation procedure of the TX-1 Setting tool. You can find further information of the TX-1 Setting tool in the instruction manual of Image Mate 4, downloaded in the step “➍ ABOUT IMAGE MATE 4”. P.34 For details, refer to the instruction manual of Image Mate 4. -
Page 39: ➏ Others
➏ OTHERS 6-1 SHOOTING FORWARD OR BACKWARD By rotating the camera head you can shoot forward, backward, up, down, left and right. ※For information of the rotatable range of the camera head, refer to P17 “MOVING PARTS OF THE TX-1”. The image will become upside down depending on the direction of the rotation. -
Page 40: Displaying Enlarged Imagesusing A Microscope
DISPLAYING ENLARGED IMAGESUSING A MICROSCOPE By attaching the separately sold microscope attachment lens to a microscope, you can display the enlarged image. ■PROCEDURE ①Change the setting of the TX-1. MENU ]>[ Camera control ]>[ Microscope mode]>[ ON ] [ ②Set the microscope. Place the object you want to view, such as a prepared slide, on the microscope and then look into the microscope to adjust the focus and brightness. -
Page 41: Exiting The Microscope Mode
④Adjust the angle of the microscope and the TX-1 to fit each other. ⑤Adjust the brightness. Adjust the brightness with the mirror or the light on the microscope. ⑥Adjust the display range. ⑦Adjust the focus. ・Depending on the type of eyepiece, you may not be able to view the object clearly even after adjusting the zoom. -
Page 42: Firmware Update Procedure
The firmware of the TX-1 will be updated from time to time. By updating the firmware, you will be able to use new functions. Download the latest firmware from Elmo official website and update the firmware of the TX-1 according to the following procedure. -
Page 43: Changing Ssid And Key
6.Disconnect the USB cable after the copy is completed. 7.When the Power LED starts to flash quickly between red and blue, the firmware update starts. ※The update takes several minutes. (The TX-1 restarts several times during the update process.) 8.The update is complete when the Power LED turns blue. ※Check whether the firmware has been successfully updated to the latest version by going to: “Information”... -
Page 44: Capturing A3 Sized Documents
6-6 CAPTURING A3 SIZED DOCUMENTS The TX-1 can capture images in 3 different angles of view. A3 sized documents (4:3 aspect ratio ①) can be captured. The shooting conditions are as follows:For details about how to change the resolution, refer to “Live Settings”. P.37 ◆A3 sized documents shooting conditions (when not using the zoom) When displaying via WiFi... -
Page 45: ➐ Trouble Shooting
4 ➐ TROUBLE SHOOTING SYMPTOMS AND CONFIRMATION Check the following items. If any abnormality is found, consult the dealer from whom you purchased this product or our nearest branch/office. Symptom Possible cause/remedy ・The cable is not correctly connected. ・The AC adapter is disconnected from the wall outlet. ・The AC adapter is disconnected from the power supply socket of the unit. - Page 46 ・ This may be interference fringes between dots of printed matter and TV scanning lines or CMOS pixels. Changing the shooting range may help the problem. The image is striped. ・ Vertical stripes may appear on an LCD projector image. Manually adjusting the dot clock at the projector side may help the problem.
-
Page 47: ➑ Specifications
5 ➑ SPECIFICATIONS GENERAL Specifications Item Power source DC5V (AC adapter AC100 ~ 240V) Power consumption 7.0W W391.7 x D230.0 x H427.9mm (When setup) Outside dimensions W183.0 x D230.0 x H482.8mm (When folded) Weight Approx. 2.4kg (Main body only) RGB input Mini Dsub 15P connector, female x 1 Output terminal HDMI output terminal x 1 Ext. -
Page 48: Illumination Device
Item Specifications Analog RGB output Analog RGB output 0.7V XGA:1024 × 768 @ 60Hz (p-p) Horizontal frequency: 48.363kHz 75 Ω unbalanced Vertical frequency: 60.004Hz Sync. signal XGA :Negative polarity HDMI output Image output 1080i 720p White balance Auto / Natural light / Fluorescent light / Incandescent light ※1 Brightness control Auto (with level adjustment) / Manual Image mode... -
Page 49: Trademarks And Licenses
TRADEMARKS AND LICENSES 、Image Mate are the registered trademarks of ELMO Co., Ltd. HDMI、 High-Definition Multimedia interface are trademarks or logo and registered trademarks of HDMI Licensing LLC. Wi-Fi is a trademark or registered trademark of the Wi-Fi Alliance. All other company/product names described in this manual are trademarks or registered trademarks of their respective companies.
Need help?
Do you have a question about the TT-X1 and is the answer not in the manual?
Questions and answers