Table of Contents
Advertisement
Quick Links
Operation Manual
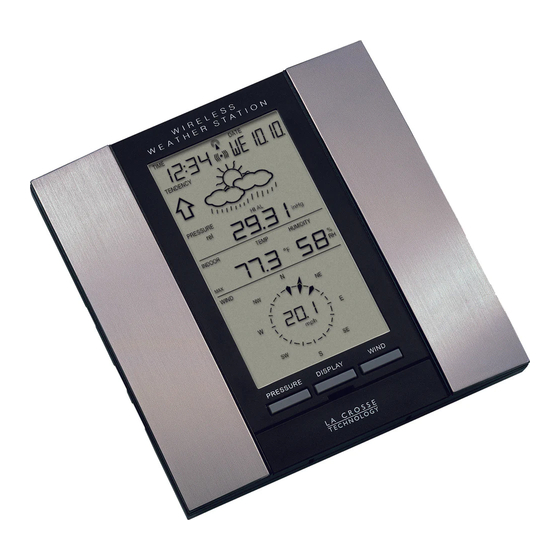
Professional Remote Weather Station
Table of Contents
1.
Introduction. ................................................................................... 2
2.
Intended use. ................................................................................. 2
Weather Station. ............................................................................ 2
System requirements for PC use................................................... 2
Features of the base station. ......................................................... 3
Features of the thermo-hygro sensor. ........................................... 3
Features of the wind sensor .......................................................... 3
Features of the rain sensor............................................................ 3
3.
Safety Notes .................................................................................. 4
4.
Packaged contents ........................................................................ 5
5.
Setting up....................................................................................... 6
6.
Operation using cable connection or wireless 433MHz................. 9
7.
LCD overview .............................................................................. 10
8.
Function test ................................................................................ 11
9.
Mounting ...................................................................................... 12
10.
Resetting & factory settings ......................................................... 14
11.
Function description .................................................................... 16
12.
Operation keys ............................................................................ 19
13.
Basic programming modes .......................................................... 21
14.
MIN/MAX programming modes ................................................... 22
15.
Alarm programming modes ......................................................... 23
16.
Auto-memory for stored values ................................................... 30
17.
Accessories: extensions cables................................................... 30
18.
Changing batteries ...................................................................... 31
19.
Problems and interference with operation ................................... 32
20.
Transmission range ..................................................................... 33
21.
Cleaning and maintenance.......................................................... 33
22.
Specifications .............................................................................. 34
23.
Warranty Information ................................................................... 36
This Operation Manual is part of this product and should be kept in a
safe place for future reference. It contains important notes on setup and
operation.
Please see www.heavyweather.info for a complete IM, FAQ and
downloads of the most current software.
1.
Introduction
Thank you for purchasing this Professional Remote Weather Station.
Designed for everyday use, the weather station will prove to be an asset of
great value for your personal use in the home or office. Please read this
instruction manual thoroughly to fully understand the correct operation of your
Page
weather station and benefit from its unique features.
2.
Intended Use
Weather Station
The base station measures the indoor environment of its surrounding area and
receives weather data from the following three outdoor sensors:
1)
Thermo-Hygro Sensor
2)
Wind Sensor
3)
Rain Sensor
The received data is continuously updated to bring you the latest weather
information on the base station's LCD. The outdoor thermo-hygro sensor is
the main data communication unit since both the wind and rain sensors are
connected to the thermo-hygro sensor for operating power and rely on it to
communicate to the base station. Weather data sent from the thermo-hygro
sensor can be done by wireless 433MHz transmission (up to 100ft in open
space) or by cable connection.
Using the enclosed 6.5ft computer cable and CD-ROM, you can install the
Heavy Weather software to your PC and access the latest weather information
from your PC and upload up to 175 sets of recorded weather data received by
the base station. Recorded data can be used to generate statistics and charts
onto your spreadsheets (175 sets of data is stored in the base even if the PC
is switched OFF). The software itself does not set any limits as to how many
data sets can be transferred to PC.
This weather station is designed to work easily with your PC, simply connect
and disconnect the PC cable at any time.
System Requirements for PC use:
The minimum system requirement for use of this "Heavy Weather" software is:
Operating system: Windows 98 or above
Processor: Pentium 166 MHz or above
RAM: 32MB of RAM or above
Hard disk: 20MB free space
CD-ROM drive
For full details on operation and installation of the "Heavy Weather" software
refer to the PC manual in PDF format on the CD-ROM.
Advertisement
Table of Contents

Related Manuals for La Crosse Technology WS-2315


Summary of Contents for La Crosse Technology WS-2315
-
Page 1: Table Of Contents
Operation Manual Introduction Professional Remote Weather Station Thank you for purchasing this Professional Remote Weather Station. Designed for everyday use, the weather station will prove to be an asset of Table of Contents great value for your personal use in the home or office. Please read this instruction manual thoroughly to fully understand the correct operation of your Page weather station and benefit from its unique features. -
Page 2: Features Of The Base Station
Features of the base station: Safety Notes • Receives and displays the WWVB radio controlled time and date • • Damage caused by failure to comply with this instruction manual will Display of extensive weather data, in all cases with programmable alarm invalidate any guarantee! The manufacturer and supplier will not be held functions for certain weather conditions as well as records of all minimum and maximum values along with time and date of their recordings... -
Page 3: Packaged Contents
Packaged Contents Setting up Before setting up, carefully unpack the contents onto a table or flat surface and First, choose to use the adaptor (included in this set) or batteries for operation. check that the following are complete: Both these methods allow for operation using wireless 433MHz transmission or cable connection between the base station and the sensors and setting up Item: Consisting of:... -
Page 4: Setting Up
Pull away the rain cover of the thermo-hygro sensor to reveal the three sockets (for the wind sensor, rain sensor and the base station) Setting up using batteries: Connect the attached cables of wind and rain sensors to the corresponding sockets of the thermo-hygro sensor by clicking them into place Open the battery cover of the thermo-hygro sensor located below the three sockets and insert 2 x AA, IEC LR6, 1.5V batteries and close the... -
Page 5: Operation Using Cable Connection Or Wireless 433Mhz
Operation using cable connection or wireless 433MHz LCD Overview Cable Connection: The following illustration shows the full segments of the LCD for Using this method of operation will provide interference free transfer of the description purposes only and will not appear like this during normal weather data from the sensors to the base station. -
Page 6: Function Test
Base Station Function test With two foldable legs at the back of the unit, the base station can be placed onto any flat surface or wall mounted at the desired location by the hanging Once the weather station is powered up, perform a function test by checking holes also at the back of the unit. -
Page 7: Resetting & Factory Settings
Mounting the thermo-hygro Sensor Mounting the Rain Sensor Funnel portion Rain Cover Wall Bracket Base portion Main Unit For accurate results, the rain sensor should be securely mounted onto a horizontal surface about 2-3ft above the ground and in an open area away from trees or other coverings where rainfall may be reduced causing inaccurate readings. -
Page 8: Function Description
Do not remove batteries or unplug the AC adaptor of the base station Function Description of the Weather Station otherwise all 175 sets of recorded weather history data for transferring to the PC will be lost (for full details of PC use, please see PC user manual in the After setting up, the following data will be displayed in different sections on the enclosed Heavy Weather CD-ROM). - Page 9 Weather forecasting (LCD Section 1) The three weather icons Sunny, Cloudy and Rainy represent the weather Weather Data (LCD Section 2) forecasting. There are also two weather tendency indicators to show the air Indoor temperature and humidity are displayed simultaneously in this section. pressure tendency either side of the weather icons.
-
Page 10: Operation Keys
- Wind direction - Wind direction display in degrees Operation keys ALARM key - In normal mode to enter the alarm programming mode - In alarm programming mode to select the following The base station has 8 keys for easy operation. Please refer to the following setting modes: table for use and function of each key: Further descriptions of the key - Time alarm setting... -
Page 11: Basic Programming Modes
• If reception has been successful, the received time and date will overwrite the manually set time and date and no further reception is Basic Programming Modes attempted until the following day MIN/MAX Programming Modes Manual Setting modes The manual setting mode allows the user to change several basic settings, MIN/MAX display Mode which is done by accessing one mode after the other simply by pressing the The MIN/MAX Mode provides the user with information about the MIN/MAX... -
Page 12: Alarm Programming Modes
while any of these values are displayed, that particular minimum or maximum Press and hold the SET key to enter the alarm hour time set mode (the record will be reset to current reading together with the current time and date hour digits will flash) and set the desired hour by using the PLUS (+) or with the exception of the following: MINUS (-) keys... - Page 13 2) Continue to press the ALARM key until you reach the indoor humidity high 6) Press ALARM key to confirm and press the MIN/MAX key to return the alarm set mode normal display mode or press the ALARM once more to toggle to another 3) Press and hold the SET key to enter the indoor humidity high setting alarm setting mode.
- Page 14 Pressure high alarm and low alarm setting Storm warning alarm setting 1) Press the ALARM key to enter the normal time alarm Unlike the other weather alarms, the storm warning alarm is set by entering 2) Continue to press the ALARM key until you reach the pressure high alarm the main manual setting mode as follows: set mode 1) Press the SET key to enter the manual setting mode...
-
Page 15: Auto-Memory For Stored Values
When a set weather alarm condition has been activated, that particular alarm Auto memory for stored values will sound and flash for approximately 2 minutes but will continue to flash until weather conditions have become more steady. The base station has a memory back up system, which is used to memorize user-defined settings for when the batteries are changed or if a power failure Weather Alarms occurs. -
Page 16: Changing Batteries
For best results, do not to add more than 32ft of extension cable from item to item onto the existing cable lengths as this may reduce reception levels. Problems and interference with operation Again, reception and interference levels will greatly depend on the surrounding environment at your point of mounting. -
Page 17: Transmission Range
Transmission Range Specifications The transmission distance from the thermo-hygro sensor to the base station in Outdoor data open space under optimum conditions is 100ft. Although the signal Transmission Distance in Open Field 100ft max. transmission may travel though solid surfaces or objects, the following points Temperature Range -21.8°F to +157.8°F (show OFL”... -
Page 18: Warranty Information
Measuring Range Air Pressure 8.85 inHg to 32.45 inHg (Standard air pressure at an altitude of 30,000 ft La Crosse Technology provides a 1-year warranty on this weather is around 8.85 inHg) station. Contact La Crosse Technology immediately upon discovery of Resolution 0.01 inHg...
Need help?
Do you have a question about the WS-2315 and is the answer not in the manual?
Questions and answers