Table of Contents
Advertisement
Quick Links
Advertisement
Table of Contents

Subscribe to Our Youtube Channel
Related Manuals for LG VCARPETX


Summary of Contents for LG VCARPETX
- Page 1 OWNER’S MANUAL CLEANING ROBOT Before using, please carefully read the Safety Precautions pages to allow for safe operation of the product. After reading the operation manual, please keep it in an easily accessible location. VCARPETX VPARQUET VHOMBOT3 www.lg.com...
- Page 2 FEATURES Corner Master By having adopted a brand new concept design that is appropriate for walls, the Robot Cleaner's cleaning performance is incredibly efficient. Learning Mode The Robot Cleaner is capable of memorizing the cleaning environment via its Smart Operation feature for smarter cleaning. Turbo Mode In the "Turbo"...
-
Page 3: Table Of Contents
CONTENTS BEFORE USING ADDITIONAL INFORMATION Safety precautions Troubleshooting 35~37 Included with product Before you call for service Parts description 9~10 Button functions Display status information REFERENCE Before you start Product specifications Overview Open source software notice METHOD OF USE How to install the home station How to turn the Robot Cleaner power supply on &... -
Page 4: 2~5 Safety Precautions
3. If the supply cord is damaged, it must be replaced by LG Electronics Service Agent in order to avoid a hazard 4. This appliance can be used by children aged from 8 years and above and persons with reduced physical,... - Page 5 Failure to follow this warning can cause electric shock, fire or product failure. If the power cord is broken, do not plug it in. Take the product to an LG Electronics Authorised service repairer. Always use a dedicated power Do not place the home station and the Robot Cleaner near a heating outlet with a 10 amp rating.
- Page 6 Doing so can cause product failure. Do not put any water or detergent on the Robot Cleaner. If liquids get inside of the Robot Cleaner, turn off the power supply and contact an LG Electronics sales agent or customer care center.
- Page 7 SAFETY PRECAUTIONS CAUTION If the floor is wet or has wet spots, When the robot cleaner is operating, it may hit the chair leg, wipe them up before using the Robot Cleaner. Do not use the desk leg, table leg or other narrow pieces of furniture.
-
Page 8: Included With Product
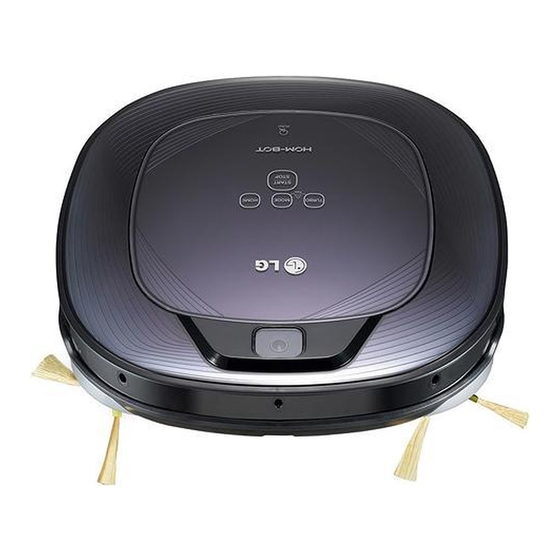
This guide briefly describes how to use the Cleaning Robot. allow for safe operation of the product. After reading the operation For more detail, please refer to the user manual manual, please keep it in an easily accessible location. www.lg.com www.lg.com Cleaning Tool Dust bin filter (spare) - Page 9 PARTS DESCRIPTION - ROBOT CLEANER Plan view Upper camera sensor Dust bin cover Display & Manipulation button Dust bin cover button Front view Ultrasonic sensors Obstacle detecting sensor window Detecting sensors of home station & Receiving sensors of remote controller Rear view Power switch Ventilation port...
- Page 10 PART DESCRIPTION – HOME STATION / DUST BIN Home station Remote controller holder Charging terminal Power switch Power cord fixing hook Dust bin Dust bin handle Cleaning brush Dust bin cover Suction port flap Sponge filter Dust bin cover opening button HEPA filter Filter cover s Figures can be different from actual objects.
- Page 11 BUTTON FUNCTIONS – ROBOT CLEANER • If the button is pressed, ‘Turbo Mode’ will be set with a voice confirmation. TURBO • If the button is pressed whilst in ‘Turbo Mode’ , it will be canceled. • Used to turn the power ON, start or stop cleaning. •...
- Page 12 BUTTON FUNCTIONS – REMOTE CONTROLLER Start Home Pressing this button will Used to recharge the Robot Cleaner by start the cleaning. (p16) making it return to the Home Station. (p17) Mode Turbo Change the cleaning mode. Used to activate or deactivate (p19) 'Turbo' mode.
-
Page 13: Display Status Information
DISPLAY STATUS INFORMATION Mute icon This icon indicates whether the Mute is ON or OFF. Battery icon This icon indicates the Lock icon residual battery level, Indicates whether 'Lock‘ is it flickers if the battery activated or not. needs recharging. AM/PM icon Schedule icon This indicates whether it's... -
Page 14: Before You Start
BEFORE YOU START Check these items before cleaning • Do not use this device in a room where a child is left alone. The child could be injured. • Remove fragile or unnecessary objects from the room to be cleaned. Especially, remove expensive ceramics and valuables from the floor. -
Page 15: Overview
OVERVIEW Install the home station. (p14) 1.5 Insert the power cord plug into an outlet and locate the 2 station against a wall. If power is not supplied to the 1.5 home station, the Robot Cleaner will not charge. Turn on the power supply of the Robot Cleaner. -
Page 16: How To Install The Home Station
Do not operate the Robot Cleaner if the Home Station has a damaged cord or plug, if it is not working properly, or if it has been damaged or dropped. To avoid hazard, the cord must be replaced by LG Electronics, Inc. or a qualified service person. -
Page 17: How To Turn The Robot Cleaner Power Supply On & Off
HOW TO TURN THE ROBOT CLEANER POWER SUPPLY ON & OFF Turning on the main power supply Make sure the Power Switch on the rear-left of the Robot Cleaner. If the power is OFF, turn the switch ON. ※ When turning on the power switch, do not press the button located at the upper section of the Robot Cleaner. -
Page 18: 6 How To Start And Stop Cleaning 17~18
HOW TO START AND STOP CLEANING Using the buttons on the Robot Cleaner After the Robot Cleaner is turned on, press the START/STOP button to begin cleaning. A melody will sound and cleaning will begin. Press the START/STOP button during the cleaning cycle to stop cleaning. -
Page 19: How To Charge The Battery
HOW TO CHARGE THE BATTERY Automatic charging The Robot Cleaner returns to the home station at the end of a cleaning cycle or when its battery is running low. ※ If 10 minutes elapse without the Robot Cleaner moving or the battery is too low, the power will automatically be turned OFF. - Page 20 HOW TO CHARGE THE BATTERY Remaining Battery Charge Indicator Battery level is indicated on Status Display, as follows. • If recharging is in progress, the Battery Level Lamp flickers. • If recharging is complete, only the 'Battery' and 'Clean Mode' icons are displayed to save the energy. •...
-
Page 21: Cleaning Modes
CLEANING MODES Zigzag Cleaning In 'Zigzag Clean' mode, Robot Cleaner repeats a zigzag operation to clean every and each spot in the cleaning area. If you need to quickly clean an area choose 'Zigzag Clean' mode. Press ‘Mode’ button on Remote Controller or main unit to select 'Zigzag Clean' mode and press 'Start' button. - Page 22 CLEANING MODES My Space Cleaning Pressing 'My Space' on Remote Controller will set the My Space cleaning mode with a voice message. For cleaning of particular spaces, select this mode. The 1st stage: Use the Remote Controller to manually run the cleaning on outskirts of each cleaning block.
-
Page 23: Auxiliary Cleaning Modes
AUXILIARY CLEANING MODES Manual cleaning By pressing a direction key on Remote Controller, you can move Robot Cleaner in a Manual mode. Robot Cleaner will clean the area, moving forward/backward/left/right, according to the input of the direction key. While in 'Manual' mode, the robot cleaner will run into obstacles placed behind it if the backward key on the remote remains held down. - Page 24 AUXILIARY CLEANING MODES Turbo Mode Pressing 'Turbo' button on Remote Controller or main unit will activate 'Turbo' mode, with a voice message. While in 'Turbo' mode, pressing the same button will cancel 'Turbo' mode, with a voice message. In 'Turbo' mode, Robot Cleaner runs more intensely for a powerful clean.
-
Page 25: Time Setting
TIME SETTING You can set the current time on the Robot Cleaner. Pressing ‘Clock' button on Remote Controller, when Robot Cleaner is waiting, will start the current time setting. Set the time units by using 'uv' buttons Flickering on Remote Controller. Set the unit of minutes using 'uv' Flickering buttons on Remote Controller. -
Page 26: Scheduled Cleaning
SCHEDULED CLEANING You can schedule a cleaning so that the Robot Cleaner starts cleaning at a scheduled time. Pressing 'Schedule' button on Remote Controller, when the battery is recharging, will start the scheduled cleaning setting. Setting/Cancelling the reservation is only possible when the unit is recharging. Select 'One Time' or 'Everyday' option Flickering by using 'uv' buttons on Remote... -
Page 27: Mop Cleaning (Option)
MOP CLEANING (OPTION) By attaching the ultra microfiber mop, you can effectively use the Robot Cleaner to remove dust. When the mop plate is attached, the Robot Cleaner will not climb on to carpets or over thresholds, in order to prevent transferring dirt from the mop. Caution Do not cover the bottom camera sensor by mop. -
Page 28: Location Search Function
LOCATION SEARCH FUNCTION The Robot Cleaner remembers its location while cleaning. If the user moves the Robot Cleaner while it is operating, it will search for the location it was moved from by using its navigational location search function before continuing to clean. -
Page 29: Smart Diagnosis
SMART DIAGNOSIS Robot Cleaner uses this Smart Diagnosis feature to run a self-diagnosis. If any irregularity is found from the diagnosis, please contact the local LG Electronics service center. ※ During Smart Diagnosis, the Robot Cleaner will move about within a 50 cm radius. So, make sure no objects are in the way within a 1 m radius around the Home Station, before starting Smart Diagnosis. - Page 30 Run Smart Diagnosis again and, if the same message is try smart diagnosis again after turning the main power switch on announced, contact an LG Electronics service center. the back of the HOM-BOT 'Off' then 'On' again. If the problem continues, please contact LG Electronics customer care.
-
Page 31: Cleaning The Dust Bin
CLEANING THE DUST BIN If the dust bin is full, suction power can be reduced. Clean the dust bin before and after each cleaning session. Clean the dust bin using the following sequence: 1. Open the dust bin cover by pressing the PUSH button on the Robot Cleaner. -
Page 32: Cleaning The Dust Bin Filter
CLEANING THE DUST BIN FILTER The Dust Bin Filter consists of a HEPA Filter and Sponge Filter. Clean both the HEPA and Sponge filters as per the following sequence. 1. Pull the hook on the left of the HEPA Filter module on the rear side of Dust Bin to separate the HEPA Filter and the sponge. -
Page 33: Cleaning The Brush
CLEANING THE BRUSH The rotating Brush, located on the bottom of Robot Cleaner, helps collect the dust. Clean the Brush as per the following sequence. ※ Before turning over the main unit, lay a soft cloth on the floor and remove the Dust Bin. Otherwise, the main unit can get scratches and dust will fall from Dust Bin. -
Page 34: Cleaning The Sensor/Charging Terminal
CLEANING THE SENSOR/CHARGING TERMINAL There are sensors on the Robot Cleaner that detect obstacles, stairways and the home station for charging the battery. In order to maintain the performance of the Robot Cleaner, regularly clean the sensors and charging terminal as follows: 1. -
Page 35: Cleaning The Side Brush
CLEANING THE SIDE BRUSH Foreign objects/materials such as hair can easily adhere to the side brush. Remove such materials at least once a week. If excessive amounts of foreign materials are stuck to the brush, there is the risk of damage to the brushes. If the floor is rough or walls are frequently cleaned, the side brush may bend or become damaged. -
Page 36: Cleaning The Ultra Microfiber Mop (Option)
※ If the Mop is used in a damp or wet state, it will cause the Robot Cleaner to malfunction. • To avoid product malfunction, only use the ultra microfiber mop provided with the Robot Cleaner. • Additional microfiber mops can be purchased by visiting a nearby LG Electronics service center. -
Page 37: Troubleshooting
TROUBLESHOOTING Upon a voice message, "The wheels are not touching the floor. Please move HOM-BOT onto flat floor." A warning message will be given if a wheel does not contact the floor surface for any reason. • Is a wheel trapped in the front door, balcony, stairway, etc? s Move the Robot Cleaner on to the flat floor. - Page 38 TROUBLESHOOTING Upon a voice message, "Please check that the dust bin and filter are properly installed." A warning message will be given if there is no Dust Bin or Filter Cover fitted. • Is the Dust Bin fitted to the Robot Cleaner? s Open the Dust Bin Cover and check to ensure the Dust Bin is in place.
- Page 39 TROUBLESHOOTING Upon a voice message, "Please remove any foreign material from the brush on the bottom of the HOM-BOT." A warning message will be given if foreign materials restrict the Brush's rotation. Lay a soft cloth on the floor and put the Robot Cleaner upside down on it. ※...
-
Page 40: Before You Call For Service
BEFORE YOU CALL FOR SERVICE Confirm before reporting the failure of Robot Cleaner. Problem Solutions (Reference page) The power supply cannot be Check that the power switch is turned on. (Page 15) turned on. The power supply This is not a failure. Robot Cleaner has its own power saving function. automatically turns off. -
Page 41: Product Specifications
PRODUCT SPECIFICATIONS Item/Model LG HOM-BOT VCARPETX / VPARQUET / VHOMBOT3 340 mm × 340 mm × 89 mm External Dimensions 3 kg Weight 18 W Power Consumption DC 16.8 V Battery (Fully Charging) 350 mm/s (Maximum) Traveling Velocity Use Time Approx. -
Page 42: Open Source Software Notice
REFERENCE ITEMS Open source software notice To obtain the source code under GPL, LGPL, MPL and other open source licenses, that is contained in this product, please visit http://opensource.lge.com. In addition to the source code, all referred license terms, warranty disclaimers and copyright notices are available for download. - Page 43 Disposal of waste batteries/accumulators 1. When this crossed-out wheeled bin symbol is attached to batteries/accumulators of Your product it means they are covered by European Directive 2006/66/CE. 2. This symbol may be combined with chemical symbols for mercury(Hg), cadmium(Cd) or lead(Pb) if the battery Contains more that 0.0005% of mercury, 0.002% of cadmium or 0.004% of lead.
- Page 45 MEMO...
- Page 46 MEMO...
- Page 47 MEMO...
- Page 48 LG Electronics Inc. EU Representative, Krijgsman 1,1186 DM Amstelveen, The Netherlands Made in Korea...
Need help?
Do you have a question about the VCARPETX and is the answer not in the manual?
Questions and answers