
Related Manuals for Quadratec Q9000 Synthetic


Summary of Contents for Quadratec Q9000 Synthetic
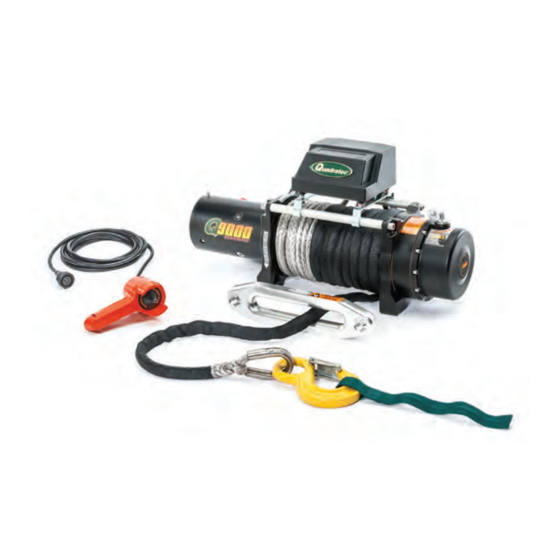
- Page 1 Self-Recovery Winch Operator s Guide ’ Instruction and Operation Manual ® The Trusted Source...
- Page 2 Q-Series Winch Record this data for your records as shown below: Date of Purchase: ____________________________________ Model Number: _______________________________________ Serial Number on Gearbox Leg: ________________________ Serial Number on Motor Leg: ___________________________ On the Gearbox Leg: Find the 11 digit number beginning with “QD” Motor Leg: Find...
-
Page 3: Table Of Contents
Table of Contents Section I: Q-Series Winch Operation and Care Defining: Warning, Caution and Notice ......5 Symbol Index ..............6 General Safety Precautions ........7-15 Winch Anatomy (the parts of the winch)....16-17 Clutch Operation............18 Remote Control Switch..........19 Cleaning ..............20 Maintenance & Battery Recommendations ....20 Use &... - Page 4 Heavy Duty D -Ring............28 Snatch Block ............28 Shovel & Hand Tools..........29 Other Useful Off Road Accessories......29-31 Part 3 - Setting up the pull How to choose an anchor point .........32 Steps 1 -5: Setting up the pull .......33-35 Anchoring to a live tree..........35 Anchoring to a dead tree, rock or stump ....35 Anchoring to another vehicle........35 Steps 6-11: Setting up the pull.......35-37...
-
Page 5: Section I: Q-Series Winch Operation And Care Defining: Warning, Caution And Notice
AVOID RISK OF SERIOUS INJURY BY READING ALL SAFETY MESSAGES AND PROCEDURE NOTICES CONTAINED IN THIS OPERATORS GUIDE AND THE AC- COMPANYING INSTALLATION MANUAL BEFORE ATTEMPTING TO INSTALL OR USE YOUR WINCH A Few Words About Product Safety: Your safety and the safety of others is very important. To help you avoid risks and make informed decisions this manual contains safety messages about your Q-Series self-recovery winch. -
Page 6: Symbol Index
Explanation of Symbols: Your safety and the safety of others is very important. To help you avoid risks and make informed decisions. Always Wear Read the Instruction Leather Gloves Manual Always Use Supplied Always Wear Hearing Hook Strap and Eye Protection Properly Seat Load in Keep Fingers Clear of Throat of Hook... -
Page 7: General Safety Precautions
Section I: SAFETY CONSIDERATIONS In order to be useful as a vehicle self-recovery tool, your Q series winch uses a powerful electric motor to develop a line pull of roughly 9000 lbs. In order to avoid risk of injuries, all users and bystanders to winch operations should acquaint themselves with the following important safety considerations. - Page 8 MOVING PARTS ENTANGLEMENT HAZARDS LIST Installation Safety continued: ALWAYS pass remote lead thru window (and not through pinch point of the door) when used in vehicle ALWAYS Know Your Winch. Take time to fully read the Instructions and/or Operations Guide, and/or Basic Guide to Winching Techniques, in order to understand your winch and its operations.
- Page 9 MOVING PARTS ENTANGLEMENT HAZARDS LIST Installation Safety continued: ALWAYS complete the winch installation and hook attachment before installing the wiring. ALWAYS keep hands clear of winch rope, hook loop, hook and fairlead opening during installation, operation, and when spooling in or out. ALWAYS position fairlead with printed warning readily visible on top.
- Page 10 MOVING PARTS ENTANGLEMENT HAZARDS LIST Properly Seat Load in Never Apply Load to Throat of Hook Hook Tip or Latch Winching Safety continued: ALWAYS require operators and bystanders to be aware of vehicle and or load and stay clear of cable and vehicle path in case winch line fails or vehicle rolls.
- Page 11 FALLING OR CRUSHING HAZARDS LIST Never Use Winch as a Hoist Do Not Move People Wind Rope on Bottom Never Wind Rope of Drum Over Top of Drum FALLING OR CRUSHING HAZARDS: ALWAYS stand clear, keep hands clear, keep others away. NEVER operate winch with less than 5 wraps of rope around the drum.
- Page 12 CUT AND BURN INJURY HAZARDS LIST Hand Piercing/ Hot Surface Hazard Cutting Hazard CUT AND BURN INJURY HAZARDS ALWAYS wear heavy leather gloves when handling winch rope to protect from burrs. ALWAYS be aware of possible hot surfaces at winch motor, drum or rope during or after winch use. CHEMICAL AND FIRE HAZARDS LIST Explosion/...
- Page 13 CHEMICAL AND FIRE HAZARDS LIST CHEMICAL AND FIRE HAZARDS continued ALWAYS verify area is clear of fuel lines, fuel tank, brake lines, electrical wires, etc., when drilling. ALWAYS consult installation manual for proper wiring details. ALWAYS insulate and protect all exposed wiring and electrical terminals.
- Page 14 MOVING PARTS ENTANGLEMENT HAZARD LIST Finger/Fairlead Keep Fingers Clear of Crushing Hazard Fairlead Pinch Point MOVING PARTS ENTANGLEMENT HAZARDS NEVER leave remote control where it can be activated during free spooling, rigging, or when the winch is not being used. NEVER leave the winch remote control plugged in when installing, freespooling, rigging, servicing or when the winch is not being used.
- Page 15 Safety Summary: As you can see, winching must be taken seriously. The preceeding Warnings, Cautions and Notices may seem like a lot to absorb, but in summary we think you will agree that these Warnings, Cautions and Notices are fairly straight forward and sensible.
-
Page 16: Winch Anatomy (The Parts Of The Winch)
Section I: Winch Anatomy This section will familiarize you with the name and purpose of the major Q Series Winch parts & components. Chafe Guard 1. Controller: Sends the flow of electrical power to the winch motor to tell the winch what you want it to do. The remote switch has three positions: Power In, Power Out and Off. - Page 17 4. Clevis Hook: The clevis hook connects your vehicle to a recovery point. Ensure that the hook is securely fastened to the winch line. 5. Nylon Hook Strap: A 12” long strap that holds the clevis hook. Made to keep fingers away from the hawse fairlead while winch line is being spooled in.
-
Page 18: Clutch Operation
Battery Friendly Product: Our powerful 4.8 HP series wound motor and class leading low gear ratios give fast line speeds with a “Battery Friendly” low current draw that will get the most winching time from your battery's available charge state. Engaged Free Spool Clutch Operation:... -
Page 19: Remote Control Switch
Remote Control: The remote control plugs into the winch control box, allowing the operator to control the winch direction, as well as stand well clear of the winch line while operating the winch. Remote Control Switch Positions: Switch Up = Winch Out Switch Down = Winch In Switch Center = Motor Off Always use extreme... -
Page 20: Cleaning
The minimum requirement for a 12 volt automotive DC battery is 650 Cold Cranking Amps. Ask your Quadratec sales representative for details about heavy-duty batteries and terminals for your vehicle. General Maintenance: All moving parts within the winch have been lubricated at the factory using high temperature lithium grease. -
Page 21: Use & Care Of Synthetic Winch Line
Synthetic Winch Line Care: Regular use of your winch will result in normal wear to the winch line. Most wear occurs slowly and may be considered New line: no visible wear acceptable and safe. Excessive and abnormal wear can pres- ent a dangerous situation. -
Page 22: Troubleshooting
Quick Reference Winch Troubleshooting Guide Symptom Possible Cause Suggested Remedy Motor does not Switch assembly not Insert switch assembly firmly to the turn on connected properly connector. Loose battery cable Tighten nuts on cable connection connectors. Tap Solenoid to free contact, applying 12V Solenoid (for 12V motor) or 24V (for 24V motor) to coil malfunctioning... -
Page 23: Section Ii: Q-Series Winching Guide
Section II: Q-Series Winching Guide Congratulations on your recent purchase of a Q series winch from Quadratec. This high quality winch has the power and performance to give you years of safe winching capabilities if you use it properly. The following guide will help you in using your Q series winch in the safest and most effective manner. -
Page 24: Practice, Practice, Practice
will need about 500 lbs. of tension on the cable during this operation. Once you have completed this pull, be sure to rewind cable in nice tight rows not allowing the upper rows to intertwine with the lower rows. Please see step 15 for the proper method for rewinding your winch line as this is an extremely important procedure. -
Page 25: Winching Guidelines To Always Remember
winch damage. You alone are in charge of your pull so do not rush to get it done. Plan your recovery and pull to the plan is the best way to safely get out of any situation. Prior practice using your winch and having the correct tools and accessories available before a needed recovery will help you with your plan and allow you the best options for a safe winch pull. -
Page 26: Part 2- Essential Winch Accessories & Equipment
At the minimum we suggest the following accessories be carried with you at all times. All of these items are readily available by themselves or in handy money saving kits from Quadratec.com: Leather Gloves > >... -
Page 27: Winch Hook Strap
Winch Hook Strap Each series winch includes a nylon winch hook strap. If not already attached to your winch hook, you should immedi- ately attach this strap be- fore using your winch. This strap allows you to keep your fingers away from the hawse fairlead when the winch line is being spooled in and prevent the possibility of finger or hand pinching. -
Page 28: Heavy Duty D-Ring
Heavy Duty D-Ring The D-Ring is a safe de- vice for connecting the looped ends of cables or straps creating a secure winching point. The D- Ring “pin” is threaded for easy on/off and is perfect for attaching to snatch blocks. Make sure your D-Ring is the proper size for your application. -
Page 29: Shovel & Hand Tools
Shovel & Other Hand tools Depending on your situation, sometimes just having a winch is not enough. We recommend carrying compact tools such as a shovel, Hi-Lift® Jack or multi tools to help you out of those extra tough situations. New off road shovel designs actually fold up and are easily stored under a seat. - Page 30 Safety Goggles Each of us only gets one set eyes. strongly suggest you always wear safety goggles or glasses to reduce the possibility of any flying object debris contacting your eyes. Leaning heavy branch Line Dampener Winch Line Dampener Like in a playground game of “tug of war”...
- Page 31 Off Road Shovel Hi-Lift Jack: > > Shovel Hi - Lift Tow Hooks Line Dampener > > Tow Hook Dampener A quick search in the online Quadratec Product Search will show all current category options, or call 800-745-5337 to place an order...
-
Page 32: Part 3 - Setting Up The Pull
Part 3 - Setting up the pull Now that you have become familiar with your Q Series Winch, follow the steps below to get setup for your winch pull: How to choose an anchor point A secure anchor point is critical to all winching and recov- ery operations. -
Page 33: Steps 1 -5: Setting Up The Pull
and block wheels to prevent your vehicle from moving. Important Note for vehicles with automatic transmissions: If you leave your vehicle in park you risk wedging or damaging the parking sprag. If you are really in a bind and have no natural anchor points or other vehicle to anchor to, you can bury a log or your spare tire deep in the ground with a Choker Chain attached to create an anchor point. - Page 34 Step Three: Place Strap on Hook Attach green winch strap to winch hook. Put the hook into the strap loop and hold strap between the thumb and forefinger Always use ensuring you will be well strap on the hook clear of the winch hook. Step Four: Pull out Wire Pull out enough winch line to reach your anchor point while...
-
Page 35: Anchoring To A Live Tree
Anchoring to a Live Tree Wrap the Tree Trunk protector as low as possible around a large diameter tree. Hook the two looped ends into a heavy duty D-Ring. Connect the D ring to the loop that holds the winch hook and secure the screw in clevis pin. Do not over tighten the clevis pin. - Page 36 Step Seven: Attach Winch Remote Control Attach the remote to the winch keeping the remote winch cable behind the winch. Step Eight: Make sure winch line has a damper This is a very important safety step. Place a blanket, large jacket, tree branch or designed line weight on the middle portion of the winch line (in between anchor...
- Page 37 Unwind some wire rope operation proceeds, make sure the winch cable is winding evenly on the winch drum. Step Ten: Place remote over driver side door mirror Move the winch remote back to towards the vehicle cab and place over the driver’s side view mirror. If you plan on winching from inside the cab of your vehicle, run the remote cable through an open window and not through the door as the door will pinch the remote cable.
-
Page 38: Part 4 - Engaging Your Winch For The Pull
Part 4 - Engaging your Winch for the Pull Now that you have set up the winching operation correctly, you are ready to initiate the pull. To make sure this opera- tion goes as safely as possible, you will need to create a large safety zone around the winching area. - Page 39 Make the pull from inside the cockpit. the obstacle. Winch slowly and steadily for a period not to exceed 1-1.5 minutes per pull. Exceeding 90 second pulls will place a strain on your electrical system and the winch. Taking a short break in-between 60 second pulls allows the battery to recharge itself and therefore provide the maximum pulling power.
- Page 40 Step Fourteen: Verify Pull Results Is it unstuck? Once the vehicle is on secure ground and is able to be safely driven, the pull is over. Stop the winching process, put the vehicle in park/gear and set the parking brake. Carefully reduce the tension on the line and remove the winch line from the anchor point making sure the line remains untangled.
- Page 41 tension by holding it with a gloved hand, slowly spool the rope back onto the drum guiding it into even tight rows. Do not let the line slide through your hands! Walk the rope to the winch and stop when necessary to retrieve more line and straighten and tighten the rows.
-
Page 42: Part 5 - Vehicle Recovery Winch Rigging Options
Part 5 - Recovery Winch Rigging Options Every recovery situation is different and in some cases you may be in a situation where you need to use a snatch block to create a straight line pull, increase your winching power due to a deep stuck situation or you have limited space to create an effective pull. -
Page 43: Increasing Winching Power With A Snatch Block
Changing the direction of the pull requires use of a tree saver and a snatch block, secured to a point directly in front of vehicle being recovered. This allows rope to wind properly onto winch drum. straight pull is not possible. The use of a snatch block to create a 90 degree angle as shown below will create this straight line pull and provide the pulling power necessary. -
Page 44: Double Line Pull
Running wire rope through snatch block Double Line Pull: A Double Line Pull is used when a vehicle is thought to be “deep stuck” in mud or on a very steep slope where extra pulling force is required. Start by feeding out enough winch line rope to free the winch hook. -
Page 45: Triple Line Pull
Attaching D-Ring to snatch block anchor points and three D-Rings to perform a triple line pull. Using the same techniques as the double line pull, find a heavy duty mounting location on your vehicle (Frame mounted attachment point) for the first snatch block and the D-Ring at- tachment. - Page 46 Pull of Last Resort: A Deep Buried Anchor Point It is possible to be stuck in a spot where, although you would want to winch there is no anchor point such as a tree or large boulder. This is typical of getting stuck at a beach or in the desert.
- Page 47 At Quadratec, we are here to serve you with both online and expert human resources. If you require assistance or have questions about your winch or winch-related accessories, please call 800-745-6037 during normal business hours.
- Page 48 ® The Trusted Source...
Need help?
Do you have a question about the Q9000 Synthetic and is the answer not in the manual?
Questions and answers