Table of Contents
Advertisement
Available languages
Available languages
Read and understand this manual before use. Keep this manual for future reference.
OPERATOR'S MANUAL
MANUAL DEL USUARIO
2.5 Gal / 10 L
Model No. • Modelo
VOM205P 0901
FOR YOUR SAFETY
PARA SU SEGURIDAD
Lea y entienda este manual antes de usar.
Guarde este manual para futura referencia.
Distributed By / Distribuido Por
Cleva North America Inc.,
601 Regent Park Court
Greenville, SC 29607
Wet/Dry Vacuums
Aspiradoras Mojado/Seco
©2020 Energizer Auto. Armor All
is a trademark of Energizer Auto
and is used under license by
Cleva North America, Inc.
©2020 Energizer Auto. Armor All
es marca registrada de Energizer Auto
y se utiliza bajo licencia de
Cleva North America, Inc.
EN
P. 02
ES
P. 13
Advertisement
Table of Contents

Subscribe to Our Youtube Channel
Related Manuals for ArmorAll VOM205P 0901


Summary of Contents for ArmorAll VOM205P 0901
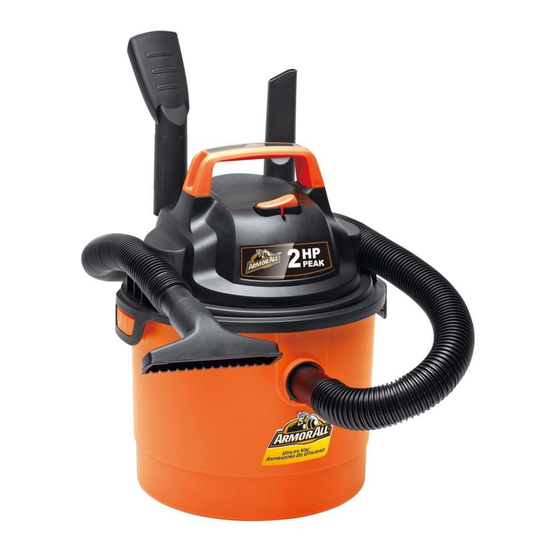
- Page 1 P. 02 P. 13 2.5 Gal / 10 L Model No. • Modelo VOM205P 0901 FOR YOUR SAFETY Read and understand this manual before use. Keep this manual for future reference. PARA SU SEGURIDAD Lea y entienda este manual antes de usar.
-
Page 2: Table Of Contents
TABLE OF CONTENTS Part No. VO70BZ.20.60.02 SECTION Page Warranty……………………………………..……………………………………………………...……....... Safety Instructions & Warnings………………………………………….…………………………......…. Double Insulation Instructions………………………………………………………………….….......…... Extension Cord…………………………………………………………………………………….......……. Unpacking & Checking Carton Contents………….……………………..……………….………......…. General Assembly Instructions…………………………………………………………….…......………. Dry Vacuum Operation……..………..……………………………………………………………......… … Liquid Vacuum Operation……………………………………………………………………………......… Blower Operation…………..………………………………………………………………………….......… Maintenance……………………………………………………………………………….……….......……. Installing & Cleaning Reusable Cloth Filter……….……………...………………..….……….......…….. Installing &... -
Page 3: Safety Instructions & Warnings
SAFETY INSTRUCTIONS & WARNINGS IMPORTANT SAFETY INSTRUCTIONS Read and understand all instructions before using this vacuum Read and understand this owner’s manual and all labels on the Wet/Dry Vacuum cleaner before operating. Safety is a combination of common sense, staying alert and knowing how your vacuum works. Use this Wet/Dry Vac only as described in this manual. -
Page 4: Double Insulation Instructions
DOUBLE INSULATION INSTRUCTIONS This Wet/Dry Vac is double-insulated, eliminating the need for a separate grounding system. Use only identical replacements parts. Read the instructions for Servicing Double-Insulated Wet/Dry Vacs before servicing. Use this Wet/Dry Vac as described in this manual. Observe the following warnings that appear on the motor housing of your Wet/Dry Vac. -
Page 5: Unpacking & Checking Carton Contents
UNPACKING & CHECKING CARTON CONTENTS Remove all contents from the box. Remove the power head and take out any contents inside the collection tank. Check each item against the carton contents list. Description………………... Vac Assembly…………..Wall Mounting Support……. Hose ……………..…… Crevice Tool….…………….. -
Page 6: General Assembly Instructions
GENERAL ASSEMBLY INSTRUCTIONS Before beginning assembly of product, make sure all parts are present. Compare parts with package contents list and diagram. If any part is missing or damaged, do not attempt to assemble the product. Contact customer service for replacement parts. Estimated Assembly Time: 15 minutes Tools Required for Assembly: Drill, Screwdriver WARNING:... -
Page 7: Dry Vacuum Operation
IMPORTANT! • Do not mount the rack over 5 feet from the floor. • Do not screw the rack to drywall only. Secure the screws to a stud. • Do not hang from or sit on the vacuum when on mounting rack. •... -
Page 8: Liquid Vacuum Operation
LIQUID VACUUM OPERATION DO NOT USE THE REUSABLE CLOTH FILTER FOR LIQUID VACUUMING. LIQUID VACUUMING WARNING: BE SURE TO READ, UNDERSTAND, AND APPLY, INFORMATION ENTITLED ‘SAFETY INSTRUCTIONS & WARNINGS’. DO NOT VACUUM IN AREAS WITH FLAMMABLE GASES, VAPORS, OR EXPLOSIVE DUSTS IN THE AIR. FLAMMABLE GASES OR VAPORS INCLUDE BUT ARE NOT LIMITED TO: LIGHTER FLUID, SOLVENT TYPE CLEANERS, OIL-BASED PAINTS, GASOLINE, ALCOHOL OR AEROSOL SPRAYS. -
Page 9: Blower Operation
BLOWER OPERATION This Wet/Dry Vac has blowing capabilities. To use the blower feature follow the instructions listed. WARNING: ALWAYS WEAR SAFETY GOGGLES COMPLYING WITH ANSI Z87.1 (OR IN CANADA, CSAZ94.3) BEFORE USING BLOWER. WARNING: KEEP BYSTANDERS CLEAR FROM BLOWING DEBRIS. WARNING: WEAR A DUST MASK IF BLOWING CREATES DUST THAT MIGHT BE INHALED. -
Page 10: Installing & Cleaning Reusable Cloth Filter
INSTALLING & CLEANING REUSABLE CLOTH FILTER Installing Reusable Cloth Filter 1. Verify that the power cord is disconnected from the outlet. (fig.1) 2. Remove power head and place in upside down position. 3. Slide reusable cloth filter down over the filter cage making sure the cage is completely covered. ( fig. 2 & 4. -
Page 11: Troubleshooting
TROUBLESHOOTING WARNING: TO REDUCE THE RISK OF ELECTRIC SHOCK-UNPLUG BEFORE TROUBLESHOOTING. Symptom Possible Causes Corrective Action Vacuum will not operate. 1) No power supply. 1) Check power supply – cord, breakers, fuses. 2) Faulty power cord. 2) Unplug and check the power cord. -
Page 12: Exploded View & Parts List
EXPLODED VIEW & PARTS LIST... - Page 13 INDICE Sección Página Garantía….………………………………………………………………………………………….....….. Instrucciones de seguridad y advertencias.……………………………………..………………......Instrucciones del aislamiento doble……. …………………………………………………………......Cordón de extensión..……………………………………………………………………………......…… Desempaquetado y contenido de la caja………….. .……………………..…………………….......…. Instrucciones de ensamblaje general...………………………..……………………………….......…..Recogido de materiales secos…...………………………………………………………………......….. Recogido de líquidos con la aspiradora…….……………………………………………………......…. Soplador.……………………………………………………………………………………………......Mantenimiento.……………………...………………………………………………………………......…. Instalación y limpieza del filtro de tela……………...………………..….………………………......…...
- Page 14 INSTRUCCIONES DE SEGURIDAD Y ADVERTENCIAS INSTRUCCIONES DE SEGURIDAD IMPORTANTES Lea y entienda todas las instrucciones antes de usar esta aspiradora. Lea y entienda el manual del usuario y todas las etiquetas en la aspiradora mojado/seco antes de utilizar. La seguridad es una combinación de sentido común, hay que permanecer alerta y saber como su aspiradora trabaja.
- Page 15 INSTRUCCIONES DE AISLAMIENTO DOBLE Esta aspiradora mojado/seco tiene aislamiento doble, eliminando la necesidad de un sistema de conexión a tierra separado. Utilice solamente piezas de repuesto idénticas. Lea las instrucciones para mantenimiento de su aspiradora mojado/seco con doble-aislamiento antes de realizar ajustes y reparaciones. Utilice esta aspiradora según lo descrito en este manual.
- Page 16 DESEMPAQUETADO Y CONTENIDO Retire todo el contenido de la caja. Retire el motor y saque cualquier contenido del envase. Compruebe cada artículo contra la lista de contenido. Lista de contenido Clave Descripción......Cant. Ensamblaje de la aspiradora..1 Soporte de montaje.....1 Manguera........1 Herramienta para ranuras...1 2-en-1 Boquilla de utilidad ..1 Boquilla para autos...………..…1...
- Page 17 INSTRUCCIONES DE ENSAMBLAJE Antes de comenzar a ensamblar el producto, asegúrese de tener todas las piezas. Compare las piezas con la lista del contenido del paquete y el diagrama. No intente ensamblar el producto si falta alguna pieza o si éstas están dañadas.
- Page 18 Para su conveniencia esta aspiradora viene con montaje para la pared. ¡IMPORTANTE! • No monte el bastidor a más de 5 pies del piso. • No sujete los tornillos a las paredes de tablero de yeso solamente. Sujete los tornillos al montante detrás de los tableros de yeso.
- Page 19 INSTRUCCIONES DE FUNCIONAMIENTO: ASPIRAR MATERIALES EN SECO 4. Inserte el extremo grueso de la manguera en el cabezal y asegúrela en su lugar. Empuje el accesorio requerido sobre el final libre de la manguera o de la extensión. (fig. 5) 5.
- Page 20 ¡IMPORTANTE! Al aspirar grandes cantidades de líquidos con la aspiradora, no sumerja la apertura de la manguera totalmente en el líquido; deje un boquete en la extremidad de la manguera para permitir afluencia del aire. La máquina esta equipada con un flotador que detiene la acción de succión cuando el envase alcanza su capacidad máxima.
- Page 21 MANTENIMIENTO 1. Verifique que el enchufe esté desconectado del tomacorriente. (fig. 1) 2. Desconecte la manguera del envase. (fig. 2) 3. Suelte las asas y quite la tapa del envase. (fig. 3) 4. Limpie todo el sucio o partículas del envase y manguera. (fig. 4) Para limpiar y remplazar los filtros vea las instrucciones.
- Page 22 INSTALACIÓN Y LIMPIEZA DEL FILTRO DE ESPONJA Instalación del filtro de esponja Verifique que el enchufe esté desconectado del tomacorriente. (fig. 1) Quite la tapa del envase y colóquela en posición invertida con la jaula hacia arriba. Siga las instrucciones para quitar el filtro de polvo.
- Page 23 PARTES DE REPUESTO Y DIAGRAMA...
Need help?
Do you have a question about the VOM205P 0901 and is the answer not in the manual?
Questions and answers