Table of Contents
Advertisement
Advertisement
Table of Contents

Related Manuals for Zokop YPO2-09C


Summary of Contents for Zokop YPO2-09C
- Page 1 Page: 1/17 YPO2-09C Portable Air Conditioner User's Manual...
-
Page 2: Table Of Contents
Page: 2/17 Contents Important Safeguards.....………………………………………….…….…... 3 Function Description……………….……………………………….…………...…. 4 Features and Parts…………………………………………………….…………….4 Installation…………………………………………………..…………………. …….5 Control Setting…………………………………………………………….………….8 Remote Control……….….……………………………………………….…………11 Water Drainage Methods………..…………………………………………………12 Maintenance…………………………………..………………….………….………13 Handling of the Unit………………………………………………………………...14 End of Season Storage………………..……………………………………………15 Troubleshooting……………………….………………………………………….…16 Appendix………………………….……………………………………….…….…...17 Thank you for selecting this super quality air-conditioner. Please keep this User’s Manual properly for future reference. -
Page 3: Important Safeguards
Page: 3/17 Important Safeguards Important safeguards: * This air-conditioner is suitable for indoor use only rather than for other occasions. * Rated operating range: this unit shall be connected to 220-240V / 50Hz power output end. * The air-conditioner shall be installed in accordance with the wiring rules of local grid to ensure proper grounding. -
Page 4: Function Description
Page: 4/17 cleaner. Recommendation: Do not operate this unit if the ambient temperature is greater than 35℃ in the cooling mode or lower than 5℃ in the heating mode. Function Description This series of mobile air-conditioners are available in cooling only and cooling & heating models of different sizes. -
Page 5: Installation
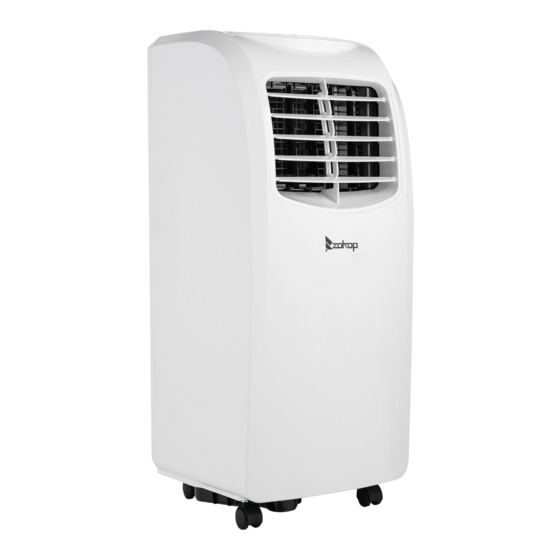
Page: 5/17 1. Control panel 14. Lower air duct bottom 2. Horizontal louvre 15. Wire-winding post 3. Vertical louvre 16. Drain cap 4. Air outlet frame 17. Evaporator filter mesh 5. Vertical Louvre connecting lever 18. Evaporator filter frame 6. Caster 19. - Page 6 Page: 6/17 1.2 .Installation of the C shape buckle of the heat exhaust hose and unit Slide way of the back sh ell Rotary hole Rotation shaft of the back shell Snap joint of the C shape buckle of the back shell l Figure 3 Figure 4...
- Page 7 Page: 7/17 3). Hold the unit with one hand and the heat exhaust hose short connector with another hand; or both people cooperate with one person holding the unit and the other person pulling the heat exhaust hose to prolong the heat exhaust hose gently. Note: 1.
-
Page 8: Control Setting
Page: 8/17 Important notes: The exhaust hose is 280mm-1500mm long and this length is determined based on the specification of the air-conditioner (s). Do not use prolonged hose or replace with other different hoses as this may affect the functions of the air-conditioner. The exhaust must be smooth and the air-conditioner may overheat if the exhaust is obstructed. - Page 9 Page: 9/17 2. Operation instructions: 1). When the unit is energized for the first time, the buzzer will play the energizing music, the double 8 display area will display the ambient temperature value, and the temperature display range is H is indicated if the temperature is higher than 10—35℃.
- Page 10 Page: 10/17 query the remaining timed start/shutdown time. If the timer button is pressed twice continuously within 5s, it is possible to cancel timing. 6). The up button and down button may be used to change the set value of the temperature, as follows: The up button and down button may be used to change the set value of the temperature.
-
Page 11: Remote Control
Page: 11/17 3. Delay protection function of the compressor This unit offers restart protection for the compressor. Except that the compressor may start immediately when the unit is energized for the first time, there is 3-minute delay start protection after the compressor is shut down. 4.After the compressor operates continuously for 10 minutes, if the pipe temperature sensor detects that the difference between the pipe temperature and room temperature is less than 3℃... -
Page 12: Water Drainage Methods
Page: 12/17 Water Drainage 1. Manual drain: (as shown in Figure 12) 1). Once the unit shuts down upon full water, turn off the power of the unit and then unplug the power plug. Note: move the unit carefully to avoid spillage of water in the water tray at the bottom of the unit. -
Page 13: Maintenance
Page: 13/17 Water plug Drain cap Drain hose Water outlet Figure 13 Figure 14 Maintenance and Servicing Prior to maintenance and servicing of the unit, turn off the power and unplug the plug. 1. Surface cleaning Clean the surface of the unit with wet soft cloth. Do not use chemical solvents such as alcohol and gasoline;... -
Page 14: Handling Of The Unit
Page: 14/17 Figure 14 2.2 Installation of the filter frame and filter mesh Special note: be sure to install the filter mesh first and then install the filter frame. 1)To install the evaporator filter mesh and condenser filter mesh, point the back end of the filter mesh toward the socket and then push the filter mesh evenly and gently into the socket. -
Page 15: End Of Season Storage
Page: 15/17 2. Leave the unit in the upright position when handling or moving it. 3. To handle or move the unit, drain the water in the unit first to prevent the water in the unit from flowing onto the ground or carpet. 4. -
Page 16: Troubleshooting
Page: 16/17 Troubleshooting Never repair or remove the air-conditioner yourself. Disqualified repair will void the warranty card and may cause harm to the removal personnel and property. If you encounter any of the problems listed in the table below or the recommended remedy does not work, contact the professional service agency. -
Page 17: Appendix
Page: 17/17 Appendix Fuse parameters Model: FSD or 50F Voltage: 250V Current: 3.15A Schematic diagram of the air-conditioner Capillary Condenser Compressor Evaporator For specific technical parameters of the models, refer to the nameplate on the product (s). Disposal: do not store waste products with other non-classified wastes. Such wastes shall be stored separately for other special purposes.
Need help?
Do you have a question about the YPO2-09C and is the answer not in the manual?
Questions and answers