Table of Contents
Advertisement
Quick Links
Change for life
Owner's Manual
Original Instructions
Dehumidifier
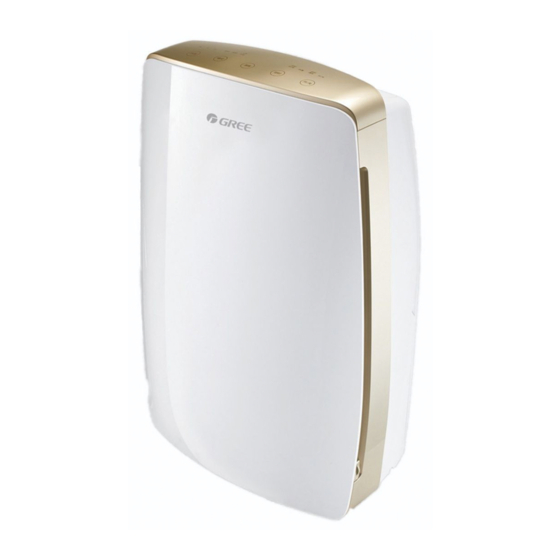
Models:GDN20AT-K5EBA1A
GDN40AU-K5EBA1A
Thank you for choosing our product.
Please read this Owner's Manual carefully before operation and
retain it for future reference.
If you have lost the Owner's Manual, please contact the local agent
or visit www.gree.com or send an email to global@gree.com.cn for
the electronic version.
Advertisement
Table of Contents

Related Manuals for Gree GDN40AU-K5EBA1A


Summary of Contents for Gree GDN40AU-K5EBA1A
- Page 1 Thank you for choosing our product. Please read this Owner’s Manual carefully before operation and retain it for future reference. If you have lost the Owner's Manual, please contact the local agent or visit www.gree.com or send an email to global@gree.com.cn for the electronic version.
-
Page 2: Table Of Contents
Content Operation Notices ● The Refrigerant..................1 ● Safety Precautions..................2 ● Operation Area..................3 ● Parts Name.....................4 ● Check Before Operation.................5 Operation Instructions ● Operation Method...................6 ● Drainage Method ..................9 Maintenance ● Clean and Maintenance................12 Malfunction ● Troubleshooting..................15 ● Error Codes ..................17 ●... - Page 3 Explanation of Symbols Indicates a hazardous situation that, if not avoided, will DANGER result in death or serious injury. Indicates a hazardous situation that, if not avoided, could WARNING result in death or serious injury. Indicates a hazardous situation that, if not avoided, may CAUTION result in minor or moderate injury.
-
Page 4: The Refrigerant
Appliance filled with flammable gas R290. Before install and use the appliance, read the owner’s manual first. Before install the appliance, read the installation manual first. Before repair the appliance, read the service manual first. The Refrigerant To realize the function of the air conditioner unit, a special refrigerant circulates in the system. -
Page 5: Safety Precautions
Safety Precautions ● This appliance can be used by children aged from 8 years and above and persons with reduced physical, sensory ormental capabilities or lack of experience and knowledge if they have been given supervision or instruction concerning use of the app- liance in a safe way and understand the hazards involved. -
Page 6: Operation Area
Operation Area ● This dehumidifier is intended for indoor applications only. It should not be used for commercial or industrial applications. ● During operation, the nearby enclosed space, such as wardrobe can't be dehumidified. temperature will not below 5°C or above 32°C. -
Page 7: Parts Name
Parts Name Front Side Control Panel Air outlet Cover plate (continous drainge) Air inlet Back Side Fixing hole of power cord Water Bucket Power cord... -
Page 8: Check Before Operation
Check Before Operation aced. Below are the checking steps: 1. Hold the handles on both sides of the water bucket and pull it out following the arrow direction. moved a little after long-time transportation. If it's not placed properly, move it to the correct position by hand. -
Page 9: Operation Method
Operation Method Dehumidify mode indicator Bucket Full Indicator Filter Cleaning Display Window Indicator Speed Indicator Timer Indicator On/Off Indicator Filter Water High Clean ON/OFF Smart Cont Timer ON/OFF Full Mode Timer Humidity ON/OFF Notes: ● Water bucker must be correctly installed for operation. ●... - Page 10 Humidity Button Press Humidity button to set your required humidity. If hold Humidity button, humidity can be set in 10% increment among 30%-80% circularly. After that, the set humidity will be displayed for 5s. Mode Button Press Mode button can set 3 kinds of dehumidify mode - Smart, Cont. and Dry.
- Page 11 Other Instructions 1. Alarm Warning If the water bucket is full or the water bucket hasn't been put on the correct position for 3mins, the buzzer will give out sound for 10s for reminding you to empty the water bucket or re-install the water bucket at correct position. 2.
-
Page 12: Drainage Method
Drainage Method Method 1: Drain water through water bucket Notes: ● Do not remove the bucket when unit is in operation or has just stopped. ● Do not use the hose if using water bucket to collect water. When the hose is connected, water will be drained out through it instead of into the bucket. - Page 13 Method 2: Drain water through drain hose This unit is connect with drain outlet. User can purchase the drain hose whose inner diameter is 14mm (length is 1.3-1.5m) and assemble it on the drain adapter to drain condensate water. When assembling the continuous drain equipment, do turn off the unit and pull out the power plug.
- Page 14 3. Insert the drain hose into drainage adapter to make sure the water won't leak out. The horizontal height of drain hose should not be higher than the drain outlet. Do not block the drain outlet to make the condensate water can be drained out smoothly.
-
Page 15: Clean And Maintenance
Clean and Maintenance Warning: ● Before cleaning, turn off the dehmidifier and disconnect the power. Otherwise, it may lead to electric shock. Otherwise it will damage unit's appearance. 1. Grille and Case To clean the case: When there is dust on the case, use soft towel to dust it off;... - Page 16 The side with foam plastic should be beneath the drain lid. Do not remove the foam plastic on the float. GDN40AU-K5EBA1A 1. Take out the water bucket and then pour out the residual water. 2. As shown in the figure, rotate the handle to make it out from the shaft hole and then remove the handle.
- Page 17 Check Before Use-season ● Check whether air outlet is blocked. ● Check whether power plug and power socket are in good condition. ● Check whether drain hose is damaged. Care After Use-season ● Disconnect power. ● Empty the water bucket. Long-time Storage steps below in order to maintain the unit in good condition.
-
Page 18: Troubleshooting
Troubleshooting ● Not all the following problems are malfunctions. Problem Possible Causes ● Unit is operating in an area where temperature is higher than 32°C or lower than 5°C. Controls can not be set. ● Bucket is full. ● Noise will rise if compressor has just started. Noise suddenly rises during ●... - Page 19 ● Dehumidifier can't be started up. Problem Possible Causes Solution ● Check if power is lost. If yes, wait for the power to restore. ● If not, check whether the ● Power is not supplied for power circuit or power socket Power indicator is has been damaged.
-
Page 20: Error Codes
Error Codes ● Unit's Malfunction Codes Display Code Malfunction Unit's Possible Causes Name Condition Display Window ● Ambient temperature sensor is loosen or is poorly connected with the terminal of display board. ● Some element of display board Ambient may have been put upside down Temperature and cause short circuit. - Page 21 Display Code Malfunction Unit's Possible Causes Name Condition Display Window The compressor Freon-lacking ● Refrigerant is leaking. stops. protection ● System is blocked Buttons are invalid. ● Ambient operation condition is bad. Overload ● The evaporator and condenser protection are blocked with filth. compressor ●...
-
Page 22: Electric Schematic Diagram
Electric schematic diagram The Electric schematic diagram are subject to change without notice. Please refer to which one on the unit. FAN MOTOR LIQUID LEVEL HUMIDITY SWITCH SENSOR YEGN DISPLAY BOARD MAIN BOARD COMP-GL N AC-L1 θ STEPPING TUBE MOTOR TEMP.SENSOR COMP. -
Page 23: Specialist's Manual
Specialist’s Manual Aptitude requirement for maintenance man(repairs should be done only be specialists). a. All the work men who are engaging in the refrigeration system should bear the valid certification awarded by the authoritative organization and the qualification for dealing with the refrigeration system recognized by this industry. b. - Page 24 Specialist’s Manual Refrigeration equipment Checking Where electrical components are being changed, they shall be fit for the purpose and to the correct specification. At all times the manufacturer’s maintenance and service guidelines shall be followed. If in doubt, consult the manufacturer’s technical department for assistance.
- Page 25 Specialist’s Manual Ensure that the apparatus is mounted securely. Ensure that seals or sealing materials have not degraded to the point that they no longer serve the purpose of preventing the ingress of flammable atmospheres. Replacement parts shall be in accordance with the manufacturer’s specifications. NOTE : The use of silicon sealant can inhibit the effectiveness of some types of leak detection equipment.
- Page 26 Specialist’s Manual The refrigerant charge shall be recovered into the correct recovery cylinders. For appliances containing flammable refrigerants, the system shall be “flushed” with OFN to render the unit safe. This process may need to be repeated several times. Compressed air or oxygen shall not be used for purging refrigerant systems. For appliances containing flammable refrigerants, flushing shall be achieved by breaking the vacuum in the system with OFN and continuing to fill until the working pressure is achieved, then venting to atmosphere, and finally pulling down to a vacuum.
- Page 27 Specialist’s Manual f) Make sure that cylinder is situated on the scales before recovery takes place. g) Start the recovery machine and operate in accordance with manufacturer's instructions. h) Do not overfill cylinders. (No more than 80 % volume liquid charge). i) Do not exceed the maximum working pressure of the cylinder, even temporarily.
- Page 28 GREE ELECTRIC APPLIANCES, INC. OF ZHUHAI Add: West Jinji Rd, Qianshan, Zhuhai,Guangdong, China, 519070 Tel: (+86-756) 8522218 Fax: (+86-756) 8669426 E-mail: gree@gree.com.cn www.gree.com 600005061021...
Need help?
Do you have a question about the GDN40AU-K5EBA1A and is the answer not in the manual?
Questions and answers