Table of Contents
Advertisement
Quick Links
Technical Overview ...................................................................................................................................... 2
I. Important Notes ..................................................................................................................................... 2
II. Before You Purchase/Open .................................................................................................................. 2
III. Before You Begin Installation ............................................................................................................... 2
IV. What is Reverse Osmosis .................................................................................................................... 2
Installation Introduction ................................................................................................................................. 2
I. Working with Quick Connect Fittings ...................................................................................................... 2
II. Flushing ................................................................................................................................................ 3
Installing Connections .................................................................................................................................. 3
I. Feed Water Connection ......................................................................................................................... 3
II. Drain Clamp .......................................................................................................................................... 3
III. Drilling Faucet Hole - Stainless Steel Sink) .......................................................................................... 3
IV. Mounting the Faucet ............................................................................................................................ 3
................................................................................................................................................................. 4
V. Storage Tank Assembly ........................................................................................................................ 4
Connecting the RO System .......................................................................................................................... 4
I. Fittings ................................................................................................................................................... 4
II. Tubing ................................................................................................................................................... 4
System Start Up & Operation........................................................................................................................ 5
I. Plumber Commissioning Steps .............................................................................................................. 5
II. Client to Complete Commissioning ....................................................................................................... 5
III. Automatic Shut off ................................................................................................................................ 6
IV. Turning the System On/Off .................................................................................................................. 6
Maintenance ................................................................................................................................................. 6
I. Replacement Parts................................................................................................................................. 6
II. Replacement Cartridges ....................................................................................................................... 6
III. Testing Filters ...................................................................................................................................... 6
Troubleshooting ............................................................................................................................................ 7
Additional Extras........................................................................................................................................... 9
I. Water Hammer Arrester ......................................................................................................................... 9
II. Leak Shut Off Kit ................................................................................................................................. 10
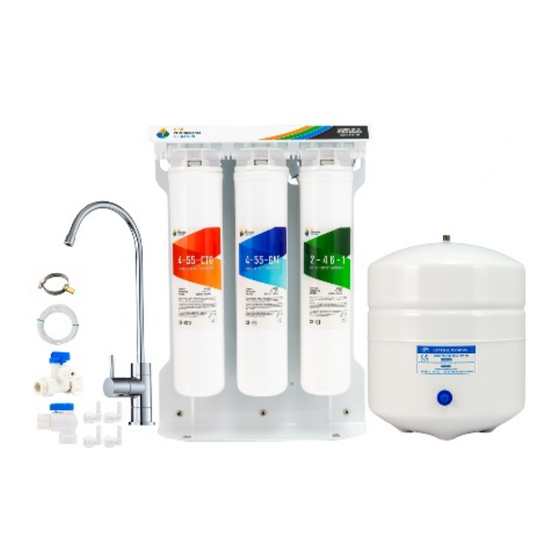
H1-EQ5AN
Undersink RO System
Contents
Page 1 of 10
Advertisement
Table of Contents

Related Manuals for FSA H1-EQ5AN


Summary of Contents for FSA H1-EQ5AN
-
Page 1: Table Of Contents
H1-EQ5AN Undersink RO System Contents Technical Overview ............................2 I. Important Notes ............................. 2 II. Before You Purchase/Open ........................2 III. Before You Begin Installation ....................... 2 IV. What is Reverse Osmosis ........................2 Installation Introduction ..........................2 I. Working with Quick Connect Fittings ...................... 2 II. -
Page 2: Technical Overview
Technical Overview I. Important Notes For correct operation of this appliance, it is essential to observe the manufacturer’s instructions. Installation must be carried out by a qualified plumber or authorised technician to comply with Australian Plumbing Codes. This RO system is certified to WaterMark Standards AS/NZS 3497 Under the Certificate number 022780. -
Page 3: Flushing
II. Flushing Laws and regulations prevent us from wet testing these filtration systems prior to sending them out. Therefore, during assembly of these systems they are not pressure tested so it is possible to have a small leak in a connection (which is simply fixed by re-seating the tubing or tightening a fitting). As the filters are dry packed, the systems will require flushing before first use Installing Connections I. -
Page 4: Storage Tank Assembly
V. Storage Tank Assembly 1. Using standard white plumbers’ tape – wrap the stainless-steel port (top of tank) with 6 – 8 even rounds of tape. 2. Install the 90° Tank Valve Elbow firmly NOTE: At no point should you need to tamper with the air valve on the tank during new installation – these tanks are pre-set to ~7psi (while empty). -
Page 5: System Start Up & Operation
until you feel it ‘seat’. Finally, tighten the locking nut to secure the tubing – this will prevent the tubing from releasing. Measure a length of blue tubing to go between the Storage Tank & the ‘Tank’ port. Measure a length of black tubing to go between the Drain clamp & the ‘Drain’ Port. Measure a length of white tubing to go between the Faucet &... -
Page 6: Automatic Shut Off
III. Automatic Shut off This system is fitted with automatic shut off. It is designed so that while the tank is full of water, the system is under pressure – this creates back pressure on the shut off valve and closes off the production water which will stop the water flow to the drain. -
Page 7: Troubleshooting
example, 200 – 85% = 30mg/L. So, if your test reading was approaching 30mg/L or higher, it would be time to change the membrane. Troubleshooting Problem Possible Cause(s) Solution Leaking between Unseated Tube Check all tubing connections by firmly pushing them into the fitting &... - Page 8 3. pH testing equipment can range from a cheap test pen right up to lab grade equipment. Before coming to a conclusion on pH issues, it is best to ensure the equipment used to measure the pH of the RO water is of high standards and suitable for reading pH levels in low EC water (i.e.
-
Page 9: Additional Extras
2. Faulty Shut Off are sitting in just the right spot, they can lock the valve in Valve place. Try tilting the system from side to side, back & forth to shift the air pockets. You can also tap on the 4-way shut off 3. -
Page 10: Leak Shut Off Kit
II. Leak Shut Off Kit Highly absorbent capsule sits in place under the shut off lever (like a reverse mouse trap). It quickly absorbs water causing the capsule to expand in an upward direction putting pressure on the shut off valve. When sufficient water has been absorbed, the lever will snap shut, stopping the inlet water flow and saving any possible water damage. - Page 11 Rev. 03/09/2021 General Warranty Water Filter Systems¹ (Excluding consumables) Manufactured or Assembled² by High Performance Filtration (HPF) are covered under a 12-month Warranty Against Defects (Manufacturer’s Warranty). This warrants the water filter system to be free from defects in material and workmanship for a period of 12 months from date of sale.
- Page 12 Consumer Guarantees Act. Extended Warranty The H1-302BN & H1-EQ5AN Undersink RO System is eligible for an extended 4-year warranty (commencing no later than 12 months from sale date), to provide a total warranty of 5 years. This extended warranty is subject to terms and conditions outlined below.
Need help?
Do you have a question about the H1-EQ5AN and is the answer not in the manual?
Questions and answers