
Related Manuals for Galanz BIOUK004BL


Summary of Contents for Galanz BIOUK004BL
- Page 1 BIOUK004BL / BIOUK004BLSS User Instruction Manual Built-in Electric Oven Model: BIOUK004 (BL) (BLSS) Please carefully read these instructions before installing and operating the oven.
- Page 2 BIOUK004BL / BIOUK004BLSS...
-
Page 3: Table Of Contents
BIOUK004BL / BIOUK004BLSS CONTENTS IMPORTANT SAFETY INSTRUCTIONS ..........4 SPECIFICATIONS ................7 INSTALLATION ................7 PARTS NAMES ................10 CONTROL PANEL ................. 10 OPERATING INSTRUCTIONS ............11 SETTING THE LAMP ................. 11 CHILD LOCK ..................12 SETTING PREHEAT ................12 SETTING A COOKING PROGRAMME WITHOUT PREHEAT .... -
Page 4: Important Safety Instructions
BIOUK004BL / BIOUK004BLSS IMPORTANT SAFETY INSTRUCTIONS General Warnings 1. When unpacking the oven, ensure you keep packing materials such as plastic bags, polystyrene or nails out of the reach of children. 2. To avoid the possibility of fire and explosion, do not put combustible items into, near or onto the oven. - Page 5 BIOUK004BL / BIOUK004BLSS the temperature of accessible surfaces may be high. Care should be taken to avoid touching the outer surface and heating elements inside the oven. 14. The appliance is not intended to be operated by means of an external timer or separate remote-control system.
- Page 6 BIOUK004BL / BIOUK004BLSS Hints for Cooking 1. When the oven is first switched on, it may emit acrid smelling fumes from the bonding agent used for insulating the panels around the oven. This is completely normal; if it does occur, wait for the fumes to clear before putting food into oven.
-
Page 7: Specifications
BIOUK004BL / BIOUK004BLSS SPECIFICATIONS 220-240V~ 50Hz Power Supply: 3000W Rated power output: Outside Dimensions: 595mm(H)×595mm(W)×570mm(D) Oven Cavity Dimensions: 340mm(H)×470mm(W)×410mm(D) Oven Capacity: 65Litres Gross Weight: Approx.41.5 kg Net Weight: Approx. 36.5 kg INSTALLATION Installation and electrical connection must be carried out by qualified professional technical personnel. - Page 8 BIOUK004BL / BIOUK004BLSS Figure 1 Figure2...
- Page 9 BIOUK004BL / BIOUK004BLSS a) For correct operation of the oven, the kitchen housing must be suitable. b) The panels of the kitchen unit that are next to the oven must be made of a heat resistant material. Ensure that the glue of units made of veneered wood can withstand 120 ℃...
-
Page 10: Parts Names
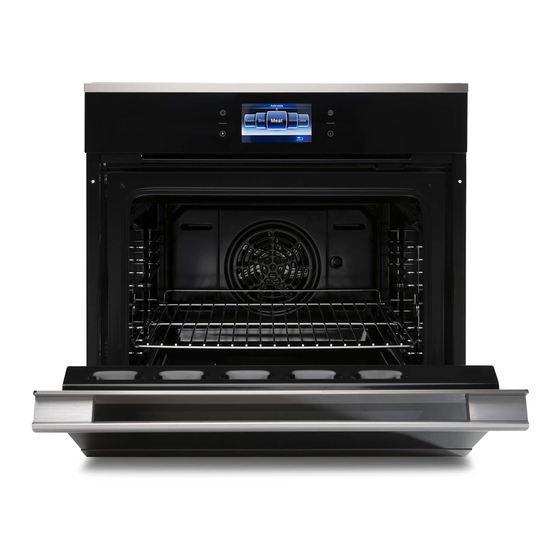
BIOUK004BL / BIOUK004BLSS PARTS NAMES 1. Control panel 6. Rotary grill broach 2. Heater tubes 7. Grill rack 3. Cavity sealing ring 8. Oil collector 4. Convection fan 9. Oven cavity 5. Rotary grill bracket 10. Oven door handle... - Page 11 BIOUK004BL / BIOUK004BLSS CONTROL PANEL Button Name Function Image Press once to cancel a programme. Press again to Homepage confirm and return to the main display. Use this pad to switch the oven Light light on or off (except in child lock mode).
-
Page 12: Operating Instructions
BIOUK004BL / BIOUK004BLSS OPERATING INSTRUCTIONS When the oven power is initially turned on, the system will enter shutdown mode and “ ”will flash. Press “ ”pad to activate the boot-up interface and the oven will enter the homepage operation interface. -
Page 13: Child Lock
BIOUK004BL / BIOUK004BLSS CHILD LOCK Lock: In any mode, press and hold “ ”pad for 3 seconds to lock the system. In the locked state, press any pad on the oven to display the lock interface and prompt the user to release the lock. - Page 14 BIOUK004BL / BIOUK004BLSS Function Temperature Heating Type Code Suitable for the menu Range Modes Kebabs (220℃) Convection Grilled steak(250℃) Roast Chicken (250℃) Baked sweet potato (250℃) 3D Hot air Roast leg of lamb (250℃) Barbecue (230℃) Pizza (180℃) Convection bake Quiche (190℃)
-
Page 15: Oven Assist Function
BIOUK004BL / BIOUK004BLSS homepage will enter the temperature selection interface. Slide left or right to select the cooking temperature and then press the temperature required. The homepage enter the Preheat and No Preheat selection interface. Press Preheat to select if required and press Confirm. -
Page 16: Auto Menu Setting
BIOUK004BL / BIOUK004BLSS Slide the time interface up or down to enter the cooking time. Press “ ” to confirm. 3. Defrost a) Find “Defrost” on the home page and press it. b) Slide the interface left or right to choose the temperature and press once to select. - Page 17 BIOUK004BL / BIOUK004BLSS 1.14 Peanut Butter Brownie Bake 190 3rd Rack Level 1.15 Banana Oats Cake Bake 160 3rd Rack Level 1.16 Honey Cake Bake 160 3rd Rack Level 1.17 Apple Chips Bake 185 3rd Rack Level 1.18 Upside Down Cake...
- Page 18 BIOUK004BL / BIOUK004BLSS Grilled Shrimp Convection 180 3rd Rack Level Tilapia Mossambica Convection 250 3rd Rack Level Menu category: Pizza and Breads Code Menu Cook temperature Shelf Bottom Heat + convection Baby Bread Pizza 3rd Rack Level (190) Vegetable Bruschetta...
- Page 19 BIOUK004BL / BIOUK004BLSS For example to bake Honey Cake: a) Slide the home page to choose “Auto menu” and press it once. b) Slide the auto menu interface to choose “Cakes and Cookies” and press it. Then select Honey Cake and press it.
-
Page 20: Favourite Function
BIOUK004BL / BIOUK004BLSS FAVOURITE FUNCTION After cooking you can store a programme by clicking “Favourite” and the display will show . The next time you can directly find the cooking programme in the favourite section, select the programme and press... -
Page 21: Cleaning And Care
BIOUK004BL / BIOUK004BLSS CLEANING AND CARE General Instructions 1. Ensure that the appliance is switched off and unplugged before replacing the lamp or cleaning to avoid the possibility of electric shock. 2. Wipe the oven using a soft, damp cloth or sponge and a little washing-up liquid. - Page 22 BIOUK004BL / BIOUK004BLSS 12. For safety reasons, do not clean the appliance with steam jet or high-pressure cleaning equipment. 13. Do not use aggressive cleaning products, abrasive sponges or rough cleaning cloths. 14. When the oven is scrapped, to avoid the possibility of injury destroys the lock device and cut off the outside cable.
- Page 23 BIOUK004BL / BIOUK004BLSS Cleaning the Oven Door and Glass Panel Use a mild cleaning fluid and sponge or cloth to clean and dry the oven door. Do not use steel wire or corrosive cleaners and scrapers as this will damage the surface of the oven. The oven door can be removed for cleaning (see below).Do not corrosive or abrasive...
- Page 24 BIOUK004BL / BIOUK004BLSS B. Removing the door glass 1. Remove the top (shutter) by unscrewing the bolts on both sides (see figure 2). 2. Unscrew the other 6 bolts in the opposite top on both sides of the door. 3. Pull out and remove the Glass 1 (see figure 3) 4.
- Page 25 BIOUK004BL / BIOUK004BLSS Larger version Larger version Hinge Hinge support D. Cleaning the Oven Cavity Sealing Ring To ensure correct performance, the oven cavity is equipped with a sealing ring which should be cleaned and checked regularly for any damage. The sealing ring can be removed for cleaning. If the seal joint is damaged or shows signs of aging, please contact the after-sales service department for a replacement.
-
Page 26: How To Use Accessories
BIOUK004BL / BIOUK004BLSS HOW TO USE ACCESSORIES A. Installation around layer frame (see figure 1): Install the left and right layer frame respectively into the cavity fixed screw position B. Grill Rack insert location and layer (see figure 2): C. Installing the Grill (See figure 3): 1. - Page 27 BIOUK004BL / BIOUK004BLSS C. Install the rotary grilling bracket 1. Put the Oil Collector on the first layer. 2. Insert the Rotary Grilling Bracket into oven layer 4 (figure 4). Note the location of the Rotary Grilling Bracket can only be inserted into layer 4.
- Page 28 BIOUK004BL / BIOUK004BLSS 5. Start the grill programme, ensuring the rotary grilling broach rotates normally. Close the oven door. 6. When the cooking is complete, open the oven door, connect the rotary grilling broach handle and remove the food (figure 7).
- Page 29 BIOUK004BL / BIOUK004BLSS NOTE: 1. The Rotary Grilling Broach is suitable for cooking large meat joints and whole poultry. 2. Fixing the food onto broach: Insert the broach through the middle of the food and fasten each side of the food using the forks.
-
Page 30: Troubleshooting Tips
BIOUK004BL / BIOUK004BLSS TROUBLESHOOTING TIPS Please refer to the following table for assistance with some common problems before calling the after-sales service department. Failures Possible reasons Suggestions to handle The heating Rotate the function knob mode cannot be Oxidation build up several times, then selected. - Page 31 BIOUK004BL / BIOUK004BLSS Produced for: Galanz (UK) Ltd 54 Clarendon Road, WD17 1DU The user manual can also be checked and downloaded from our website: www.galanz.co.uk...
- Page 32 BIOUK004BL / BIOUK004BLSS Galanz (UK) Ltd | sales@uk.galanz.com...
Need help?
Do you have a question about the BIOUK004BL and is the answer not in the manual?
Questions and answers