Table of Contents
Advertisement
Quick Links
Advertisement
Table of Contents

Related Manuals for Medeli CDP5200-BK


Summary of Contents for Medeli CDP5200-BK
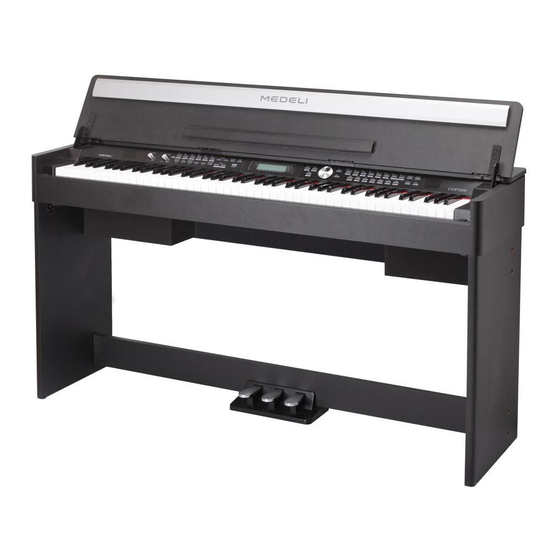
- Page 1 DIGITAL PIANO Owner’s Manual...
- Page 2 INFORMATION FOR YOUR SAFETY! THE FCC REGULATION WARNING (for USA) PRECAUTIONS This equipment has been tested and found to comply with PLEASE READ CAREFULLY BEFORE PROCEEDING the limits for a Class B digital device, pursuant to Part 15 of Please keep this manual in a safe place for future reference. the FCC Rules.
-
Page 3: Table Of Contents
Contents Panel & Display Description Mixer ................. Front Pane ..............4 Pedal Function............24 LCD................4 Rear Panel..............5 Function Menu Pedal................5 Tune................25 KeySplit..............25 Setup Beat Type..............26 Setup Guide..............6 Metro Volume............26 Power Supply..............9 Pedal Type..............26 Reverb Volume............26 Connections Chorus Volume............27 Connecting a pair of Headphones......10 Harmony Type............27 Connecting an Audio Equipment.......10 Harmony Speed............27... -
Page 4: Panel & Display Description
Panel & Display Description Front Panel 1. [VOLUME] knob When [SHIFT] button pressed SONG MODE: Adjust master volume 3. [RHYTHM] button 12. [START/STOP] button Adjust the RHYTHM volume Start or stop playing the song 2. [BRILLIANCE] knob Adjust voice brilliance 4. -
Page 5: Rear Panel
Panel & Display Description When [SHIFT] button released When [SHIFT] button pressed 20. LCD 21. [STYLE] button 21. [DEMO] button Display the information of the piano Enter style mode Enter demo mode 24. Data dial 22. [VOICE] button 22. [PERFORM] button Adjust the value Enter voice mode Enter the Performance Assistant... -
Page 6: Setup
Setup This section contains information about setting up your instrument and preparing to play. Carefully read this section before turning the power on. Setup Guide Before you begin assembling the instrument, check that all the parts below were supplied. You also need to have a Phillips screwdriver. Piano body Left leg component Right leg component... - Page 7 Setup A. Install the piano legs as shown below. First, insert the four Turned Nuts into the holes at the back of the Pedal Panel. Second, align both the left and the right legs to each side of the Pedal Panel. Third, insert the a screws M6x50 through the screw holes and fit them into the Turned Nuts.
- Page 8 Setup D. Insert the pedal cord to the Pedal jack at the rear of The Piano and fix the cord to the sound boxes with a cable tie. Foot pedal cable Fix the back board to the sound box cover (left and right) with gasket and screw M4X24.
-
Page 9: Power Supply
Setup Power Supply Make sure that the piano is turned off. Before you switch your piano on or off, turn down the volume of piano and any connected audio equipments first. Connect the AC adaptor to the DC power jack instrument. Connect the power cable to the AC outlet. -
Page 10: Connections
Connections Connecting a pair of Headphones A standard pair of stereo headphones can be plugged in here for private practice or late-night playing. Jack1: when a pair of headphones is plugged into the jack 1, internal stereo speaker system is automatically shut off. The sound can only be heard from headphones. -
Page 11: Adjusting The Master Volume
Adjusting the Master Volume Turn the [VOLUME] knob clockwise, the volume increases and vice versa. Adjusting the Voice Brilliance Turn the [BRILLIANCE] knob clockwise, the voice sounds brighter and vice versa. You can change the piano brilliance as you wish. Playing the Demo Song The instrument features 5 wonderful demos. -
Page 12: Playing Voices
Playing Voices The instrument features 500 exceptionally realistic voices. Please refer to Voices List. Playing Voices In idle mode, press [VOICE] button or one of the voice direct buttons to enter the voice mode. LCD will display the “VOICE R1” indicate, and display the current voice name and number. -
Page 13: Touch
Playing Voices Play the keyboard in different sections, and you will hear two different voices. When lower function is on, holding down [SHIFT] button, and then pressing [LOWER] button will turn lower function off. Note: Default Split Point The right hand voice does not change when you change lower voice. Split Point The Point on the keyboard that separates voice L and voice R1/R2 is called the "split point". -
Page 14: Piano Mode
Playing Voices Piano Mode This function is to set the voice of the whole keyboard to piano instantly. Holding down [SHIFT] button, and then press [PIANO] button can enter or exit piano mode. In piano mode, the accompaniment control is the same to other mode. -
Page 15: Scale
Playing Voices Scale This function allows you to experience different stretched tunings when you play certain genres of music that is not composed based on twelve equal interval. Press [SCALE] button can open or close scale function. The corresponding indicate on the LCD will light or light off. StGrdPno SCALE Scale type and root key selection... -
Page 16: Auto Accompaniment
Note: Default auto accompaniment section The piano can save 10 user styles. To use your styles, you should use the software of MEDELI to convert the style, then use the USB to save the styles to piano. Accompaniment Sections There are various types of Auto Accompaniment sections that allow you to vary the arrangement of the accompaniment to match the song you are playing. -
Page 17: Playing Different Accompaniment Sections
Auto Accompaniment INTRO Section The intro is an opening section of the song. Each preset style features two different patterns. When the intro pattern finished, the system will automatically shift to the main section. MAIN Section The main is an important section of the song. And it plays an accompaniment pattern and repeat infinitely until another section’s button is pressed. -
Page 18: Accompaniment Volume
Auto Accompaniment Accompaniment Volume This function is used to change the volume of all tracks of accompaniment. Press [ACCOMP] button, the LCD will display ACCOMP volume (0 to 127). At this time, you can use the data dial, or [+/YES]/ [-/NO] button to adjust ACCOMP volume. -
Page 19: Tempo
Auto Accompaniment SINGLE FINGER Single-finger makes it simple to produce major, seventh, minor and minor seventh chords by pressing a minimum number of keys on the auto accompaniment section. MULTI-FINGER Multi-finger allows you to play chords in normal fingering. Try playing the 32 chord types in C scale as listed on the right. -
Page 20: Harmony
Harmony The harmony function can add harmony effect to the main voice. Harmony Switch Press [HARMONY] button. The LCD displays “OFF”, which indicates the harmony effect is turned off now. When the LCD displays “OFF”, repeat the previous operation. The LCD now displays “Duet”, which indicates the harmony effect is open, and the type is Duet. -
Page 21: Performance Assistant
Performance Assistant There are 2 voices you can select to perform in performance assistant mode: Guitar, Piano. What’s the performance assistant? Performance assistant is an easy-to-use function. With this function you will find playing to be more interesting. Even if you are not a keyboard player, the performance assistant will help you to play your familiar instrument voice on the keyboard. -
Page 22: Playing In Guitar Mode
Performance Assistant Playing in Guitar Mode SteelGtr Play a chord in the chord part. A chord type will be displayed on the LCD and the guitar root note will PERFORM be sounded. Play a broken chord in the sub area 1. When the chord type displayed, press a white key in the sub area 1, a wonderful broken chord phrase will start. -
Page 23: Dsp Effect
DSP Effect With the built in digital effects, you can add ambiance and depth to your music in a variety of ways such as adding reverb that makes you sound like you are playing in a concert hall or adding harmony notes for a full, rich sound. -
Page 24: Pedal Function
Pedal Function The sustain pedal is a single pedal which can be configured to different Pedal Sust pedal function. Please refer the pedal setting menu for detail. Sustain Pedal(Pedel Sust) If assign pedal is set as “Pedel Sust”, step on the assign pedal, all notes played on the keyboard will have a longer sustain Pedal St/T Pedal Start/Stop(Pedal St/T) -
Page 25: Function Menu
Function Menu Holding down [SHIFT] button, and then press [FUNCTION</>] button to enter function menu. The LCD displays the current function menu option. Use [+/YES]/ [-/NO] or data dial to set parameter of the current menu. The option and parameters are as follows: LCD display Range Default... -
Page 26: Beattype
Function Menu Beat Type Holding down [SHIFT] button, and then press [FUNCTION </> button to select beat type menu. LCD displays “xxx BeatType”. Use [+/YES]/ [-/NO] or data dial to change beat type. The range of beat type: 0, 2~9. Press [+/YES] and [-/NO] simultaneously will set the beat type value to its default setting: 004. -
Page 27: Chorus Volume
Function Menu Chorus Volume Holding down [SHIFT] button, and then press [FUNCTION </> button to select chorus volume menu. LCD displays “xxx ChorusVol”. Use [+/YES]/ [-/NO] or data dial to change chorus volume. Range: 0~127 ChorusVol Press [+/YES] and [-/NO] simultaneously will set the chorus volume to its default setting. -
Page 28: Midi In
Function Menu MIDI IN Holding down [SHIFT] button, and then press [FUNCTION </> button to select MIDI in menu. LCD displays “xxx Midi In”. Use [+/YES]/ [-/NO] or data dial to change MIDI in channel:1~16, ALL. Midi In Press [+/YES] and [-/NO] simultaneously will set MIDI in channel to its default setting: ALL. -
Page 29: Restore Factory Setting
Restore Factory Setting Pressing and holding [+/YES] and [-/NO] button together and then turn the power on, the piano would be restored to factory setting. It will delete all the user data: user styles, user songs and registered memory. The LCD will display “Loading.”. After the restore completed, the piano will start normally. -
Page 30: Accompaniment Freeze
Register Memory Accompaniment Freeze When the freeze function is turned on, the parameters about accompaniment (style number, accompaniment section, accompaniment volume, tempo, transpose, chord status, mixer, key split point) will not change when recalling a registered memory. Press the [FREEZE] button, the LCD will display FREEZE indicate. Now the accompaniment parameters would not be changed when recalling registered memory. -
Page 31: Song Recording
Song Recording With the easy-to-use song recording features, you can record your own keyboard performances as a user song. 10 user songs can be recorded with 6 tracks (1 ACCOMP track, 5 MELODY tracks) each. Among them, the accompaniment track is used for recording style and this recorded track is user song's accomp. -
Page 32: Stop Recording
Song Recording Stop Recording When recording is in process, holding down [SHIFT] button and then press the [RECORD] button to stop recording. When recording is in process, if the memory is full, the recording will stop and save automatically, and the LCD displays “Rec_Full”. Rec_Full If you choose the accomp recording, the recording will stop automatically when the ending of the rhythm finishes. -
Page 33: Song
Song The piano has 70 songs in all, including 10 user songs. Listen to the songs Press the [SONG] button to enter the song mode. The LCD shows “SONG” indicate and it will play all songs circularly. Use the data dial, [+/YES] or [-/NO] button to select a song. Jambalay Once you start playing a song by pressing [ ] button, it will play... -
Page 34: Midi
MIDI With the MIDI functions you can expand your musical possibilities. This section will let you know what MIDI is, and what it can do, as well as how you can use MIDI on your instrument. What's MIDI? MIDI (short for Musical Instrument Digital Interface) allows a wide variety of electronic musical instruments, computers and other related devices to connect and communicate with one another. -
Page 35: Troubleshooting
Troubleshooting Problem Possible Cause and Solution “ ” The speakers produce a sound This is normal and is no cause for alarm. whenever the power is turned ON or OFF. No sound when the keyboard is played. The R1/R2/L voice volume (Mixer) settings could be set too low. -
Page 36: Voice List
Voice List Name LCD Name Glockenspiel 2 Glocken2 Music Box 1 MusicBox Piano Stereo Grand Piano StGrdPno Music Box 2 MusicBo2 Acoustic Grand Piano (wide) 1 GrandPnW Music Box 3 MusicBo3 Acoustic Grand Piano (dark) GrandPnD Toy Box ToyBox Octave Piano 1 OctPno1 Music Box &... - Page 37 Voice List Electric Bass (finger) 2 FngrBas2 Guitar Acoustic Guitar (nylon) 1 NylonGtr Electric Bass (finger) 3 FngrBas3 Acoustic Guitar (nylon) 2 NylonGt2 Finger Slap Bass FngrSlap Acoustic Guitar (nylon + key off) NylGtrOf Wah Finger Bass WahFnBs Ukulele Ukulele Electric Bass (pick) 1 PickBass Velocity Nylon Guitar...
- Page 38 Voice List Synth Strings 5 SynStrs5 Synth Brass 1 SynBras1 Resonant Strings ResonSt Synth Brass 2 SynBras2 Stereo Slow Strings SSlowStr Synth Brass 3 SynBras3 Slow Strings SlowStr Synth Brass 4 SynBras4 Strings and Brass Str&Bras Analog Synth Brass 1 AnaBras1 Legato Strings LegatStr...
- Page 39 Voice List Lead 4 (chiff) ChiffLd Percussive Lead 5 (charang) CharanLd Tinkle Bell TnklBell Lead 5a (wire lead) WireLead Agogo Agogo Lead 6 (voice) VoiceLd Steel Drums SteelDrm Lead 7 (fifths) FifthsLd Woodblock WoodBlok Lead 8 (bass + lead) BassLead Castanets Castanet Lead 8a (soft wrl)
- Page 40 Voice List Full Strings 1 FullStr1 Combined Voice Stereo Piano & Strings Pad StPn&Str Full Strings 2 FullStr2 Stereo Piano & Choir StPn&Cho Symphonic Symphon Stereo Piano & Synth Strings StPn&Syn Stereo Choir & Strings StCh&Str Stereo Piano & Warm Pad StPn&Pad Stereo Choir &...
-
Page 41: Style List
Style List Soft Ballad SoftBald Full Name LCD Name 8 BEAT Natural Ballad NatuBld 8BtPiano Love Ballad LoveBld 8Beat Piano 8Beat1 8Beat 1 Easy Ballad EasyBld 8Beat Shuffle 8BtShufl Slow Ballad SlowBald Guitar Pop 1 GtPop1 Folk Ballad FolkBld 8BtHiHop Pop Ballad 1 PopBld1 8Beat Hip Hop... - Page 42 Style List Hip Hop 2 HipHop2 Tikitikita Tikitkta SOUL & FUNK Lambada Lambada Funk 1 Funk1 Pop Cha Cha 1 PChaCha1 Classic Funk ClasFunk Pop Cha Cha 2 PChaCha2 Gospel Swing GopSwing Salsa 2 Salsa2 Gospel Gospel WALTZ & TRADITIONAL Funk 2 Funk2 Waltz...
-
Page 43: Song List
Song List Prelude In C Prelude LCD Name Full Name FOLK & COUNTRY Chinese Dance ChDance Jambalay Jambalaya Emperors Waltz EmprWalz Ding! Dong! Merrily On High DingDong March Militaire MilMar1 Battle Battle Hymne Of The Republic Symphony No.40 Symphony GrayMare The Old Gray Mare JAZZ &... - Page 44 Album List Beyond the reef BeyondThReef Old folks at home Old folks Blue tango BlueTango One way ticket to the blues OnWyTicktBls Brazil Brazil Only you OnlyYou Bridal march BridalMarch Over the rainbow OverRainbow Can't help fallin' in love CantHlpFalLv Petite fleur PetiteFleur Carry me back to old virginny...
-
Page 45: Chord List
Chord List Chord Name (Abbreviation) Normal Voicing Chord Display Major [M] 1-3-5 Major sixth [6] 1-(3)-5-6 Major seventh [M7] 1-3-(5)-7 Major seventh sharp eleventh [M7#11] 1-(2)-3-#4-(5)-7 CM7#11 CM7#11 Major add ninth [Madd9] 1-2-3-5 Cmadd9 CM(9) Major ninth [M9] 1-2-3-(5)-7 CM7(9) Major sixth add ninth [6 9] 1-2-3-(5)-6 C6 9... -
Page 47: Scale Tuning System
Scale Tuning System A tuning system is the system used to define which tones, or pitches, to use when playing music. In other words, it is the choice of number and spacing of frequency values used. The equal temperament (has only one tuning method, and is suitable for keyboard) is the common musical scale used at present, used for the tuning of pianos and other instruments of relatively fixed scale. - Page 48 CDP5200_G13...
Need help?
Do you have a question about the CDP5200-BK and is the answer not in the manual?
Questions and answers