Chapters
Table of Contents

Subscribe to Our Youtube Channel
Related Manuals for LG 55EG910T


Summary of Contents for LG 55EG910T
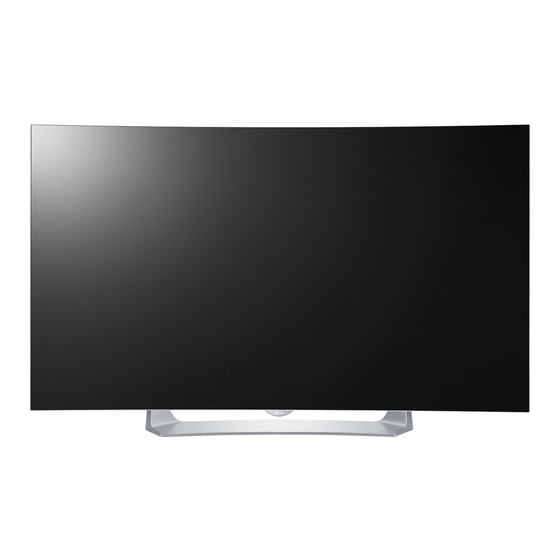
- Page 1 OWNER’S MANUAL Please read this manual carefully before operating your TV and retain it for future reference. 55EG910T *MFL68741567* www.lg.com P/NO : MFL68741567 (1510-REV01)
-
Page 2: Important Safety
IMPORTANT SAFETY INSTRUCTIONS IMPORTANT SAFETY Read these instructions. Keep these instructions. INSTRUCTIONS Heed all warnings. Follow all instructions. Always comply with the following precautions • Do not allow the television to become wet. to avoid dangerous situations and ensure peak performance of your product. - Page 3 IMPORTANT SAFETY INSTRUCTIONS • Protect the power cord from being walked on • CAUTION concerning the Power Cord (Can differ by country): or pinched particularly at plugs, convenience receptacles, and the point where they exit from Check the specification page of this owner’s the apparatus.
- Page 4 TV, unplug the power cord and contact an • Do not attempt to modify this product in any authorized service center. way without written authorization from LG • Keep the product away from direct sunlight. Electronics. Unauthorized modification could •...
- Page 5 IMPORTANT SAFETY INSTRUCTIONS • Do not use high voltage electrical equipment near the TV (e.g., a bug zapper). This may result in product malfunction. • Dot Defect The panel is a high technology product with resolution of two million to six million pixels. In a very few cases, you could see fine dots on the screen while you’re viewing the TV.
-
Page 6: Viewing 3D Imaging
3D content. Cautions when using the 3D glasses Symptoms which require discontinuation • Make sure to use LG 3D glasses. Otherwise, you or refraining from watching 3D contents may not be able to view 3D videos properly. • Do not watch 3D content when you feel fatigue •... -
Page 7: Licenses
LG Electronics will also provide open source code to you on CD-ROM for a charge covering the cost of performing such distribution (such as the cost of media, shipping, and handling) upon email request to opensource@lge.com. -
Page 8: Table Of Contents
TABLE OF CONTENTS TABLE OF CONTENTS IMPORTANT SAFETY MAGIC REMOTE FUNCTIONS INSTRUCTIONS Registering Magic Remote How to Use Magic Remote Viewing 3D imaging Precautions to Take When Using the Magic Remote LICENSES USING THE USER GUIDE OPEN SOURCE SOFTWARE NOTICE INFORMATION SPECIFICATIONS TABLE OF CONTENTS... -
Page 9: Installation Procedure
INSTALLATION PROCEDURE / ASSEMBLING AND PREPARING INSTALLATION PROCEDURE Open the package and make sure all the accessories are included. Attach the stand to the TV set. Connect an external device to the TV set. Make sure the network connection is available. You can use the TV network functions only when the network connection is made. - Page 10 ASSEMBLING AND PREPARING Remote Control, Owner’s Manual Cable Holder Batteries (AA) (See page 15.) (See page 26.) Cinema 3D Glasses Stand Base Stand Screws The number of 3D glasses may (See page 14.) 4 EA, M4 x L20 differ depending upon the (See page 14.) model or country.
-
Page 11: Optional Extras
The model name or design may be changed due to the manufacturer’s circumstances or policies. AN-MR6** AG-F***DP AG-F*** Magic Remote Dual Play Glasses Cinema 3D Glasses AN-VC550 LG Audio Device Smart Camera Parts and Buttons Screen Speakers Remote Control Sensor Joystick Button Power Indicator... -
Page 12: Using The Joystick Button
ASSEMBLING AND PREPARING Using the Joystick Button You can operate the TV by pressing the button or moving the joystick left, right, up, or down. Basic Functions When the TV is turned off, place your finger on the joystick button, Power On press it once, and release it. -
Page 13: Lifting And Moving The Tv
ASSEMBLING AND PREPARING Lifting and Moving the TV • When handling the TV, be careful not to damage the protruding joystick button. • When transporting the TV, do not expose the TV When moving or lifting the TV, read the following to jolts or excessive vibration. - Page 14 ASSEMBLING AND PREPARING Packing Brace Stand Cover CAUTION • When assembling the stand, lay the packing brace on a table or product box and then place the TV with its screen facing down on the packing brace. Be sure to protect the screen 4 EA from scratches.
-
Page 15: Mounting On A Table
ASSEMBLING AND PREPARING Mounting on a Table Insert and tighten the eye-bolts or TV brackets and bolts on the back of the TV. (Image shown may differ from your TV) - If there are bolts inserted at the eye-bolts position, remove the bolts first. Lift and tilt the TV into its upright position on a table. -
Page 16: Mounting On A Wall
Mounting on a Wall Wall mount bracket (optional) OTW150 An optional wall mount can be used with your LG Television. Consult with your local dealer for a wall mount that supports the standard used by your TV model. Carefully attach the wall mount bracket at the rear of the TV. -
Page 17: Making Connections
MAKING CONNECTIONS MAKING CONNECTIONS You can connect various external devices to the TV. Supported external devices are: HD receivers, DVD players, VCRs, audio systems, USB storage devices, PC, gaming devices, and other external devices. For more information on external device’s connection, refer to the manual provided with each device. NOTE •... -
Page 18: Connecting To An Hd Receiver, Dvd Player, Or Vcr
MAKING CONNECTIONS Connecting to an HD receiver, DVD Player, or VCR Connect a HD receiver, DVD Player, or VCR to the TV and select an appropriate input mode. HDMI Connection HDMI is the best way to connect a device. Transmits the digital video and audio signals from an external device to the TV. Connect the external device and the TV with the HDMI cable as shown in the following illustration. -
Page 19: Dvi To Hdmi Connection
MAKING CONNECTIONS DVI to HDMI Connection Transmits the digital video signal from an external device to the TV. Connect the external device and the TV with the DVI-HDMI cable as shown in the following illustration. To transmit an audio signal, connect an audio cable. -
Page 20: Component Connection
MAKING CONNECTIONS Component Connection Transmits analog video and audio signals from an external device to the TV. Connect the external device and the TV with a component cable as shown in the following illustration. NOTE • If cables are installed incorrectly, it could cause the image to display in black and white or with distorted color. -
Page 21: Composite Connection
MAKING CONNECTIONS Composite Connection Transmits analog video and audio signals from an external device to the TV. Connect the external device and the TV with the composite cable as shown in the following illustration. NOTE • If you have a mono VCR, connect the audio cable from the VCR to the AUDIO L/MONO jack of the TV. •... -
Page 22: Connecting To A Pc
MAKING CONNECTIONS Connecting to a PC NOTE • Use an HDMI connection for the best image quality. • Depending upon the graphics card, DOS mode video may not work if a HDMI to DVI Cable is in use. • In PC mode, there may be noise associated with the resolution, vertical pattern, contrast or brightness. If noise is present, change the PC output to another resolution, change the refresh rate to another rate or adjust the brightness and contrast on the PICTURE menu until the picture is clear. -
Page 23: Hdmi Connection Or Dvi To Hdmi Connection
MAKING CONNECTIONS HDMI Connection or DVI to HDMI Connection Choose method A or B to make connection. Method A: HDMI Connection (*Not Provided) HDMI Method B: DVI to HDMI Connection (*Not Provided) (*Not Provided) AUDIO OUT DVI OUT... -
Page 24: Connecting To An Audio System
MAKING CONNECTIONS Connecting to an Audio System You may use an optional external audio system instead of the built-in speakers. Digital Optical Audio Connection Transmits a digital audio signal from the TV to an external device. Connect the external device and the TV with the optical audio cable as shown in the following illustration. -
Page 25: Connecting A Usb Drive
MAKING CONNECTIONS Connecting a USB Drive Connect a USB storage device such as a USB flash thumbdrive, external hard drive, or a USB memory card reader to the TV and access the SmartShare menu to use various multimedia files. NOTE •... -
Page 26: Magic Remote Functions
MAGIC REMOTE FUNCTIONS MAGIC REMOTE FUNCTIONS When the message Magic remote control battery is low. Change the battery. is displayed, replace the batteries. To install batteries, open the battery cover, replace batteries (1.5 V AA) matching the ends to the label inside the compartment, and close the battery cover. -
Page 27: Registering Magic Remote
MAGIC REMOTE FUNCTIONS / USING THE USER GUIDE Registering Magic Remote Precautions to Take When Using the Magic Remote How to register the Magic Remote • Use the remote control within the specified range (within 10 m). You may experience To use the Magic Remote, first pair it communication failures when using the device with your TV. -
Page 28: Specifications
Less than 80 % condition Storage Temperature -20 °C to 60 °C Storage Humidity Less than 85 % Thickness Depth 55EG910T MODELS (55EG910T-DB) Dimensions With stand (mm) 1,225 x 760 x 208 Without stand (mm) 1,225 x 719 x 48.9 (87.3) -
Page 29: Maintenance
MAINTENANCE / TROUBLESHOOTING MAINTENANCE Cleaning Your TV Clean your TV regularly to keep it at peak performance and to extend the product’s lifespan. CAUTION • Before cleaning, turn the power off and disconnect the power cord and all other cables. •... - Page 30 The model and serial numbers of the TV are located on the back and on one side of the TV. Record them below should you ever need service. MODEL SERIAL...
- Page 31 OWNER’S MANUAL EXTERNAL CONTROL DEVICE SETUP Please read this manual carefully before operating the set and retain it for future reference. www.lg.com...
- Page 32 KEY CODES KEY CODES • This feature is not available for all models. Code Code Function Note Function Note (Hexa) (Hexa) CH +, PR + R/C Button List R/C Button CH -, PR - R/C Button Exit R/C Button Volume + R/C Button PIP(AD) R/C Button...
- Page 33 (TV) (PC) • LGTV supports PL2303 chip-based (Vendor ID : 0x0557, Product ID : 0x2008) USB to serial converter RS-232C IN which is not made nor provided by LG. (CONTROL & SERVICE) (PC) (TV) • It can be purchased from computer stores that carry accessories for IT support professionals.
- Page 34 EXTERNAL CONTROL DEVICE SETUP (TV) (PC) (TV) (PC) Phone jack Type RS-232C IN • You need to purchase the phone-jack to RS-232 cable required for the connection between the PC and (CONTROL & SERVICE) (PC) (TV) the TV, which is specified in the manual. RS-232C IN (CONTROL &...
- Page 35 EXTERNAL CONTROL DEVICE SETUP Communication Parameters • Baud rate : 9600 bps (UART) • Stop bit : 1 bit • Data length : 8 bits • Communication code : ASCII code • Parity : None • Use a crossed (reverse) cable. Command reference list (Depending on model) DATA...
- Page 36 EXTERNAL CONTROL DEVICE SETUP Transmission / Receiving Protocol Transmission [Command1][Command2][ ][Set ID][ ][Data][Cr] [Command 1] : First command to control the TV. (j, k, m or x) [Command 2] : Second command to control the TV. [Set ID] : You can adjust the [Set ID] to choose desired monitor ID number in option menu. Adjustment range in TV is 1 to 99.
- Page 37 EXTERNAL CONTROL DEVICE SETUP * Commands may work differently depending on model and signal. 01. Power (Command: k a) Ack [d][ ][Set ID][ ][OK/NG][Data][x] ► To control Power *On or Off of the set. * In case of video mute on only, TV will display On Transmission[k][a][ ][Set ID][ ][Data][Cr] Screen Display(OSD).
- Page 38 EXTERNAL CONTROL DEVICE SETUP Data Min : 00 to Max : 64 * (Depending on model) Ack [i][ ][Set ID][ ][OK/NG][Data][x] 14. Bass (Command: k s) 09. Tint (Command: k j) ► To adjust Bass. ► To adjust the screen tint. You can also adjust in the AUDIO menu.
- Page 39 EXTERNAL CONTROL DEVICE SETUP Set ID = All = 00 5th Band 20(decimal) Data 00 & 01 = Channel Data is 10 = 00 0a Acknowledgement [v][ ][Set ID][ ][OK/NG][Data][x] Data 02 = Analog Antenna TV = 00 Result = ma 00 00 0a 00 * It depends on model, and can adjust when sound mode is EQ adjustable value.
- Page 40 EXTERNAL CONTROL DEVICE SETUP Number Data 05 = Digital Antenna TV = 02 - 22 : Antenna TV (DTV) – Don’t Use Physical Total = ma 00 00 00 11 00 01 02 Channel Number - 26 : Cable TV (CADTV) - Don’t Use Physical 2.
- Page 41 11 11 EXTERNAL CONTROL DEVICE SETUP 24. Input select (Command: x b) (Main Picture Input) ► To select input source for main picture. Transmission [x][b][ ][Set ID][ ][Data][Cr] Data X : don’t care 00 : DTV 01 : CADTV 02 : Satellite DTV 10 : ATV Ack [t][ ][Set ID][ ][OK][Data00][Data01][Data02] ISDB-BS (Japan)
- Page 42 EXTERNAL CONTROL DEVICE SETUP 27. Auto Configure (Command: j u) (Depending on model) ► To adjust picture position and minimize image shaking automatically. It works only in RGB (PC) mode. Transmission [j][u][ ][Set ID][ ][Data][Cr] Data 01 : To set Ack [u][ ][Set ID][ ][OK/NG][Data][x]...
- Page 43 MANUAL DEL USUARIO Lea atentamente este manual antes de poner en marcha el equipo y consérvelo para futuras consultas. 55EG910T www.lg.com...
- Page 44 INSTRUCCIONES DE SEGURIDAD IMPORTANTES INSTRUCCIONES DE Lea estas instrucciones. Conserve estas instrucciones. SEGURIDAD IMPORTANTES Preste atención a las advertencias. Siga todas las instrucciones. Siga siempre estas instrucciones para evitar • No use el aparato cerca del agua. situaciones peligrosas y garantizar el rendimiento máximo del producto.
- Page 45 INSTRUCCIONES DE SEGURIDAD IMPORTANTES • Asegúrese de que el cable de alimentación • PRECAUCIÓN con respecto al cable de esté protegido para evitar que lo pisen o alimentación (puede variar según el país): aplasten, especialmente en los enchufes, los Consulte la página de especificaciones en el tomacorrientes o el punto de salida desde el manual del usuario.
- Page 46 • No intente modificar este producto de ninguna mientras esté enchufado. No lo instale en lugares manera sin autorización previa por escrito de LG con demasiado polvo. Electronics. Cualquier tipo de modificación sin •...
- Page 47 INSTRUCCIONES DE SEGURIDAD IMPORTANTES • No utilice equipo de alto voltaje cerca de la TV, (por ejemplo, eliminador de insectos eléctrico). Esto puede causar que el producto funcione mal. • Aparición de puntos El panel es un producto de alta tecnología con una resolución de entre dos y seis millones de píxeles.
- Page 48 Síntomas que requieren descontinuación Use los anteojos 3D con precaución o abstinencia de ver contenido en 3D • Asegúrese de usar anteojos 3D LG. De lo • No vea contenido en 3D cuando experimente contrario, no podrá ver correctamente los videos fatiga debido a falta de sueño, exceso de trabajo...
- Page 49 LG Electronics también le proporcionará el código fuente abierto en un CD-ROM con un cargo que cubra el costo de realizar tal distribución (como el costo de los medios, el envío y el manejo) con una previa solicitud por correo electrónico a opensource@lge.com.
- Page 50 ÍNDICE DE CONTENIDOS ÍNDICE DE CONTENIDOS INSTRUCCIONES DE SEGURIDAD FUNCIONES DEL CONTROL IMPORTANTES REMOTO MÁGICO Ver imágenes en 3D Registrando el Control Remoto Mágico Como usar el Control Remoto Mágico Precauciones LICENCIAS CÓMO UTILIZAR LA GUÍA DEL SOFTWARE DE CÓDIGO ABIERTO USUARIO ÍNDICE DE CONTENIDOS ESPECIFICACIONES...
-
Page 51: Procedimiento De Instalación
PROCEDIMIENTO DE INSTALACIÓN / MONTAJE Y PREPARACIÓN PROCEDIMIENTO DE INSTALACIÓN Abra el paquete y asegúrese de que todos los accesorios estén incluidos. Instale la base del televisor. Conecte un dispositivo externo al televisor. Asegúrese de que la conexión de red esté disponible. Solo podrá... - Page 52 MONTAJE Y PREPARACIÓN Control Remoto Mágico y Manual del usuario Sujetacables baterías (AA) (Consulte p. 15) (Consulte p. 26) Anteojos 3D para cine Base de Soporte Tornillos de soporte La cantidad de anteojos 3D (Consulte p. 14) 4 PZ, M4 x L20 puede variar según el modelo (Consulte p.
-
Page 53: Complementos Opcionales
AN-MR6** AG-F***DP AG-F*** Remoto Mágico Anteojos Dual Play Anteojos 3D para cine AN-VC550 Dispositivo de audio de LG Cámara Inteligente Componentes y botones Pantalla Bocinas Sensor del control remoto Botón de control El Indicador de Poder El botón de control se encuentra debajo de la pantalla del TV. -
Page 54: Uso Del Botón De Control
MONTAJE Y PREPARACIÓN Uso del botón de control Simplemente puede operar las funciones de la TV, presionando o moviendo el botón de control izquierda, derecha, hacia arriba o abajo. Funciones Básicas Cuando la TV está apagada, coloque el dedo en el botón de control y Encendido presione una vez y suéltelo. -
Page 55: Levantar Y Trasladar El Televisor
MONTAJE Y PREPARACIÓN Levantar y trasladar el televisor • Al transportar la TV, tenga cuidado de no dañar el botón de control que sobresale. • Al transportar el televisor, no lo someta a Si desea levantar o trasladar el televisor, lea las sacudones o vibración excesiva. - Page 56 MONTAJE Y PREPARACIÓN Refuerzo del empaque Cubierta de soporte PRECAUCIÓN • Cuando monte el soporte, coloque el refuerzo del empaque en una mesa o superficie plana y luego coloque la TV con la pantalla hacia abajo 4 PZ en el refuerzo del empaque. Asegúrese de M4 x L20 proteger la pantalla de rayones.
-
Page 57: Montar Sobre Una Mesa
MONTAJE Y PREPARACIÓN Montar sobre una mesa Inserte y ajuste los tornillos de ojo del televisor en su parte posterior. (La imagen puede ser diferente a la de su televisor) - En caso de que haya tornillos insertados, primero retírelos. Levante el televisor y déjelo en posición vertical sobre la mesa. -
Page 58: Montar En La Pared
• Si instala el televisor en el techo o en una pared inclinada, podría caerse y provocar lesiones graves. Utilice un soporte de pared autorizado por LG y comuníquese con el distribuidor local o con personal técnico calificado. 1 0 c m •... -
Page 59: Establecer Conexiones
ESTABLECER CONEXIONES ESTABLECER CONEXIONES Conecte varios dispositivos externos al televisor y cambie los modos de entrada para seleccionar un dispositivo externo. Para obtener más información sobre cómo conectar dispositivos externos, consulte sus respectivos manuales. Entre los dispositivos externos disponibles pueden mencionarse los siguientes: receptores de HD, reproductores de DVD, VCR, sistemas de audio, dispositivos de almacenamiento USB, PC, dispositivos de juegos, etc. -
Page 60: Conexión A Un Receptor De Hd, Reproductor Dvd O Vcr
ESTABLECER CONEXIONES Conexión a un receptor de HD, reproductor DVD o VCR Conecte un receptor de HD, reproductor de DVD o VCR al televisor y seleccione el modo de entrada apropiado. Conexión HDMI La conexión HDMI es la mejor manera de conectar un dispositivo. Transmite las señales de audio y video digitales de un dispositivo externo al televisor. -
Page 61: Conexión Dvi A Hdmi
ESTABLECER CONEXIONES Conexión DVI a HDMI Transmite las señales de video digital de un dispositivo externo al televisor. Conecte el dispositivo externo y el televisor con el cable DVI-HDMI tal como se muestra en la siguiente ilustración. Para transmitir una señal de audio, conecte un cable de audio. -
Page 62: Conexión Por Componente
ESTABLECER CONEXIONES Conexión por componente Transmite las señales de audio y video analógicas de un dispositivo externo al televisor. Conecte el dispositivo externo y el televisor con el cable componente tal como se muestra en la siguiente ilustración. NOTA • Si la instalación de los cables no es la adecuada, podría proyectarse una imagen en blanco y negro o con colores distorsionados. -
Page 63: Conexión Compuesta
ESTABLECER CONEXIONES Conexión compuesta Transmite las señales de audio y video analógicas de un dispositivo externo al televisor. Conecte el dispositivo externo y el televisor con el cable compuesto tal como se muestra en la siguiente ilustración. NOTA • Si posee una VCR monofónica, conecte el cable de audio de la VCR a la toma AUDIO L/MONO del televisor. •... -
Page 64: Conectarse A Un Pc
ESTABLECER CONEXIONES Conectarse a un PC NOTA • Se recomienda utilizar el televisor con la conexión HDMI para obtener una calidad de imagen óptima. • Según la tarjeta gráfica, es posible que no funcione el modo DOS cuando se utiliza un cable HDMI a DVI. •... -
Page 65: Conexión Hdmi O Conexión Dvi A Hdmi
ESTABLECER CONEXIONES Conexión HDMI o Conexión DVI a HDMI Escoja el método A o B para realizar la conexión. Método A: Conexión HDMI (*No incluido) HDMI Método B: Conexión DVI a HDMI (*No incluido) (*No incluido) AUDIO OUT DVI OUT... -
Page 66: Conexión A Un Sistema De Audio
ESTABLECER CONEXIONES Conexión a un sistema de audio Puede usar un sistema de audio externo opcional en lugar de la bocina incorporada. Conexión de audio óptico digital Transmite señales de audio digital del televisor a un dispositivo externo. Conecte el dispositivo externo y el televisor con el cable de audio óptico tal como se muestra en la siguiente ilustración. -
Page 67: Conexión A Un Dispositivo Usb
ESTABLECER CONEXIONES Conexión a un dispositivo USB Conecte un dispositivo de almacenamiento USB como una memoria USB Flash, un disco duro externo o un lector de tarjetas de memoria USB al televisor y acceda al menú SmartShare para poder utilizar distintos archivos multimedia. -
Page 68: Funciones Del Control Remoto Mágico
FUNCIONES DEL CONTROL REMOTO MÁGICO FUNCIONES DEL CONTROL REMOTO MÁGICO Cuando aparezca el mensaje Batería baja en el Control Remoto Mágico. Cambie la batería , reemplace la batería. Para reemplazar las baterías, abra la tapa del compartimiento de baterías, reemplace las baterías (AA de 1,5 Vcc) haga coincidir los extremos con la etiqueta que se encuentra dentro del compartimiento. -
Page 69: Registrando El Control Remoto Mágico
FUNCIONES DEL CONTROL REMOTO MÁGICO / CÓMO UTILIZAR LA GUÍA DEL USUARIO Registrando el Control Remoto Precauciones que debe seguir Mágico al utilizar el Control Remoto Mágico Como registrar el Control Remoto Mágico • Use el control remoto dentro del alcance especificado (dentro de 10 m) Es posible que Para utilizar el Control Remoto Mágico, experimente errores en la comunicación cuando... -
Page 70: Especificaciones
Con base (kg) 15,0 Peso Sin base (kg) 12,8 Corriente de consumo / Consumo de la potencia 3,2 A / 320 W Módulo inalámbrico LG (LGSBW41) Especificaciones Inalámbrico LAN Bluetooth Estándar Estándar IEEE 802.11a/b/g/n Versión Bluetooth 4.0 2 400 a 2 483,5 MHz... -
Page 71: Mantenimiento
MANTENIMIENTO / SOLUCIÓN DE PROBLEMAS MANTENIMIENTO Limpieza del televisor Limpie regularmente el televisor para que siga funcionando con el máximo rendimiento y para extender la vida útil del producto. PRECAUCIÓN • Antes de proceder con la limpieza, apague el equipo y desconecte el cable de alimentación y todos los cables. - Page 72 Los números de modelo y de serie del televisor se encuentran ubicados en la parte posterior del aparato. Regístrelos en el siguiente espacio por si alguna vez necesita recurrir al servicio técnico. MODELO SERIE...
- Page 73 MANUAL DEL USUARIO CONFIGURACIÓN DE DISPOSITIVOS DE CONTROL EXTERNOS Lea atentamente este manual antes de poner en funcionamiento el equipo y consérvelo para futuras consultas. www.lg.com...
- Page 74 CÓDIGOS DE TECLA CÓDIGOS DE TECLA • Esta función no está disponible en todos los modelos. Código Código Función Nota Función Nota (Hexa) (Hexa) CH +, PR + Botón RC Lista Botón RC CH -, PR - Botón RC Salir Botón RC Volumen + Botón RC...
- Page 75 (TV) (PC) • LGTV admite el uso de un USB a convertidor de serie basado en chip PL2303 (ID de proveedor: 0x0557, RS-232C IN ID de producto: 0x2008) que LG no fabrica ni incluye. (CONTROL & SERVICE) (PC) (TV) •...
- Page 76 CONFIGURACIÓN DE DISPOSITIVOS DE CONTROL EXTERNOS (TV) (PC) (TV) (PC) Tipo de adaptador telefónico RS-232C IN RS-232C IN • Para realizar la conexión entre la PC y la TV, que se especifica en el manual, debe comprar el cable de (CONTROL &...
- Page 77 CONFIGURACIÓN DE DISPOSITIVOS DE CONTROL EXTERNOS Parámetros de comunicación • Velocidad en baudios : 9600 bps (UART) • Bit de parada: 1 bit • Longitud de datos: 8 bits • Código de comunicación: código ASCII • Paridad: Ninguna • Use un cable cruzado (reversa). Lista de referencia de comandos (según el modelo) Datos...
- Page 78 CONFIGURACIÓN DE DISPOSITIVOS DE CONTROL EXTERNOS Protocolo de Transmisión/Recepción Transmission [Command1][Command2][ ][Set ID][ ][Data][Cr] [Command 1] : Primer comando para controlar la TV. (j, k, m o x) [Command 2] : Segundo comando para controlar la TV. [Set ID] : Puede ajustar [Set ID] para elegir el número de ID del monitor que desea en el menú de opciones.
- Page 79 CONFIGURACIÓN DE DISPOSITIVOS DE CONTROL EXTERNOS * Según el modelo y la señal, los comandos podrán funcionar de un modo diferente. 01. Potencia (Command: k a) (imagen apagada) 10: Silenciador de video encendido ► Para controlar el encendido o apagado del dispositivo.
- Page 80 CONFIGURACIÓN DE DISPOSITIVOS DE CONTROL EXTERNOS Datos Mín. : 00 a Máx.: 64 Ack [r][ ][Set ID][ ][OK/NG][Data][x] Ack [i][ ][Set ID][ ][OK/NG][Data][x] * (según el modelo ) 09. Tinte (Command: k j) 14. Graves (Command: k s) ► Para ajustar el tinte de la pantalla. ►...
- Page 81 CONFIGURACIÓN DE DISPOSITIVOS DE CONTROL EXTERNOS * Ejemplos de comandos de sintonización: 4er. Banda 19 (decimal) 1. Sintonizar el canal Antena analógico (PAL) 10. Set ID = Todo = 00 5er. Banda 20 (decimal) Datos 00 & 01 = Datos de canal es 10 = 00 0a Acknowledgement [v][ ][Set ID][ ][OK/NG][Data][x] Datos 02 = TV Antena analógica = 00 Resultado = ma 00 00 0a 00...
- Page 82 CONFIGURACIÓN DE DISPOSITIVOS DE CONTROL EXTERNOS - 22: TV Antena (DTV): no usar número de Total = ma 00 00 00 11 00 01 02 canal físico - 26: Cable de TV (CADTV): no usar un número 2. Sintonizar el canal BC (ISDB-BS) 30. de canal físico Set ID = Todo = 00 - 46: Cable de TV (CADTV): usar solo un...
- Page 83 11 11 CONFIGURACIÓN DE DISPOSITIVOS DE CONTROL EXTERNOS [Data 00] [Data 01] [Data 02] [Data 03] 24. Input select (Selección de entrada) (Command: x b) (Entrada de la imagen principal) ► Para seleccionar la fuente de entrada para la imagen principal. X: no importa Transmission [x][b][ ][Set ID][ ][Data][Cr] Ack [t][ ][Set ID][ ][OK][Data00][Data01]...
- Page 84 CONFIGURACIÓN DE DISPOSITIVOS DE CONTROL EXTERNOS 27. Configuración automática (Comando: j u) ► Para ajustar la ubicación de la imagen y reducir su temblor de manera automática. La configuración automática solo funciona en el modo RGB-PC. Transmission [j][u][ ][Set ID][ ][Data][Cr] Dato 01: Ejecutar Configuração automática Ack [u][ ][Set ID][ ][OK/NG][Data][x]...
Need help?
Do you have a question about the 55EG910T and is the answer not in the manual?
Questions and answers