Table of Contents
Advertisement
Advertisement
Table of Contents

Related Manuals for Yamaha MX88BK


Summary of Contents for Yamaha MX88BK
- Page 1 Owner’s Manual...
- Page 2 Yamaha. If a cart, etc., is used, please observe all safety mark- Warning: ings and instructions that accompany the accessory product.
- Page 3 The above statements apply ONLY to those products distrib- users manual, may cause interference harmful to the opera- uted by Yamaha Corporation of America or its subsidiaries. * This applies only to products distributed by YAMAHA CORPORATION OF AMERICA. (class B) MX49 MX61 MX88 Owner’s Manual...
- Page 4 (1) this device may not cause harmful interference, and (2) this device must accept any interference received, including interference that may cause undesired operation. CAN ICES-3 (B)/NMB-3(B) • This applies only to products distributed by Yamaha Canada Music Ltd. • Ceci ne s’applique qu’aux produits distribués par Yamaha Canada Musique Ltée. (can_b_01)
- Page 5 Explication des symboles graphiques L'éclair avec une flèche à l'intérieur d'un ATTENTION triangle équilatéral est destiné à attirer RISQUE D'ÉLECTROCUTION l'attention de l'utilisateur sur la présence NE PAS OUVRIR d'une « tension dangereuse » non isolée à l'intérieur de l'appareil, pouvant être suffisamment élevée pour constituer un ATTENTION : POUR RÉDUIRE LES RISQUES D'ÉLECTROCUTION, risque d'électrocution.
-
Page 6: Precautions
For AC adaptor WARNING CAUTION • This AC adaptor is designed for use with only Yamaha electronic • When setting up, make sure that the AC outlet is easily accessible. If instruments. Do not use for any other purpose. some trouble or malfunction occurs, immediately turn off the power switch of the instrument and disconnect the AC adaptor from the •... - Page 7 AC outlet. Yamaha cannot be held responsible for damage caused by improper use or modifications to the instrument, or data that is lost or destroyed. Always turn the power off when the instrument is not in use.
- Page 8 • L'adaptateur secteur est conçu pour être utilisé exclusivement avec • Lors de l'installation, assurez-vous que la prise secteur est facilement les instruments de musique électroniques Yamaha. Ne l'affectez pas accessible. En cas de problème ou de dysfonctionnement, désactivez à un autre usage.
- Page 9 à débrancher le cordon d'alimentation de la prise murale. Yamaha ne peut être tenu responsable des détériorations causées par une mauvaise manipulation de l'instrument ou par des modifications apportées par l'utilisateur, ni des données perdues ou détruites.
- Page 10 OBSERVERA! The model number, serial number, power requirements, etc., may be found on or near the name plate, which is at the bottom of the Apparaten kopplas inte ur växelströmskällan (nätet) så länge som unit. You should note this serial number in the space provided den ar ansluten till vägguttaget, även om själva apparaten har below and retain this manual as a permanent record of your pur- stängts av.
- Page 11 • This product incorporates and bundles contents in which Yamaha owns copyrights or with respect to which Yamaha has license to use others’ copyrights. Due to copyright laws and other relevant laws, you are NOT allowed to distribute media in which these contents are saved or recorded and remain virtually the same or very similar to those in the product.
-
Page 12: Introduction
Introduction Thank you for purchasing the Yamaha MX49, MX61, or MX88 (hereafter referred to in this Owner’s Manual as this instrument) Music Synthesizer. Please read this owner’s manual carefully before using the instrument in order to take full advantage of its various features. When you have finished reading the manual keep it in a safe, accessible place, and refer to it when you need to better understand an operation or function. -
Page 13: About The Manuals
The Reference Manual, the Synthesizer Parameter Manual, and the Data List are provided as data documents in PDF format. The PDF manuals listed above can be obtained from the Yamaha Downloads web page. To do so, go to the web page using the following URL, enter “MX49,” “MX61,” or “MX88” into the “Model Name” field, and then click “Search.”... -
Page 14: Main Features
This instrument contains a wide range of dynamic and authentic waveforms derived directly from the world famous Yamaha MOTIF (including the realistic instrument sounds of acoustic piano, electric piano, synthesizer, drums, and many others). These give you exceptionally high-quality sound for playing and recording in various musical genres. Moreover, you can easily play back phrases of each instrument—even complex phrases impossible to play live—by using the... -
Page 15: Table Of Contents
Contents PRECAUTIONS ........... S6 Using the Arpeggio function ......... 18 Playing back the Arpeggio ........18 Introduction .............2 Changing the Arpeggio tempo ........ 19 Accessories.............2 Changing the Arpeggio type ........19 About the Manuals ..........3 Keyboard Octave/Transpose settings ....20 Included Documents.......... -
Page 16: Controls And Functions
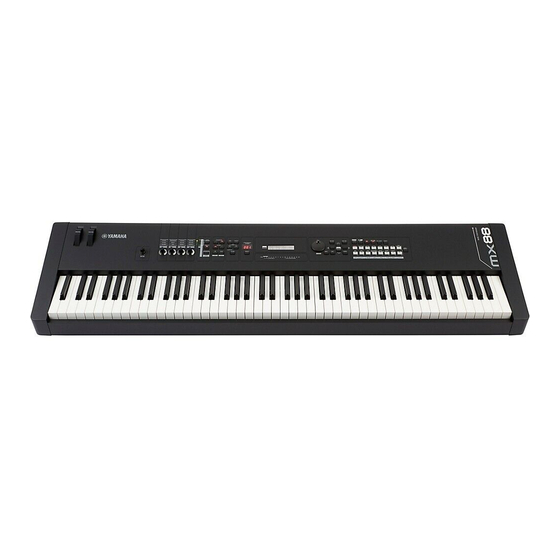
Controls and Functions Front Panel (The illustration is of the MX49; however, the controls and terminals of the MX61 and MX88 are the same.) & 1 [MASTER VOLUME] knob (page 10) 9 OCTAVE [-]/[+] buttons (page 20) Adjusts the volume of the overall sound. Use these buttons to change the note range of the keyboard. - Page 17 Controls and Functions G H I ^ [PERFORMANCE NUMBER] display E [ENTER] button Indicates the number of the selected Performance. Use this button to select the display to be edited, to define the value, and to execute a Job or a Store &...
-
Page 18: Rear Panel
Controls and Functions Rear Panel MX49, MX61 MX88 1 DC IN jack (page 9) 7 [AUX IN] (Auxiliary Input) jack (page 25) Connect the supplied power adaptor to this connector. The Auxiliary Input stereo mini-jack is used to input audio from an external audio device. -
Page 19: Setting Up
Setting Up Power supply Connecting speakers or headphones Make connections for the supplied power adaptor (page 40) in the following order. Before you connect the power adaptor, make sure that the power of this Since this instrument has no built-in speakers, you will instrument is set to Standby status (N). -
Page 20: Auto Power Off Function
Setting Up Auto Power Off function Adjusting the volume and the brightness of the To prevent unnecessary power consumption, this instrument features an Auto Power Off function that display automatically turns the power off if the instrument is not operated for a specified period of time. In the default settings, the power will be turned off if this instrument is Adjust the volume levels of this instrument and the not operated for 30 minutes. -
Page 21: Resetting User Memory To The Initial Factory Settings
Setting Up Resetting User Memory to the initial factory settings The original factory settings of this synthesizer’s User Memory can be restored as described here. The Performances, User Voices, and Utility settings of the User Memory will be reset to the initial factory settings. This operation is especially handy when you’ve unintentionally deleted or overwritten the Performances or Utility settings. -
Page 22: Basic Operation And Displays
Basic Operation and Displays Moving the cursor Changing (editing) parameter values The display cursor indicates a selected item and is shown in the three following types. Rotating the [DATA] dial to the right (clockwise) increases Arrow type the value, while rotating it to the left (counter-clockwise) decreases it. -
Page 23: Selecting A Page
Basic Operation and Displays Selecting a page Leaving the current display The display to be edited may consist of multiple pages. In this case, the upper (s)/ lower (a) icons are indicated at the bottom left of the display. You can select a page by If you wish to return to the previous display from the using the Cursor [u]/[d] buttons. -
Page 24: Quick Guide
Quick Guide Playing the Voices Selecting a Voice for Part 1 The instrument consists of 16 Parts. Voices, which are the The Voices of the instrument are conveniently divided into basic sounds and building blocks of the instrument, are specific categories, each based on a general instrument assigned to each Part. -
Page 25: Selecting A Voice For Part 2
Quick Guide Selecting a Voice for Part 2 Combining Voices (Layer) Here, you’ll learn how to select a Voice for Part 2 as well You can select separate Voices for Parts 1 and 2, and as Part 1. By setting the Voices of Part 1 and Part 2 in the play both Voices together in a layer. -
Page 26: Playing Separate Voices With Your Left And Right Hands (Split)
Quick Guide To cancel the Layer function, press [LAYER] To change the Split Point, simultaneously again. hold down [SPLIT] and press the desired key. The [LAYER] lamp turns off, and only the Part 1 Voice Split Point sounds. HINT Creating a thick, textured sound by layering Voices By slightly increasing/decreasing the value of the “Detune”... -
Page 27: Changing The Tonal Qualities Of The Voice With The Controllers
Quick Guide Changing the tonal qualities Knobs [A] – [D] You can change the brightness and tone characteristics of the Voice with the of Part 1/Part 2 in realtime by turning the Knobs while you play. Three functions are assigned to each Knob, controllers alternatively selected via the [KNOB FUNCTION] button. -
Page 28: External Controllers
Quick Guide Using the Arpeggio function External Controllers The Arpeggio function lets you create arpeggios (broken Rear Panel chords) by simply playing the appropriate notes on the keyboard. For example, you could play the notes of a triad—the root, third, and fifth—and the Arpeggio function will automatically create a variety of interesting arpeggio-type phrases. -
Page 29: Changing The Arpeggio Tempo
Quick Guide Changing the Arpeggio tempo Select “03:Arp Select” with the Cursor [u]/ [d] buttons, then press [ENTER]. This calls up the Edit display related to the Arpeggio Press [TEMPO]. for the Part. Part01 03:Arp*Select While playing back the Arpeggio from the keyboard, change the tempo with the [DATA] dial. -
Page 30: Keyboard Octave/Transpose Settings
Quick Guide Keyboard Octave/ Playing the Performances Transpose settings A program in which multiple Voices (parts) are combined is referred to as a “Performance,” and the instrument has a total of 128 Performances. A Performance consists of Octave up to 16 Parts. The Parts which you normally use for playing the keyboard are Parts 1 and 2. -
Page 31: Playing Back Rhythm Patterns
Quick Guide NOTE Playing back Rhythm The 128 Performances are divided into eight groups (A – H), each of which consist of sixteen Performances. To select these groups of Performances, simultaneously Patterns hold down [SHIFT] and use the [DATA] dial or [INC/ YES]/[DEC/NO] buttons. -
Page 32: Changing The Rhythm Pattern Type And Sound
Quick Guide When you have finished making the desired Rhythm Pattern settings, press [J] (Stop) to stop the Rhythm Pattern. Changing the tempo for the NOTE If you wish to cancel this standby status, press Rhythm Pattern [J] (Stop). Play the keyboard. Press [TEMPO]. -
Page 33: Playing The Keyboard Along With Songs
Quick Guide Playing the keyboard Press [EXT. SONG]. along with Songs MIDI data and audio data contained in the USB flash memory can be played back as a “Song” on the instrument. Press the Cursor [u] button repeatedly if MIDI and audio data necessary to call up the 1st page, then rotate MIDI data is comprised of your keyboard the [DATA] dial to select the desired MIDI... -
Page 34: Playing Back Audio Data Of The Usb Flash Memory
1st page, then rotate support all commercially available USB flash the [DATA] dial to select the desired audio memories, nor can Yamaha guarantee operation of data. USB devices that you purchase. Before purchasing a USB flash memory for use with this instrument,... -
Page 35: Playing Back Song Data Of A Portable Music Player
Quick Guide Press the play button on the connected music Using USB flash memories player. By connecting the instrument to a USB flash The song data of the music player is played back memory, you can save data you’ve created to the from the instrument. - Page 36 Quick Guide NOTE You can also edit each effect parameter in the 3rd or Press the Cursor [u] button if necessary to later pages. For details about each parameter, see the select “01:Chorus Eff,” then press [ENTER]. “Synthesizer Parameter Manual” PDF document. The Chorus effect setting display is called up.
-
Page 37: Changing The Insertion Effect Of The Voice (Voice Edit)
Quick Guide Changing the Insertion Effect of Press [EXIT], then use the Cursor [u]/[d] buttons to select “05:Voice Insert Eff”/ the Voice (Voice Edit) ”06:Drumkit Ins Eff.” Finally, press [ENTER]. The Insertion effect display of the Voice Edit is called You can edit parameters of the Voice assigned to each Part. -
Page 38: Changing The Controller Set For The Voice (Voice Edit)
Quick Guide Changing the Controller Set for Use the Cursor [u]/[d] buttons to select a Controller Set from Controller Sets 1 – 6, then the Voice (Voice Edit) press [ENTER]. You can assign different functions for the controllers Voice*Ctrl*Set (Knobs, Modulation Wheel, etc.) to each Voice. Each Voice can have up to six sets which determine the a 01:Set1 available controllers for the Voice and their functions. -
Page 39: Storing A Voice (Voice Store)
Quick Guide Storing a Voice (Voice Store) Storing a Performance (Performance Store) The edited Voice parameters can be stored as a User Voice separately from a Performance. Moreover, these When you are satisfied with the Performance you’ve stored User Voices can be assigned to a different Part or created, store the new settings to internal memory (as a Performance. -
Page 40: Changing Voices Smoothly While Performing
Quick Guide Changing Voices smoothly To change Voices for other Parts, repeat steps 2 to 5 above. while performing NOTE You can also change Parts with the Category buttons or the Cursor [l]/[r] button in pages other than the 1st When you change a Voice assigned to a Part or select a page. -
Page 41: Making Global System Settings (Utility Settings)
Quick Guide Making Global System NOTE Adjusting the display brightness To adjust the brightness of the display, simultaneously hold down [UTILITY] and press [INC/YES]/[DEC/NO]. Settings (Utility settings) Pressing [UTILITY] calls up the Utility display, from which For details about the Utility settings, see the you can make global system settings. -
Page 42: Saving Settings To Usb Flash Memory
Quick Guide Saving settings to USB flash Loading the settings from a USB memory flash memory You can save all data of the User memory—containing Connect the USB flash memory to the USB Performances, created User Voices, and Utility settings— to USB flash memory as an “All”... -
Page 43: Connecting An External Midi Instrument
Quick Guide Connecting an external If you’ve set “Type” to “Performance” in step 5, select the desired Performance number, MIDI instrument then press [ENTER]. If you’ve set “Type” to something other than With a standard MIDI cable (available separately), you “Performance”... -
Page 44: Controlling An External Midi Keyboard Or Synthesizer From The Instrument
Quick Guide HINT HINT MIDI Transmit and Receive channels – MIDI Transmit and Receive Channels – Changing the Performances remotely Sounding only an external tone generator The MIDI Receive channels for Parts 1 – 16 of the The MIDI Receive channels for Parts 1 – 16 of the instrument are fixed to 1 –... -
Page 45: Appendix
Appendix Shift Function List Some of the important functions and operations on the instrument can be executed with convenient panel control shortcuts. Simply hold down the [SHIFT] button and press the indicated button (as described below). Operation Function [SHIFT] + [INC]/[DEC]/[DATA] dial Increases/decreases the value by 10. - Page 46 Appendix LCD indication Description Illegal file. The file specified for loading is unusable by this instrument or cannot be loaded in the current status. Illegal format. The format of the file specified for playback is SMF Format 1 or an audio data format other than WAV.
-
Page 47: Troubleshooting
No sound? Wrong sound? When a problem like this occurs, please check the following points before assuming that the product is faulty. Many problems can be solved by executing the Factory Set operation (page 11), after backing up your data to an USB flash memory (page 32). If the problem persists, consult your Yamaha dealer. No Sound. - Page 48 Appendix Distorted sound. Are the effect settings appropriate? Use of certain effects at certain settings may produce distortion. [EDIT] Select “02:Part” [ENTER] Select “05:Voice Insert Eff”/“05:DrumKit Insert Eff” [ENTER] Are the filter settings appropriate? Excessively high filter resonance settings can cause distortion.
- Page 49 Appendix Cannot start the Arpeggio. Check whether [ARP] is turned on or off. Are the Arpeggio switches for both Part and Common set to on? [EDIT] Select “02:Part” [ENTER] Select “03:Arp Select” [ENTER] “Switch” [EDIT] ...
-
Page 50: Specifications
(this book), Cubase AI Download Information The contents of this manual apply to the latest specifications as of the publishing date. To obtain the latest manual, access the Yamaha website then download the manual file. Since specifications, equipment or separately sold accessories may not be the same in every locale, please check with your Yamaha dealer. -
Page 51: Index
Appendix Index [ARP] button ............... 7, 19 [JOB] button ................6 Arpeggio ................. 18 Audio data ................23 Auto Power Off function ............10 Key On Start function ..............21 [AUX IN] jack ..............8, 25 [KNOB FUNCTION] button ..........6, 17 Knobs [A] – [D] ..............6, 17 Brightness of the display .......... - Page 52 Appendix Save ..................32 [SELECT] button ..............7, 20 [SHIFT] button ..............7, 35 SMF ..................23 Song ..................23 Speaker ..................9 Split ..................16 [SPLIT] button ..............7, 16 Standby/On switch ..............8, 9 [J] (Stop) button ..............6 Stopping Arpeggio playback ..........
- Page 56 Yamaha Web Site (English only) https://www.yamahasynth.com/ Yamaha Downloads https://download.yamaha.com/ Manual Development Group © 2012 Yamaha Corporation Published 02/2017 MW##*.*-**E0 Printed in China ZV90250...
Need help?
Do you have a question about the MX88BK and is the answer not in the manual?
Questions and answers