Table of Contents
Advertisement
Quick Links
Advertisement
Table of Contents

Related Manuals for Optoma EH416


Summary of Contents for Optoma EH416
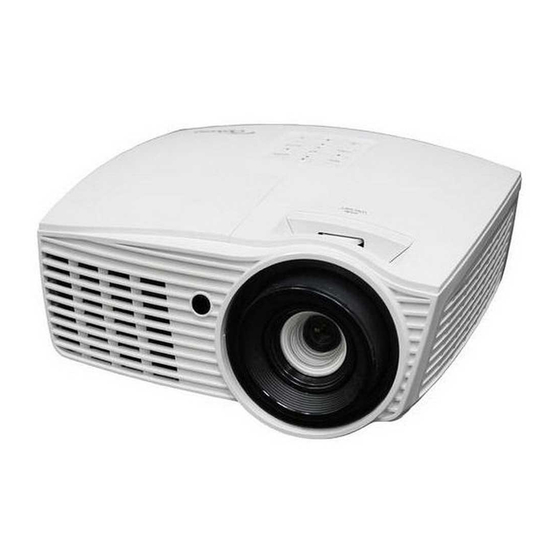
- Page 1 Projector ® User manual...
-
Page 2: Table Of Contents
TablE of ConTEnTs safETY ....................4 Important Safety Instruction....................... 4 3D Safety Information ........................ 5 Copyright ........................... 6 Disclaimer ..........................6 Trademark Recognition ......................6 FCC ............................7 Declaration of Conformity for EU countries ................7 WEEE ............................7 InTRoDUCTIon .................. 8 Package Overview........................ - Page 3 Image size and projection distance ..................56 Projector dimensions and ceiling mount installation ..............61 IR remote codes ........................62 Using the Information button ....................64 Troubleshooting ........................64 Warning indicators ........................66 Specifications ........................... 68 Optoma global offices ....................... 70 English...
-
Page 4: Safety
‡ Do not attempt to service the unit yourself. Opening or removing covers may expose you to dangerous voltages or other hazards. Please call Optoma before you send the unit for repair. ‡ See projector enclosure for safety related markings. -
Page 5: 3D Safety Information
‡ Only use attachments/accessories specified by the manufacturer. ‡ Do not look into straight into the projector lens during operation. The bright light may harm your eyes. ‡ When replacing the lamp, please allow the unit to cool down. Follow instructions as described on pages 53-54. -
Page 6: Copyright
‡ Watching 3D projection may also cause motion sickness, perceptual after effects, disorientation, eye strain and decreased postural stability. It is recommended that users take frequent breaks to lessen the potential of these effects. If your eyes show signs of fatigue or dryness or if you have any of the above symptoms, immediately discontinue use of this device and do not resume using it for at least thirty minutes after the symptoms have subsided. -
Page 7: Fcc
This device has been tested and found to comply with the limits for a Class B digital device pursuant to Part 15 of the FCC rules. These limits are designed to provide reasonable protection against harmful interference in a residential installation. This device generates, uses and can radiate radio frequency energy and, if not installed and used in accordance with the instructions, may cause harmful interference to radio communications. -
Page 8: Introduction
InTRoDUCTIon Package overview Carefully unpack and verify that you have the items listed below under standard accessories. Some of the items under optional accessories may not be available depending on the model, specification and your region of purchase. Please check with your place of purchase. Some accessories may vary from region to region. The warranty card is only supplied in some specific regions. -
Page 9: Product Overview
InTRoDUCTIon Product overview notee: Do not block projector inlet or outlet air vents. Item Item Focus Ring Lens Cap Zoom Ring 10. Tilt-Adjustment Feet Lens Shift Ring 11. Lens IR Receiver 12. Lamp Cover Keypad 13. Ventilation (outlet) Input / Output 14. -
Page 10: Connections
InTRoDUCTIon Connections notee: Remote mouse requires special remote control. Item Item USB Power Out (5V 1A) Connector RS-232 Connector VGA-OUT Connector RJ-45 Connector VGA2 In/YPbPr / Connector 10. AUDIO-IN 1 Connector HDMI 1 / MHL Connector 11. AUDIO-IN 2 Connector MOUSE / SERVICE Connector 12. -
Page 11: Keypad
InTRoDUCTIon Keypad Item Item Enter Power Keystone Correction On/Standby LED Information Lamp LED Re-Sync 10. Source Four Directional Select Keys 11. Menu Temp LED English... -
Page 12: Remote Control
InTRoDUCTIon Remote control Power Switch Freeze Enter Page- Laser Page+ Keystone Volume Menu HDMI Video User1 User2 User3 Source Resync Item Item Power On / Off 15. Brightness Mode Freeze 16. Mouse On / Off Display Blank / Audio Mute 17. -
Page 13: Setup And Installation
Do not operate the projector in any orientation other that table top or ceiling mount. The projector should be horizontal and not tilted either forwards/backwards or left/right. Any other orientation will invalidate the warranty and may shorten the lifetime of the projector lamp or the projector itself. For none standard installation advise please contact Optoma. English... -
Page 14: Connecting Sources To The Projector
sETUP anD InsTallaTIon Connecting sources to the projector MOLEX Item Item Audio In Cable HDMI Dongle VGA Out Cable 10. USB Power Cable VGA Cable 11. RS232 Cable RCA Component Cable 12. RJ-45 Cable MHL Cable 13. Audio In Cable HDMI Cable 14. -
Page 15: Adjusting The Projector Image
sETUP anD InsTallaTIon adjusting the projector image Image height The projector is equipped with elevator feet for adjusting the image height. Locate the adjustable foot you wish to adjust on the underside of the projector. Rotate the adjustable foot clockwise or counterclockwise to raise or lower the projector. Tilt-Adjustment Feet Tilt-Adjustment Ring Zoom, focus, and lens shift... -
Page 16: Remote Setup
sETUP anD InsTallaTIon Remote setup Installing / replacing the batteries Two AAA size batteries are supplied for the remote control. Remove the battery cover on the back of the remote control. Insert AAA batteries in the battery compartment as illustrated. Replace back cover on remote control. - Page 17 sETUP anD InsTallaTIon Approx. 10° Approx. 15° English...
-
Page 18: Using The Projector
UsInG THE PRoJECToR Powering on / off the projector Power Switch Freeze Enter Power Switch Freeze Page- Laser Page+ Enter Keystone Volume Page- Laser Page+ Keystone Volume Menu Menu HDMI Video User1 User2 User3 HDMI Video Source Resync User1 User2 User3 Lens cap (*) Source... -
Page 19: Selecting An Input Source
UsInG THE PRoJECToR Powering off Turn off the projector by pressing the " " either on the projector keypad or the remote control. The following message will be displayed: Power off Power off? Press power key again. Power Switch Freeze Press the "... -
Page 20: Menu Navigation And Features
UsInG THE PRoJECToR menu navigation and features The projector has multilingual on-screen display menus that allow you to make image adjustments and change a variety of settings. The projector will automatically detect the source. To open the OSD menu, press the key on the projector keypad or the “Menu”... -
Page 21: Osd Menu Tree
UsInG THE PRoJECToR osD menu tree main sub menu sub menu 2 sub menu 3 sub menu 4 Values menu Presentation Bright Cinema Game Display Mode [Data] sRGB DICOM SIM. User Off [Default] Blackboard Light Yellow Wall Color [Data] Light Green Light Blue Pink Gray... - Page 22 UsInG THE PRoJECToR main sub menu sub menu 2 sub menu 3 sub menu 4 Values menu Cancel [Default] Reset Color Matching Exit Red Gain -50~50 Green Gain -50~50 Blue Gain -50~50 Red Bias -50~50 RGB Gain/Bias Green Bias -50~50 Blue Bias -50~50 Cancel [Default]...
- Page 23 Audio 1 / Audio 2 / Default [Default] Audio Audio 1 / Audio 2 [Default depednds Audio Input by connector] Audio 1 / Audio 2 [Default depednds Video by connector] Off [Default] Audio Out (Standby) On (X416/W416/EH416/WU416) Front [Default] Rear Setup Projection Ceiling-top Rear-top English...
- Page 24 UsInG THE PRoJECToR main sub menu sub menu 2 sub menu 3 sub menu 4 Values menu 16:9 [WXGA / WUXGA Screen Type models] 16:10 [Default] Lamp Reminder On [Default] Lamp Settings Cancel [Default] Lamp Reset Filter Usage (read only) Hours Optional Filter Installed...
- Page 25 UsInG THE PRoJECToR main sub menu sub menu 2 sub menu 3 sub menu 4 Values menu Off [Default] HDMI Link No [Default] Inclusive of TV HDMI Link Mutual Settings Power On Link* PJ --> Device [Default] Device --> PJ Off [Default] Power Off Link Green Grid...
- Page 26 UsInG THE PRoJECToR main sub menu sub menu 2 sub menu 3 sub menu 4 Values menu HDMI 2 Test Pattern Brightness Contrast Sleep Timer [Default] Remote Settings Color Matching User3 Color Temperature [depends on remote] Gamma Projection Lamp Settings Zoom Freeze Projector ID...
- Page 27 UsInG THE PRoJECToR main sub menu sub menu 2 sub menu 3 sub menu 4 Values menu Closed Captioning Off [Default] Top Left Top Right Menu Location Center [Default] Bottom Left Menu Settings Bottom Right Menu Timer 5sec 10sec [Default] HDMI1/MHL HDMI2 Input Source...
- Page 28 UsInG THE PRoJECToR main sub menu sub menu 2 sub menu 3 sub menu 4 Values menu Cancel [Default] Reset OSD Setup Reset Cancel [Default] Reset to Default Network Status (read only) MAC Address (read only) Off [Default] DHCP IP Address 192.168.0.100 [Default] Subnet Mask 255.255.255.0 [Default]...
-
Page 29: Display Image Settings Menu
UsInG THE PRoJECToR main sub menu sub menu 2 sub menu 3 sub menu 4 Values menu Regulatory Serial Number Source Resolution 00x00 Refresh Rate 0.00Hz Display Mode Power mode(standby) Bright 0 hr Eco. 0 hr Lamp Hours Dynamic 0 hr Information Eco+ 0 hr... - Page 30 UsInG THE PRoJECToR ‡ : To experience the 3D effect, you need to have 3D glasses. Make sure your PC/portable device has a 120 Hz signal output quad buffered graphics card and a 3D Player installed. Wall Color (data-mode only) Use this function to obtain an optimized screen image according to the wall color.
-
Page 31: Display 3D Menu
UsInG THE PRoJECToR RGB, or YUV. ‡ Color space (HDmI input only) : select an appropriate color matrix type from the following: auto, RGB(0-255), RGB(16-235), and YUV. ‡ White levele: Allow user to adjust White Level when inputting Video signals. ‡... -
Page 32: Display Aspect Ratio Menu
UsInG THE PRoJECToR 3D format Use this option to select the appropriate 3D format content. ‡ auto : When a 3D identification signal is detected, the 3D format is selected automatically. ‡ : Display 3D signal in “Side-by-Side” format. ‡ Top and bottom : Display 3D signal in “Top and Bottom”... - Page 33 UsInG THE PRoJECToR XGa scaling table: source 480i/p 576i/p 1080i/p 720p Scale to 1024x768. 16x9 Scale to 1024x576. native No scaling will be made; the image is displayed with the resolution based on input source. auto -If source is 4:3, the screen type will be scaled to 1024x768. -If source is 16:9, the screen type will be scaled to 1024x576.
- Page 34 UsInG THE PRoJECToR WXGa auto mapping rule (screen type 16x10): Input resolution auto/scale auto H-resolution V-resolution 1280 1066 1066 1024 1066 4e:3 1280 1024 1066 1400 1050 1066 1600 1200 1066 1280 1280 Wide laptop 1280 1280 1280 1280 1280 sDTV 1280 1280...
- Page 35 UsInG THE PRoJECToR WXGa auto mapping rule (screen type 16x9): Input resolution auto/scale auto H-resolution V-resolution 1280 1024 4e:3 1280 1024 1400 1050 1600 1200 1280 1280 Wide laptop 1280 1200 1280 1152 1280 sDTV 1280 1280 1280 HDTV 1920 1080 1280 1080P scaling table:...
- Page 36 UsInG THE PRoJECToR WUXGa scaling table for 1920x1200 DmD (screen type 16x10): notee: ‡ Supported screen type 16:10 (1920x1200), 16:9 (1920x1080). ‡ When screen type is 16:9, the 16x10 format becomes unavailable. ‡ When screen type is 16:10 the 16x9 format becomes unavailable. ‡...
-
Page 37: Display Edge Mask Menu
UsInG THE PRoJECToR WUXGa scaling table for 1920x1200 DmD (screen type 16x9): 16 e: 9 screen 480i/p 576i/p 1080i/p 720p Scale to 1440x1080. 16x9 Scale to 1920x1080. Scale to 1920x1440, then get the central 1920x1080 image to display. native mode 1:1 mapping centered. -
Page 38: Display Keystone Menu
UsInG THE PRoJECToR Display keystone menu Keystone Adjust the image distortion caused by tilting the projector. audio mute menu mute Use this option to temporarily turn off the sound. ‡ one: Choose the “On” to turn mute on. ‡ offe: Choose the “Off”... -
Page 39: Setup Filter Settings Menu
UsInG THE PRoJECToR Setup filter settings menu filter Usage Hours Display the filter time. optional filter Installed Set the warning message setting. ‡ Yese: Display warning message after 500 hours of use. notee: “Filter Usage Hours / Filter Reminder / Filter Reset” will only appear when “Optional Filter Installed” is “Yes”. ‡... -
Page 40: Setup Security Menu
UsInG THE PRoJECToR Power mode (standby)* Set the power mode setting. ‡ activee: Choose “Active” to return to normal standby. ‡ Eco.e: Choose “Eco.” to save power dissipation further < 0.5W. notee: ‡ If the “Signal Power On*” option is turned “On” or the “Audio Out (Standby)” option is turned “On”, the power consumption of the projector in standby mode will be over 3W. -
Page 41: Setup Test Pattern Menu
UsInG THE PRoJECToR HDmI link Enable/disable the HDMI Link function. The inclusive TV, power on link, and power off link options will only available if the setting is set to “On”. Inclusive of TV Set to “Yes” if you prefer both TV and projector to be automatically turned off at the same time. To prevent both devices to be turned off at the same time, set the setting to “No”. -
Page 42: Setup Reset All Menu
UsInG THE PRoJECToR menu settings Set the menu location on the screen and configure menu timer settings. ‡ menu location : Select the menu location on the display screen. ‡ menu Timer : Set the duration where the OSD menu stays visible on the screen. Input source Select the input source between HDMI1/MHL, HDMI2, VGA, and video. -
Page 43: Network Lan Menu
UsInG THE PRoJECToR network lan menu network status Display the network connection status (read-only). maC address Display the MAC address (read-only). DHCP Use this option to enable or disable the DHCP function. ‡ : Projector will obtain an IP address automatically from your network. ‡... -
Page 44: Network Control Menu
UsInG THE PRoJECToR making a direct connection from your computer to the projector* Turn “Off” the DHCP option on the projector. Configure the IP address, Subnet Mask, Gateway, and DNS on projector (“Network > LAN”). Open Network and Sharing Center page on your PC, and assign the identical network parameters to your PC as set on projector. -
Page 45: Setup Network Control Settings Menu
UsInG THE PRoJECToR setup network control settings menu lan_RJ45 function For simplicity and ease of operation, the projector provides diverse networking and remote management features. The LAN / RJ45 function of the projector through a network, such as remotely manage: Power On / Off, brightness, and contrast settings. - Page 46 UsInG THE PRoJECToR lan RJ45 Connect an RJ45 cable to RJ45 ports on the projector and the PC (laptop). On the PC (Laptop), select start > Control Panel > network Connections. Right-click on the L ocal area Connection, and select Property. In the Properties window, select the General tab, and select Internet Protocol (TCP / IP).
- Page 47 UsInG THE PRoJECToR Click “Properties”. Type in the IP address and Subnet mask, then press “OK”. Press the “Menu” button on the projector. Open on projector network > lan. Enter the following connection parameters: ± DHCP: Off ± IP Address: 192.168.0.100 ±...
- Page 48 UsInG THE PRoJECToR Press “Enter”. The projector is setup for remote management. The LAN / RJ45 function displays as follows: Information page Main page Tool page English...
- Page 49 UsInG THE PRoJECToR Contact IT helpdesk Rs232 by Telnet function There is alternative RS232 command control way, in projector so called “RS232 by TELNET” for LAN / RJ45 interface. Quick start-Guide for “Rs232 by Telnet” ‡ Check and get the IP address on OSD of the projector. ‡...
-
Page 50: Info Menu
UsInG THE PRoJECToR Specification for “RS232 by TELNET”: Telnet: TCP. Telnet port: 23 (for more detail, kindly please get contact with the service agent or team). Telnet utility: Windows “TELNET.exe” (console mode). Disconnection for RS232-by-Telnet control normally: Close Windows Telnet utility directly after TELNET connection ready. ±... -
Page 51: 3D Setup
UsInG THE PRoJECToR 3D setup Turn on your projector. Connect your 3D source. For example, 3D Blu ray, Games console, PC, Set top box, etc. Ensure you have inserted 3D content or selected the 3D channel. Turn on your 3D glasses. Please refer to the 3D glasses user manual on how to operate the 3D glasses. -
Page 52: Maintenance
maInTEnanCE Replacing the lamp The projector automatically detects the lamp life. When the lamp life is nearing the end of use, a warning message will appear on the screen. Warning lamp Warning lamp life exceeded. When you see this message, please contact your local reseller or service center to change the lamp as soon as possible. -
Page 53: Replacing The Lamp (Continued)
maInTEnanCE Replacing the lamp (continued) Procedure: Switch off the power to the projector by pressing the " " button on the remote control or the projector keypad. Allow the projector to cool down for at least 30 minutes. Disconnect the power cord. Unscrew the screw on the cover. -
Page 54: Installing And Cleaning The Dust Filter
maInTEnanCE notee: ‡ The screw on the lamp cover and the lamp cannot be removed. ‡ The projector cannot be turned on if the lamp cover has not been placed back on the projector. ‡ Do not touch the glass area of the lamp. Hand oil can cause the lamp shatter. Use a dry cloth to clean the lamp module if it was accidentally touched. -
Page 55: Additional Information
aDDITIonal InfoRmaTIon Compatible resolutions Digital compatibility b0/Established b0/standard Timing b0/Detail Timing b1/Video mode b1/Detail Timing Timing 720x400 @ 70Hz XGA/WXGA: Native timing: 640x480p @ 60Hz 1280x720p @ 60Hz 640x480 @ 60Hz 1440x900 @ 60Hz XGA: 720x480p @ 60Hz 1366x768 @ 60Hz 640x480 @ 67Hz 1024x768 @ 120Hz 1024x768 @ 60Hz... -
Page 56: Image Size And Projection Distance
If 3D input is 1080p@24hz, the DMD should replay with integral multiple with 3D mode. ‡ Support NVIDIA 3DTV Play if there is no patent fee from Optoma 1080i@25hz and 720p@50hz will run in 100 hz; other 3D timing will run in 120hz. - Page 57 Lens Shift Range PJ lens Center to top of image Image Shift Range Vertical range at Vertical + Vertical - Horizontal + Horizontal - (D) = (A) - (B) any Horizontal (Max) (A) (Min) (B) (Right) (Left) position 52.6 44.9 70.1 59.8 10.3...
- Page 58 aDDITIonal InfoRmaTIon Lens Shift Range PJ lens Center to top of image Image Shift Range Vertical range at Vertical + Vertical - Horizontal + Horizontal - Vertical Shift any Horizontal Range (Max) (A) (Min) (B) (Right) (Left) position 52.0 44.3 57.8 49.3 72.2...
- Page 59 aDDITIonal InfoRmaTIon Lens Shift Range PJ lens Center to top of image Image Shift Range Vertical range at Vertical + Vertical - Horizontal + Horizontal - Vertical Shift any Horizontal Range (Max) (A) (Min) (B) (Right) (Left) position 54.5 46.6 60.5 51.8 75.7...
- Page 60 aDDITIonal InfoRmaTIon Lens Shift Range PJ lens Center to top of image Image Shift Range Vertical range at Vertical + Vertical - Horizontal + Horizontal - Vertical Shift any Horizontal Range (Max) (A) (Min) (B) (Right) (Left) position 53.0 45.6 58.9 50.6 73.6...
-
Page 61: Projector Dimensions And Ceiling Mount Installation
InfoRmaTIon Projector dimensions and ceiling mount installation To prevent damage to your projector, please use the Optoma ceiling mount. If you wish to use a third party ceiling mount kit, please ensure the screws used to attach a mount to the projector meet the following specifications: ‡... -
Page 62: Ir Remote Codes
aDDITIonal InfoRmaTIon IR remote codes Power Switch Freeze Enter Page- Laser Page+ Keystone Volume Menu HDMI Video User1 User2 User3 Source Resync Printing-key Description code definition Power Power on/off Press to turn on / off the projector. Switch Switch Press to switch the USB mouse on / off. Display blank / Press to hide / unhide the screen picture and turn off / on audio. - Page 63 aDDITIonal InfoRmaTIon Printing-key Description code definition Page + Page+ Press to page up. Keystone+ Press to adjust image distortion caused by tilting the pro- Keystone jector. Keystone- Volume + Press to adjust to increase / decrease the volume. Volume Volume - ‡...
-
Page 64: Using The Information Button
aDDITIonal InfoRmaTIon Using the Information button The Information function ensures easy setup and operation. Press the button on the keypad to open the Information menu. Troubleshooting If you experience a problem with your projector, please refer to the following information. If a problem persists, please contact your local reseller or service center. - Page 65 aDDITIonal InfoRmaTIon The image is stretched when displaying 16:9 DVD title ‡ When you play anamorphic DVD or 16:9 DVD, the projector will show the best image in 16: 9 format on projector side. ‡ If you play the LBX format DVD title, please change the format as LBX in projector OSD. ‡...
-
Page 66: Warning Indicators
aDDITIonal InfoRmaTIon Remote control problems If the remote control does not work ‡ Check the operating angle of the remote control is pointed within ±15° horizontally and ±10° vertically to the IR receivers on the projector. ‡ Make sure there are not any obstructions between the remote control and the projector. Move to within 7 m (23 ft) of the projector. - Page 67 aDDITIonal InfoRmaTIon ‡ Lamp warning: Warning lamp Warning lamp life exceeded. ‡ Temperature warning: Warning TEmPERaTURE Too HIGH Please: 1. Make sure air in and outlets are not blocked. 2. Make sure the environment temperature is under 45 degree C. If the problem persists in spite of the above.
-
Page 68: Specifications
ADDITIONAL INFORMATION Specifications Optical Description - Up to UXGA, 1600 x1200, 60Hz WUXGA for WXGA 16:10 Maximum resolution - 1920x1200 @60hz only supported for RB (Reduced Blanking) Lens - Manual zoom and manual focus - In Bright mode (Normal mode) 3000 hours standard @260W, 50% survival rate - In STD mode (Eco mode) 5000 hours typical @220W, 50% survival rate Lamp - In ImageCare (Normal mode) 5500 hours typical @260W, 50% survival rate... - Page 69 ADDITIONAL INFORMATION Electrical Description - Horizontal scan rate: 15.375~91.146 KHz Scan rate - Vertical scan rate: 24~ 85 Hz (120Hz for 3D featured projector) Built-in speaker Yes, 10W Power requirement 100 - 240V ±10 50/60Hz Input current 2.5-1.0 A Mechanical Description Installation orientation Desktop/Front, Desktop/Rear, Ceiling/Front, Ceiling/Rear...
-
Page 70: Optoma Global Offices
InfoRmaTIon Optoma global offices For service or support, please contact your local office. Japan 3178 Laurelview Ct. 888-289-6786 東京都足立区綾瀬3-25-18 Fremont, CA 94538, USA 510-897-8601 info@os-worldwide.com 株式会社オーエス www.optomausa.com services@optoma.com 0120-380-495 www.os-worldwide.com コンタクトセンター: Canada Taiwan 3178 Laurelview Ct. 888-289-6786 12F., No.213, Sec. 3, Beixin Rd.,... - Page 71 www.optoma.com...
Need help?
Do you have a question about the EH416 and is the answer not in the manual?
Questions and answers