Table of Contents

Related Manuals for Go Power IC Series


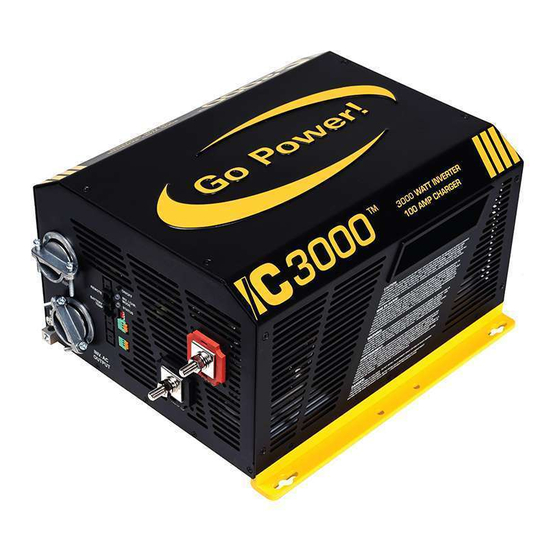
Summary of Contents for Go Power IC Series
- Page 1 INVERTER/CHARGER User Manual GP-IC-2000 GP-IC-3000 © 2019 Go Power! Worldwide Technical Support and Product Information gpelectric.com Go Power! 201-710 Redbrick Street Victoria, BC, V8T 5J3 Tel: 1.866.247.6527 79497_MANUAL_GP-IC-Series_RevH...
- Page 2 Combined with the numerous DC power systems Go Power! manufactures and sells, the IC Series allows you to enjoy the luxuries that electricity provides, with or without a campsite hookup. This manual will aid in the process of installing the Go Power! IC Se- ries Inverter/Charger.
-
Page 3: Table Of Contents
1. CONTENTS GENERAL INFORMATION ......................4 CAUTIONS/WARNINGS ............................4 DISCLAIMERS ..............................7 IC SERIES KIT PARTS ............................7 2.3.1 PARTS CHECKLIST ..........................7 UNIT FEATURES ...............................8 UNIT DIMENSIONS ............................10 UNIT ACCESSORIES ............................11 INSTALLATION TOOLS AND MATERIALS ....................11 INSTALLATION .......................... 12 TYPICAL Inverter/Charger SYSTEM OVERVIEW ..................12 LOCATION AND ENVIRONMENTAL REQUIREMENTS ................ -
Page 4: General Information
2.GENERAL INFORMATION 2.1 CAUTIONS/WARNINGS This document contains important safety instructions for the products produced by Go Power! Read all instructions and cautionary markings on the product and on any accessories or additional equipment included in the installation. Failure to follow these instructions could result in severe shock or possible electrocution. Use extreme caution at all times to prevent accidents. - Page 5 Do not perform any servicing other than that specified in the WARNING! installation instructions unless qualified to do so, or have been Lethal Voltage instructed to do so by Go Power! Technical Support personnel. To avoid electric shock, disconnect the DC input and AC input of the inverter at least 5 minutes before performing any installation or maintenance. Do not tighten the AC and DC terminals or pull on the AC and DC wiring when the inverter is running.
- Page 6 If a battery must be removed, always remove the grounded terminal from the battery first. Make sure all devices are de-energized or disconnected to avoid causing a spark. Use the battery types recommended by Go Power!. Follow the battery manufacturer’s recommendations for installation and maintenance. Insulate batteries as appropriate against freezing temperatures. A discharged battery will freeze more easily than a charged one.
-
Page 7: Disclaimers
Go Power! will refuse requests for exchanges or returns, resulting from the purchase and installation of items which do not comply with local codes. To avoid such concerns Go Power! recommends installation by a professional electrician or RV technician. -
Page 8: Unit Features
GENERAL INFORMATION 2.4 UNIT FEATURES Power Inverter/Charger Status LED Switches ON/OFF Switch Mode Intake Air Vents (and on right side) Positive (+) ON/OFF DC Terminal INV. / CHR. MODE REMOTE STATUS Negative (-) DC Terminal BATTERY AC INPUT TEMP Mounting AC Entry/Exit Flange Terminals... - Page 9 GENERAL INFORMATION Built-in Handles INPUT INPUT Exhaust Air Vents AC Input Circuit Serial Number AC Access Cover Breakers (Back side) Label Please note: Label shown is for a GP-IC-2000. Please refer to the label on your Inverter/Charger for accurate information. Dip Switches - Reserved for future use.
-
Page 10: Unit Dimensions
GENERAL INFORMATION 2.5 UNIT DIMENSIONS 13.6” (346mm) 4.9” 2” (51mm) 4.9” (124mm) (124mm) .28” .51” (7mm) (13mm) 12” (304mm) 12.6” (321mm) 14.9” (378mm) 13.7” (349mm) CAUTION: • TO PREVENT FIRE, DO NOT COVER OR OBSTRUCT VENTILATION OPENINGS. DO NOT MOUNT IN ZERO-CLEARANCE COMPARTMENT. -
Page 11: Unit Accessories
GENERAL INFORMATION 2.6 UNIT ACCESSORIES ® The IC Series Inverter/Charger has two accessories available: INVERTER SHORE POWER ON/OFF UNIT READINGS UNIT SETUP CHARGER REMOTE SETTINGS ON/OFF • IC Series remote (not included). • Battery temperature sensor (included). ENTER / SET... -
Page 12: Installation
3.1 TYPICAL SYSTEM OVERVIEW The following diagrams on pages 12-15 show how the IC Series is typically installed in a mobile RV application. The diagrams show where the Inverter/Charger is installed and how the mobile power system can be integrated with a Go Power! RV Solar Kit (sold separately by Go Power;... - Page 13 INSTALLATION GP-IC-Remote Solar Controller Cable to Battery Bank Cable to IC Series AC Power OUTPUT - to RV appliances AC Power INPUT - from Shore Power/Generator (Fuses/Breakers not shown) IC Series IC Series Inverter/Charger Inverter/Charger Cables to/from Battery Bank Cables From...
- Page 14 AC Transfer Switch Refrigerator Vent Cover Cable Entry Plate Main Pane Solar Charge Controller Earth Ground (RV, Boat Ground) Fuse Battery Temperature Sensor To Battery Bank To Battery Bank Typical RV Solar Kit (sold separately by Go Power) [page 14] | gpelectric.com...
- Page 15 120/240 VAC Remote Control (Optional) 120 VAC 240 VAC (cabin install) 120 VAC Sub Panel IC Series Inverter/Charger DC Panel Battery Disconnect Switch (not required if circuit breaker is used) Fuse or Circuit Breaker Battery Bank gpelectric.com | [page 15]...
-
Page 16: Location And Environmental Requirements
Make sure the Inverter/Charger is installed in a location where the normal air temperature is between 0 °C and 50 °C. The cooler the better within this range. Note the IC Series maximum output wattage will derate in temperatures above 45 °C. -
Page 17: Mounting The Inverter/Charger
C B 2 C B 1 MISE EN GARDE: The IC Series Inverter/Charger is Marine UL listed. In order to properly mount the Inverter/Charger in a marine application, REMOTE STATUS • POUR PRÉVENIR LES RISQUES D’INCENDIE, NE PAS COUVRIR NI OBSTRUER LES OUVERTURES D’AÉRATION. NE PAS MONTER LE PRODUIT DANS UN COMPARTIMENT SANS AUCUN DÉGAGEMENT. -
Page 18: General Wiring Specifications
3.4 GENERAL WIRING SPECIFICATIONS The following sections detail how the IC Series Inverter/Charger should be wired. Before starting any wiring, read and understand these instructions. Wiring should meet all local codes and standards and be performed by qualified personnel such as a licensed electrician. -
Page 19: Dc Wiring
Inverter/Charger unit should be minimized except from the over-current and battery disconnect devices. All additional connection points will cause extra voltage drops. • The Battery bank voltage must match the DC voltage required by the IC Series, which is 12V. Do not connect a 24V battery bank to the Inverter/Charger. •... -
Page 20: Dc Wire Sizing
If you install a fuse for overcurrent protection, then a separate disconnect switch will need to be installed. 3.5.3 PREPARING THE DC CABLES Go Power! supplies 2 ring lugs with the IC Series, which can be used for the Inverter/Charger end of the DC Cables. Source the correct ring terminals for the batteries you are using. -
Page 21: Battery Temperature Sensor
INSTALLATION DO NOT INSTALL ANYTHING BETWEEN RING LUG and DC TERMINAL Split Washer Washer Battery Temperature Sensor Battery Cable (with ring lug) Battery Post (Negative Terminal) Inverter/Charger DC Terminal Battery Cable (with ring lug) M8mm Washer M8mm Split Washer M8mm Nut DO NOT INSTALL ANYTHING BETWEEN RING LUG and BATTERY POST... -
Page 22: Wiring The Inverter/Charger To The Battery Bank
AC wiring is complete and the AC and DC overcurrent protection has been installed. 240 VAC The IC Series are 12V Inverter/Chargers so the battery bank must be wired in series, parallel, or series-parallel to provide the correct voltage: 12V. Example battery configurations are shown on page 23. The interconnecting wires between the individual batteries must be sized and rated exactly the same as those used between the battery bank and Inverter/Charger. -
Page 23: Battery Layouts
INSTALLATION 3.5.7 BATTERY BANK CONFIGURATIONS 12 VDC 12 VDC (400 AH) (600 AH) 12 VDC 12 VDC 12 VDC (400 AH) 12 VDC (600 AH) (400 AH) (600 AH) 12 VDC 12 VDC (100 AH) 12 VDC 12 VDC (200 AH) 12 VDC 12 VDC 12 VDC... -
Page 24: Dc Grounding
The DC ground wire connection on the IC Series is used to connect the exposed chassis of the Inverter/Charger to the DC grounding system. Use copper wire that is either bare or provided with green insulation. This terminal accepts CU/AL conductors from #14 to #2 AWG (2.1 to 33.6mm2). -
Page 25: Ac Power Sources
INSTALLATION 3.6.1 AC POWER SOURCE TYPES AC Input power to the IC Series can be supplied from a split-phase or dual-input single phase AC source. These sources typically include utility power or a generator. • Split Phase: This source has 4 lines: 2 Hot Lines, one neutral and one ground. The 2 hot lines are 120VAC and are 180 degrees out of phase with each other, so that the 2 voltages equal 240VAC. -
Page 26: Ac Terminal Block Connections
(to sub panel) 3.6.4 AC TERMINAL BLOCK CONNECTIONS The IC Series has a six-pole AC terminal block and two AC ground terminals to connect the Inverter/Charger’s AC input and output wiring. The terminal block and ground terminals can be accessed by removing the three Phillips screws holding the AC cover plate. -
Page 27: Ac Cable Connections
INSTALLATION • Connect the NEUTRAL (white) from the main panel to the Inverter/Chargers ACN-IN terminal. Tighten the terminal securely to 16 in lbf (1.8 N-m). IN 1 AC Live from main panel IN 2 AC Live from main panel ACN-IN AC Neutral from main panel Main Panel OUT 1... - Page 28 INSTALLATION ACN-IN ACN-IN OUT1 OUT1 OUT2 OUT2 ACN-OUT ACN-OUT size : 55x36.5mm AC WIRING CHECKS • Ensure all wires are secured. In RV applications use zip ties or other non-conductive fasteners to prevent chaffing or damage from movement and vibration. • Ensure strain reliefs or grommets are in place to prevent damage to the wiring or conduit where it passes through the walls/bulkheads or other openings.
-
Page 29: Ac Wiring 1 - Single Phase, ≤30A Service, Single In/Single Out
Hot 1 (Black) Neutral Bus Bar Notes: Ground Bus Bar * All previous converter/charger wiring must be disconnected from the breaker panel. The IC Series is now used for battery bank charging. Maximum 30A Break (single pole) #10 AWG GFCI... -
Page 30: Ac Wiring 2 - Single Phase, 30A> Service, Single In /Single Out
Notes: Using powered use mor Charger Notes: conditio * All previous converter/charger wiring must be disconnected from the breaker panel. The IC Series is now used for battery bank charging. All p breaker GFCI GFCI Outlet Outlet 120 VAC 120 VAC... -
Page 31: Ac Wiring 3 - Split Phase, 50A Service, Dual In, Dual Out, Option 1
AC Neutral to main panel Notes: Main Panel * All previous converter/charger wiring must be disconnected from the breaker panel. The IC Series is now used for battery bank charging. Hot 1 (Black) Neutral Bus Bar Hot 2 (Red) Ground Bus Bar... -
Page 32: Ac Wiring 4 - Split Phase, 50A Service, Dual In, Dual Out, Option 2
Sub Panel Notes: l Bus Bar Ground Bus Bar Neutral Bus Bar * All previous converter/charger wiring must be disconnected from the breaker panel. The IC Series is now used for battery bank charging. GFCI GFCI Outlet Outlet 240 VAC 120 VAC [page 32] | gpelectric.com... -
Page 33: Grounding The Inverter - Ac Grounding
AC Ground from main panel Inverter/Charger When using the IC Series in inverting mode and when using multiple other AC power sources (shore or generator power), there OUT 1 is the potential of having multiple connections between neutral and ground. The Inverter/Charger automatically switches the AC Live to sub panel neutral to ground when switching from Inverting to AC pass-through mode. -
Page 34: Disabling The Neutral To Chassis Ground Connection
120 VAC 120 VAC The IC Series Inverter/Charger has the automatic neutral to ground switching feature enabled as a factory default setting. In some installations this feature must be physically disabled by disconnecting the neutral to chassis ground connection. Please consult your local code requirements to see if this feature must be physically disconnected. -
Page 35: Final Inspection
Corrosion The IC Series’ AC and DC terminals must be connected to the common boat ground to provide an important safety feature. This ground connection can introduce the risk of galvanic corrosion and/or electrolysis of the boat’s underwater metallic hardware. A galvanic isolator or an onboard isolation transformer can be used to prevent galvanic corrosion. -
Page 36: Operation
SEARCH WATTS When the Inverter in the IC Series is turned ON, the automatic search function is enabled. This feature is used to conserve battery power when no AC power is required (no appliances being used). - Page 37 BATTERY CHARGER SPECIFICATIONS The IC Series Inverter/Charger is equipped with a PFC (Power Factor Corrected) and PI (Proportional Integral) multistage battery charger. These 2 features maximize the real power from AC Shore Power. The multistage battery charger can use up to four different charging stages to help monitor and keep the batteries healthy.
-
Page 38: Ac Power Pass-Through Mode
OPERATION 4.2 AC POWER PASS-THROUGH MODE In AC power pass-through mode: • Shore power (utility or generator) is connected. • The power required by the appliances (fridge, TV, charger) is 3600W (30AAC x 120VAC) - • Shore power is powering all the appliances (3600W) - •... -
Page 39: Charging Mode
Charging Mode * No load power required (fridge, air conditioner, etc) Batteries Charging IC Series operates in Battery Charging Mode Up to 100 ADC / Hour (2) 1800W (15 AAC x 120 VAC) of shore power used to charge the batteries, this equates to ≈... -
Page 40: Power Sharing Mode
OPERATION Main Panel 4.4 POWER SHARING MODE 1 In power sharing mode: AC Power Pass Through Mode • The power required by the appliances (fridge, TV, charger) is 4200W (35AAC x 120VAC) - * IC-2000 operates in AC Pass Through Mode (1) 3600W of Load Power required (fridge, air conditioner, etc) Shore power (Utility or Generator) is connected and supplying 6000W (50AAC x 120VAC) - •... -
Page 41: Generator Mode
OPERATION Main Panel 4.5 POWER SHARING MODE 2 In generator mode: Inverting Mode Discharging Battery Battery Dis - Charging (1) 2000W of load power required (fridge, air conditioner, etc) ≈186 Amps DC / hour • The power required by the appliances (fridge, TV, outlets) is 3600W (30AAC x 120VAC) - * IC-2000 operates in Inverting Mode (2) Batteries are supplying all the load power required •... -
Page 42: Inverting Mode
OPERATION 4.6 INVERTING MODE In inverting mode: • The load power required by the appliances (fridge, TV, charger) is 2000W (16.7AAC x 120VAC) - • The inverter supplies the 2000W or 3000W (186 ADC x 12VDC x 0.9) of AC power required to power the appliances - •... -
Page 43: Battery Temperature Sensor Operation
4.7 BATTERY TEMPERATURE SENSOR (BTS) OPERATION The IC Series Inverter/Charger is delivered with a battery temperature sensor. By installing this sensor, the charge voltages are automatically adapted for deviating temperature. With a BTS installed, if the temperature around the BTS is below 20°C, the absorb and float charge voltage increases. If the temperature around the BTS is above 20°C, the absorb and float charge voltage decreases. The... -
Page 44: Ic Series Fault Conditions
4.9 IC SERIES FAULT CONDITIONS The IC Series is protected against fault conditions and in normal use it will be rare to see any. If a fault condition does occur, the Inverter/Charger will shut down as a safety measure to protect itself, the battery bank, and the AC loads. The following fault... -
Page 45: Specifications
Unit is in search mode, which means load is Inverter/Charger to full output power, or turn off Inverter LED is too small for search mode circuit detection. search function with the IC Series Remote. Loose or corroded battery cables. Clean and tighten all cables. Low output or Low batteries. - Page 46 SPECIFICATIONS Electrical Specification Item GP-IC-2000 Nominal Voltage 12 VDC Absolute Max. DC Input 25 VDC HBCO/HBCI 17 VDC ±0.3V LBCO/LBCI 9.0 VDC ±0.3V Input Voltage Range 9 - 17 VDC ±0.3V Input Characteristics Input Over-Voltage Protection 16.5 - 17 VDC Input Under-Voltage Protection 9 - 10.5 VDC Max DC Input Current...
- Page 47 SPECIFICATIONS Electrical Specification Item GP-IC-3000 Nominal Voltage 12 VDC Absolute Max. DC Input 25 VDC HBCO/HBCI 17 VDC ±0.3V LBCO/LBCI 9.0 VDC ±0.3V Input Voltage Range 9 - 17 VDC ±0.3V Input Characteristics Input Over-Voltage Protection 16.5 - 17 VDC Input Under-Voltage Protection 9 - 10.5 VDC Max DC Input Current...
-
Page 48: Important Safety Instructions
SAVE THESE INTRUCTIONS: This manual contains important safety and operating procedures. The IC Series Inverter/Chargers are Marine UL listed, and can be used in marine applications. Below are important safety and operating instructions for using the IC Series in marine applications. -
Page 49: Warranty Return Procedure
Return defective product to place of purchase. Unless approved by Go Power! Management, all product shipped collect to Go Power! will be refused. Test items or items that are not under warranty, or units that are not defective, will be charged a minimum bench charge of $50.00 US plus taxes and shipping. -
Page 50: Product End Of Life Information - Recycling
If you have no local certified e-waste recycling center, the IC Series Inverter/Charger can be disassembled manually and recycled responsibly. A Phillips screwdriver is required to disassemble the Inverter/Charger. Note: The IC Series should only be disassembled at the end of its service life. Go Power! provides no spare parts for the Inverter/Charger. Remove the screws holding the outer case to the base plate. The plastic handles can be removed from the outer case by pushing them out from the inside. - Page 51 END OF LIFE - RECYCLING INFORMATION Remove the screws holding PCB #2. PCB #2 Recycling (small electronics) Remove the screws holding the transformer. Transformer (Copper) Recycling (small electronics) Metals Copper Remove the screws holding the Remove the screws holding PCB The Inverter/Charger has been fans.
- Page 52 © 2019 Go Power! Worldwide Technical Support and Product Information gpelectric.com Go Power! 201-710 Redbrick Street Victoria, BC, V8T 5J3 Tel: 1.866.247.6527 79497_MANUAL_GP-IC-Series_RevH...
Need help?
Do you have a question about the IC Series and is the answer not in the manual?
Questions and answers