
Related Manuals for Shure A900-PM-38IN


Summary of Contents for Shure A900-PM-38IN
- Page 1 A900-PM-38IN Mounting Kit for 3/8-in. Threaded Rod Shure A900-PM-3/8IN Mounting Kit user guide. Attach MXA920 microphones to 3/8-inch threaded rod using this kit and the included VESA bracket. Version: 0.2 (2022-D)
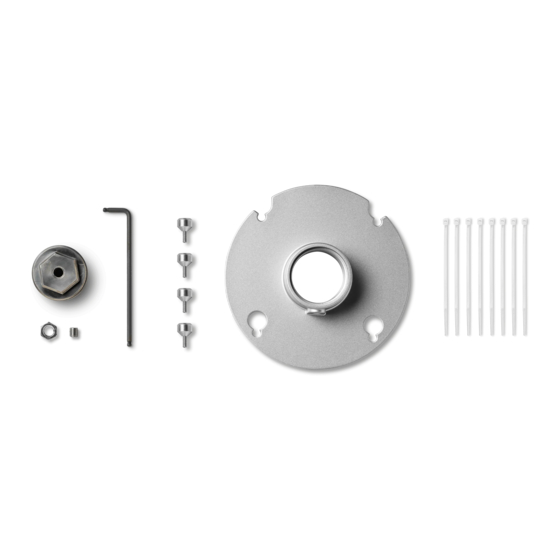
- Page 2 Shure Incorporated Table of Contents What's in the Box A900-PM-38IN Mounting Kit for 3/8-in. Threaded Rod 3 Attaching Microphones to 3/8 in. Threaded Rod A900-PM-3/8IN Mounting Kit IMPORTANT SAFETY INSTRUCTIONS Compatible Microphones Contact Customer Support...
- Page 3 A900-PM-3/8IN Mounting Kit Shure's A900-PM-3/8IN Mounting Kit includes parts to install MXA920 series microphones on 3/8-inch diameter threaded rod (rod not included). Install the threaded rod on the ceiling and then attach the microphone using the VESA bracket for a simple mounting solution.
- Page 4 Shure Incorporated Attaching Microphones to 3/8 in. Threaded Rod To get started, you will need: • A900-PM-3/8IN kit • 3/8 in. diameter threaded rod and hardware to attach to ceiling* • Ethernet cable* *Not included Install the threaded rod on the ceiling according to manufacturer's instructions. Route the Ethernet cable down the side of the threaded rod.
- Page 5 Shure Incorporated Lift the microphone and align the thumb screws with the holes in the VESA bracket. Tighten the thumb screws to secure the microphone to the VESA bracket. Important: Before tightening, make sure that the thumb screws are properly seated in the VESA bracket.
- Page 6 Shure Incorporated Connect the Ethernet cable to the microphone. Secure the Ethernet cable to the threaded rod with the cable ties. IMPORTANT SAFETY INSTRUCTIONS READ these instructions. KEEP these instructions. HEED all warnings. FOLLOW all instructions. DO NOT use this apparatus near water.
- Page 7 Shure Incorporated CLEAN ONLY with dry cloth. DO NOT block any ventilation openings. Allow sufficient distances for adequate ventilation and install in accordance with the manufacturer’s instructions. DO NOT install near any heat sources such as open flames, radiators, heat registers, stoves, or other apparatus (in cluding amplifiers) that produce heat. Do not place any open flame sources on the product.
Need help?
Do you have a question about the A900-PM-38IN and is the answer not in the manual?
Questions and answers