Table of Contents
Advertisement
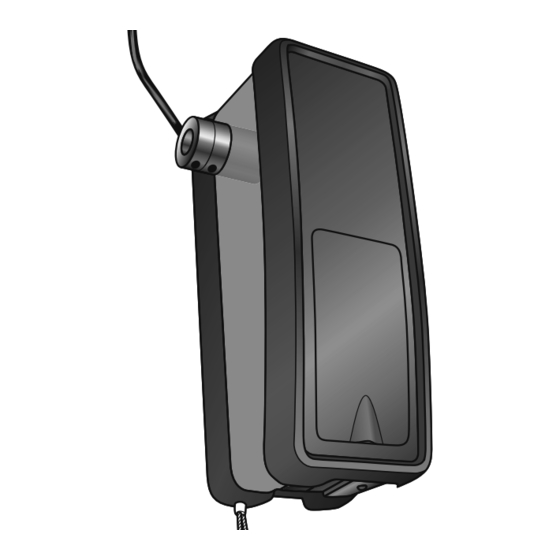
GARAGE DOOR OPENER
For Residential and Light Duty Commercial Use
Install On Sectional Doors With Torsion
■ Please read this manual and the enclosed safety materials carefully!
■ Fasten the manual near the garage door after installation.
■ The door WILL NOT CLOSE unless the Protector System
connected and properly aligned.
■ Periodic checks of the garage door opener are required to ensure safe operation.
■ The model number label is located behind the hinged door of your opener.
■
DO NOT exceed 10 complete cycles of door operation per hour.
Model 3800PLD
Assemblies Only
®
®
and cable tension monitor are
The Chamberlain Group, Inc.
845 Larch Avenue
Elmhurst, Illinois 60126-1196
www.liftmaster.com
Advertisement
Table of Contents

Related Manuals for Chamberlain LiftMaster Elite Security+ 3800PLD


Summary of Contents for Chamberlain LiftMaster Elite Security+ 3800PLD
- Page 1 ■ The door WILL NOT CLOSE unless the Protector System connected and properly aligned. ■ Periodic checks of the garage door opener are required to ensure safe operation. ■ The model number label is located behind the hinged door of your opener.
-
Page 2: Table Of Contents
Introduction Safety Symbol and Signal Word Review This garage door opener has been designed and tested to offer safe service provided it is installed, operated, maintained and tested in strict accordance with the instructions and warnings contained in this manual. -
Page 3: Planning
• Doors up to 180 sq. ft. (16.7 sq. m). Review or inspect proposed installation area. The garage door opener can be installed on the left or right side of door. Select the side that meets the requirements listed below. -
Page 4: Preparing Your Garage Door
To prevent damage to garage door and opener: • ALWAYS disable locks BEFORE installing and operating the opener. • ONLY operate garage door opener at 120 V, 60 Hz to avoid malfunction and damage. • DO NOT exceed 10 complete cycles of door operation per hour. -
Page 5: Carton Inventory
Introduction Carton Inventory Accessories included with the garage door opener will vary depending on the model purchased. If anything is missing, carefully check the packing material. Remote Control Visor Clip ® Smart Control Panel Power Door Lock with 2-Conductor White & White/... -
Page 6: Assembly
Assembly Attach the Collar to the Garage Door Opener To avoid installation diffi culties, do not run the garage door garage door opener until instructed to do so. The garage door opener can be installed on either side of the door (see PLANNING section page 3). -
Page 7: Attach Mounting Bracket To The Garage Door Opener
Socket Wrench WARNING WARNING 7. NEVER wear watches, rings or loose clothing while installing or servicing the garage door opener. They could be caught in door or operator mechanisms. 8. Install wall-mounted door control: • within sight of the door. -
Page 8: Position And Mount The Garage Door Opener
NOTE: For additional mounting options refer to the accessories page. Close the garage door completely. Slide the garage door opener onto the end of the torsion bar. If the torsion bar is too long or damaged, you may need to cut the torsion bar. Ensure the collar does not touch the bearing plate. -
Page 9: Attach The Emergency Release Rope And Handle
The power door lock is used to prevent the garage door from being manually opened once the door is fully closed. The power door lock must be mounted within 10 feet of garage door opener with approximately a 3 inch (7.6 cm) distance between the center of a door roller and the hole for the power door lock bolt. -
Page 10: Attach The Cable Tension Monitor (Required)
For right side installation, remove the snap-ring holding the roller in place and reassemble it on the opposite side of the cable tension monitor. -
Page 11: Install The Smart Control Panel
LCD screen. SPECIAL NOTE: Only one Smart Control Panel opener. If additional door controls are desired to operate the same garage door opener, it is recommended to use model 378LM wireless door control as the secondary door control. -
Page 12: Install Remote Light
3. If the plug does not fi t fully in the outlet, reverse the plug. 4. If it still does not fi t, contact a qualifi ed electrician. Install Remote Light The remote light (garage door opener light) is designed to plug directly into a standard 120V outlet. Select an appropriate location on the ceiling to mount the light within 6 feet (1.8 m) of an electrical outlet so that... -
Page 13: Electrical Requirements
To make a permanent connection through the 7/8 inch hole in the back of the garage door opener (according to local code): 1. Remove the garage door opener from the torsion bar, remove cover screws and set the cover aside. -
Page 14: Install The Evercharge
2. Attach the SPS to the support with the 1-1/2 inch lag screws (2) provided. There are mounting holes on either side of the SPS. 3. Connect the SPS cord into the connector on the bottom of the garage door opener. 4. Follow all instructions included with the EverCharge proper operation. -
Page 15: Install The Protector System
® Safety Reversing Sensor 6" (15 cm) max. above floor Be sure power is NOT connected to the garage door opener BEFORE installing the safety reversing sensor. To prevent SERIOUS INJURY or DEATH from a closing garage door: • Correctly connect and align the safety reversing sensor. - Page 16 Installation INSTALLING THE BRACKETS Be sure power to the opener is disconnected. Install and align the brackets so the safety reversing sensors will face each other across the garage door, with the beam no higher than 6" (15 cm) above the fl oor. They may be installed in one of three ways, as follows. Track Installation 1.
- Page 17 Installation MOUNTING AND WIRING THE SAFETY REVERSING SENSORS Slide a 1/4"-20x1/2" carriage bolt head into the slot on each sensor. Use wing nuts to fasten safety reversing sensors to brackets, with lenses pointing toward each other across the door. Be sure the lens is not obstructed by a bracket extension.
- Page 18 Installation ALIGNING THE SAFETY REVERSING SENSORS Plug in the opener. The indicator lights in both the sending and receiving eyes will glow steadily if wiring connections and alignment are correct. The sending eye amber indicator light will glow regardless of alignment or obstruction.
-
Page 19: Adjustment
Adjustment Program the Travel Limits Travel limits regulate the points at which the door will stop when moving up or down. Adjust the position of the door by using the black and purple buttons. Black moves the door UP (open) and purple moves the door DOWN (close). SETTING THE UP POSITION: Press and hold the black button until the LED starts fl... -
Page 20: Set The Force
The door must travel through a complete cycle, up and down, in order for the force to be set properly. If the garage door opener cannot open and close the door fully, inspect the door to ensure that it is balanced properly and is not sticking or binding. -
Page 21: Test The Safety Reversal System
When the door reverses on the 1-1/2 inch (3.8 cm) board (or 2x4 laid fl at), remove the obstruction and run the garage door opener through 3 or 4 complete travel cycles to test adjustment. If the garage door opener continues to fail the Safety Reverse Test, call for a trained door systems technician. IMPORTANT SAFETY CHECK: Test the Safety Reverse System after: •... -
Page 22: Test Cable Tension Monitor
Adjustment Test Cable Tension Monitor If your cable tension monitor has been activated the LED on the garage door opener will blink 9 times. Test Power Door Lock 1. With the door fully closed, the power door lock bolt should be protruding through the track. -
Page 23: Operation
11. ALL repairs to cables, spring assemblies and other hardware, ALL of which are under EXTREME tension, MUST be made by a trained door systems technician. 12. ALWAYS disconnect electric power to garage door opener BEFORE making ANY repairs or removing covers. SAVE THESE INSTRUCTIONS. -
Page 24: Using The Smart Control Panel
Feature, below. Motion Sensing (Automatic Light Feature) The garage door opener light will turn on automatically when a person enters the garage. When a person walks in front of the door control, the light will come on for fi ve minutes, then shut off. -
Page 25: Using The Remote Control
Operation Using the Remote Control Press and hold the button down until the door or gate starts to move. The remote control will operate from up to 3 car lengths away on typical installations. Installations and conditions vary, contact an installing dealer for more information. The Remote Control Battery The LED(s) on your remote control will stop fl... -
Page 26: Care Of Your Garage Door Opener
Garage door opener operates from the remote, but not from the Door Control: • Is the door control lit? If not, reverse the wires. If the garage door opener runs, check for a faulty wire connection at the door control, a short under the staples, or a broken wire. - Page 27 • If the garage door opener lights blink, check the safety reversing sensor (see Installation Step 9). • If the garage door opener lights don’t blink and it is a new installation (see Adjustment Step 2). For an existing installation, see below.
-
Page 28: Smart Control Panel Messages
Meaning: This message will appear when the ‘learn’ button has been pressed a second time on the door control or anytime on the garage door opener. The garage door opener is ready to program another remote control by simply pressing the remote control button. -
Page 29: Diagnostic Chart
• Remove sensors from brackets and shorten sensor wires to 1-2 ft. (30-60 cm) from back each of sensor. • Reattach sending eye to garage door opener using shortened wires. If sending eye indicator light glows steadily, attach the receiving eye. -
Page 30: Programming
Programming Your garage door opener has already been programmed at the factory to operate with your hand-held remote control. The door will open and close when you press the button shown. Below are instructions for programming your garage door opener to operate with additional 895MAX remote controls. -
Page 31: To Add, Reprogram Or Change A Keyless Entry Pin
One Button Close: The garage door opener can be closed by pressing only the ENTER button if the one button close feature has been activated. This feature has been activated at the factory. To activate or deactivate this feature press and hold buttons 1 and 9 for 10 seconds. The keypad will blink twice when the one button close is active. -
Page 32: Programming Light Or Additional Light
Programming Reprogramming Light or Additional Light Your garage door opener remote light has already been programmed at the factory to operate with your opener. Any additional or replacement remote lights will need to be programmed. Press and the “learn” button on the light until the LED comes ON. -
Page 33: Repair Parts
41A6388 Collar with set screws (2) 41A6102 Power door lock 41A5266-1 Safety sensor brackets (2) 380LM Remote Light (garage door opener light) 41D96-1 Light lens for light NOT SHOWN 101D173 Push bar for door control 41A6288 Hardware bag for light... -
Page 34: Garage Door Opener Assembly Parts
Repair Parts Garage Door Garage Door Opener Assembly Parts KEY PART NO. NO. DESCRIPTION 41DJ001 Logic board complete with plate 41A6408 Travel Module 41C168 Transformer KEY PART NO. NO. DESCRIPTION 41A6095 Motor with bracket 41B122 Power cord 41A6348-3 Cover... -
Page 35: Accessories
fl oor. 377LM ® Keyless Entry with Security✚ Enables homeowner to operate garage door garage door opener from outside by entering a password on a specially designed keyboard. Also can add a temporary password for visitors or service persons. -
Page 36: Repair Parts And Service
ONE YEAR LIMITED WARRANTY FOR EVERCHARGE The Chamberlain Group, Inc. (“Seller”) warrants to the first retail purchaser of this product, for the residence in which this product is originally installed, that it is free from defect in materials and/or workmanship for a period of 60 full months from the date of purchase and that the motor is free from defect in materials and/or workmanship for a period of the lifetime of the product.