Table of Contents
Advertisement
Quick Links
INSTALLATION INSTRUCTIONS
Fan Models Only: CX242DDWT, CX302DDWT, CX24BD2SPD, CX30BD2SPD, CX36BD2SPD
Fan Models with Hub: CX242DDWTHUB, CX302DDWTHUB, CX24BDM-2SPDHUB, CX30BD-2SPDHUB, CX36BD2SPDHUB
Read all warnings and instructions before beginning to install this fan.
WARNING – TO REDUCE THE RISK OF FIRE, ELECTRIC SHOCK, OR INJURY TO
a) Installation work and electrical wiring must be done by qualified person(s) in accordance with all
applicable codes and standards, including fire-rated construction.
b) Sufficient air is needed for proper combustion and exhausting of gases through the flue
(chimney) of fuel burning equipment to prevent back drafting. Follow the heating equipment
manufacturer's guideline and safety standards such as those published by the National Fire
Protection Association (NFPA), and the American Society for Heating, Refrigeration and Air
Conditioning Engineers (ASHRAE), and the local code authorities.
c) When cutting or drilling into wall or ceiling, do not damage electrical wiring and other hidden
utilities.
WARNING –
d)
FAN WITH ANY SOLID-STATE SPEED CONTROL DEVICE.
e) Use this unit only in the manner intended by the manufacturer. If you have questions, contact the
manufacturer.
f) Before servicing or cleaning unit, switch power off at service panel and lock the service disconnecting
means to prevent power from being switched on accidentally. When the service disconnecting means
cannot be locked, securely fasten a prominent warning device, such as a tag, to the service panel.
DOUBLE CHECK FAN BLADES ARE SECURE TO HUB PRIOR TO INSTALLATION.
BLADES CAN BE DAMAGED DURING SHIPMENT AND CAN BECOME A HAZARD
1. This unit has an unguarded propeller. Do not use in locations readily accessible to people or animals.
2. For general ventilating use only. Do not use to exhaust hazardous or explosive materials and vapors.
3. Carbon monoxide is an odorless, colorless gas that can kill. It may be drawn into the house by operating
this fan if your fuel-burning equipment is not properly maintained, or if you lack adequate attic space.
FOR
WHOLE HOUSE FANS
PERSONS, OBSERVE THE FOLLOWING:
TO REDUCE THE RISK OF FIRE OR ELECTRIC SHOCK, DO NOT USE THIS
CAUTION
UPON ACTIVATION OF MOTOR!
Advertisement
Table of Contents

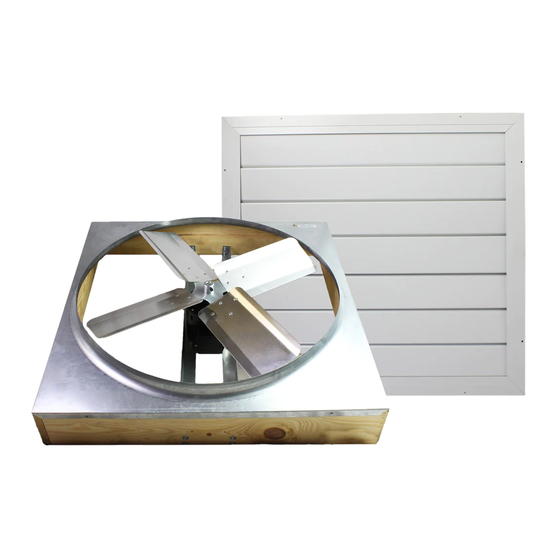
Summary of Contents for Maxx air CX242DDWT
- Page 1 INSTALLATION INSTRUCTIONS WHOLE HOUSE FANS Fan Models Only: CX242DDWT, CX302DDWT, CX24BD2SPD, CX30BD2SPD, CX36BD2SPD Fan Models with Hub: CX242DDWTHUB, CX302DDWTHUB, CX24BDM-2SPDHUB, CX30BD-2SPDHUB, CX36BD2SPDHUB Read all warnings and instructions before beginning to install this fan. WARNING – TO REDUCE THE RISK OF FIRE, ELECTRIC SHOCK, OR INJURY TO...
- Page 2 INSTALLATION INSTRUCTIONS VERY IMPORTANT Please read before attempting installation The fan and shutter are designed for horizontal installation only—the louvers will not function in the vertical position. The wooden fan frame is installed on top of the joists, and the shutters open up between the joists, so the rough opening will be smaller than the fan frame size.
- Page 3 Deciding on a Joist-In or Joist-Out Installation Joist-In Installation Joist-Out Installation The ceiling joists will be left intact for this This method involves removing one or more method. You will need another attic access, as the ceiling joists. This is the preferred method, as the fan will not fit through the shutter opening with best location does not necessarily coincide with the joist(s) in place.
- Page 4 Step 2: Cut the Shutter Opening • Cut through ceiling along lines using a circular saw. Measure depth of drywall and adjust the saw so you only cut the drywall and avoid the joists. • Carefully remove the drywall from the opening *Note* Make sure the exposed joist is centered if doing the joist-in installation.
- Page 5 Step 5: Facing Installation • Use 2 X 6 boards to create a square with the inside dimensions being the same distance as the shortest dimension of the shutter rough opening (i.e. 26” for a 24-in model, etc.). • Nail or screw in the facing to the framed opening. Joist-In Installation Joist-Out Installation TIP: If doing a joist-out installation, use lumber from the support pieces as the long cuts and the removed joists as the...
- Page 6 Step 6: Prepare and Install Fan Assembly (cont.) • Push fan assembly through the shutter opening diagonally or through another attic access if doing a joist-in installation. • Place frame on top of facing or additional frame and draw alignment marks around the base of the assembly then secure to the facing using screws.
- Page 7 Step 8: Wiring Instructions (cont.) • Connect High speed motor lead (BLACK) to the top right terminal of High/Low switch (HIGH). • Connect Low speed motor lead (RED) to the bottom left terminal of High/Low switch (LOW). • Connect incoming common wire (WHT) to the common wire (WHITE) from the motor. •...
- Page 8 This product is warranted against defects in materials and workmanship for the time period listed by model number below, from the date of original retail purchase. No other parts or components are warranted. There is no warranty for defects caused by abuse, faulty installation, or the like. CX242DDWT, CX302DDWT Limited 10-Year CX24B2SPD, CX30BD2SPD, CX36BD2SPD Limited 10-Year Repairs or replacement parts supplied under this warranty are warranted only for the period of this warranty;...


Need help?
Do you have a question about the CX242DDWT and is the answer not in the manual?
Questions and answers