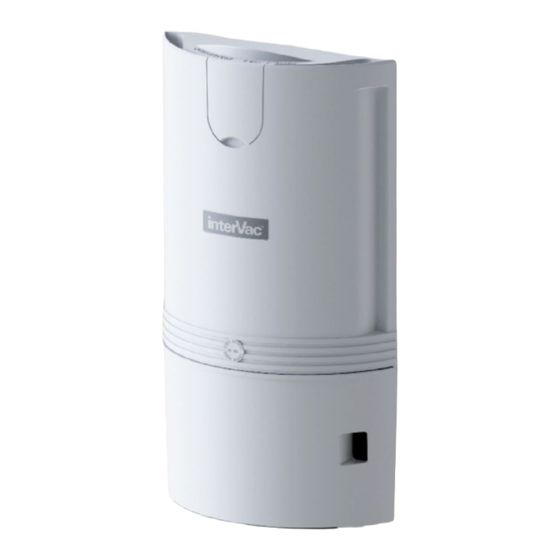
InterVac IVD 660-F Installation And Operating Manual
Hide thumbs
Also See for IVD 660-F:
- Installation and operating manual (12 pages) ,
- Installation and operating manual (12 pages)
Advertisement
Quick Links
THE COMPACT CENTRAL VACUUM SPECIALIST
Please note the IVD-660-H is sold as one master convertible unit. If you desire to
flush mount the IVD-660-H, you will need to remove the side panels and purchase
the mounting frame separately (K-385)
INSTALLATION and OPERATING MANUAL
MODEL: IVD 660-F
IN-WALL INSTALLATION
(Mounting frame sold
separately)
IF YOU SHOULD HAVE ANY QUESTIONS OR EXPERIENCE A PROBLEM WITH YOUR INTERVAC
PRODUCT, DO NOT RETURN THIS PRODUCT TO THE STORE OR DEALER
This manual must be read and understood before installation, adjustment, service, or maintenance is
performed. This unit should be installed by a qualified technician. Modification of this product can be extremely
hazardous and could result in personal injury or property damage. Instructions must stay with unit.
Phone 772-463-1400 • USA & Canada toll free 888-499-1925
www.intervacdesign.com • e-mail: sales@intervacdesign.com
IMPORTANT:
To extend the life of
a vacuum motor, it
is very important to
protect the motor
from the dirt you
are vacuuming up.
Always attach the
dust bag properly,
and the filter under
the bag in the
correct position.
See page 10.
PLEASE CALL US DIRECT 1-888-499-1925
WARNING: Owner read carefully.
InterVac Design
2939 SW 42nd Avenue
Corp., Palm City, FL 34990
RECORD THIS INFORMATION FOR
FUTURE REFERENCES
MODEL NUMBER
DATE OF PURCHASE
PLACE OF PURCHASE
Manual #
M13-E
Rev.: 3/2022
120 and 220 volt
MODEL: IVD 660-H
SURFACE MOUNTED
with side panels
date: 3/2017
66XF
Advertisement

Summary of Contents for InterVac IVD 660-F
- Page 1 See page 10. IF YOU SHOULD HAVE ANY QUESTIONS OR EXPERIENCE A PROBLEM WITH YOUR INTERVAC PRODUCT, DO NOT RETURN THIS PRODUCT TO THE STORE OR DEALER PLEASE CALL US DIRECT 1-888-499-1925 WARNING: Owner read carefully.
-
Page 2: Important Safety Instructions
LIMITED WARRANTY InterVac Design Corp. will repair the power unit with new or rebuilt parts, free of charge for three (3) years in North America from the date of original purchase in the event of a defect in materials or workmanship. Warranty might vary from country to country. - Page 3 Specification: 120 Volt, 12.5 Amp 50/60Hz, high efficiency motor, 660 air watts. 220/230 Volt, 6.5 Amp 50/60 Hz 11 lb, 660 Air Watts Parts List: Model IVD660-F, (flush, recessed in wall) MODEL IVD660-H, (hanging, surface mounted) Mounting frame #K-385 for 2x4 wood studs, 16” on center Metal vacuum hanger + screws 6 screws for installing frame Left and right-side panels...
- Page 4 MODEL 660-FC, Flush mounted, power Cord For New Construction, In-Wall with Power Cord Attached Note: Two studs must be on 16” centers or 14-1/2” (36.8 cm) between studs. If the studs are further apart, have the carpenter install another stud or attach only one flange to a stud and let the other side float, the vacuum will clamp it to the drywall.
- Page 5 MODEL 660-FC, Flush mounted with power Cord STAND-ALONE Installation into existing 2x4 Dry-Wall, no Pipe Connection Use 2 Plywood Strips 3/8” x 1-1/2” x 22” long with double sticking tape. If you do not have installation frame #K385 as a cutout template, use the dimensions in the drawing. You also need the new blocked intake fitting #K-383, see below.
- Page 6 Outside Exhaust attachment Frame between 2 studs, # K-365 on bottom of 16” center, with reducer, vacuum connecting to the pipe and wire installed hole in the mounting frame. (Not available at this time) Dry wall on top of frame with low voltage wires shown Vacuum with junction...
- Page 7 BACK VIEW OF IVD660-H VACUUM Installing hanger (metal) for surface mounting TOP PLATE (5.2 cm) dimension 3.2 cm Inch to the first hole in the mounting bracket Model 660-H WITHOUT TOP PLATE Marking the upper AND SIDE PANELS UPPER mounting hole MOUNTING HOLE for the vacuum hanger.
- Page 8 FRO NT VIEW OF IVD6 60-H UTILITY VAL VE IN OPEN POS ITION STEEL MOUNTING BRACKET ON/OFF S WITCH FOR UTILITY VAL VE ONLY InterVac Design Corp. 3-1-201 7 Palm C ity, Fl. part K-395 O-ring pipe upper O-ring push slider " space...
- Page 9 PLEASE NOTE: NORMALLY A CENTRAL VACUUM CLEANER IS STARTED WITH THE VACUUM VALVES AROUND THE HOUSE WALLS. WITH THE INTERVAC YOU CAN ALSO UTILIZE THE VALVE IN THE DOOR OF THE POWER UNIT TO CLEAN YOUR GARAGE OR CAR USING THE on/off SWITCH.
- Page 10 Pic. 5 Pic. 6 Pic. 7 Pic. 8 D: To change motor filter when dirty, replacement Part # 1. Remove door and dust bag. 2. Reach into the bottom of the vacuum chamber and pull the motor filter out. Please, notice there is a ½” radius cut out on the back side of the filter towards the right.
- Page 11 PART # AS11 "VacPort.com” for RM Models Air Turbo Nozzle Elongated Dust Brush Model A910 w/o LED light PART # X251 PART # X451 Model A900 with LED light INTERVAC reserves the right to make improvements and modifications without notice.
- Page 12 Install the vacuum close to the garage door. This way cars can be reached inside and outside the garage. Most effective installation. Minimal wall space. other InterVac Models Model RMH-120 Model F120 Installed as a traditional (GF120 without central vacuum system...


Need help?
Do you have a question about the IVD 660-F and is the answer not in the manual?
Questions and answers