Table of Contents
Advertisement
Quick Links
THE COMPACT CENTERAL VACUUM SPECIALIST
RECORD THIS INFORMANTION FOR
FUTURE REFERENCES
MODEL: ______________________
Date Purchased: ______________
Place Purchased: _____________
INSTALLATION AND OPERATING MANUAL
Model CS-6 +
PLEASE NOTE:
CS8
and CS6
The
The
CS-RM
IF YOU SHOULD HAVE ANY QUESTIONS OR EXPERIENCE A PROBLEM WITH YOUR INTERVAC
PRODUCT, DO NOT RETURN THIS PRODUCT TO THE STORE OR DEALER, PLEASE CALL OUR
SERVICE DEPARTMENT AT: 1-888-499-1925, WE ARE HERE TO HELP.
This manual must be read and understood before installation, adjustment,
service or maintenance is performed. This unit should be installed by a
120- and 220-VOLT POWER UNITS
MODEL CS-6 for Power Management
MODEL
CS-8
MODEL
CS-RM
CS-8
have single opening in the dust bag
has double opening in the dust bag
WARNING: Owner read carefully.
qualified technician.
InterVac Design
2939 SW 42nd Ave. Palm City, Fl. 34990
1-888-499-1925
e-mail: intervac@intervacdesign.com
Power Cord or Hardwired
with Power Cord
VacPort
VacPort
Vacuum valve
Corp.,
www.intervacdesign.com •
Manual #M10
Revision Date :3-11-2022
Model CS8-RM
Model
CS-RM
66XF
Advertisement
Table of Contents

Related Manuals for InterVac CS-6


Summary of Contents for InterVac CS-6
- Page 1 CS-RM has double opening in the dust bag IF YOU SHOULD HAVE ANY QUESTIONS OR EXPERIENCE A PROBLEM WITH YOUR INTERVAC PRODUCT, DO NOT RETURN THIS PRODUCT TO THE STORE OR DEALER, PLEASE CALL OUR SERVICE DEPARTMENT AT: 1-888-499-1925, WE ARE HERE TO HELP.
-
Page 2: Important Safety Instructions
LIMITED WARRANTY InterVac Design Corp. will repair the power unit with new or rebuilt parts, free of charge for two (2) years in North America from the date of original purchase in the event of a defect in materials or workmanship. Warranty might vary from country to country. -
Page 3: Specification
Specification: CS-6 and CS-8 120 Volt, 10 Amp 60Hz, Weight 5.5 lb. CS-RM 120 Volt, 10 Amp 60Hz high efficiency motor, Weight 5.6 lb. CS and CS-RM 220 Volt, 5 Amp, 50/60 Hz Parts List: Vacuum Cleaner with screws and clamps... - Page 4 After installing the following electrical connections, you can only run one appliance at a time. The Following installation can be made only by a qualified electrician For Power Management CS-6 only Hard Wiring model CS-8 CS-RM Turn off the breaker to the area you will install the unit.
-
Page 5: Installation Instruction
CS-8 Installation Instruction POWER UNIT The central vacuum should be mounted so that power supply cord can be plugged directly into an electrical outlet. Choose a place that is centrally located to maximize the reach with the vacuum hose. The minimum wall thickness is 3/8” the maximum is 1”. The cut-out in the wall is 11“wide X 6”... - Page 6 FIG 7. With a Phillip head screwdriver adjust the distance between the clamp and the vacuum frame so the clamp reaches behind the frame. FIG 8. Slide the vacuum with the cord into the opening. You might have to hold the 2 lower clamps up.
- Page 7 CS-RM Installation Instruction SEE PAGE 5 and 6 FOR THE POWER UNIT INSTALLATION Inside the vacuum chamber you will find the flanged pipe with 4 screws. Attach the black flanged pipe into the back hole of the power unit. Install the vacuum valve about 3 to 4 feet from the vacuum. (The 2” dia. Flex-hose comes standard at 4’...
- Page 8 VARIOUS VALVE CONNECTION for CS-RM Model AS40-E X640, 2" dia. flex hose valve/reducer CS-RM pipe coupling D900 Threaded Hose AF-01 Coupling, 2 required D920 flanged fitting, supplied with vacuum AS40-E, black P40, 45° "T" valve/reducer CS-RM D900 Threaded Hose Coupling 4 required A900-E VacPort, LED, black...
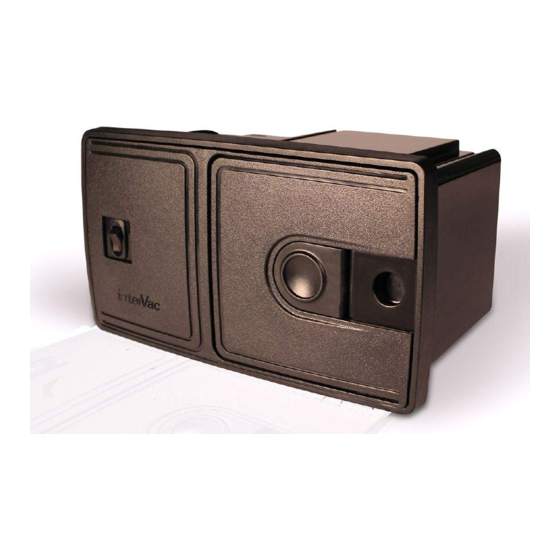
- Page 9 Installing dust bag and motor filter...
- Page 10 HOW TO OPERATE YOUR VACUUM CLEANER IF THE VACUUM STOPS RUNNING: If the vacuum hose becomes clogged the motor will shut off. Push the switch into "source" (Model CS-6) or "off" position (Model CS-8 and CS-RM) and let the motor cool down for one hour.
- Page 11 C.2. To change motor filter, Replacement Part # 1. Remove FRONT PANEL with DUST BAG. 2. On the left side, inside the vacuum chamber, you will see the filter with the arrow pointing towards the back wall. 3. Replace the filter with a new or cleaned filter, with the arrow pointing towards the back wall check that the filter stays on the left side of the top and bottom frame.
-
Page 12: Troubleshooting
CS-RM MODELS with double collar bag Replacement bag: Part # high filtration 5-layer fiber bag. 1. Remove the front panel on the vacuum cleaner by sliding the latch/lock to the left and remove the front panel with dust bag attached dust bag. Remove full bag and discard. 2. -
Page 13: Maintenance Instruction
CLEANING THE STRETCH HOSE: The stretch hose, besides all its' conveniences, tends to get clogged, especially if you have pets. a) Lift the hose up on both ends and dispense some liquid detergent into both ends. b) With a garden hose, holding both ends still up, fill ¾ with water. c) Shake hose up and down, let detergent loosen the dirt.
Need help?
Do you have a question about the CS-6 and is the answer not in the manual?
Questions and answers