Advertisement
Quick Links
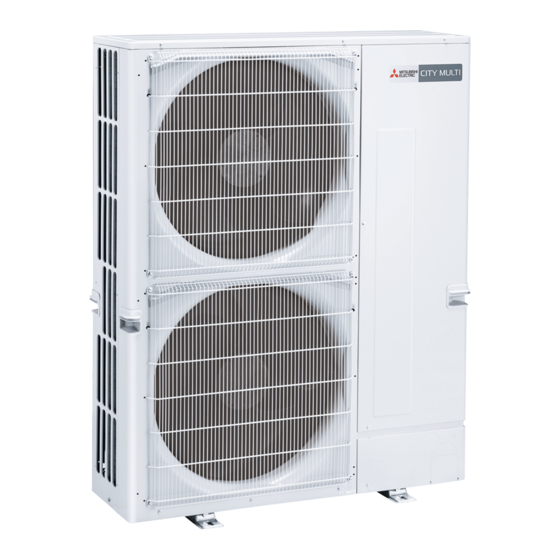
Air-Conditioners
Klimalar
PUMY-P112, P125, P140VKM5
PUMY-P112, P125, P140VKM5-ET
PUMY-P112, P125, P140YKM4
PUMY-P112, P125, P140YKM4-ET
PUMY-P112, P125, P140YKME4
INSTALLATION MANUAL
For safe and correct use, read this manual and the indoor unit installation manual thoroughly before installing
the air-conditioner unit.
MONTAJ ELKİTABI
Emniyetli ve doğru kullanım için, klima cihazını monte etmeden önce bu kılavuzu ve iç ünite montaj kılavuzunu
tamamıyla okuyun.
For use with the R410A
R410A ile beraber kullanmak için
FOR INSTALLER
MONTÖR İÇİN
English
Türkçe
Advertisement

Related Manuals for Mitsubishi Electric CITY MULTI PUMY-P Series


Summary of Contents for Mitsubishi Electric CITY MULTI PUMY-P Series
- Page 1 Air-Conditioners Klimalar PUMY-P112, P125, P140VKM5 PUMY-P112, P125, P140VKM5-ET PUMY-P112, P125, P140YKM4 PUMY-P112, P125, P140YKM4-ET For use with the R410A PUMY-P112, P125, P140YKME4 R410A ile beraber kullanmak için INSTALLATION MANUAL FOR INSTALLER English For safe and correct use, read this manual and the indoor unit installation manual thoroughly before installing the air-conditioner unit.
- Page 2 Manual Download http://www.mitsubishielectric.com/ldg/ibim/ en Go to the above website to download manuals, select model name, then choose language. de Besuchen Sie die oben stehende Website, um Anleitungen herunterzuladen, wählen Sie den Modellnamen und dann die Sprache aus. Rendez-vous sur le site Web ci-dessus pour télécharger les manuels, sélectionnez le nom de modèle puis choisissez la langue. Ga naar de bovenstaande website om handleidingen te downloaden, de modelnaam te selecteren en vervolgens de taal te kiezen.
-
Page 3: Table Of Contents
Contents 1. Safety precautions ..................1 5. Drainage piping work ................13 2. Installation location ..................3 6. Electrical work ..................13 3. Installing the outdoor unit ................6 7. Test run ....................22 4. Installing the refrigerant piping ..............6 Caution: • Do not vent R410A into the atmosphere. Confirmation of parts attached In addition to this manual, the following part is supplied with the outdoor unit. - Page 4 1. Safety precautions 1.1. Before installation Caution: • Do not use the unit in an unusual environment. If the air conditioner is installed • When installing the unit in a hospital or communications office, be prepared for in areas exposed to steam, volatile oil (including machine oil), or sulfuric gas, noise and electronic interference.
-
Page 5: Installation Location
2. Installation location 2.1. Refrigerant pipe Refer to Fig. 4-1. 2.2. Choosing the outdoor unit installation location • Avoid locations exposed to direct sunlight or other sources of heat. • Select a location from which noise emitted by the unit will not inconvenience neigh- bors. - Page 6 2. Installation location 2.5. Connecting a Cylinder (EHST20C) or Hydrobox (EHSC) unit When connecting a Cylinder or Hydrobox unit, be aware of the following points because the Cylinder and Hydrobox unit are different from other indoor units. 2.5.1. Connection restrictions •...
- Page 7 2. Installation location 2.9. Ventilation and service space 2.9.1. When installing a single outdoor unit 2.9.2. When installing multiple outdoor units Minimum dimensions are as follows, except for Max., meaning Maximum dimen- Leave 25 mm space or more between the units. sions, indicated.
-
Page 8: Installing The Outdoor Unit
2. Installation location 2.9.3. Windy location installation When installing the outdoor unit on a rooftop or other location unprotected from the wind, situate the air outlet of the unit so that it is not directly exposed to strong winds. Strong wind entering the air outlet may impede the normal airflow and a malfunction may result. - Page 9 4. Installing the refrigerant piping 4.2. Pipe length and height difference A+B+C+D+a+b+c+d+e [ 300 m L = A+B+C+D+e [ 150 m 4.2.1. Connection without Branch Box (Fig. 4-1) ℓ = B+C+D+e [ 30 m (mm) H [ 50 m (Outdoor lower H [ 40 m*) h [ 15 m Liquid pipe Gas pipe...
- Page 10 4. Installing the refrigerant piping 4.2.3. Mixed system (City Multi indoor units and M, S, P series indoor units via Branch box) (Fig. 4-3) 1. In case of using 1-Branch boxes A Outdoor Unit B First joint C Branch header D Branch box E CityMulti Indoor unit* F M, S, P series Indoor unit, Cylinder unit or Hydrobox unit...
- Page 11 4. Installing the refrigerant piping 4.3. Selecting pipe size I In case of using 1-branch box Flare connection employed. (No. brazing) 4.3.1. Connection without Branch Box Branch box Indoor unit Outdoor unit 10-50 63-140 112-140 Gas side Pipe size (mm) ø12.7 ø15.88 ø15.88...
- Page 12 4. Installing the refrigerant piping 4.3.3. Mixed system (City Multi indoor units and M, S, P series indoor units via Branch box) A Outdoor Unit (Fig. 4-6) B First joint C Branch header D Branch box E CityMulti Indoor unit F M, S, P series Indoor unit Fig.
- Page 13 4. Installing the refrigerant piping 4.4. Connecting pipes (Fig. 4-7) 45°± 2° • Conduct sufficient anti-condensation and insulation work to prevent water dripping from the refrigerant piping. (liquid pipe/gas pipe) • Increase insulation depending on the environment where the refrigerant piping is installed, or condensation may occur on the surface of the insulation material.
- Page 14 4. Installing the refrigerant piping 4.6. Refrigerant pipe airtight testing method (1) Connect the testing tools. • Make sure the stop valves A B are closed and do not open them. • Add pressure to the refrigerant lines through the service port C of the liquid stop valve A and the gas stop valve B.
-
Page 15: Drainage Piping Work
4. Installing the refrigerant piping <Additional Charge> 4.8. Additional refrigerant charge Calculation of refrigerant charge Additional refrigerant charge Refrigerant for the extended piping is not included in the outdoor unit when the unit is Pipe size Pipe size Total capacity of Amount for the shipped from the factory. - Page 16 6. Electrical work 6.2. Control box and connecting position of wiring <PUMY-P·VKM> (Fig. 6-1) 1. Connect the wiring between the outdoor unit and the indoor unit or branch box to B1 B2 the transmission terminal block (TB3) of the outdoor unit. Connect the wiring between the outdoor unit and the centralized control system to the transmission terminal block (TB7) of the outdoor unit.
- Page 17 6. Electrical work <Example of Transmission Cable Wiring: Not using Branch box> ■ ■ M-NET Remote Controller MA Remote Controller M-IC M-IC M-IC M-IC M-IC M-IC M-IC M-IC (51) (51) (01) (02) (05) (06) (01) (02) (05) (06) M1M2S M1M2S M1M2S M1M2S TB15...
- Page 18 6. Electrical work <Incorrect Systems> 1. Group operation by single 2. Group operation between different 3. Connection of M-NET Remote controller remote controller refrigerant systems (3-branch type) (3-branch type) (3-branch type) (5-branch type) A-IC A-IC A-IC A-IC A-IC A-IC MA-RC MA-RC WL-RC M-NET...
- Page 19 6. Electrical work 6.4. Wiring of main power supply and equipment capacity Schematic Drawing of Wiring: When Not Using a Branch Box (Example) (Fig. 6-6) ■ PUMY-P·VKM5 ~/N 220-230-240 V 50 Hz ~/N 220-230-240 V 50 Hz ~/N 220-230 V 60 Hz ~/N 220-230 V 60 Hz ■...
- Page 20 6. Electrical work Cross-sectional area of Wire for Main Power Supply and On/Off Capacities <When power is supplied separately> Minimum Wire Cross-sectional area (mm Power Supply Breaker for Wiring *1 Breaker for Current Leakage Model Main Cable Ground ~/N 220-230-240 V 50 Hz P112-140VKM5 32 A 32 A 30 mA 0.1 sec.
- Page 21 6. Electrical work <Example of “F2” calculation> Sample chart Condition PEFY-VMS × 4 + PEFY-P·VMA-E × 1, C = 8 (refer to right sample chart) F2 = 19.8 × 4/8 + 38 × 1/8 6000 = 14.65 → 16 A breaker (Tripping current = 8 × 16 A at 0.01s) *3 Current sensitivity is calculated using the following formula.
- Page 22 6. Electrical work 6.5. Address setting Switch address setting Branch Box M, S, P CITY MULTI series Outdoor series Indoor Address Connection Setting – ON: Indoor connect Switch OFF: No connection None tens digit ones digit tens digit ones digit tens digit ones digit (SW1-6 not use) SWU2 SWU1...
- Page 23 6. Electrical work Ex3. Outdoor + Branch <1> (M, S, P series Indoor A, B, C, D, E) + Branch <2> (M, S, P series Indoor A, B, C) + CITY MULTI series Indoor <1> + CITY MULTI series Indoor <2> *1 Outdoor address Branch Box <1>...
-
Page 24: Test Run
7. Test run 7.1. Before test run ► After completing installation and the wiring and piping of the indoor and 3. After connecting the wires to the compressor, the compressor will start to warm outdoor units, check for refrigerant leakage, looseness in the power supply up after power is supplied. - Page 25 <ENGLISH> English is original. The other languages versions are translation of the original. CAUTION • Refrigerant leakage may cause suffocation. Provide ventilation in accordance with EN378- • Be sure to wrap insulation around the piping. Direct contact with the bare piping may result in burns or frostbite.
- Page 26 Travellers Lane, Hatfield, Herts., AL10 8XB, England, U.K. Polish Branch Krakowska 50, PL-32-083 Balice, Poland MITSUBISHI ELECTRIC TURKEY ELEKTRİK ÜRÜNLERI A.Ş. Şerifali Mah. Kale Sok. No: 41 34775 Ümraniye, İstanbul / Turkey MITSUBISHI ELECTRIC (RUSSIA) LLC 115114, Russia, Moscow, Letnikovskaya street 2, bld.1, 5th floor Please be sure to put the contact address/telephone number on this manual before handing it to the customer.
Need help?
Do you have a question about the CITY MULTI PUMY-P Series and is the answer not in the manual?
Questions and answers