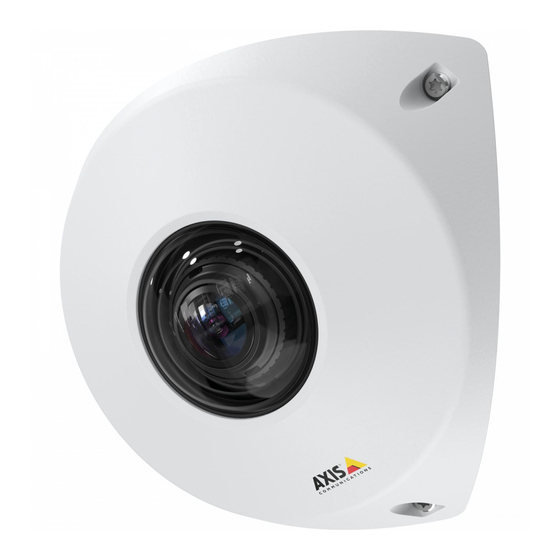
Axis P9106-V User Manual
Hide thumbs
Also See for P9106-V:
- User manual (19 pages) ,
- Repainting instructions (7 pages) ,
- Installation manual (36 pages)
Table of Contents
Advertisement
Quick Links
Advertisement
Table of Contents

Summary of Contents for Axis P9106-V
- Page 1 AXIS P9106-V Network Camera User Manual...
-
Page 2: Table Of Contents
AXIS P9106-V Network Camera Table of Contents Solution overview ......... . . -
Page 3: Solution Overview
AXIS P9106-V Network Camera Solution overview Solution overview... -
Page 4: Product Overview
AXIS P9106-V Network Camera Product overview Product overview Status LED microSD card slot Focus ring Control button Network connector (PoE) -
Page 5: Find The Device On The Network
Find the device on the network Find the device on the network To find Axis devices on the network and assign them IP addresses in Windows®, use AXIS IP Utility or AXIS Device Manager. Both applications are free and can be downloaded from axis.com/support. -
Page 6: Additional Settings
AXIS P9106-V Network Camera Additional settings Additional settings Need more help? You can access the built-in help from the device’s webpage. The help provides more detailed information on the device’s features and their settings. Image quality Select exposure mode There are different exposure mode options in the camera that adjusts aperture, shutter speed, and gain to improve image quality for specific surveillance scenes. - Page 7 AXIS P9106-V Network Camera Additional settings Hide parts of the image with privacy masks You can create one or several privacy masks to hide parts of the image. 1. Go to Settings > Privacy mask. 2. Click New. 3. Adjust the size, color, and name of the privacy mask according to your needs.
-
Page 8: Overlays
Image with WDR. Note WDR may cause artifacts in the image. Find out more about WDR and how to use it at axis.com/web-articles/wdr. Maximize details in an image Important If you maximize details in an image, the bitrate will probably increase and you might get a reduced frame rate. -
Page 9: Streaming And Storage
Additional settings Make sure that AXIS Video Motion Detection is running: 1. Go to Settings > Apps > AXIS Video Motion Detection. 2. Start the application if it is not already running. 3. Make sure you have set up the application according to your needs. - Page 10 AXIS P9106-V Network Camera Additional settings quality or frame rate when the instantaneous bitrate is kept below the specified target bitrate. You can choose to either prioritize image quality or frame rate. We recommend that you configure the target bitrate to a higher value than the expected bitrate. This gives you a margin for additional complexity that needs to be captured.
- Page 11 H.264 or MPEG-4 Part 10/AVC Note H.264 is a licensed technology. The Axis product includes one H.264 viewing client license. To install additional unlicensed copies of the client is prohibited. To purchase additional licenses, contact your Axis reseller. H.264 can, without compromising image quality, reduce the size of a digital video file by more than 80% compared to the Motion JPEG format and by as much as 50% compared to the MPEG-4 standard.
-
Page 12: Events
1. Go to Settings > System > Events and add a rule. 2. Type a name for the rule. 3. In the list of conditions, under Application, select AXIS Video Motion Detection (VMD). 4. In the list of actions, under Recordings, select Record video while the rule is active. -
Page 13: Applications
Add audio capability to your product With the AXIS T61 Audio and I/O Interface products, you can add audio capability to your product. Use the setup in, for example, interview rooms. You can place the Axis network video product on the wall or ceiling to give good visual coverage, and the AXIS T61 Audio and I/O Interface on or above the interview table. - Page 14 2. Connect the AXIS T61 Audio and I/O Interface (2) and the PoE switch (3) with a PoE cable. Once the devices are connected, an audio tab becomes visible in the settings for your Axis network video device. Go to the audio...
-
Page 15: Troubleshooting
AXIS P9106-V Network Camera Troubleshooting Troubleshooting If you can’t find what you’re looking for here, try the troubleshooting section at axis.com/support. Reset to factory default settings Important Reset to factory default should be used with caution. A reset to factory default resets all settings, including the IP address, to the factory default values. -
Page 16: Technical Issues, Clues And Solutions
Axis device. Check all cabling and reinstall the device. Possible IP address conflict The static IP address in the Axis device is used before the DHCP server sets a dynamic address. with another device on the... -
Page 17: Performance Considerations
The TTL (Time To Live) value may need to be increased. No multicast H.264 Check with your network administrator that the multicast addresses used by the Axis device displayed in the client are valid for your network. - Page 18 Heavy network utilization due to poor infrastructure affects the bandwidth. • Viewing on poorly performing client computers lowers perceived performance and affects frame rate. • Running multiple AXIS Camera Application Platform (ACAP) applications simultaneously may affect the frame rate and the general performance.
-
Page 19: Specifications
AXIS P9106-V Network Camera Specifications Specifications To find the latest version of the product’s datasheet, go to the product page at axis.com and locate Support & Documentation. LED Indicators Note • The Status LED can be configured to flash while an event is active. - Page 20 AXIS P9106-V Network Camera Specifications Network connector RJ45 Ethernet connector with Power over Ethernet (PoE).
- Page 21 User Manual Ver. M4.2 AXIS P9106-V Network Camera Date: January 2020 © Axis Communications AB, 2018 - 2020 Part No. T10129997...


Need help?
Do you have a question about the P9106-V and is the answer not in the manual?
Questions and answers