Advertisement
Quick Links
WARRANTY
DO NOT RETURN YOUR PRODUCT TO THE STORE. PLEASE CONTACT BABY TREND
FOR REPLACEMENT PARTS, SERVICE AND REPAIR.
The Baby Trend
warranty covers workmanship defects within the first 180 days of pur-
®
chase. Any product which has been subjected to misuse, abuse, abnormal use, excessive
wear and tear, improper assembly, negligence, environmental exposure, alteration or ac-
cident, or has had its serial number altered or removed invalidates all claims against the
manufacturer. Any damage to property during installation is the sole responsibility of the end
user. The Customer Service Department can be contacted at 1 (800) 328-7363 Monday
through Friday between 8:00am and 4:30pm (PST). Return Authorizations are required prior
to returning product(s) to Baby Trend
GARANTIA
NO DEVUELVA SU PRODUCTO A LA TIENDA. POR FAVOR CONTACTE A BABY TREND
PARA PIEZAS DE REPUESTO, SERVICIO Y REPARACION.
La garantía de Baby Trend
cubre defectos de fábrica dentro de los primeros 180 días de
®
la compra.Cualquier producto que haya sido sometido a uso indebido, abuso, uso anormal,
desgaste excesivo, montaje incorrecto, negligencia, exposición ambiental, alteración o ac-
cidente, o que ha tenido su número de serie alterado o removido anula todos los reclamos
contra el fabricante. Cualquier daño a la propiedad durante la instalación es de la exclusiva
responsabilidad del usuario final. El Departamento de Servicio al Cliente puede ser con-
tactado a 1 (800) 328-7363 Lunes a viernes entre 8:00am y 4:30pm (PST).Un numero de
autorizacion es requerido antes de la devolución de los producto(s) a Baby Trend
válida sólo en América del Norte.
GARANTIE
NE PAS RETOURNER VOTRE PRODUIT AU MAGASIN. VEUILLEZ CONTACTER BABY
TREND POUR DES PIÈCES DE RECHANGE, ENTRETIEN ET RÉPARATION.
La garantie Baby Trend
couvre les vices de fabrication dans les 180 jours suivant l'achat du
®
produit. Tout produit qui a été soumis à un usage abusif, une utilisation anormale, une usure
excessive, un montage incorrect, de la négligence, de l'exposition environnementale, de la
modification ou un accident, ou a eu son numéro de série modifié ou supprimé annule toutes
les réclamations contre le fabricant. Tout dommage à la propriété lors de l'installation est de
la seule responsabilité de l'utilisateur final. Le service client peut être contacté au 1 (800)
328-7363 du lundi au vendredi 8 h – 16 h 30 (PST). Une autorisation sera nécessaire avant
de retourner le produit à Baby Trend
®
www.babytrend.com
Baby Trend, Inc.
1607 S. Campus Ave.,
Ontario, CA 91761
. Warranty only valid in North America.
®
. Garantie valable uniquement en Amérique du Nord.
1-800-328-7363
(8:00am ~ 4:30pm PST)
www.babytrend.com
Read all instructions BEFORE assembly and USE of product.
Lea todas las instrucciones ANTES de armar y USAR el producto.
CONSERVE LAS INSTRUCCIONES PARA USO FUTURO.
Lisez toutes les instructions du manuel AVANT l'assemblage
ou L'UTILISATION de ce produit. CONSERVEZ CES INSTRUC-
. Garantia
®
KEEP INSTRUCTIONS FOR FUTURE USE.
TIONS POUR RÉFÉRENCE ULTÉRIEURE.
SS76
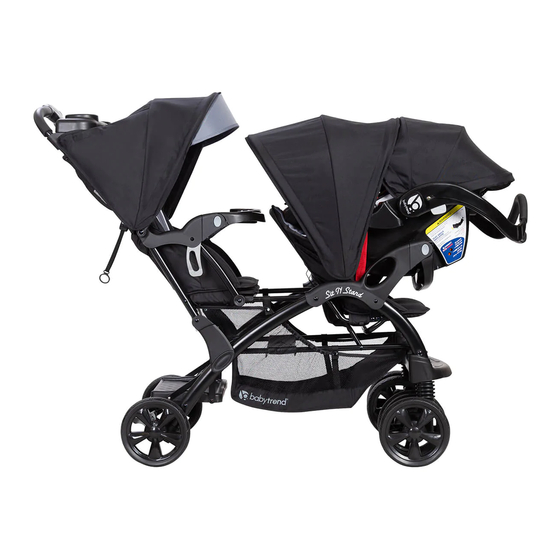
Sit-N-Stand
®
Double Stroller
Instruction Manual
Manual de Instrucciones
Manuel d'instruction
www.babytrend.com
SS76XXX_3L_032619
Advertisement

Subscribe to Our Youtube Channel
Related Manuals for BABYTREND NC76C61


Summary of Contents for BABYTREND NC76C61
- Page 1 à Baby Trend . Garantie valable uniquement en Amérique du Nord. ® Sit-N-Stand ® Double Stroller Instruction Manual Manual de Instrucciones Manuel d’instruction www.babytrend.com Baby Trend, Inc. 1-800-328-7363 1607 S. Campus Ave., (8:00am ~ 4:30pm PST) www.babytrend.com Ontario, CA 91761 www.babytrend.com SS76XXX_3L_032619...
- Page 2 WARNING ADVERTENCIA WARNING: ADVERTENCIA: Please follow all of these Por favor, siga todas estas instructions to ensure the safety of your child. Keep instrucciones para garantizar la seguridad de su hijo. these instructions for future reference. Conserve estas instrucciones para referencia futura. WARNING: ADVERTENCIA: Failure to follow these instructions...
- Page 3 AVERTISSEMENT PARTS PIEZAS PIÈCES AVERTISSEMENT : Check that you have all the parts for this model before assembling the stroller. Prière de suivre Verifique que tenga todas las piezas para este modelo antes de montar el carrito. toutes ces instructions afin d’assurer la sécurité de votre enfant.
- Page 4 ASSEMBLY MONTAJE ASSEMBLAGE ASSEMBLY MONTAJE ASSEMBLAGE IMPORTANT! Remove stroller from box. The front wheels, rear wheels, child tray, and parent To ensure safe operation of your MUST tray be installed prior to use. stroller, please follow these instructions carefully. Please SE DEBEN Retire el carrito de la caja.
- Page 5 ASSEMBLY MONTAJE ASSEMBLAGE ASSEMBLY MONTAJE ASSEMBLAGE • Para colocar las ruedas delanteras, incline REAR WHEELS el carrito hacia atrás de modo que se apoye RUEDAS TRASERAS sobre el manubrio con las patas delanteras ROUES ARRIÈRE y traseras hacia arriba. Ubique las ruedas delanteras en los tubos de la pata delantera 2) •...
- Page 6 ASSEMBLY MONTAJE ASSEMBLAGE ASSEMBLY MONTAJE ASSEMBLAGE 4) • To attach the child tray: Push the tray CHILD TRAY BANDEJA PARA NIÑOS downward and onto each side of the front PLATEAU POUR ENFANT armrests until both side snaps into place (Fig. 4). Repeat the above steps for the rear WARNING: The child’s tray is not a restraint child tray.
- Page 7 ASSEMBLY MONTAJE ASSEMBLAGE ASSEMBLY MONTAJE ASSEMBLAGE • Pour accéder au siège pour enfant : Tirez un CANOPY des côtés du levier de dégagement (Fig. 5a) CUBIERTA situés sur le dessous du plateau pour enfant et AUVENT soulevez-le. Un des deux côtés du plateau pour 8) •...
- Page 8 ASSEMBLY MONTAJE ASSEMBLAGE ASSEMBLY MONTAJE ASSEMBLAGE 9) • To attach the rear canopy: Line up the male fittings of the lower connection with the female • Pour démonter l’auvent arrière : Défaites le courroies du cadre de la fittings on the handle frame and push inward poussette.
- Page 9 SAFETY SEGURIDAD SÉCURITÉ SAFETY SEGURIDAD SÉCURITÉ • Para aplicar los frenos, ejerza una ligera BRAKES FRENOS presión hacia abajo a la palanca del freno situada en cada rueda trasera. El carrito FREINS podría requerir un leve movimiento hacia delante o hacia atrás para alinear los dientes Before placing your child in the stroller, please follow the instructions below.
- Page 10 SAFETY SEGURIDAD SÉCURITÉ SAFETY SEGURIDAD SÉCURITÉ TO SECURE THE CHILD Type 1 Buckle (Fig. 12a). Feed the shoulder strap through Tipo 1 Hebilla PARA SUJETAR AL NIÑO the harness spread slots. You can access Type 1 Boucle POUR ATTACHER L’ENFANT these slots from the rear of the seat.
- Page 11 SAFETY SEGURIDAD SÉCURITÉ SAFETY SEGURIDAD SÉCURITÉ • Les courroies du harnais à 5 points ont 2 Type 1 Buckle • Tipo 1: Para soltarlas, presione el Botón Tipo 1 Hebilla positions d’attache. Choisir la position qui Rojo en el Broche Central y se desprenderán Type 1 Boucle place la courroie a niveau avec, ou au- las dos Hebillas del Arnés.
- Page 12 SAFETY SEGURIDAD SÉCURITÉ SAFETY SEGURIDAD SÉCURITÉ TO RECLINE SEATS JUMP SEAT - 3 POINT HARNESS ASIENTO ADICIONAL - ARNÉS DE 3 PUNTAS PARA RECLINAR LOS ASIENTOS POUR REPOSER SIÈGE SIÈGE ARRIÈRE - HARNAIS DE SÉCURITÉ 3 POINTS WARNING: 14) • Secure the child with the jump seat 3-point The upright harness (Fig.
- Page 13 Infant Sillita Para Siége Infant Sillita Para Siége Car Seat El Automóvil d’auto Car Seat El Automóvil d’auto ADVERTENCIA: TO RECLINE SEATS - REAR SEAT Al fijar las sillitas PARA RECLINAR LOS ASIENTOS - ASIENTO para bebes, asegúrese primero de sujetar la sillita TRASERO TRASERA, y luego sujete la silita del FRENTE.
- Page 14 Infant Sillita Para Siége Infant Sillita Para Siége Car Seat El Automóvil d’auto Car Seat El Automóvil d’auto • Pour placer le siege d’auto pour Turn car seat support tabs on the stroller frame (Fig. 18c). Position the infant car seat facing enfant sur le siege arrière de la toward the rear of the stroller so the seat shell poussette: Déplacez d'abord la verrière...
- Page 15 Infant Sillita Para Siége Infant Sillita Para Siége Car Seat El Automóvil d’auto Car Seat El Automóvil d’auto • Verifique que la sillita para el automóvil esté firmemente trabada en la • Enlevez les ceintures de sécurité du bandeja para niños, luego AMARRE EL CINTURÓN DE SEGURIDAD siège d'auto pour bébé.
- Page 16 JUMP ASIENTO SIÈGE JUMP ASIENTO SIÈGE SEAT ADICIONAL ARRIÈRE SEAT ADICIONAL ARRIÈRE JUMP SEAT 21) • To remove the rear seat: Detach the recline Upper ASIENTO ADICIONAL Superior strap from the frame by folding and sliding Supérieur SIÈGE ARRIÈRE the strap through the “D-ring” located on the end of the strap (Fig.
- Page 17 JUMP ASIENTO SIÈGE JUMP ASIENTO SIÈGE SEAT ADICIONAL ARRIÈRE SEAT ADICIONAL ARRIÈRE To adjust the crotch strap: Adjust the crotch strap for rear facing sitting position. • To attach the rear seat, reverse the above steps. Para ajustar la correa de la entrepierna: Ajuste la correa de la entrepierna para que el •...
- Page 18 JUMP ASIENTO SIÈGE FOLD / PLEGAR / PLIER / SEAT ADICIONAL ARRIÈRE UNFOLD DESPLEGAR DÉPLIER STAND ON THE PLATFORM TO FOLD STROLLER PARE AL NIÑO EN LA PLATAFORMA PARA PLEGAR EL CARRITO POSITION SUR LA PLATE-FORME POUR PLIER LA POUSSETTE WARNING: 24) •...
- Page 19 MAINTENANCE MANTENIMIENTO ENTRETIEN FOLD / PLEGAR / PLIER / UNFOLD DESPLEGAR DÉPLIER • Cierre la cubierta como se describe en la SEAT PAD sección de la cubierta. ALMOHADILLA DEL ASIENTO GARNITURE DE SIÈGE • Tire del carrito hacia atrás varias pulgadas •...
- Page 20 ® BABY TREND CUSTOMER SERVICE The Customer Service Department can be contacted at 1 (800) 328-7363 Monday through Friday between 8:00am and 4:30pm (PST). Return Authorizations are required prior to returning product(s) to Baby Trend®. Warranty only valid in North America. ®...
Need help?
Do you have a question about the NC76C61 and is the answer not in the manual?
Questions and answers