
Subscribe to Our Youtube Channel
Related Manuals for Philips S5589


Summary of Contents for Philips S5589
- Page 1 S5589, S5588, S5587, S5586, S5585, S5584, S5583, S5582, S5581, S5579 www.philips.com/support/ifu...
- Page 4 empty page before TOC...
- Page 5 English 6 简体中文 31...
-
Page 6: Table Of Contents
Replacing the shaving heads_____________________________________ Support___________________________________________________________ Ordering accessories_____________________________________________ Troubleshooting__________________________________________________ Shaver_____________________________________________________________ Philips Quick Clean Pod__________________________________________ Introduction Congratulations on your purchase and welcome to Philips! To fully benefit from the support that Philips offers, register your product at www.philips.com/welcome or via the app. English... -
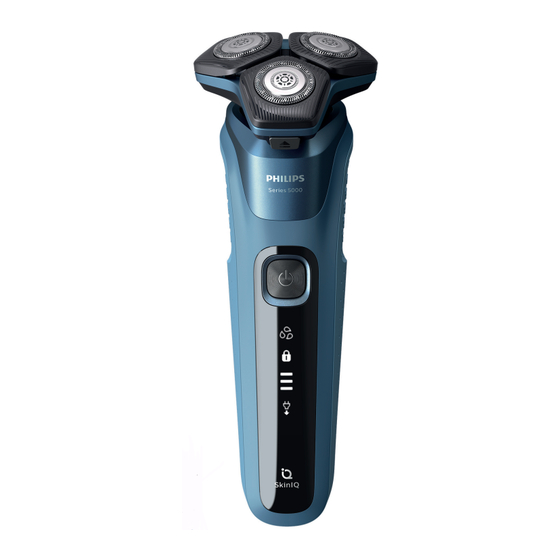
Page 7: General Description
8 Charging stand 9 Supply unit 10 Small plug 11 Protection cap 12 Pouch 13 Philips Quick Clean Pod cartridge 14 Quick Clean Pod 15 Cleaning brush 16 Length settings 17 Click-on beard styler attachment 18 Comb for beard styler attachment... -
Page 8: What Do The Icons On My Appliance Handle Mean
English What do the icons on my appliance handle mean? Icon Behavior Meaning Flashing The cleaning program was interrupted. If slowly when you put the shaver back into the Quick you remove Clean Pod within four seconds, the the shaver cleaning program resumes automatically. -
Page 9: What Does The Icon On My Quick Clean Pod Mean
English Icon Behavior Meaning Lights up The number of bars lit up show the when you remaining battery charge. pick up the appliance Bottom light The battery is almost empty (see 'How do flashing I charge my appliance?'). orange Lights The appliance is charging. -
Page 10: Charging With The Supply Unit
English Quick Charge: After approx. 5 minutes of charging, the battery contains enough energy for one shave. When the appliance is fully charged it has a cordless operating time of up to 60 minutes. Note: You cannot use the appliance while it is charging. -
Page 11: Unplug For Use' Symbol
English 2 Put the small plug in the charging stand and put the supply unit in the wall socket. 3 Place the appliance in the charging stand. Specific models only: The light ring on the bottom of the charging stand lights up and rotates quickly. -
Page 12: Shaving
English the tap. For safety reasons, the appliance can therefore only be used without cord. Shaving You can use this appliance either wet or dry, or even under the shower. For a wet shave, apply some water and shaving foam or gel to your skin and rinse the shaving heads under the tap with warm water before following the steps below. - Page 13 English Note: Make sure you rinse all foam or shaving gel off the appliance. Skin adaptation period Your first shaves may not bring you the result you expect and your skin may even become slightly irritated. This is normal. Your skin and beard need time to adapt to any new shaving system.
- Page 14 English 3 Hold the trimmer perpendicular to the skin and move the appliance downwards while you exert gentle pressure. 4 You can also use the trimmer under your nose. 5 Switch off the appliance and clean the trimmer after each use to prevent clogging and damage (see 'How do I clean my appliance and the attachments?').
- Page 15 English 2 Slide the comb straight into the guiding grooves on both sides of the beard styler attachment. 3 Press the length selector and then push it to the left or right to select the desired hair length setting. 4 Switch on the appliance. 5 Move the appliance upwards while you exert gentle pressure.
- Page 16 English 3 Hold the beard styler attachment perpendicular to the skin and move the appliance downwards while you exert gentle pressure. 4 Switch off the appliance and clean the attachment after use. Using the nose/ear trimmer attachment You can use the nose/ear trimmer attachment to trim your nose and/or ear hair.
- Page 17 - Store the appliance in the pouch (if supplied). - Alternatively, store the appliance on the charging stand (if supplied) or in the Philips Quick Clean Pod (if supplied). Travel lock You can lock the shaver when you are going to travel to prevent it from switching on accidentally.
-
Page 18: How Do I Clean My Appliance And The Attachments
English Once the travel lock is deactivated, the appliance switches on automatically. Note: The shaver unlocks automatically when it is connected to a wall socket. How do I clean my appliance and the attachments? Clean the appliance and the attachments after each use for optimal performance. -
Page 19: Thorough Cleaning
English 4 Rinse the hair chamber under a warm tap. 5 Rinse the shaving head holder under a warm tap. 6 Carefully shake off excess water and let the shaving head holder air-dry completely. 7 Close the shaving unit. Thorough cleaning We advise you to clean the shaving heads thoroughly once a month or when the shaver does not shave as well as it used to. -
Page 20: Cleaning The Pop-Up Trimmer
English 3 Rinse the hair chamber and shaving head holder under the tap. 4 Remove the shaving heads. For detailed instructions, see 'How do I replace the shaving heads?.' Note: Do not clean more than one cutter and guard at a time, since they are all matching sets. If you accidentally put a cutter in the wrong shaving guard, it may take several weeks before optimal shaving performance is restored. -
Page 21: Cleaning The Click-On Attachments
English 3 Switch on the appliance and rinse the pop-up trimmer with warm water. 4 After cleaning, switch off the appliance. 5 Carefully shake off excess water and let the pop-up trimmer air dry. 6 Close the trimmer. Tip: For optimal performance, lubricate the teeth of the pop-up trimmer with a drop of mineral oil every six months (oil not included). -
Page 22: How Do I Use The Quick Clean Pod
English 4 Carefully shake off excess water from the beard styler, combs and nose/ear trimmer attachments and let them air dry completely. Dry the cleansing brush attachment with a towel. Never dry the cutting unit with a towel or tissue, as this may damage the trimming teeth. Tip: For optimal performance, lubricate the teeth of the beard styler attachment with a drop of sewing machine oil regularly. -
Page 23: Using The Quick Clean Pod
English 4 Press the small circular piece on the handle of the Quick Clean Pod Cartridge to break the snap hook on the handle. 5 Place the Quick Clean Pod Cartridge into the Quick Clean Pod. 6 Put the top of the Quick Clean Pod back onto the base and turn it clockwise until you hear a click. -
Page 24: Replacing The Quick Clean Pod Cartridge
English Always shake excess water off the shaver before you place it in the Quick Clean Pod. 1 Place the shaver upside down into the Quick Clean Pod. The shaver automatically detects that it is in the Quick Clean Pod. 2 Switch on the shaver to start the cleaning program. -
Page 25: How Do I Replace The Shaving Heads
For maximum shaving performance, we advise you to replace the shaving heads every two years. Replace damaged shaving heads immediately. Always replace the shaving heads with original Philips shaving heads (see 'Ordering accessories'). Replacing the shaving heads 1 Switch off the shaver. - Page 26 English 2 Press the release buttons on the shaving unit and pull the shaving head holder off the shaving unit. 3 Turn the retaining rings anticlockwise and remove them. Place them aside in a safe place. 4 Remove the shaving heads from the shaving head holder.
-
Page 27: Support
Support Ordering accessories To buy accessories or spare parts, visit www.philips.com/parts-and-accessories or go to your Philips dealer. You can also contact the Philips Consumer Care Center in your country (see the international warranty leaflet for contact details). The following accessories and spare parts are... -
Page 28: Troubleshooting
This chapter summarizes the most common problems you could encounter with the appliance. If you are unable to solve the problem with the information below, visit www.philips.com/support for a list of frequently asked questions or contact the Consumer Care Center in your country. -
Page 29: Philips Quick Clean Pod
Philips Quick Clean Pod Problem Possible cause Solution My shaver isn't clean You removed the Leave the shaver in... - Page 30 Pod after rinsing the the shaving heads shaver but not each time before shaking off excess putting the shaver water. into the Philips Quick Clean Pod. You shaved with Rinse the shaving shaving gel or foam heads thoroughly and did not rinse the...
-
Page 31: 简体中文
简体中文 目录 说明________________________________________ 基本说明____________________________________ 产品手柄上的图标是什么意思?________________ 快速清洗器上的图标是什么意思?______________ 如何为产品充电?____________________________ 使用电源部件充电____________________________ 在充电座上充电(仅限于特定型号)____________ “拔出插头即可使用”符号 ____________________ 如何使用产品和附件?________________________ 剃须________________________________________ 如何清洁产品和附件?________________________ 在水龙头下冲洗剃须刀________________________ 彻底清洁____________________________________ 清洁弹出式修剪器____________________________ 清洁卡入式附件______________________________ 如何使用快速清洗器?________________________ 准备使用快速清洗器__________________________ 使用快速清洗器______________________________ 更换快速清洗器滤芯__________________________ 如何更换剃须刀头?__________________________ 更换剃须刀头________________________________ 支持________________________________________ 订购配件____________________________________ 故障种类和处理方法__________________________ 简体中文... -
Page 32: 基本说明
简体中文 剃须刀______________________________________ 飞利浦快速清洗器____________________________ 说明 感谢您的惠顾,欢迎使用飞利浦产品! 为 了让您能充分享受飞利浦提供的支持,请 在 www.philips.com/welcome 上或通过应 用程序注册您的产品。 基本说明 修发器 修发器释放滑块 剃须刀头部件 剃须刀头部件释放按钮 开/关按钮 手柄 小插头插座 充电底座 电源部件 10 小插头 11 保护盖 12 旅行盒 13 飞利浦快速清洗器滤芯 14 快速清洗器 15 清洁刷 16 长度设定 17 卡入式胡须造型器附件 18 适用于胡须造型器附件的修剪梳 19 附件支架... -
Page 33: 产品手柄上的图标是什么意思
简体中文 20 卡入式洁面刷附件 21 卡入式鼻毛修剪器附件 注意: 随附的附件可能因产品而异。 包 装盒上会显示随附于您产品的附件。 产品手柄上的图标是什么意思? 图标 行为 含义 清洁程序 清洁程序被中断。 如果您在四秒 运行期间 钟之内将剃须刀放回到快速清洗 将剃须刀 器中,清洁程序将自动恢复。 从快速清 洗器中取 出时缓慢 闪烁a 闪烁 在快速清洗器中清洁剃须刀 (请参 见 '如何使用快速清洗器?')。 在 水龙头 (请参见 '如何清洁产品和 附件?')下清洁附件。 持续亮起 清洁程序正在进行中。 从快速清 清洁程序已停止。 如果要继续, 洗器中取 需要重新启动清洁周期,具体做... -
Page 34: 快速清洗器上的图标是什么意思
简体中文 图标 行为 含义 在按下 旅行锁已激活 (请参见 '存放和携 开/关按钮 带')。 时闪烁 拿起产品 亮起的指示条的数量代表剩余的 时亮起 电池电量。 底部指示 电池电量几乎耗尽 (请参见 '如何 灯呈橙色 为产品充电?')。 闪烁 指示灯依 产品正在充电。 次闪烁 持续亮起 产品已充满电。 闪烁 在打开产品之前应先断开其与电 源插座的连接 (请参见 '如何为产 品充电?')。 快速清洗器上的图标是什么意思? 图标 行为 含义 显示在快速清洗器上 快速清洗器滤芯需要更换 (请参见 '如何使用快速清 洗器?')。... -
Page 35: 如何为产品充电
简体中文 如何为产品充电? 首次使用本产品之前,以及当电池状态指 示灯的底灯呈橙色闪烁(指示电池电量几 乎耗尽)时,请为本产品充电。 充电约需 1 小时。 快速充电: 充电大约 5 分钟后,电池含 有的电量足以完成一次剃须。 产品充满电后,可在不接电源的情况下工 作长达 60 分钟。 注意: 不能在充电时使用本产品。 使用电源部件充电 确保产品己关闭。 将充电插头插入产品,然后将电源部 件插入电源插座。 当产品处于快速充电模式时,电池 状态指示灯的各个灯会依次亮起。 大约 5 分钟后,电池状态指示灯的 底灯将闪烁。 电池现在所含的电 量足以完成一次剃须。 产品充电时,电池状态指示灯的底 灯先是闪烁,然后持续亮起。 接 下来,第二个指示灯闪烁,之后持 续亮起,以此类推,直至本产品充 满电。... -
Page 36: 在充电座上充电(仅限于特定型号
简体中文 产品充满电后,所有三个电池指示 灯都会持续亮起。 指示灯将大约 30 分钟后自动熄灭。 充电之后,从电源插座上拔下电源部 件,并从本产品上拔下小插头。 在充电座上充电(仅限于特定型号) 确保产品电源已关闭。 将小插头插入充电座,然后将电源部 件插入电源插座 将产品存置于充电座中。 仅限于特定型号: 充电座底部的光环 亮起并快速旋转。 大约 5 分钟后,光环旋转速度变 慢。 电池现在所含的电量足以完 成一次剃须。 随着产品继续充电,光环变得更 亮,旋转速度更慢。 产品充满电后,光环将完全亮起并 停止旋转。 充电之后,从电源插座上拔下电源部 件,并从充电底座上拔下小插头。... -
Page 37: 拔出插头即可使用"符号
简体中文 “拔出插头即可使用”符号 “不要接电源使用”指示灯闪烁,提醒您 应该先断开产品与电源插座的连接,并从 本产品上拔下小插头后才能打开它。 如何使用产品和附件? 警告: 使用前务必检查产品和所有配件。 如果产品或任何配件损坏,请勿继续使 用,否则可能会造成人身伤害。 请务必用 原装型号更换损坏的部件。 注意: 该产品具有防水性能。 适合在沐 浴或淋浴时使用,也可以放在水龙头下清 洗。 出于安全原因,该产品在使用时不能 连接电线。 剃须 您可以在干湿两种状态下使用本产品,甚 至可以在淋浴时使用它。 若要进行湿剃, 请先用水润湿皮肤,在皮肤上涂抹剃须泡 沫或啫喱,并在水龙头下用温水冲洗剃须 刀头,然后执行以下步骤。 启动产品。 让剃须刀头在您的皮肤上作迂回运 动,以刮剃向不同方向生长的所有须 发。 轻轻按压,以获取舒适贴面的剃 须感受。... - Page 38 简体中文 注意: 不要用力按压剃须刀,这样做 可能会导致皮肤受刺激。 注意: 如果要用啫喱或泡沫剃须,请 在剃须期间定期冲洗剃须刀头部件, 确保其能够继续在您的皮肤上顺畅滑 动。 使用剃须刀头的窄面剃除难以触及部 位的毛发,例如下颌和鼻子下方。 每次使用后,请关闭并清洁本产品。 注意: 确保冲洗干净本产品上的所有 泡沫或剃须啫喱。 皮肤适应期 前几次剃须可能不会带给您预期效果,并 且您的皮肤可能会受到轻度刺激。 这是正 常的。 您的皮肤和胡须需要时间适应任何 新的剃须系统。 为了让您的皮肤适应这款 新产品,我们建议您在 3 周时间内定期 (至少每周 3 次)仅使用本产品剃须。...
- Page 39 简体中文 清洁提醒 关闭产品时,清洗提示符号闪烁,提醒您 需要清洁产品。 每次使用后都要清洁产品和附件,以 防止堵塞和损坏 (请参见 '如何清洁产 品和附件?')。 请每个月彻底清洁一次剃须刀头,或 在产品剃须效果不如之前 (请参见 '彻 底清洁')好时进行清洁。 修剪 您可使用修剪器修剪鬓角和须髭。 向下推修剪器释放滑块可打开修剪器 。 启动产品。 将修剪器垂直放在皮肤上,向下移动 产品,同时轻轻按压。 您还可以使用修剪器剃除鼻子下方毛 发。 每次使用后,请关闭本产品并清洁修 剪器,以防止堵塞和损坏 (请参见 '如 何清洁产品和附件?')。 关闭修剪器。...
- Page 40 简体中文 使用卡入式附件 注意: 随附的附件可能因产品而异。 包 装盒上会显示随附于您产品的附件。 使用带修剪梳的胡须造型器附件 您可以使用带修剪梳的胡须造型器附件以 固定设置(或者使用不同的长度设置)修 整胡须。 您也可以在剃须前用其预先修剪 较长须发,以实现更舒适的剃须体验。 胡须造型器附件的须发长度设置对应修剪 后剩余的须发长度,范围为 1 到 5 毫米。 旋转剃须刀头或其他附件,将其从手 柄上卸下,然后将胡须造型器附件按 在手柄上。 将修剪梳直接滑入胡须造型器附件两 侧的导槽中。 按下长度选择器,然后将其向左或向 右推动以选择所需的须发长度设置。 启动产品。...
- Page 41 简体中文 向上移动产品,同时轻轻按压。 确保 修剪梳的正面与皮肤完全接触。 使用后,请关闭本产品并清洁附件。 使用不带修剪梳的胡须造型器附件 您可以使用不带修剪梳的胡须造型器附件 将胡须、须髭、鬓角或颈部轮廓修整至 0.5 毫米的长度。 您可以使用带修剪梳的胡须造型器附件以 固定设置(或者使用不同的长度设置)修 整胡须。 您也可以在剃须前用其预先修剪 较长须发,以实现更舒适的剃须体验。 将修剪梳抽离胡须造型器附件。 注意: 抓住修剪梳的中间位置,将其 抽离胡须造型器附件。 不要拉拔修剪 梳的侧面。 启动产品。 将胡须造型器附件垂直放在皮肤上, 向下移动产品,同时轻轻按压。 使用后,请关闭本产品并清洁附件。 使用鼻毛/耳毛修剪器附件 您可以使用鼻毛/耳毛修剪器附件修剪鼻毛 和/或耳毛。 修剪鼻毛 修剪之前,请确保鼻毛/耳毛修剪器附件和 鼻腔清洁无异物。...
- Page 42 简体中文 旋转剃须刀头或其他附件,将其从手 柄上卸下,然后将鼻毛/耳毛修剪器附 件按在手柄上。 启动产品。 将修剪刀头小心地插入一个鼻孔。 附件插入鼻孔的深度不得超过 0.5 厘 米。 在每个鼻孔内部缓缓地移动修剪刀 头,确保尖端的一侧紧贴在皮肤上。 这将减少可能出现的瘙痒。 使用后,请关闭本产品并清洁附件。 干鼻屎会阻塞修剪部件,因而阻止产品正 常打开。 如果修剪部件被阻塞,请清洁附 件 (请参见 '如何清洁产品和附件?')。 修剪耳毛 确保耳朵外耳道清洁,没有耳垢。 启动产品。 缓缓地沿着耳缘移动修剪刀头,以剃 掉凸出耳缘的毛发。 将修剪刀头小心地插入外耳道。 修剪刀头插入耳道的深度不能超过 0.5 厘米,否则可能损伤鼓膜。 缓缓地转动修剪刀头,以剃掉外耳道 中所有多余的毛发。 使用后,请关闭本产品并清洁附件。...
-
Page 43: 如何清洁产品和附件
简体中文 存放和携带 注意: 我们建议您将本产品及其配件晾干 后再存放,以备下次使用。 盖上剃须刀保护盖(若随附),以防 积聚灰尘。 将产品存放在软袋中(如有提供)。 或者,将本产品存放在充电座(若随 附)上或飞利浦快速清洗器(若随 附)中。 旅行锁 您在旅行时,可以锁住剃须刀,以防止电 源意外开启。 按住开/关按钮 3 秒钟以进入旅行锁模式 。 3 sec. 旅行锁启用后,旅行锁符号将闪烁。 按开/关按钮 3 秒钟。 旅行锁被禁用后,产品自动打开。 注意: 当连接到电源插座时,剃须刀会自 动解锁。 如何清洁产品和附件? 为获得出色性能,请在每次使用后都清洁 本产品和附件。... -
Page 44: 在水龙头下冲洗剃须刀
简体中文 在水龙头下冲洗剃须刀 每次使用后都要清洁剃须刀,以防止堵塞 和损坏。 请勿使用毛巾或纸巾擦拭剃须刀头部件, 否则可能会损坏剃须刀头。 冲洗剃须刀头部件时,水可能会从剃须刀 底座中滴出。 这属于正常现象。 打开剃须刀。 用温水冲洗剃须刀头部件。 关闭剃须刀。 按下释放按钮,打开剃 须刀头部件。 在温水龙头下冲洗胡茬储藏室。 用温水冲洗剃须刀头支架。 小心地甩掉多余水分并彻底晾干剃须 刀头支架。... -
Page 45: 彻底清洁
简体中文 关闭剃须刀头部件。 彻底清洁 我们建议您每个月彻底清洁一次剃须刀 头,或在剃须效果没有以前好时进行清 洁。 确保产品已关闭并且已与电源插座断 开连接。 按剃须刀头部件上的释放钮并将剃须 刀头支架从剃须刀头部件中抽离。 在水龙头下冲洗胡茬储藏室和剃须刀 头支架。 取下剃须刀头。 有关详细说明,请参 阅“如何更换剃须刀头?”。 注意: 不要同时清洁多组刀片和网 罩,因为它们都是相互匹配的。 如果 不小心将刀片装到了错误的网罩上, 则需要数周时间才能恢复产品的出色 剃须性能。... -
Page 46: 清洁弹出式修剪器
简体中文 在水龙头下清洁刀片和网罩。 甩掉多余的水分。 将剃须刀头重新放入剃须刀头部件。 有关详细说明,请参阅“如何更换剃 须刀头?”。 将剃须刀头支架的铰链卡入剃须刀头 部件顶部的槽内,并合上剃须刀头部 件。 清洁弹出式修剪器 每次使用后都要清洁修剪器,以防止堵塞 和损坏。 切勿用毛巾或纸巾擦干修剪器齿,否则可 能会损坏修剪器齿。 确保产品已关闭并且已与电源插座断 开连接。 向下推修剪器释放滑块可打开弹出式 修剪器。 启动本产品,用温水冲洗弹出式修剪 器。 清洁完成后,关闭产品。 小心地甩干多余的水,然后将弹出式 修剪器晾干。 关闭修剪器。... -
Page 47: 清洁卡入式附件
简体中文 提示: 为达到最佳效果,请每六个月用一 滴矿物油润滑一次弹出式修剪器齿(油未 随附)。 清洁卡入式附件 切勿用毛巾或纸巾擦干修剪器或胡须造型 器附件,可能会损坏修剪齿。 随附的附件可能因产品而异。 包装盒上会 显示随附于您产品的附件。 为达到最佳效果,请在每次使用后都清洁 卡入式附件。 确保产品己关闭。 旋转附件,将其从手柄上卸下。 将洁面刷头竖直抽离附件支架。 用温水彻底清洗部件。 请仅在洁面刷 附件上使用肥皂。 提示: 如果在水龙头下冲洗鼻毛/耳毛 修剪器附件无法充分清洁,请将此附 件按在手柄上,然后将修剪刀头浸入 盛有温水的玻璃杯中几分钟。 然后启 动产品,并在水龙头下冲洗。 小心地甩掉胡须造型器、修剪梳和鼻 毛/耳毛修剪器附件上多余的水,并使 其完全晾干。 用毛巾擦干洁面刷附件。... -
Page 48: 如何使用快速清洗器
简体中文 切勿用毛巾或纸巾擦拭修剪部件,否 则可能会损坏修剪齿。 提示: 为达到最佳效果,请定期用一 滴缝纫机油润滑胡须造型器附件齿 部。 如何使用快速清洗器? 准备使用快速清洗器 旋转并取下快速清洗器的顶部。 拧开快速清洗器滤芯盖。 提起密封圈上的卡舌并拉动一角,以 从快速清洗器滤芯上取下密封圈。 按下快速清洗器滤芯手柄上的小圆 片,以脱开手柄上的卡扣。... -
Page 49: 使用快速清洗器
简体中文 将快速清洗器滤芯放入快速清洗器。 将快速清洗器的顶部放回基座,然后 顺时针旋转直到听到“咔哒”声。 切勿倾斜快速清洗器,以防溢漏。 使用快速清洗器 注意: 如果您在剃须时使用了剃须泡沫、 剃须啫喱或剃须前用品,请在使用快速清 洗器前彻底冲洗剃须刀头 (请参见 '如何清 洁产品和附件?')。 将剃须刀放入快速清洗器之前,务必确保 甩掉剃须刀上多余的水份。 将剃须刀倒置放入快速清洗器中。 剃 须刀会自动检测其是否位于快速清洗 器中。 打开剃须刀,启动清洁程序。... -
Page 50: 更换快速清洗器滤芯
简体中文 每个清洁程序大约需要一分钟。 在清 洁程序运行期间,清洁符号会持续亮 起,且蓝色图标会闪烁。 清洁程序结束后,剃须刀手柄会快速 振动两次。 待剃须刀在快速清洗器中完全晾干后 再存放。 更换快速清洗器滤芯 当快速清洗器上显示滤芯更换图标时,请 立即更换快速清洗器滤芯,或遵循下表进 行更换。 使用频率 周期数 何时更换快速清 洗器滤芯 每天 大约 30 个 每月 每周几次 大约 20 个 每 2 个月 每周 大约 13 个 每 3 个月 每月 大约 3 个 每... -
Page 51: 如何更换剃须刀头
简体中文 握住手柄将快速清洗器滤芯从快速清 洗器中取出。 将滤芯中的所有剩余液体倒入排水 管,并按照当地废物管理条例回收空 的滤芯。 将新的快速清洗器滤芯放入快速清洗 器 (请参见 '准备使用快速清洗器')。 扫描左侧二维码或访问 www.philips.com/cleaning-cartridge 订购快速清洗器滤芯替换件。 如何更换剃须刀头? 为获得更好剃须效果,建议每两年更换一 次剃须刀头。 立即更换损坏的剃须刀头。 务必使用原装 飞利浦剃须刀头 (请参见 '订购配件')进行 更换。 更换剃须刀头 关闭剃须刀。... - Page 52 简体中文 按剃须刀头部件上的释放钮并将剃须 刀头支架从剃须刀头部件中抽离。 逆时针旋转固定环并将其取下。 将其 存放在安全的地方。 从剃须刀头支架上卸下剃须刀头。 直接丢弃用过的剃须刀头,以免与新 的剃须刀头混淆。 将新的剃须刀头放在支架中。 将固定环放回剃须刀头上,然后顺时 针旋转以重新安装固定环。...
-
Page 53: 订购配件
简体中文 每个固定环均具有两个凹槽,正好能 够装入剃须刀头支架的凸缘上。 顺时 针旋转固定环,直至听到“咔哒”一 声,表明固定环已就位。 注意: 当您重新插入剃须刀头并重新 安装固定环时,请将剃须刀头支架握 在手中。 切勿将剃须刀头支架放在平 面上,否则可能会损坏剃须刀头。 将剃须刀头支架的铰链卡入剃须刀头 部件顶部的槽内,并合上剃须刀头部 件。 支持 订购配件 如需购买附件或备件,请访问 www.philips.com/parts-and-accessories 或联系您的飞利浦经销商。 您还可以联系 所在国家/地区的飞利浦客户服务中心(请 参阅保修卡了解详细联系信息)。 可选配以下附件和备件: SH71 飞利浦替换剃须刀头 CC12 飞利浦快速清洗器滤芯(2 件 装) CC13 飞利浦快速清洗器滤芯(3 件 装)... -
Page 54: 故障种类和处理方法
简体中文 CC16 飞利浦快速清洗器滤芯(6 件 装) 注意: 配件可用性可能因国家/地区而 异。 故障种类和处理方法 本章归纳了使用本产品时最常见的一些问 题。如果您无法根据以下信息解决问题, 请访问 www.philips.com/support 查阅常 见问题列表,或联系您所在国家/地区的客 户服务中心。 剃须刀 问题 可能的原因 解决方法 按下开/关钮 本产品仍然连 拔掉产品插头并按开/关 时,产品不 接着电源插 按钮打开产品。 工作。 座。 出于安全 原因,本产品 在使用时不能 连接电线。 充电电池的电 给电池充电。 量已耗尽。 旅行锁已被激 按住开/关按钮 3 秒钟以 活。... - Page 55 简体中文 问题 可能的原因 解决方法 产品的剃须 剃须刀头已损 更换剃须刀头。 效果没有以 坏或磨损。 前好。 毛发或污垢堵 彻底清洁剃须刀头。 塞了剃须刀 头。 水从产品底 在清洁过程 这是正常现象,而且没 部漏出。 中,水可能聚 有危险,因为所有电子 集在产品的机 元件都封闭在产品内部 身内部与外壳 的密封电源部件中。 之间。 飞利浦快速清洗器 问题 可能的原因 解决方法 使用飞利浦快速 您在清洁程序结 请将剃须刀放在 清洗器后,剃须 束前卸下剃须 飞利浦快速清洗 刀依旧不干净。 刀。 器中以完成整个 清洁程序。 每个 清洁程序大约需...
- Page 56 简体中文 飞利浦快速清洗 飞利浦快速清洗 将剃须刀放入飞 器无法启动。 器由剃须刀的马 利浦快速清洗器 达驱动。 中。 打开剃须 刀。 剃须刀连接了电 断开剃须刀与电 源插座。 源部件的连接。 剃须刀电池电量 在使用飞利浦快 耗尽。 速清洗器前,请 给剃须刀充电。 飞利浦快速清洗 经常在冲洗剃须 每次冲洗剃须刀 器溢水。 刀后但未甩掉多 头后都要甩掉多 余水分时使用飞 余的水分,然后 利浦快速清洗 再将剃须刀放入 器。 飞利浦快速清洗 器中。 您在用剃须啫喱 使用飞利浦快速 或剃须泡沫剃须 清洗器之前,请 后,并未冲洗剃 彻底冲洗剃须刀 须刀,就使用飞 头...
- Page 59 Empty page before back cover...
- Page 60 © 2020 Koninklijke Philips N.V. All rights reserved 4222.002.5610.1 (31/7/2020) >75 % recycled paper >75 % papier recyclé...
Need help?
Do you have a question about the S5589 and is the answer not in the manual?
Questions and answers