Table of Contents
Advertisement
Quick Links
NOTICE: Westinghouse reserves the right to make product changes or updates without notice and will not be held liable for
typographical errors in literature.
NOTE TO CONSUMER: PLEASE KEEP ALL INSTRUCTIONS FOR FUTURE REFERENCE.
IF THE INFORMATION IN THIS MANUAL IS NOT FOLLOWED EXACTLY, A FIRE OR EXPLOSION MAY RESULT, CAUSING
PROPERTY DAMAGE, PERSONAL INJURY, OR LOSS OF LIFE. DO NOT STORE GASOLINE OR OTHER FLAMMABLE VAPORS
AND LIQUIDS IN THE VICINITY OF THIS OR ANY OTHER BOILER.
Do not try to light any appliance.
Do not touch any electrical switch.
Do not use any phone in your building.
Immediately call your gas supplier from a neighbor's phone. Follow the gas supplier's instructions.
If you cannot reach your gas supplier, call the fire department. Installation and service must be provided by a qualified installer,
service agency, or the gas supplier.
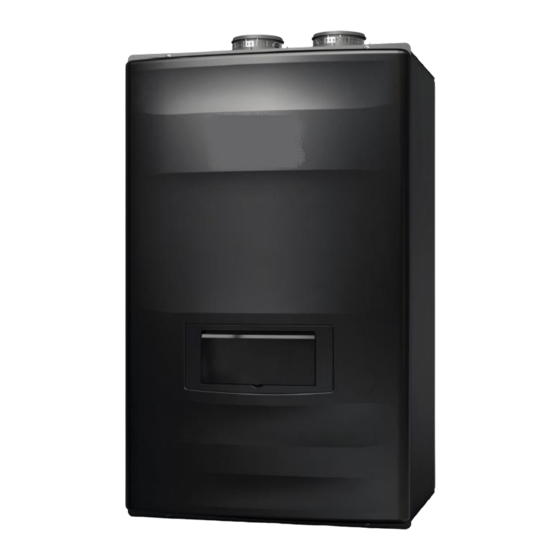
WBRU**80W / 100W / 120W / 140W / 175W / 199W
WHAT TO DO IF YOU SMELL GAS
Universal Fire
Tube Boiler
Wall Mount
INSTALLATION
MAINTENANCE
WARRANTY
Heat Exchanger Bears the ASME "H" Stamp
WHL-032 REV. 6.2.16
START-UP
PARTS
Models
Advertisement
Table of Contents

Subscribe to Our Youtube Channel
Related Manuals for Westinghouse WBRU 80W Series


Summary of Contents for Westinghouse WBRU 80W Series
- Page 1 WBRU**80W / 100W / 120W / 140W / 175W / 199W Heat Exchanger Bears the ASME “H” Stamp NOTICE: Westinghouse reserves the right to make product changes or updates without notice and will not be held liable for typographical errors in literature.
- Page 2 The following defined terms are used throughout this manual to bring attention to the presence of hazards of various risk levels, or to important product information. DANGER indicates an imminently hazardous situation which, if not avoided, will result in death or serious injury. WARNING indicates a potentially hazardous situation which, if not avoided, could result in death or serious injury.
- Page 3 In some circumstances, the property owner or his/her agent assumes the role, and at government installations, the commanding officer or departmental official may be the AHJ. NOTE: Westinghouse reserves the right to modify product technical specifications and components without prior notice. FOR THE INSTALLER This manual must only be used by a qualified heating installer/service technician.
-
Page 4: Table Of Contents
Certain AHJs, locales, and states will require that commercial boiler installations meet the CSD-1 ASME Code, Section CW-400. To meet this code, Westinghouse has integrated a temperature control system into the 926 control provided with this heating boiler. This control system complies with the requirements of CSD-1 Section CW-400 as a temperature operation control. The control monitors the temperature difference between the inlet and the outlet sensor, which is affected by boiler water flow. - Page 5 G. FREEZE PROTECTION FLUIDS ............................. 11 H. HIGH ELEVATION INSTALLATIONS............................11 PART 3 – TECHNICAL SPECIFICATIONS ..........................11 PART 4 – PREPARE BOILER LOCATION ..........................15 A. UNCRATING THE BOILER ..............................15 B. BEFORE LOCATING THE BOILER ............................15 C. LEVELING ....................................16 D.
- Page 6 PART 9 – CONNECT ELECTRICAL POWER / INITIAL STARTUP ..................44 A. GENERAL OPERATING CONDITIONS ........................... 44 B. WIRING INFORMATION ................................44 C. DIP SWITCHES ..................................45 D. WIRING A CASCADE SYSTEM ............................... 46 PART 10 – OPERATING SYSTEM INSTRUCTIONS ........................ 51 A.
-
Page 7: Part 1 - Items Shipped With The Boiler
MAINTENANCE REPORT ................................86 MAINTENANCE NOTES ................................. 89 CUSTOMER INSTALLATION RECORD FORM ..........................90 PART 1 – ITEMS SHIPPED WITH THE BOILER ITEM DESCRIPTION QUANTITY Universal Fire Tube Boiler UFT-W H-2 Form, User, and Installation 1 Each Manuals Condensate Hose (Part # 7855P-089) Anchors and Wall Mounting Bracket... -
Page 8: Part 2 - Safety Regulations
OPTIONAL EQUIPMENT Below is a list of optional equipment available from Westinghouse. These additional options may be purchased through your Westinghouse distributor: System Sensor (Part # 7250P-324) Indirect Tank Sensor (Part # 7250P-325) 2" PVC Concentric Vent Kit (Part # KGAVT0501CVT) ... - Page 9 Due to the low water content of the boiler, improper sizing of the boiler with regard to heating system load will result in excessive cycling and accelerated component failure. Westinghouse DOES NOT warrant failures caused by improperly sized boiler applications. DO NOT oversize the boiler to the system.
-
Page 10: Improper Combustion
Thoroughly flush the system (without boiler connected) to remove sediment. The high-efficiency heat exchanger can be damaged by build-up or corrosion due to sediment. Westinghouse recommends a suction strainer in all systems. Do not use petroleum-based cleaning or sealing compounds in boiler system. Gaskets and seals in the system may be damaged, possibly resulting in substantial property damage. -
Page 11: Freeze Protection Fluids
Ethylene glycol is toxic and can attack gaskets and seals used in hydronic systems. Consider boiler piping and installation when determining boiler location. NOTE: Damages resulting from incorrect installation or from use of products not approved by Westinghouse ARE NOT covered by warranty. H. HIGH ELEVATION INSTALLATIONS Natural gas at high elevation might contain less heating value than typical 1,000 BTU/cu ft and therefore can cause improper air / gas mix leading to improper combustion. - Page 12 Figure 1 – Specifications and Dimensions DESCRIPTION DIAMETER 1 ¼” CH Supply Adapter 1 ¼” CH Return Adapter ¾” Gas Inlet Adapter ½” Condensate Adapter 3” Intake Pipe Connection 3” Exhaust Vent Connection MODEL 100W 17.5 28.75 11.7 14.9 10.7 14.1 10.5 15.4...
- Page 13 Figure 2 – Components (All Models) NUMBER COMPONENT DESCRIPTION NUMBER COMPONENT DESCRIPTION Intake Pipe Adapter CH Bottom Return Adapter CH Top Supply Adapter Condensate Trap Air / Gas Mixing Pipe Condensate Adapter Gas Inlet Pipe 2 Condensate Air Pressure Switch Gas Valve Low Voltage Terminal Strip Exhaust Duct...
- Page 14 Control – The integrated control system monitors the system and responds to internal and external signals to regulate fan speed and control boiler output. This allows the boiler to deliver only the amount of heat energy required and nothing more. The control can be set up to monitor outdoor temperature through an outdoor sensor to regulate boiler set point temperature, increasing overall system efficiency while providing great comfort.
-
Page 15: Part 4 - Prepare Boiler Location
Cascade Operation - When multiple boilers are installed, they can be wired together in a cascaded system. A maximum of twenty (20) boilers can be controlled from a single boiler control. In Cascaded Systems, one boiler is designated as the “Master” and the other boilers are designed as “Followers”. -
Page 16: Leveling
The boiler should be located near a floor drain, or installed in an adequately drained drain pan. Westinghouse WILL NOT be held liable for leakage damages. To conserve water and energy, insulate all water piping, especially the hot and recirculation water lines. -
Page 17: Clearances For Service Access
D. CLEARANCES FOR SERVICE ACCESS See Figure 3 and Table 6 for recommended service clearances. If these minimum clearances are not provided, it may not be possible to service the boiler without removing it from the space. Space must be provided with combustion/ventilation air openings correctly sized for all other boilers located in the same space as the boiler. -
Page 18: Exhaust Vent And Intake Pipe
F. EXHAUST VENT AND INTAKE PIPE Vents must be properly supported. The boiler exhaust and intake connections are not designed to carry heavy weight. Vent support brackets must be within 1’ of the boiler and the balance at 4’ intervals. Venting must be readily accessible for visual inspection for the first 3’... -
Page 19: Wall-Mounting The Boiler
3. If practical, close all building doors, windows and all doors between the common venting system and other spaces in the building. Turn on clothes dryers and any boilers not connected to the common venting system. Turn on any exhaust fans, such as range hoods and bathroom exhausts, at maximum speed. -
Page 20: Part 5 - Venting
Figure 5 – Wall Mounting the Boiler PART 5 – VENTING Vent this boiler in accordance with these instructions. Failure to do so will result in property damage, severe personal injury, or death. DO NOT mix vent systems or materials unless specifically told to do so in this manual. DO NOT thermally insulate the exhaust vent or intake pipes. - Page 21 Intake pipe terminal must not terminate in areas that might contain combustion air contaminates, such as near swimming pools. For sidewall venting, the minimum horizontal distance between adjacent exhaust vent terminations is 1 foot. It is recommended this distance be greater than 1 foot to better avoid frost damage to building surfaces. ...
-
Page 22: Approved Vent Materials
B. APPROVED VENT MATERIALS NOTICE Consult Table 9 or the most recent edition of ANSI Z223.1/NFPA 54 or CAN/CGA B149.1 as well as all applicable local codes and regulations when selecting vent pipe materials. APPROVED EXHAUST VENT AND INTAKE PIPE MATERIAL Standards for Installation in: Item Material... -
Page 23: Tightening Boiler Collar To Exhaust Vent And Intake Pipe
Vent adaptors are not designed as load-bearing devices, and must not be used to support exhaust vent piping. All vent pipes must be properly connected, supported, and the exhaust must be pitched a minimum of ¼” per foot back to the boiler to allow drainage of condensate. -
Page 24: Vent Termination
E. VENT TERMINATION 1. Direct Vent, Two Pipe Roof and Sidewall Vent Terminations Figure 9 – Direct Vent, Roof and Sidewall Vent Terminations All vent pipes must be glued, properly supported, and the exhaust must be pitched a minimum of ¼” per foot back to the boiler to allow drainage of condensate. -
Page 25: Direct Vent, Optional Horizontal And Vertical Vent Kits
2. Direct Vent, Optional Horizontal and Vertical Vent Kits Figure 10 – Direct Vent, Vent Terminations (With Optional Kits) All vent pipes must be glued, properly supported, and the exhaust must be pitched a minimum of ¼” per foot back to the boiler to allow drainage of condensate. -
Page 26: Snorkel Venting
3. Snorkel Venting Figure 11 – Horizontal Venting - NOTE: Drawing is meant to demonstrate system venting ONLY. NOTES: A. For every 1” of overhang, the exhaust vent must be located 1” vertical below overhang (overhang means top of building structure and not two adjacent walls [corner of building]). -
Page 27: Power Vent, Indoor Combustion Air Installation In Confined Or Unconfined Space
4. Power Vent, Indoor Combustion Air Installation in Confined or Unconfined Space This boiler requires fresh, uncontaminated air for safe operation and must be installed in a mechanical room where there is adequate combustion and ventilating air. NOTE: To prevent combustion air contamination, see Table 1. Combustion air from the indoor space can be used if the space has adequate area or when air is provided through a duct or louver to supply sufficient combustion air based on the boiler input. - Page 28 Figure 13 – 1, 13 - 2 NOTE: These drawings are meant to demonstrate system venting only. The installer is responsible for all equipment and detailing required by local codes. WHL-032 REV. 6.2.16...
-
Page 29: Screen Installation
5. Screen Installation After connecting the intake air and exhaust vent pipes, it is required to install the included screens into the exhaust vent and intake pipe terminations to prevent damages to the unit due to blockages. Clean the vent terminations and cement the screens into the terminations. -
Page 30: Part 7 - Gas Piping
Figure 16 – Condensate Piping with Condensate Neutralizer / Condensate Piping with Condensate Neutralizer and Pump NOTES: 1. Condensate line must be pitched at least 1/4" per foot to properly drain. If this cannot be done, or a very long length of condensate hose is used, you must increase the condensate line to a minimum of 1”... -
Page 31: Additional Precaution For Excess Flow Valve (Efv)
A. ADDITIONAL PRECAUTION FOR EXCESS FLOW VALVE (EFV) If an excess flow valve (EFV) is in the gas line, check the manufacturer’s minimum and maximum flow capacity ratings. An improperly sized EFV will not allow for a full flow of gas to the boiler and will cause the boiler to malfunction. -
Page 32: Gas Connection Requirements
Maximum Liquid Propane Delivery Capacity – Length of Black Iron Pipe (Sch. 40 Metallic) in Feet Cubic Feet per Hour (0.60 Specific Gravity, 0.5 WC Pressure Drop) Pipe Size ¾” 1” 1150 1 ¼” 2350 1620 1300 1110 1 ½” 3520 2420 1940... -
Page 33: Part 8 - Water Piping
PART 8 – WATER PIPING A. GENERAL PLUMBING CONNECTION GUIDELINES Pipe material must be suitable to meet local codes and industry standards. The pipe must be cleaned and without blemish before any connections are made. Do not apply a torch within 12” of the boiler. Doing so could damage the boiler. Such damages ARE NOT covered by product warranty. -
Page 34: Backflow Preventer
B. BACKFLOW PREVENTER It may be recommended to use a back flow preventer – check local codes. If a back flow preventer or a no return valve is used, a thermal expansion tank must be installed on the cold water supply between the boiler and valve. To control thermal expansion, a thermal expansion tank suitable for potable water should be installed in systems with an installed backflow preventer. - Page 35 Table 15 – Pressure Drop through the Heat Exchanger The chart below represents the various system design temperature rise through the boiler along with their respective flows and friction loss, which will aid in circulator selection. SYSTEM TEMPERATURE RISE CHART F ∆T F ∆T F ∆T...
- Page 36 Figure 22 – Zoning with Zone Valves and Indirect Water Heating – Direct Piping NOTES: 1. This drawing is meant to show system piping concept only. Installer is responsible for all equipment and detailing required by local codes. 2. All closely spaced tees shall be within 4 pipe diameters center to center spacing. 3.
- Page 37 Figure 23 – Zoning with Pumps and Indirect Fired Water Heater – Direct Piping NOTES: 1. This drawing is meant to show system piping concept only. Installer is responsible for all equipment and detailing required by local codes. 2. All closely spaced tees shall be within 4 pipe diameters center to center spacing. 3.
- Page 38 Figure 24 – Zoning with Zone Valves and Indirect Water Heating – Primary / Secondary Shown NOTES: 1. This drawing is meant to show system piping concept only. Installer is responsible for all equipment and detailing required by local codes. 2.
- Page 39 Figure 25 – Zoning with Pumps and Indirect Fired Water Heater – Primary/Secondary Shown NOTES: 1. This drawing is meant to show system piping concept only. Installer is responsible for all equipment and detailing required by local codes. 2. All closely spaced tees shall be within 4 pipe diameters center to center spacing. 3.
- Page 40 Figure 26 – Cascaded System - Zoning with Pumps and Indirect Fired Water Heater – Primary/Secondary Shown NOTES: 1. This drawing is meant to show system piping concept only. Installer is responsible for all equipment and detailing required by local codes.
- Page 41 Figure 27 – Cascaded System - Zoning with Zone Valves and Indirect Water Heating – Primary / Secondary Shown NOTES: 1. This drawing is meant to show system piping concept only. Installer is responsible for all equipment and detailing required by local codes.
- Page 42 Figure 28 – Wiring – Zoning with Zone Valves and Indirect Water Heating Figure 29 – Wiring – Zoning with Pumps and Indirect Water Heating WHL-032 REV. 6.2.16...
-
Page 43: Pressure Relief Valve
Pressure Vessel Code, Section IV (Heating Boilers). The included 30 psi CH Pressure Relief Valve must be installed on the CH supply line to ensure a compliant installation and safe operation. Westinghouse has supplied fittings to aid installation of the CH Pressure Relief Valve. The valve is Figure 30 – Pressure Relief meant to be field installed. -
Page 44: Part 9 - Connect Electrical Power / Initial Startup
Figure 32 – Wiring External LWCO to the Boiler PART 9 – CONNECT ELECTRICAL POWER / INITIAL STARTUP Install wiring and electrically ground boiler in accordance with the authority having jurisdiction or, in the absence of such an authority, follow the National Electrical Code, NFPA 70, and/or CSA C22.1 Electrical Code-Part 1 in Canada. Failure to follow all applicable local, state, and national regulations, mandates, and building supply codes for guidelines to install the electrical power supply could result in property damage, serious personal injury, or death. -
Page 45: Dip Switches
Figure 33 – Manual Power Switch and Boiler Plug Details NOTICE If the boiler display does not come ON, first check the plug. Then check the electrical panel circuit breaker and reset it if necessary. If the circuit breaker trips again, do not reset. Disconnect the plug and have a qualified technician diagnose the problem. C. -
Page 46: Wiring A Cascade System
D. WIRING A CASCADE SYSTEM When wiring the boilers for Cascade operation, select one boiler as the Master boiler. The remaining boilers will be designated Followers. See “Setting Up a Cascade System” for more details. Connect the system sensor and outdoor sensor/0-10V (if used) to the Master boiler. For the Cascade System to work properly the system sensor must be installed. - Page 47 Figure 38 – Electrical Wiring Diagram WHL-032 REV. 6.2.16...
- Page 48 Figure 39 – Ladder Diagram WHL-032 REV. 6.2.16...
- Page 49 CONNECTOR DESCRIPTION HT SELV NO. OF LOCATION BOARD SILK GROUND Power Supply Line Boiler Pump Power Supply (Live) Ignitor Power Supply L(HT) CH / System Pump Power Supply (Live) 65001WS-12 Gas Valve Power Supply HT (120V~) AC Boiler Pump Power Supply (Neutral) 9-12 Power Supply (Neutral) DHW Pump Power Supply (Live)
- Page 50 CONNECTOR DESCRIPTION HT SELV NO. OF LOCATION BOARD SILK Flame Detect Sensor OP.S Supply Operating Water Temperature Sensor DH.S Exhaust Temperature Sensor Return Water Temperature Sensor SELV (5V) LWD1140-14 BG.S External DHW Temperature Sensor / Aquastat ST.S External System Temperature Sensor SP.S Over-Heat Temperature Sensor CN14...
-
Page 51: Part 10 - Operating System Instructions
PART 10 – OPERATING SYSTEM INSTRUCTIONS A. CONTROL PANEL Figure 42 – Boiler Control Panel Detail B. LCD DISPLAY DESCRIPTIONS Figure 43 – LCD Display Detail LCD also features a backlit lamp that will illuminate: When a user action is detected (a button is pressed) ... -
Page 52: Changing The Ch Set-Point
Display Items Time for Display Remarks All segments “ON” 1 Sec LCD Test All segments “OFF” 0.5 Sec 1 Sec Boiler Category: UFT 1 Sec 0071 1 Sec Software Version for Front Panel 1 Sec 00.XX 1 Sec Software Version for Boiler 1 Sec 00.XX 1 Sec... -
Page 53: Changing The Time
NOTE: If input voltage is less than 1.5V the 0-10V will be ignored. E. CHANGING THE TIME Press and hold the button for five seconds when the display panel is powered ON to change the time. The settings can be adjusted as follows: Year / Month / Date / Hour / Minute / Day of Week. -
Page 54: Installer Mode
d: Fr Fan speed (RPM) Current Fan Speed in RPM E: oP CH Supply Temperature (Operating Temperature) Current CH Supply Temperature f: Eh Exhaust Gas Temperature Current Exhaust Gas Temperature Current DHW tank temperature measured by the indirect tank sensor (7250P-325) will be displayed If OFF is displayed - a mechanical aqua stat is Indirect DHW Tank Temperature H: dH... - Page 55 When used with an outdoor sensor, sets the maximum outdoor design temperature for the system design. Maximum outdoor temperature must be set 4:OH Maximum Outdoor Temperature F above the minimum outdoor temperature. Range: (Minimum Outdoor Temperature + 9 F) to 110 Sets the minimum outdoor design temperature for the system.
- Page 56 Freeze Protection Operation Range Stage 1 – If control detects water temperature of 46 C) and below, it turns the DHW indirect and CH pumps On for 600s and Off for 30s. This cycle repeats until the control detects water temperature of 50 F (10 C) and above.
-
Page 57: Error Mode
FAH(F) Allows the user to change the Allows the user to change the unit 36:UC FAH(F) CEL(C) Range: F or C unit Allows the user to turn ON the step modulation, which regulates burner output CH Step Modulation 37:CM in six steps at one minute intervals. Step modulation will start at the last modulation rate of the boiler and work up one minute at a time. - Page 58 Press the Power button to clear the Error Code. 1. Check Condensate and main controller connections. Ensure all are secure. Condensate – Closed 2. Check Condensate sensor resistance. If resistance is not zero, replace the switch. is Normal, Open is Er:20 3.
- Page 59 The Error Code will go away unless it occurs five (5) times in ten (10) minutes. Press the Power button to clear the Error Code. If Error happens again: 1. Check the vent connections for blockages. Er:41 Fan Speed too High 2.
-
Page 60: Setting Up A Cascade System
This Error Code will go away when the freezing condition is remedied. If Error happens again: Freeze Protection 1. Ensure boiler is located in a mechanical room protected from freezing conditions. Er:85 (Boiler has detected 2. Ensure all valves are open to the boiler, there are no leaks. water temperature 2. -
Page 61: Outdoor Temperature Mode (Optional)
Program the Master Boiler: To finish programming the cascade system, enter the Installer Mode on the Master Boiler ONLY. Scroll down to and select the following parameters: 30:Cr – MASTER ONLY - Set cascade rotation mode to Automatic rotation or Timed rotation. 31:Ct –... -
Page 62: 0-10 Volt Input
K. 0-10 VOLT INPUT 1. A signal from a building management system may be connected to the boiler to enable remote control. This signal should be a 0-10 volt positive-going DC signal. When the 0-10V input is wired to the boiler terminal strip, a building control system can be used to control the set point temperature of the boiler. -
Page 63: Error Tree Analysis
M. ERROR TREE ANALYSIS 1. FLAME DETECTION Figure 52 – Flame Detection Error Analysis Tree 2. GAS DETECTION Figure 53 – Gas Detection Error Analysis Tree WHL-032 REV. 6.2.16... -
Page 64: Aps / Burner Overheat Limit / Condensate Block Switch
3. APS / BURNER OVERHEAT LIMIT / CONDENSATE BLOCK SWITCH Figure 54 – APS / Burner Overheat Limit / Condensate Block Switch Error Analysis Tree 4. STORAGE / OP / CH OVERHEAT / EXHAUST OVERHEAT SENSORS Figure 55 – DHW / OP / CH Overheat / Exhaust Overheat Sensors Error Analysis Tree PART 11 –... -
Page 65: Boiler Water Chemistry
A. BOILER WATER CHEMISTRY Chemical imbalance of your water can cause severe damage to your boiler and associated equipment, and may also affect efficiency. You may have to have your water quality professionally analyzed to determine whether you need to install a water softener. It is important that the water chemistry on both the domestic hot water and central heating sides are checked before installing the boiler, as water quality will affect the reliability of the system. -
Page 66: Fill And Test Water System
PROPANE BOILERS ONLY – Propane suppliers mix an odorant with the gas to make its presence detectable. In some instances, the odorant can fade, and the gas may no longer have an odor. Before startup and periodically thereafter, have the propane supplier verify the correct odorant level in the gas. -
Page 67: Purge Air From System
It is important to purge the system of air to avoid damage to the boiler. E. PURGE AIR FROM SYSTEM IMPORTANT! While commissioning the system, the air vent on top of the boiler must remain fully open to allow the boiler to properly fill. -
Page 68: Final Checks Before Starting Boiler
If the condensate outlet on the boiler is lower than the drain, you must use a condensate removal pump, available from Westinghouse (554200). This pump is equipped with two leads that can be connected to an... -
Page 69: Setting And Verifying The Combustion Setting
5. The minimum and maximum inlet gas line pressures must meet the requirements shown in Table 28. LP GAS NATURAL GAS 3.5” WC 3.5” WC Minimum Pressure Minimum Pressure 14” WC 14” WC Maximum Pressure Maximum Pressure Table 29 – Gas Pressure Requirements 6. -
Page 70: Part 12 -Installation And Start-Up Checklist
PART 12 –INSTALLATION AND START-UP CHECKLIST LIGHT OFF ACTIVITIES DATE COMPLETED Has the system been cleaned and flushed? Does water chemistry meet requirements? 1) Fill the Heating If water chemistry does not meet requirements, have treatment measures been put in System with Water place? Check all water piping and connections. - Page 71 Figure 58 – Flame Sight Glass CH Return Temperature Sensor CH Supply Temperature Outdoor Temperature Indirect Tank Sensor (7855P-097) Sensor Sensor (7250-325) Exhaust Temperature (7855P-030) (7855P-084) Sensor (7855P-092) Outside Temperature Resistance Temperature Resistance Resistance Temperature Resistance Temperature (◦F) (Ω) (◦F) (Ω) (Ω) (◦F)
-
Page 72: Part 13 - Troubleshooting
PART 13 – TROUBLESHOOTING TROUBLESHOOTING CHART PROBLEM POSSIBLE CAUSES POSSIBLE REMEDIES 1. Is the plug on the power supply cord unplugged 1. Reset the plug. from the electrical outlet? 2. Reset the circuit breaker. No electrical power 2. Is electrical panel’s 10 Amp circuit breaker tripped? 3. - Page 73 Check Exhaust Vent and Intake Pipe Terminations Verify that the boiler exhaust vent and intake pipe terminations are clean and free of obstructions. Remove any debris from the exhaust vent or intake pipe openings. If removing the debris does not allow the boiler to operate correctly, contact your qualified service technician to inspect the boiler and the vent system.
- Page 74 valve seat. If the valve does not properly seat and continues to weep, contact a qualified service technician to inspect the valve and system. If water does not flow from the valve when you completely lift the lever, the valve or discharge line may be blocked. Immediately shut the boiler down per instructions on page 2 and call a qualified service technician to inspect the valve and system.
- Page 75 When servicing is complete, make sure the condensate collector cap is replaced securely. Failure to do so will cause venting issues that will result in serious injury or death. 1. Ensure the boiler is powered off and has had time to cool. 2.
-
Page 76: Replacement Parts
REPLACEMENT PARTS NUMBER DESCRIPTION PART NUMBER NUMBER DESCRIPTION PART NUMBER M3 X 6 PH + MS 7855P-384 B-10 M4 X 12 TH + M/S 7855P-393 M4 X 8 PH + Self Tapping 7855P-385 B-11 M4 X 14 PH + Self Tapping 7855P-394 M4 X 8 TH + Self Tapping 7855P-386... - Page 77 Figure 61 – Cabinet Replacement Parts – 80 – 140W Models PART PART NUMBER DESCRIPTION NUMBER DESCRIPTION NUMBER NUMBER Cabinet Assembly 7855P-330 Air Vent Grommet 7855P-339 Top Wall Mount Bracket 7850P-068 Control Board Bracket 7855P-340 Bottom Wall Mount Bracket 7850P-092 Air Pressure Switch 7855P-262 Condensate Trap Cup...
- Page 78 Figure 62 – Cabinet Replacement Parts – 175 – 199W Models PART PART NUMBER DESCRIPTION NUMBER DESCRIPTION NUMBER NUMBER Cabinet Assembly 7855P-410 Air Vent Adapter 7855P-453 Top Wall Mount Bracket 7850P-068 Air Vent Grommet 7855P-339 Bottom Wall Mount Bracket 7850P-092 Control Board Bracket 7855P-412 Exhaust Adapter Sealing Gasket...
- Page 79 Figure 63 – Heat Exchanger Replacement Parts – 80W – 140W Models PART PART NUMBER DESCRIPTION NUMBER DESCRIPTION NUMBER NUMBER Exhaust Pipe Assembly 7855P-237 CH Supply Temperature Sensor 7855P-030 Water Level Detection Sensor 30-1 Exhaust Temperature Sensor Clip 7855P-349 7855P-029 (Low Water Cut-Off) 30-2 Exhaust Temperature Sensor...
- Page 80 Figure 64 – Heat Exchanger Replacement Parts – 175W – 199W Models PART PART NUMBER DESCRIPTION NUMBER DESCRIPTION NUMBER NUMBER Exhaust Pipe Assembly 7855P-415 32-9 Heat Exchanger Top 7855P-619 30-1 Exhaust Temperature Sensor Clip 7855P-349 32-10 Burner Refractory 7855P-612 30-2 Exhaust Temperature Sensor CH Supply Temperature Sensor 7855P-030...
- Page 81 Figure 65 – Combustion System Replacement Parts – 80W – 140W Models DESCRIPTION PART NUMBER DESCRIPTION PART NUMBER Burner Inlet Channel (with ½” Gas Pipe Gasket 7855P-367 7855P-221 Damper) 80W / 100W 46-1 Air Damper 7855P-368 7855P-377 Gas Pipe (to Mixer) 46-2 Air Damper Guide 7855P-369...
- Page 82 Figure 66 – Combustion System Replacement Parts – 175W – 199W Models DESCRIPTION PART NUMBER DESCRIPTION PART NUMBER Burner Inlet Channel (with Damper) 7855P-424 Gas Valve Assembly 7855P-431 Air Damper 7855P-618 55-1 Gas Valve Outlet Adapter 7855P-232 Air Damper Guide 7855P-369 55-2 Gas Valve O-Ring...
-
Page 83: Wbru Boiler Limited Warranty
COVERAGE A. During the first year after the original date of installation, Westinghouse warrants that it will repair or replace, at its option, any defective or malfunctioning component of the boiler with a component of equivalent size and current model. Replacement components will be warranted for ninety (90) days. - Page 84 NO OTHER WARRANTIES This Westinghouse Warranty gives you specific legal rights, and you may also have other rights that vary from state to state. Some states do not allow the exclusion or limitation of incidental or consequential damages so this limitation or exclusion may not apply to you.
-
Page 85: Start-Up Report
START-UP REPORT LIGHT OFF ACTIVITIES DATE COMPLETED ________________ 1) Fill the Check all piping and gas connections, verify all are tight heating system Has the system been cleaned and flushed? Has the boiler and the system been purged of all air? Refer to Start-Up Preparation, this manual. - Page 86 MAINTENANCE REPORT In unusually dirty or dusty conditions, care must be taken to keep boiler cabinet door in place at all times. Failure to do so VOIDS WARRANTY! The boiler requires minimal periodic maintenance under normal conditions. However, in unusually dirty or dusty conditions, periodic vacuuming of the cover to maintain visibility of the display and indicators is recommended.
- Page 87 WHL-032 REV. 6.2.16...
- Page 88 WHL-032 REV. 6.2.16...
- Page 89 MAINTENANCE NOTES WHL-032 REV. 6.2.16...
- Page 90 CUSTOMER INSTALLATION RECORD FORM The following form should be completed by the installer for you to keep as a record of the installation in case of a warranty claim. After reading the important notes at the bottom of the page, please also sign this document. Customer’s Name: Installation Address: Date of Installation:...
Need help?
Do you have a question about the WBRU 80W Series and is the answer not in the manual?
Questions and answers