Table of Contents
Advertisement
Quick Links
Installation
Start-Up
Maintenance
Parts
Warranty
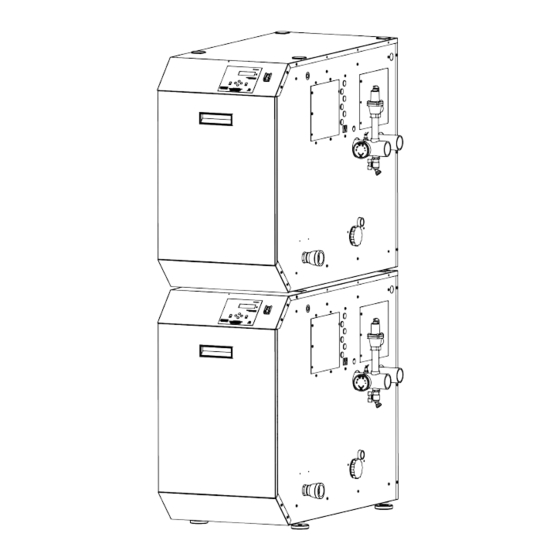
WBCMC**1000 / 1700* Models
* "NG" Denotes Natural Gas Operation
"LP" Denotes Propane Gas Operation
"HL" Denotes Installed High and Low Gas Pressure
Switches
"FS" Denotes Installed Flow Switch
"WL" Denotes Installed High Temperature Water Limit
This manual must only be used by a qualified installer / service technician. Read all instructions in this manual before installing.
Perform steps in the given order. Failure to do so could result in substantial property damage, severe personal injury, or death.
Improper installation, adjustment, alteration, service, or maintenance could void product warranty and cause property
damage, severe personal injury, or death.
California Proposition 65 Warning: This product contains chemicals known to the State of California to cause cancer, birth
defects, or other reproductive harm.
Westinghouse reserves the right to make product changes or updates without notice and will not be held liable for
typographical errors in literature.
NOTE TO CONSUMER: PLEASE KEEP ALL INSTRUCTIONS FOR FUTURE REFERENCE.
www.westinghousewaterheating.com
Commercial
Gas Fired Boilers
This Manual For Use With Boilers Manufactured After
August 13, 2013
Heat Exchanger Bears the ASME "H" Stamp
whl-428-r1 Rev. 001 Rel. 012 Date 7.21.20
Advertisement
Table of Contents

Subscribe to Our Youtube Channel
Related Manuals for Westinghouse Premium WBCMC 1000 Series


Summary of Contents for Westinghouse Premium WBCMC 1000 Series
- Page 1 California Proposition 65 Warning: This product contains chemicals known to the State of California to cause cancer, birth defects, or other reproductive harm. Westinghouse reserves the right to make product changes or updates without notice and will not be held liable for typographical errors in literature.
- Page 2 WARNING: If the information in these instructions is not followed exactly, a fire or explosion may result causing property damage, personal injury or death. • Do not store or use gasoline or other flammable vapors and liquids in the vicinity of this or any other appliance. WHAT TO DO IF YOU SMELL GAS •...
- Page 3 AHJ. DANGER indicates an imminently hazardous situation which, if NOTE: Westinghouse reserves the right to modify product technical not avoided, will result in serious personal injury or death. specifications and components without prior notice.
-
Page 4: Table Of Contents
In accordance with Section 325 (f) (3) of the Energy Policy and D. Clearances for Service Access Conservation Act, Westinghouse has provided this boiler with E. Residential Garage and Closet Installations multiple features designed to save energy by reducing the F. -
Page 5: Part 1 - General Safety Information
D. Programming Boiler Settings E. Programming the System Setting Altering any Westinghouse boiler with parts not manufactured by F. System Setting Program Navigation Westinghouse WILL INSTANTLY VOID the boiler warranty and could G. -
Page 6: Improper Combustion
The high-efficiency heat exchanger can be damaged the cold water return from the system and extract the last bit of heat by build-up or corrosion due to sediment. Westinghouse before it is exhausted. recommends a suction strainer in this type of system. -
Page 7: Optional Equipment
• Never close existing ventilation openings C. Optional Equipment • Ensure a minimum 1” clearance around hot water and exhaust Optional equipment available from Westinghouse (and Part #): vent pipes • Remote System Sensor (7250P-324) • NOTE: To prevent condensing in the fan, it is recommended to •... -
Page 8: Flooring
If local building codes require additional clearance, these codes not result in damage to surrounding areas or lower floors of the supersede Westinghouse’s. It is recommended to make note of the building. Any boiler should be installed in such a manner that if boiler model and serial number before finalizing installation. -
Page 9: Residential Garage And Closet Installations
Figure 1 - Correct and Incorrect Leveling Figure 2 - Recommended Service Clearances E. Residential Garage and Closet Installations The space must be provided with correctly sized combustion/ ventilation air openings for all other appliances located in the Check with your local Authority Having Jurisdiction for space with the boiler. -
Page 10: Direct Vent Of Exhaust And Intake
combustion must be obtained from the outdoors as outlined in the Venting section of this manual. Failure to vent the boiler properly will result in serious personal injury or death. When drawing combustion air from the outside into the mechanical room, care must be taken to provide adequate freeze Do not attempt to vent this boiler by any means other than those protection. -
Page 11: Removing A Boiler From A Common Vent System
condition of use. Areas Likely Have Products to Avoid 7. Any improper operation of the common venting system should Contaminants be corrected to conform to the National Fuel Gas Code, ANSI Z223.1. Spray cans containing Dry cleaning / laundry areas When resizing any portion of the common venting system, the fluorocarbons and establishments... - Page 12 • Total Dissolved Solids (TDS) less than 500 ppm (mg/L) gallon (85 mg/L) may be over softened. • Total dissolved solids are minerals, salts, metals, and charged • Consult local water treatment companies for unusually particles that are dissolved in water. hard water areas (above the required amounts) or for other treatment solutions if water is being over softened •...
-
Page 13: Technical Specifications
K. Technical Specifications Model 1000 1700 Installation Indoor, Floor Standing, Fully Condensing Minimum / Maximum Input (Btu/Hr) 100,000 / 1,000,000 170,000 / 1,700,005 Heating Capacity (MBH) 1600 Flue System Category IV, Sealed Combustion Direct Vent, Power Vent Minimum Combined Vent Run 16 feet Maximum Combined Vent Run 6”... -
Page 14: Part 4 - Piping
The boiler may be connected to an indirect water heater to supply RE-INSPECTION OF T&P RELIEF VALVES: T&P valves should be domestic hot water. Westinghouse offers indirect water heaters in inspected AT LEAST ONCE EVERY THREE YEARS, and replaced if stainless steel or glass-lined construction. -
Page 15: Circulators
2. The expansion tank must be located as shown in Applications, this G. Circulator Sizing manual, or following recognized design methods. See expansion tank In addition, the boiler heat exchanger has a minimum total water manufacturer’s instructions for details. Always install an expansion volume that must be taken into account when sizing the circulator. - Page 16 The boiler heat exchanger does have a pressure drop which must be considered in system design. Refer to the graph in Table 5 for pressure drop through the boiler heat exchanger. Table 5 - Heat Exchanger Pressure Drop The chart below represents various system design temperature rise through the boiler along with respective flows and friction loss. This is provided to aid in circulator selection.
-
Page 17: Check / Control Water Chemistry
Anti-Scald Mixing Valve H. Check / Control Water Chemistry Field supplied. An anti-scald mixing valve is recommended when storing domestic hot water above 115°F. Unions Chemical imbalance of the water supply may affect efficiency Field supplied. Recommended for unit serviceability. and cause severe damage to the appliance and associated Pressure Relief Valve equipment. -
Page 18: Freeze Protection Fluids
Upon completion, make sure that the fill valve is in the automatic position and each zone balance and purge or shut off is in an open position and zone valves are positioned for automatic operation. Water temperature above 140 F requires the circulator pump to run continuously and water hardness between 5 and 7 grains. -
Page 19: Applications
O. Applications AIR SEPARATOR LOW LOSS HEADER HOT WATER OUTLET FOLLOWER COLD WATER INLET DRAIN Figure 5 - Space Heating - Indirect Priority FIGURE NOTES: 1. This drawing is meant to demonstrate system piping concept only. 2. A mixing valve is recommended if the DHW temperature is set above the factory setting of 119 3. - Page 20 AIR SEPARATOR LOW LOSS HEADER HOT WATER OUTLET COLD WATER INLET DRAIN Figure 7 - Space Heating - Indirect Priority FIGURE NOTES: 1. This drawing is meant to demonstrate system piping concept only. 2. A mixing valve is recommended if the DHW temperature is set above the factory setting of 119 3.
- Page 21 LOW LOSS HEADER AIR SEPARATOR FOLLOWER Figure 9 - Cascaded Space Heating FIGURE NOTES: 1. This drawing is meant to demonstrate system piping concept only. 2. Install a minimum of 12 diameters of straight pipe upstream of all circulators. 3. Install a minimum of 6 diameters of straight pipe up and downstream of all closely spaced tees.
- Page 22 AIR SEPERATOR LOW LOSS HEADER Figure 11 - Cascaded Space Heating FIGURE NOTES: 1. This drawing is meant to demonstrate system piping concept only. 2. Install a minimum of 12 diameters of straight pipe upstream of all circulators. 3. Install a minimum of 6 diameters of straight pipe up and downstream of all closely spaced tees.
-
Page 23: Part 5 - Venting
Part 5 - Venting The boiler must be vented as detailed in this section. Ensure exhaust vent and intake piping complies with these instructions regarding vent system. Inspect finished exhaust vent and intake piping thoroughly to ensure all joints are well secured, airtight, and comply with all applicable code requirements, as well as the instructions provided in this manual. -
Page 24: Approved Materials For Exhaust Vent And Intake Pipe
B. Approved Materials for Exhaust Vent and Intake Pipe Standards for Installation In: Item Material United States Canada Pipe and Fittings Approved for Intake ONLY ABS* ANSI/ASTM D2661 ANSI/ASTM D2661 PVC Schedule 40/80 UL-1738 or ANSI/ASTM D1785 PVC-DWV Schedule 40/80 UL-1738 or ANSI/ASTM D2665 UL-1738 or ULC-S636 Pipe Approved for... -
Page 25: Exhaust Vent And Intake Pipe Location
D. Exhaust Vent and Intake Pipe Location INSIDE CORNER DETAIL FIXED OPERABLE CLOSED FIXED CLOSED OPERABLE LP-179-CC 03/28/17 Intake Pipe Terminal Exhaust Vent Terminal Area Where Intake Terminal Is Not Permitted Figure 13 - Exit Terminals for Direct Vent Systems - ANSI Z223.1 / NFPA 54 for US and CAN/CSA B149.1 for Canada DESCRIPTION CANADA Clearance above grade, veranda, porch, deck, or balcony... -
Page 26: Exhaust Vent And Intake Pipe Sizing
E. Exhaust Vent and Intake Pipe Sizing Intake Pipe Exhaust Vent Max. Total Equivalent Input De-Rate Model Vent Length (Intake Per 25’ of Vent Intake Diameter Intake Min. Length Vent Diameter Vent Min. Length and Exhaust) 1000 6” 6” 16’ 16’... -
Page 27: Applications
year statistics for the installation location/geographical area. G. Applications In addition: 1. Direct Vent Installation of Exhaust and Intake • Total length of vent piping shall not exceed the limits specified If installing a direct vent option, combustion air must be drawn in this manual. - Page 28 Figure 15 - Venting with Optional Kits (NOT INCLUDED WITH THE BOILER) Figure 17 - Stainless Steel Two Pipe Roof and Sidewall Venting NOTE: These drawings are meant to demonstrate system venting only. The installer is responsible for all equipment and detailing required by local codes.
-
Page 29: Room And Indoor Combustion Ventilation Requirements
2. Room and Indoor Combustion Ventilation Requirements When using an indoor combustion air installation, the mechanical room MUST be provided with properly sized openings, and/or be of sufficient volume to assure adequate combustion air and proper ventilation for all gas fired appliances in the mechanical room to assure adequate combustion air and proper ventilation. -
Page 30: Part 6 - Condensate Removal
Such failure IS NOT covered under warranty. requirements, Westinghouse recommends neutralizing condensate EXHAUST FANS: Any fan or appliance which exhausts air from the with a Condensate Neutralizer Kit (Part # 7350P-611). The neutralizer... -
Page 31: Part 7 - Wiring
temperatures or any type of blockage. In installations that may encounter sustained freezing conditions, the use of heat tape is recommended to avoid freezing of the condensate line. It is also Label all wires prior to disconnecting them when servicing the recommended to bush up the condensate line size to 1”... -
Page 32: Alarm Connections (Top Boiler Connection)
Westinghouse 7250P-325 tank sensor. When a tank sensor is used, 3. Connect the high gas pressure switch to the pigtail that you removed the control will automatically detect its presence and a demand for the jumper plug from. -
Page 33: Optional Flow Switch
FIELD CONNECTION BOARD WIRING 1000/1700 CAT3/CAT5 CONNECTION POINTS CAT3/CAT5 CONNECTION POINTS Figure 24 - Cascade Master and Follower Wiring 4. Disconnect red wire on the low water cut off probe and connect it M. Optional Flow Switch to the red wire from the wire harness (included in kit). NOTE: Follow the more detailed instructions included with the flow 5. -
Page 34: Optional Ul353 Low Water Cut-Off Interface Kit
UL353 LWCO cut-off probe on the boiler. (available from Westinghouse, Part # 7350P-601). In this installation, 4. Route the rest of the wires through the hole provided in the cabinet it is recommended to install the flow switch kit first. -
Page 35: Wiring Of Cascade System Communication Bus
Avoid running communication cables parallel and close conversions ARE NOT ALLOWED on the 1700 model. A properly to or against high voltage (120 volt or greater) wiring. Westinghouse calibrated combustion analyzer must be used to verify proper recommends that the maximum length of communication bus cables combustion. -
Page 36: Gas Piping
The gas supply shall have a minimum of no less than 3.5” water column, a maximum inlet pressure of no greater than 14” water column (350 mm), and ½ pound pressure (3.5 kPa). The entire piping system, gas meter, and regulator must be sized properly to prevent excessive pressure drop (greater than 0.5”... -
Page 37: Gas Table
Westinghouse. Failure to use a conversion kit when converting 2. Loosen the pressure tap with a small screwdriver. Refer to Figures 29 the boiler to fire on Natural or Propane gas will result in extremely and 30 for location. -
Page 38: Boiler Gas Valve
D. Boiler Gas Valve Figure 29 - 1000 Model Gas Valve Figure 30 - 1700 Model Gas Valve whl-428-r1 Rev. 001 Rel. 012 Date 7.21.20... -
Page 39: Part 9 - Start-Up Preparation
*NOTE: It is recommended you clean heat exchanger at least Westinghouse (554200). This pump is equipped with two leads that once a year to prevent lime scale buildup. Follow the maintenance... -
Page 40: Fill And Test Water System
Westinghouse (554200). This pump is equipped with two leads that h. Disconnect the wires that are connected to the THERMOSTAT can be connected to an alarm or another type of warning device to terminals of the customer connection board. -
Page 41: Cascade System - 1000 And 1700 Models
Part 10 - Start-Up Procedure Ensure the boiler is full of water before firing the burner. Failure to do so will damage the boiler. Such damage IS NOT covered by warranty, and could result in property damage, severe personal injury, or FOR YOUR OWN SAFETY READ BEFORE OPERATING death. -
Page 42: Operating Instructions
One of the zeroes will be blinking. Use the ^ v arrow keys to change Boiler Setting Program Navigation the blinking digit to the correct value. Use the < > arrow keys to Once the code is confirmed, the user can start to set the Boiler Settings. select the next digit to change and again use the ^ v keys to change Use the arrow keys on the display to navigate through the Boiler the value. -
Page 43: Programming The System Setting
Screen Description E. Programming the System Setting System Setting Program Access Function 9 Max Supply Temp Note: Programming the boiler control is not possible when the boiler Sets the maximum design supply is firing. Make sure any input which can create a demand on the boiler, MAX SUPPLY TEMP temperature based on the minimum such as the tank thermostat, is turned off, so the boiler will remain idle... - Page 44 WITH Function 30 Extra Boiler Mode common vent. Factory Default: 2 Allows for a non Westinghouse boiler BOILERS on Cascade Master (bottom to be controlled when the cascade boiler), COMMON FLUE on Cascade Bottom Boiler...
-
Page 45: Resetting The Maintenance Schedule
RESET will be displayed. Using the > key scroll to the selection of Function 37 Modbus Mode year or hours. Press ENTER to reset the selected Service Schedule. Enables Modbus Mode To change a setting, press ENTER. Press the ^ and v keys to make appliance. - Page 46 SYS DHW ON central heat and DHW demand. sensor (Westinghouse 7250P-325) Table 22 - Boiler Control Status Menu Screens is displayed on the bottom line. If DHW SET The next ten screens display the last ten boiler lockout faults.
-
Page 47: Cascade Menu
This screen displays the third oldest This screen displays the tenth boiler control lockout fault. The oldest boiler control lockout fault. top line will alternate between The top line will alternate between FAULT HISTORY FAULT HISTORY the words ‘FAULT HISTORY’ and the words ‘FAULT HISTORY’... -
Page 48: Boiler Test Mode
This screen displays overall cascade Combustion Settings on All Models power output. The range of this value is Natural Gas (NG) Propane (LP) the number of boilers communicating Fan Speed Low Ignition High Ignition High with the Master x 100. For example, CASCADE PWR 100% if 8 boilers are connected and firing, Carbon... -
Page 49: User Interface Display
When servicing or replacing components that are in direct contact DO NOT USE THIS APPLIANCE IF ANY PART HAS BEEN SUBMERGED with boiler water, be certain that: IN WATER. Immediately call a qualified service technician. The • There is no pressure in the boiler. (Pull the release on the relief appliance MUST BE replaced if it has been submerged. - Page 50 1. Check line voltage. It must be between 100 and 128 volts. 2. If available, connect a PC and use Westinghouse service software to check the 24v supply display in the lower left corner of the screen. The number displayed here must be greater than 128 and should be no greater than 250.
- Page 51 F02 indicates the supply temperature sensor 1. Check the electrical connection to the thermistor on the outlet of the boiler has failed. The boiler will not manifold. Verify 5 VDC by checking the Molex connector. If there is restart until a technician replaces the sensor no 5 VDC, check the harness.
- Page 52 1. Watch the igniter through the observation window. 2. If there is no spark, check the spark electrode for the proper .196” (5.0 mm ± 1mm) gap. See below. 3. Remove any corrosion from the spark electrode and flame rectifier probe. 4.
- Page 53 1. Check flue system for obstructions. 2. Check proper communication between boilers. FLAP CLOSED F15 Flapper valve physically stuck closed. 3. Check operation of flapper valve. 4. Check wiring between valve and controller. 5. Replace valve-flapper. 1. Check flue system for obstructions. 2.
-
Page 54: Part 13 - Maintenance
Supply Temperature Sensor Part 13 - Maintenance Outdoor Sensor (7250P-324) (7250P-319) Boiler Sensor (7250P-667) A. Procedures Indirect Sensor (7350P-325) Periodic maintenance should be performed once a year by a qualified service technician to assure that all the equipment is Outside Resistance High / Low Temp Resistance... -
Page 55: Cleaning Water Side Of Heat Exchanger
Figure 31 - Heat Exchanger Detail C. Cleaning Water Side of Heat Exchanger 1. Make sure power is turned off to the boiler. Run water through water system to ensure it is below room temperature. 2. Close isolation valves on the return and supply connections to the boilers as shown in the piping diagrams in this manual. -
Page 56: Part 14 - Installation Checklist
Part 14 - Installation Checklist Light Off Activities Date Completed: Check all piping and gas connections. Verify all are tight. Pressurize system. 1. Fill the Heating System Add water to prime condensate cup. Verify near boiler piping is properly supported. Leak test using locally approved meth- ods (consult jurisdictional code book). - Page 57 Inspection Activities Date Last Completed Piping 1st Year 2nd Year 3 Year 4th Year* Check boiler and system piping for any sign of leakage; make sure Near boiler piping pipes are properly supported. Check condition of all vent pipes and joints. Ensure the vent piping Vent terminations are free of obstructions and blockages.
-
Page 58: Part 16 - Replacement Parts
Part 16 - Replacement Parts 1000 Models ITEM REPLACEMENT DESCRIPTION PART# . S . . S . . S . . S . " 2 . S . . S . . S . . S . SUPPLY MANIFOLD (w/ SENSOR, HARNESS) 7350P-377 SYSTEM SENSOR WIRE HARNESS (NOT SHOWN) 7350P-746... - Page 59 1000 Models Figure 34 - 1000 Model Combustion System Replacement Parts - *Not Shown whl-428-r1 Rev. 001 Rel. 012 Date 7.21.20...
- Page 60 1700 Models Figure 35 - 1700 Model Combustion System Replacement Parts Model Control Board Part Numbers Model Control Board Part Numbers 1000 TOP 7350P-1304 1700 TOP 7350P-1308 1000 BOTTOM 7350P-1305 1700 BOTTOM 7350P-1309 Table 31 - Control Board Replacement Part Numbers whl-428-r1 Rev.
- Page 61 1000 1700 Figure 36 - Water Side Replacement Parts - All Models whl-428-r1 Rev. 001 Rel. 012 Date 7.21.20...
- Page 62 1000 1700 Description 7350P-345 7350P-346 MOD CON FRAME 7250P-317 7250P-317 LEVELING FOOT/MOUNT KIT 7250P-316 7250P-069 JACKET MOUNTING BRACKET 7350P-063 7350P-063 #10 x 1/2" SELF TAPPING SCREW 7350P-315 7350P-061 JACKET - BOTTOM (w/SCREWS) 7350P-313 7350P-057 JACKET - LEFT SIDE (w/SCREWS) 7350P-314 7350P-058 JACKET - RIGHT SIDE (w/SCREWS) 7350P-049...
-
Page 63: Limited Warranty
Westinghouse warrants this boiler and its components to be free H. It is expressly agreed between Westinghouse and the Owner that from defects in material and workmanship according to the following repair, replacement, or refund are the exclusive remedies of the terms, conditions, and time periods. - Page 64 NOTE: Any components or boilers returned to Westinghouse for warranty analysis will become the property of Westinghouse and will not be returned, even if credit is denied. If all warranty conditions are satisfied, Westinghouse will provide replacement components to the retailer.
-
Page 65: Maintenance Notes
Maintenance Notes whl-428-r1 Rev. 001 Rel. 012 Date 7.21.20... -
Page 66: Customer Installation Record Form
Customer Installation Record Form The following form should be completed by the qualified installer / service technician for you to keep as a record of the installation in case of a warranty claim. After reading the important notes at the bottom of the page, please also sign this document. Customer’s Name Date of Installation Installation Address...
Need help?
Do you have a question about the Premium WBCMC 1000 Series and is the answer not in the manual?
Questions and answers