
Related Manuals for Smeg LBI107


Summary of Contents for Smeg LBI107
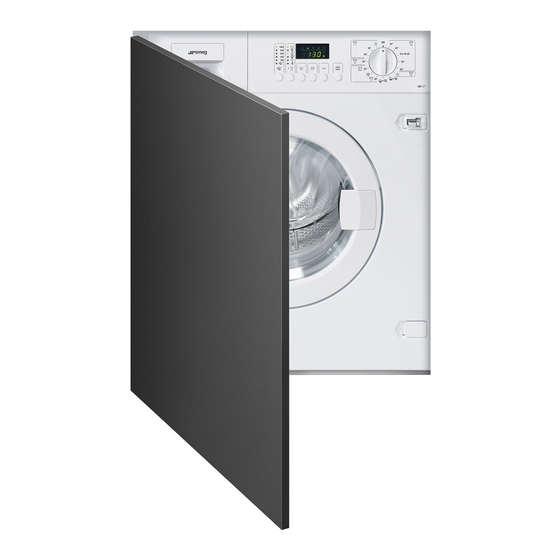
- Page 1 LAVATRICE WASHING MACHINE LAVE-LINGE WASCHVOLLAUTOMAT LAVADORA LIBRETTO ISTRUZIONI INSTRUCTION MANUAL MANUEL D'INSTRUCTIONS GEBRAUCHSANLEITUNG MANUAL DE INSTRUCCIONES...
-
Page 2: Table Of Contents
Contents 1. PRECAUTIONS FOR SAFETY AND USE ................... 2 2. INSTALLATION INSTRUCTIONS ....................7 3. DESCRIPTION OF CONTROLS ....................12 4. USING THE APPLIANCE FOR WASHING ................13 5. CLEANING AND MAINTENANCE ................... 21 6. TROUBLESHOOTING ......................... 24 7. ADDITIONAL INFORMATION FOR THE USER ..............26 This appliance is tagged in accordance with European Directive 2002/96/EC on Waste Electrical and Electronic Equipment - WEEE. -
Page 3: Precautions For Safety And Use
READ THE INSTRUCTIONS ATTENTION! You are advised to read all the instructions in this manual carefully; it will in- form you about the right conditions for the proper, safe use of your washing machine. It is very important to keep this instruction manual with the appliance for fu- ture reference. - Page 4 Information on household detergents, additives and cleaning agents can be found on the following website www.cleanright.eu. WARNING: the higher the spin speed, the higher will be the noise and the lower the remaining moisture content. The lower the amount of residual mois- ture at the end of the wash, the lower the energy consumption will be during drying."...
- Page 5 The washing machine must never be used on vehicles, on board ships or planes, or in environments with hazards, such as explosive or corrosive en- vironments (powders, vapours and gases) or explosive and/or corrosive liq- uids. Do not install the washing machine in places with a risk of frost. Frozen pipes may burst under the pressure.
- Page 6 Keep children away from the appliance when the door or the detergent drawer is open; the appliance might contain detergent resides which may cause permanent injury to the eyes, mouth and throat, or even cause death by suffocation. The appliance is not intended for use by persons (including children) with reduced physical, sensory or mental capabilities, or lack of experience and knowledge, unless they have been given supervision or instruction concern- ing use of the appliance by a person responsible for their safety.
- Page 7 If the appliance is provided with a plugless supply cord: It is necessary to install in the fixed wiring an all-pole disconnection de- vice having a gap between contacts of at least 3,5mm. After installation the disconnection device has to be easy to reach. ...
-
Page 8: Installation Instructions
2. INSTALLATION INSTRUCTIONS Important! The appliance must be installed by a qualified engineer in compliance with the relevant regulations. The washing machine is heavy. Take care when lifting it. 2.1 UNPACKING The unit on flexible mounts is fixed in place for transport using the screws (A) on the rear of the washing machine with the relative plastic spacers (B). - Page 9 WARNING! Do not turn the appliance upside-down or place it on its sides. All the transport retainer fittings should be kept in a safe place; they must be fitted again if the appliance has to be moved around in the future. 2.2 POSITIONING AND LEVELLING Place appli-...
- Page 10 The water intake and drain hoses can be fitted pointing to the left or right for ef- fective installation. WARNING! This operation must be carried out with care to prevent the washing machine from vibrating, moving or generating excessive noise during use.
- Page 11 2.4 CONNECTING TO THE DRAIN Insert the end of the drain hose into a drain pipe having inside diameter of at least 4 cm, at least 50 to 90 cm above floor level, or connect it securely (using the plastic fitting on the elbow in the hose) to a sink or bathtub. In all cases, check that the end of the drain hose is securely fixed to pre- vent the repulsive force of the water from pushing it out of place.
- Page 12 2.5 ELECTRICAL CONNECTION Before connecting the plug to the power socket ensure that: 1. The electrical system voltage is the same as that stated on the name- plate on the front of the appliance, in the zone visible when the door is open.
-
Page 13: Description Of Controls
3. DESCRIPTION OF CONTROLS 3.1 CONTROL PANEL All the appliance's control and monitoring devices are placed together on the front panel. Display: shows the settings (spin speed, cycle status, child lock on/off). The settings can be modi- fied using the buttons underneath. Buttons (from left to right): Start/Pause button: Programme Selector... -
Page 14: Using The Appliance For Washing
4. USING THE APPLIANCE FOR WASHING 4.1 PREPARING THE ITEMS FOR WASHING Subdivide the items for washing by fabric type and colour fastness. Wash white and coloured items separately. New coloured items should be washed separately the first time. Normally, items carry labels with washing instructions. The fol- lowing is a short description of the symbols used on these labels. - Page 15 4.2 OPENING THE DOOR The appliance is fitted with a safety device which prevents the door from being opened while the programme is in progress. Check that all the water has been drained from the tank and the drum is at a standstill.
- Page 16 The main wash detergent compartment has a tang allowing the use of liquid detergent. To in- sert it, pull it towards the front and then lower it. Following the recommendations in the "Programmes Ta- ble" supplied with this manual, place the detergent and any additives in the drawer before the start of the pro- gramme.
- Page 17 4.7 LIQUID DETERGENT DOSES Pour the dose required into the measuring cap supplied with the bottle of liquid deter- gent and place it in the drum, or use the main wash compartment of the detergent drawer, fitting the insert provided. The scale on the red insert is intended as an aid when deciding the dose of liquid de- tergent.
- Page 18 4.11 SELECTING AND CONFIRMING OPTIONS Options Start Pause Option selection Confirm option 1. The Option Selection button can be used to select the following options in sequence (from the top down): Prewash: adds a stage before the main wash, lasting about 20 minutes at a tempera- ture of 35°C.
- Page 19 4.12 TIME TO END Delay Time to end Start pause symbol Start Pause Delay Time to end 1. The Time to End key can be pressed repeatedly to select the time after which the washing programme will end. The time to end of cycle function calculates the initial duration of the washing cycle, the settings made (temperature, spin speed and op- tions) which may shorten or lengthen the cycle's initial duration, and the delay time the user wishes to add before the cycle starts.
- Page 20 4.14 INTERRUPTING OR CHANGING THE WASHING PROGRAMME The washing programme in progress can be interrupted at any moment: 1. Press the “Start/Pause” button for about 3 seconds: the display shows the word PAUS (for 1 second) alternating with the time remaining until the end of the cycle (for 1 sec- ond).
- Page 21 4.16 CHILD LOCK 1. When this function is activated, the modification of options, temperatures, spin speed and the washing/drying cycle is not possible while the cycle is in progress. Child Lock Symbol 2. To activate the Child Lock Function, press the Child Lock (1) button and hold it down. Also press the Options selection (2) button within 3 seconds.
-
Page 22: Cleaning And Maintenance
5. CLEANING AND MAINTENANCE Important – Before carrying out any cleaning or maintenance procedure, the plug must be disconnected from the power supply socket. 5.1 CLEANING THE OUTSIDE OF THE APPLIANCE Regular, thorough cleaning will keep your appliance looking good. ... - Page 23 5.4 CLEANING THE DRAIN PUMP The drain pump only needs cleaning if it has been blocked by buttons, brooches or similar objects and the water is not being pumped out. In this case, proceed as described below. 1. Remove the mains plug to disconnect the appliance from the electricity supply. 2.
- Page 24 5.5 CLEANING THE DETERGENT DRAWER The detergent drawer should be kept clean, removing all solid deposits. To simplify this operation, completely remove the detergent drawer (pull the drawer fully out, press in the zone marked PUSH and then remove completely). Remove the siphon "A"...
-
Page 25: Troubleshooting
6. TROUBLESHOOTING This produce complies with the relevant regulations governing the safety of electrical equipment. For safety reasons, any technical inspections or repairs must be performed by qualified staff, to prevent all hazards for the user. If the appliance does not work, before calling the After-Sales Service, to avoid unnecessary expense, check yourself that the operations listed in this troubleshooting table have been carried out.. - Page 26 Not all fabric conditioner Check that detergent drawer siphons are correctly fitted and not used or too much water fouled. left in compartment Appliance does not spin Anti-imbalance safety device tripped because laundry not evenly distributed in drum. If laundry is still wet at end of cycle, rearrange it in the drum by hand and repeat spin programme only.
-
Page 27: Additional Information For The User
7. ADDITIONAL INFORMATION FOR THE USER The following information is provided in accordance with the European Ecodesign regulation (EU) 2019/2023 The values indicated for programs other than Eco 40-60 are indicative only. Washing machine Cycle Rated Energy Water Programme Temperature Spin Residual Detergent... - Page 28 ** Eco 40-60 program Test program compliant with European Ecodesign regulation (EU 2019/2023) and the European regulation on energy labelling using cold water (15°C) (EU 2019/2014). Washing program that is able to clean normally soiled cotton laundry declared to be washable at 40°C or 60°C together in the same washing cycle.
- Page 29 PROGRAM GUIDE Detergent drawer compartments Options Programs Temp. Max. Spin Max. Prewash Wash Conditioner Prewash Intensive Easy Extra rinse Rapid Wash program description (°C) (rpm) washing Iron load (kg) Delicate coloureds with light ...
- Page 30 GUIDA PROGRAMMI Scomparti cassetto detersivi Opzioni Programmi Temp. Max. Prelavaggio Lavaggio Ammorbidente Prelavaggio Intensivo Stira Risciacquo Rapido Descrizione programma lavaggio (°C) Centrifuga carico Meno aggiuntivo (giri/m') lavaggio (kg) Delicati colorati poco Lavaggio a 20°C, risciacqui e centrifuga finale alla ...
- Page 31 GUIDE DES PROGRAMMES Compartiments bac à détergents Options Programmes Temp. Charge Prélavage Lavage Adoucissant Prélavage Intensif Anti- Rinçage Rapide Description programme de lavage (°C) Essorage maxi. froissement plus (trs/mn) lavage (kg) Linge de couleur délicat peu Lavage à 20°C, rinçages et essorage final à la vitesse ...
- Page 32 PROGRAMM-LEITFADEN Kammern der Waschmittelschublade Optionen Programme Temp. Max. Max. Vorwäsche Hauptwäsche Weichspüler Vorwäsche Intensiv Bügelleicht Sonderspülgang Schnell Beschreibung des Waschprogramms (°C) Schleuder Beladung drehzahl Waschen (U/min) (kg) Gering verschmutzte nicht Hauptwäsche 20°C, Spülen und Endschleudern mit der ...
- Page 33 GUÍA PROGRAMAS Compartimentos cajón detergentes Opciones Programas Temp. Máx. Carga máx. Prelavado Lavado Suavizante Prelavado Intensivo Planchar Enjuague Rápido Descripción programa lavado (°C) Centrífuga lavado (kg) menos adicional (r.p.m.) Delicadas coloreadas Lavado a 20 ºC, enjuagues y centrifugado final a la velocidad ...
- Page 34 LEIDRAAD PROGRAMMA'S Vakjes wasmiddellade Opties Programma's Temp. Max. Centrifuge Max. Voorwas Hoofdwas Wasverzachter Voorwas Intensief Minder Extra Snel Beschrijving wasprogramma (°C) (toeren/min.) vulgewicht strijken spoelbeurt (kg) Delicate, bonte, weinig Wassen op 20°C, spoelen en eindcentrifuge bij ...
- Page 35 GUIA DE PROGRAMAS Compartimentos da gaveta para detergentes Opções Programas Temp. Centrifugaç Carga máx. Pré-lavagem Lavagem Amaciador Pré-lavagem Intensiva Engomar Enxaguamento Rápida Descrição do programa de lavagem (°C) ão máx. de lavagem fácil adicional (rpm) (kg) Roupas delicadas Lavagem a 20°C, enxaguamentos e centrifugação final à ...
- Page 36 PROGRAMTABELL Tvättmedelslådans fack Funktioner Program Temp. Max. Max. Förtvätt Huvud- Sköljmedel Förtvätt Intensiv Skrynkel- Extra- Snabb Beskrivning av tvättprogram (°C) centrifu- tvättmängd tvätt fritt sköljning gering (kg) (varv/minut) Lätt smutsad Tvättning på 20 °C, sköljning och slutcentrifugering på valt ...
- Page 37 ВЫБОР ПРОГРАММ Отсеки дозатора для моющих средств Дополнительные функции Программы Темп. Макс. Макс. Предварит Стирка Смягчитель Предварит Интенсивная Гладьте Дополнител Быстрая Описание программы стирки (°C) отжим загрузка ельная ельная меньше ьное (об/мин) для стирка стирка полоскание стирки (кг) Стирка при 20°C, полоскания и конечный отжим на Цветные...
- Page 38 ISTRUZIONI DI MONTAGGIO DELLE LAVATRICI INTEGRABILI ASSEMBLY INSTRUCTIONS FOR BUILT-IN WASHING MACHINES MONTAGEANLEITUNG FÜR EINBAUBAREWASCH- MASCHINEN INSTRUCTIONS DE MONTAGE DES LAVE-LINGE INTÉGRABLES INSTRUCCIONES DE INSTALACIÓN DE LAS LAVA- DORAS INTEGRABLES INSTRUÇÕES DE MONTAGEM DAS MÁQUINAS DE LAVAR ROUPA INTEGRÁVEIS MONTAGEINSTRUCTIES VAN INTEGREERBARE WASMACHINES MONTERINGSANVISNING FOR INTEGRERBARE VASKEMASKINER...
- Page 39 INSTRUKCJA MONTAŻU PRALEK DO ZABUDOWY WAŻNE - Urządzenie spełnia przepisy bezpieczeństwa obowiązujące w sprzętu elektrycznego musi być zainstalowane przez zakresie wykwalifikowanego technika, zgodnie z obowiązującymi przepisami, aby zapobiec zagrożeniom dla użytkownika. Wymiary wnęki do zabudowy muszą być następujące: Wymiary do minimalna wysokość...
- Page 40 2) Umieścić szablon na wewnętrznej stronie panelu i przy pomocy podziałki dopasować ustaloną wysokość listwy do dolnej części tegoż panelu (rys. 4). Szablon musi być wypośrodkowany również w kierunku poziomym w oparciu o linie pionowe zaznaczone na końcach. 3) Po umieszczeniu szablonu w prawidłowym położeniu wyznaczyć...
- Page 41 pralka została umieszczone na końcu danego ciągu mebli. Osłona musi bezwzględnie zapobiegać stykaniu części instalacji elektrycznej pod napięciem i musi wymagać użycia narzędzi do jej usunięcia. Firma nasza nie ponosi żadnej odpowiedzialności za nieprzestrzeganie powyższych norm bezpieczeństwa. Ciągła listwa zestawu mebli kuchennych musi być wyjmowana Zakładanie celu umożliwienia...
- Page 42 820mm 560mm 596mm 820mm 58mm ca. 82kg 150mm 16mm...
- Page 43 2 2 2 3 - A 2 2 2 8 8 8 1 1 1 7 7 7 3 3 3 3 3 3 9 9 9 4 4 4 11 11 11 6 6 6 1 1 1 5 5 5 6 6 6 1 1 1 2 2 2...
- Page 44 Unterkante Unterkante Lower edge Lower edge Côté inférieur Côté inférieur e e e e e e Lato inferiore Lato inferiore Lado inferior Lado inferior Onderkant Onderkant 16...21mm 16...21mm Нижний край Нижний край Strona dolna Strona dolna 592...595mm 592...595mm e e e e e e Ø...
- Page 45 1 1 1 3 3 3 2 2 2 1 1 1 2 2 2 1 1 1 3 3 3...
Need help?
Do you have a question about the LBI107 and is the answer not in the manual?
Questions and answers