
Related Manuals for Smeg LBI127


Summary of Contents for Smeg LBI127
- Page 1 LAVATRICE WASHING MACHINE LAVE-LINGE WASCHVOLLAUTOMAT LAVADORA LIBRETTO ISTRUZIONI INSTRUCTION MANUAL MANUEL D'INSTRUCTIONS GEBRAUCHSANLEITUNG MANUAL DE INSTRUCCIONES...
-
Page 2: Table Of Contents
Contents 1. PRECAUTIONS FOR SAFETY AND USE ................... 2 2. INSTALLATION INSTRUCTIONS ....................7 3. DESCRIPTION OF CONTROLS ....................12 4. USING THE APPLIANCE FOR WASHING ................13 5. CLEANING AND MAINTENANCE ................... 22 6. TROUBLESHOOTING ......................... 25 7. ADDITIONAL INFORMATION FOR THE USER ..............27 This appliance is tagged in accordance with European Directive 2002/96/EC on Waste Electrical and Electronic Equipment - WEEE. -
Page 3: Precautions For Safety And Use
READ THE INSTRUCTIONS ATTENTION! You are advised to read all the instructions in this manual carefully; it will in- form you about the right conditions for the proper, safe use of your washing machine. It is very important to keep this instruction manual with the appliance for fu- ture reference. - Page 4 Information on household detergents, additives and cleaning agents can be found on the following website www.cleanright.eu. WARNING: the higher the spin speed, the higher will be the noise and the lower the remaining moisture content. The lower the amount of residual moisture at the end of the wash, the lower the energy consumption will be during drying."...
- Page 5 The washing machine must never be used on vehicles, on board ships or planes, or in environments with hazards, such as explosive or corrosive en- vironments (powders, vapours and gases) or explosive and/or corrosive liq- uids. Do not install the washing machine in places with a risk of frost. Frozen pipes may burst under the pressure.
- Page 6 Keep children away from the appliance when the door or the detergent drawer is open; the appliance might contain detergent resides which may cause permanent injury to the eyes, mouth and throat, or even cause death by suffocation. The appliance is not intended for use by persons (including children) with reduced physical, sensory or mental capabilities, or lack of experience and knowledge, unless they have been given supervision or instruction concern- ing use of the appliance by a person responsible for their safety.
- Page 7 If the appliance is provided with a plugless supply cord: It is necessary to install in the fixed wiring an all-pole disconnection de- vice having a gap between contacts of at least 3,5mm. After installation the disconnection device has to be easy to reach. ...
-
Page 8: Installation Instructions
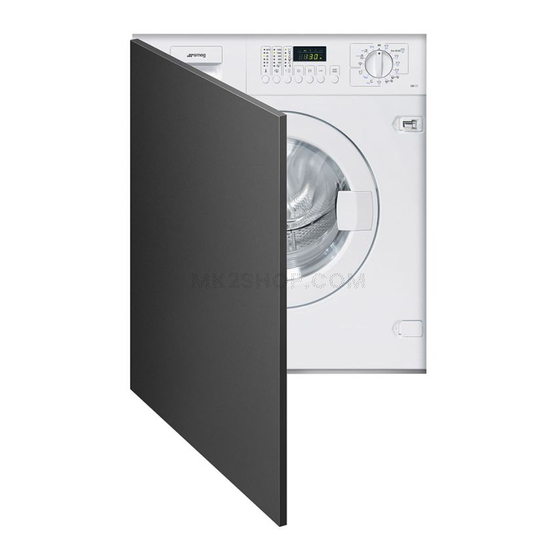
2. INSTALLATION INSTRUCTIONS Important! The appliance must be installed by a qualified engineer in compliance with the relevant regulations. The washing machine is heavy. Take care when lifting it. 2.1 UNPACKING The unit on flexible mounts is fixed in place for transport using the screws (A) on the rear of the washing machine with the relative plastic spacers (B). - Page 9 2.2 POSITIONING AND LEVELLING Place appli- ance in the chosen position. Level the appli- ance carefully in all directions with the aid of a spirit level, adjusting the height of the feet if neces- sary. Once done, fix the feet in place with the locknuts provided. 3.
- Page 10 Warning! This operation must be carried out with care to prevent the washing machine from vibrating, moving or generating excessive noise during use. If the appliance is installed on a carpeted floor, take care to ensure that the openings in the bottom of the washing machine are not ob- structed.
- Page 11 2.4 CONNECTING TO THE DRAIN Insert the end of the drain hose into a drain pipe having inside diameter of at least 4 cm, at least 50 to 90 cm above floor level, or connect it securely (using the plastic fitting on the elbow in the hose) to a sink or bathtub. In all cases, check that the end of the drain hose is securely fixed to pre- vent the repulsive force of the water from pushing it out of place.
- Page 12 2.5 ELECTRICAL CONNECTION Before connecting the plug to the power socket ensure that: 1. The electrical system voltage is the same as that stated on the name- plate on the front of the appliance, in the zone visible when the door is open.
-
Page 13: Description Of Controls
3. DESCRIPTION OF CONTROLS 3.1 CONTROL PANEL All the appliance's control and monitoring devices are placed together on the front panel. Display: shows the settings (spin speed, cycle status, child lock on/off). The settings can be modi- fied using the buttons underneath. Buttons (from left to right): Start/Pause button: Programme Selector... -
Page 14: Using The Appliance For Washing
4. USING THE APPLIANCE FOR WASHING 4.1 PREPARING THE ITEMS FOR WASHING Subdivide the items for washing by fabric type and colour fastness. Wash white and coloured items separately. New coloured items should be washed sepa- rately the first time. Normally, items carry labels with washing instructions. The following is a short description of the symbols used on these labels. - Page 15 4.2 OPENING THE DOOR The appliance is fitted with a safety device which prevents the door from being opened while the programme is in progress. Check that all the water has been drained from the tank and the drum is at a standstill.
- Page 16 4.5 ADDING DETERGENT AND ADDITIVE The internal tray comprises three compartments, marked with the symbols prewash detergent main wash detergent for fabric conditioner, starch, additives, etc. (e.g. treatment products). The additives are added to the washing tank automatically during the final rinse. The main wash detergent compartment has a tang allowing the use of liquid detergent.
- Page 17 4.6 POWDER DETERGENT DOSES Laundry with normal dirt Choose a programme without prewash. Pour the total amount of detergent shown on the pack into the main wash compartment of the detergent drawer. Very dirty laundry Choose a programme with prewash. Place ¼...
- Page 18 4.10 SWITCHING ON THE APPLIANCE AND SELECTING THE WASHING PROGRAMME To switch on the appliance and select the programme, proceed as follows: Turn the programmes knob in either direction. This switches on the washing machine. Select the washing programme. The time left to the end of the programme on the dis- play.
- Page 19 4.11 SELECTING AND CONFIRMING OPTIONS Options Start Pause Option selection Confirm option 1. The Option Selection button can be used to select the following options in sequence (from the top down): Prewash: adds a stage before the main wash, lasting about 20 minutes at a tempera- ture of 35°C.
- Page 20 4.12 TIME TO END Time to end symbol Start pause symbol Start Pause Time to end button 1. The Time to End key can be pressed repeatedly to select the time after which the washing programme will end. The time to end of cycle function calculates the initial duration of the washing cycle, the settings made (temperature, spin speed and op- tions) which may shorten or lengthen the cycle's initial duration, and the delay time the user wishes to add before the cycle starts.
- Page 21 4.14 INTERRUPTING OR CHANGING THE WASHING PROGRAMME The washing programme in progress can be interrupted at any moment: 1. Press the “Start/Pause” button for about 3 seconds: the display shows the word PAUS (for 1 second) alternating with the time remaining until the end of the cycle (for 1 sec- ond).
- Page 22 4.16 CHILD LOCK 1. When this function is activated, the modification of options, temperatures, spin speed and the washing/drying cycle is not possible while the cycle is in progress. Child Lock Symbol 2. To activate the Child Lock Function, press the Child Lock (1) button and hold it down. Also press the Option selection (2) button within 3 seconds.
-
Page 23: Cleaning And Maintenance
5. CLEANING AND MAINTENANCE Important – Before carrying out any cleaning or maintenance procedure, the plug must be disconnected from the power supply socket. 5.1 CLEANING THE OUTSIDE OF THE APPLIANCE Regular, thorough cleaning will keep your appliance looking good. ... - Page 24 5.4 CLEANING THE DRAIN PUMP The drain pump only needs cleaning if it has been blocked by buttons, brooches or similar objects and the water is not being pumped out. In this case, proceed as described below. Remove the mains plug to disconnect the appliance from the electricity supply. Depending on the model, pro- ceed as follows: Built-in/totally concealed model –...
- Page 25 5.5 CLEANING THE DETERGENT DRAWER The detergent drawer should be kept clean, removing all solid deposits. To simplify this operation, completely remove the detergent drawer (pull the drawer fully out, press in the zone marked PUSH and then remove completely). Remove the siphon "A"...
-
Page 26: Troubleshooting
6. TROUBLESHOOTING This produce complies with the relevant regulations governing the safety of electrical equipment. For safety rea- sons, any technical inspections or repairs must be performed by qualified staff, to prevent all hazards for the user. If the appliance does not work, before calling the After-Sales Service, to avoid unnecessary expense, check your- self that the operations listed in this troubleshooting table have been carried out. - Page 27 Appliance does not spin Anti-imbalance safety device tripped because laundry not evenly distrib- uted in drum. If laundry is still wet at end of cycle, rearrange it in the drum by hand and repeat spin programme only. Emptying water from drum In the event of a power blackout or appliance failure, the water can be removed from the drum using the emergency procedure.
-
Page 28: Additional Information For The User
7. ADDITIONAL INFORMATION FOR THE USER The following information is provided in accordance with the European Ecodesign regulation (EU) 2019/2023 The values indicated for programs other than Eco 40-60 are indicative only. Washing machine Cycle Rated Energy Water Programme Temperature Spin Residual Detergent... - Page 29 ** Eco 40-60 program Test program compliant with European Ecodesign regulation (EU 2019/2023) and the European regulation on energy labelling using cold water (15°C) (EU 2019/2014). Washing program that is able to clean normally soiled cotton laundry declared to be washable at 40°C or 60°C together in the same washing cycle.
- Page 30 ISTRUZIONI DI MONTAGGIO DELLE LAVATRICI INTEGRABILI ASSEMBLY INSTRUCTIONS FOR BUILT-IN WASHING MACHINES MONTAGEANLEITUNG FÜR EINBAUBAREWASCH- MASCHINEN INSTRUCTIONS DE MONTAGE DES LAVE-LINGE INTÉGRABLES INSTRUCCIONES DE INSTALACIÓN DE LAS LAVA- DORAS INTEGRABLES INSTRUÇÕES DE MONTAGEM DAS MÁQUINAS DE LAVAR ROUPA INTEGRÁVEIS MONTAGEINSTRUCTIES VAN INTEGREERBARE WASMACHINES MONTERINGSANVISNING FOR INTEGRERBARE VASKEMASKINER...
- Page 31 Pagina Page Seite Page Página Página Bladzijde Side Sida Sayfa Страница Strona صفحة...
- Page 32 ISTRUZIONI DI MONTAGGIO DELLE LAVATRICI INTEGRABILI IMPORTANTE - La macchina risponde alle vigenti norme di sicurezza relative alle apparecchiature elettriche e deve essere installata da un tecnico specia- lizzato secondo le norme in vigore, onde evitare pericoli per l’utente. Dimensioni per Le quote del vano di alloggiamento devono essere: altezza l’inserimento minima 820mm, larghezza minima 600mm e profondità...
- Page 33 2) Posizionare la maschera nel lato interno del pannello e far coincidere l’altezza dello zoccolo stabilita, con il lato inferio- re del pannello stesso (fig. 4) attraverso la scala graduata. La maschera deve essere centrata anche in senso orizzon- tale, facendo riferimento alle linee verticali segnate nelle estremità.
- Page 34 utilizzato il kit di innalzamento della lavabiancheria acqui- stabile tramite il Servizio Ricambi. E’ comunque necessario, per adeguarsi alle norme di sicurez- za, chiudere completamente le aperture che si dovessero for- mare tra il pavimento e il lato inferiore dello zoccolo e tra il pa- vimento e le fiancate della macchina quando la lavatrice è...
- Page 35 ASSEMBLY INSTRUCTIONS FOR BUILT-IN WASHING MA- CHINES IMPORTANT - This machine complies with current safety regulations govern- ing electrical appliances and, to ensure user safety, it must be installed by a qualified technician as required by current legislation Size of cabinet The minimum dimensions of the cabinet are: height 820 mm, width 600 mm, depth 584 mm (fig.
- Page 36 Place the template of the inner side of the panel and match the height of the baseboard with the lower edge of the panel (fig. 4) using the graduated scale. Make sure the template is horizon- tally centred with reference to the vertical lines marked at the ends.
- Page 37 impossible to touch live components and a tool must be required to remove it. Our company declines all liability for failure to observe the above safety requirement. Applying the It must be possible to remove the continuous kitchen baseboard to allow the drain pump to be cleaned if necessary. baseboard In some cases, the baseboard is not continuous but limited to the width of the washing machine.
- Page 38 MONTAGEANLEITUNG FÜR EINBAUBARE WASCHMASCHINEN – WICHTIG Waschmaschine entspricht geltenden Sicher- heitsvorschriften für elektrische Geräte und muss von einem Fachtechniker entsprechend den geltenden Normen installiert werden, um Gefahren für den Benutzer zu vermeiden. Der Einbauraum muss wie folgt bemessen sein: Mindesthöhe Abmessungen 820mm, Mindestbreite 600mm und Mindesttiefe 584mm (Abb.
- Page 39 2) Die Maske auf der Innenseite der Platte positionieren, und zwar so, dass die festgelegte Sockelhöhe mit der Unterkan- te der Platte übereinstimmt (Abb. 4), hierzu eine Mess- Skala benutzen. Die Maske muss auch horizontal zentriert sein, und zwar unter Bezugnahme auf die an den Enden markierten senkrechten Linien.
- Page 40 Falls der Einbauraum eine Höhe von 870 mm haben sollte, ist der Bausatz zur Erhöhung der Waschmaschine zu ver- wenden. Der Bausatz ist mittels des Ersatzteilservice erhältlich. In Übereinstimmung mit den geltenden Sicherheitsvorschriften müssen die Öffnungen, die sich eventuell zwischen dem Fußboden und der Unterseite des Sockels sowie zwischen dem Fußboden und den Seitenwänden der Waschmaschine bilden, unbedingt geschlossen werden, sofern die Waschmaschine am...
- Page 41 INSTRUCTIONS DE MONTAGE DES LAVE-LINGE INTÉGRABLES IMPORTANT - La machine est conforme aux normes de sécurité en vigueur en matière d’appareils électriques et doit être installée par un technicien qualifié conformément aux normes en vigueur, afin d’éviter tout risque pour l’utilisateur.
- Page 42 2) Positionner le gabarit du côté interne du panneau et faire coïncider la hauteur de plinthe définie avec le côté inférieur du panneau (fig. 4) en utilisant l’échelle graduée. Le gabarit doit également être centré à l’horizontale, en se référant aux lignes verticales marquées dans les extrémités.
- Page 43 Dans tous les cas, afin de se conformer aux normes de sécuri- té, il faut fermer complètement les éventuelles ouvertures entre le sol et le côté inférieur de la plinthe et entre le sol et les pan- neaux latéraux de la machine quand le lave-linge est positionné à...
- Page 44 INSTRUCCIONES DE INSTALACIÓN DE LAS LAVADORAS IN- TEGRABLES IMPORTANTE - La máquina cumple las normas de seguridad vigentes relati- vas a los aparatos eléctricos y debe ser instalada por un técnico especializa- do según las normas en vigor, a fin de evitar peligros para el usuario. Las cotas del vano de alojamiento deben ser: altura mínima Dimensiones 820mm, anchura mínima 600mm y profundidad mínima 584mm...
- Page 45 2) Situar la máscara por el lado interior del panel y hacer coincidir la altura establecida del zócalo con el lado infe- rior del panel (fig. 4) mediante la escala graduada. La máscara se debe centrar también en sentido horizontal, haciendo referencia a las líneas verticales indicadas en los extremos.
- Page 46 Si el vano de empotramiento tiene una altura de 870 mm, se debe utilizar el kit de elevación de la lavadora que se puede comprar a través del Servicio de Recambios. En cualquier caso es necesario, para adecuarse a las normas de seguridad, cerrar completamente las aberturas que se for- men entre el pavimento y el lado inferior del zócalo y entre el pavimento y los lados de la máquina cuando la lavadora está...
- Page 47 INSTRUÇÕES DE MONTAGEM DAS MÁQUINAS DE LAVAR ROUPA INTEGRÁVEIS IMPORTANTE – A máquina cumpre com as normas de segurança vigentes re- lativas aos aparelhos eléctricos e deve ser instalada por um técnico especiali- zado de acordo com as normas em vigor, para evitar perigos para o utilizador. As medidas do compartimento de alojamento devem ser: altura Dimensões para mínima 820 mm, largura mínima 600 mm e profundidade míni-...
- Page 48 2) Colocar a máscara no lado interior do painel e fazer coin- cidir a altura da base estabelecida, com o lado inferior do próprio painel (fig. 4) com auxílio da escala graduada. A máscara deve estar centrada também no sentido horizon- tal, fazendo referência às linhas verticais marcadas nas extremidades.
- Page 49 Se o compartimento de encaixe possuir uma altura de 870 mm deve ser utilizado o kit para levantar a máquina de la- var roupa que pode ser comprado através do Serviço de Sobressalentes. Todavia, para conformar-se às normas de segurança, é ne- cessário fechar completamente as aberturas que eventualmen- te se formassem entre o pavimento e o lado inferior da base e entre o pavimento e as partes laterais da máquina quando a...
- Page 50 MONTAGEINSTRUCTIES INTEGREERBARE WASMACHINES BELANGRIJK – De machine voldoet aan de veiligheidsvoorschriften be- treffende elektrische apparatuur en moet volgens de geldende voorschriften door een gespecialiseerde monteur worden geïnstalleerd, om gevaar voor de gebruiker te voorkomen. De afmetingen van de inbouwruimte moeten zijn: mini- Afmetingen voor mumhoogte 820 mm, minimumbreedte 600 mm en minimum- de inbouw...
- Page 51 Plaats de bescherming aan de binnenkant van het paneel en laat de vastgestelde hoogte van de voetlijst via de schaalverdeling overeenkomen met de onderkant van het paneel zelf (fig. 4). De bescherming moet ook horizontaal zijn gecentreerd. Houd u hierbij aan de verticale lijnen die aan de uiteinden zijn aangegeven.
- Page 52 van ten minste 2 mm overblijft. Ook de achterkant van de machine moet van de achterwand staan. Als de inbouwruimte een hoogte heeft van 870 mm, moet de verhogingskit van de wasmachine worden gebruikt, die verkrijgbaar is via de Reserveonderdelen Service. Om u aan de veiligheidsvoorschriften aan te passen, moeten de openingen die tussen de vloer en de onderkant van de sokkel en tussen de vloer en de zijkanten van de machine kunnen...
- Page 53 MONTERINGSANVISNING INTEGRERBARE VAS- KEMASKINER VIGTIGT - Maskinen opfylder kravene i de gældende sikkerhedsstandarder vedrørende elektrisk udstyr og skal installeres af en specialuddannet tekniker med overholdelse af de gældende standarder for at undgå farer for brugeren. Indbygningsmål Nichen skal have følgende mål: min. højde 820 mm; min. bredde 600 mm;...
- Page 54 Anbring skabelonen indvendigt på panelet og sørg for, at den fastsatte sokkelhøjde flugter med panelets nederste kant (fig. 4). Benyt den gradinddelte skala. Skabelonen skal også centreres i vandret retning ved hjælp af de lodrette linier, som er afmærket i enderne. Når skabelonen er anbragt korrekt, optegnes placeringen af følgende huller ved hjælp af en blyant: ...
- Page 55 digt, hvis vaskemaskinen er i slutningen af en række element- Beklædningen skal hindre kontakt med de strømførende dele og skal kun kunne fjernes ved hjælp af værktøj. Producenten kan ikke gøres ansvarlig i tilfælde af manglende overholdelse ovennævnte sikker- hedsforskrifter. Elementernes sammenhængende sokkel skal kunne fjernes Anbringelse af således, at eventuel rengøring af afløbspumpen er mulig.
- Page 56 MONTERINGSANVISNINGAR FÖR INBYGGNADSBARA TVÄTTMASKINER VIKTIGT - Maskinen överensstämmer med gällande säkerhetsföreskrifter angående elektrisk apparatur och ska installeras av en specialiserad tekniker i enlighet gällande föreskrifter för att skydda användaren mot faror. Måtten för utrymmet där tvättmaskinen ska byggas in: Min. höjd Dimensioner för 820 mm, min.
- Page 57 2) Lägg mallen på panelens insida och se till att sockelns fastställda höjd sammanfaller med panelens nedre sida (fig. 4) med hjälp av den graderade ska- lan. Mallen ska även centreras i horisontell riktning, se de vertikala linjerna som är markerade i ändarna. 3) Efter att mallen har placerats i korrekt läge, ska följande hål markeras genom att sticka igenom mallen med spetsen på...
- Page 58 även finnas ett utrymme mellan tvättmaskinens bakstycke och den bakre väggen. Om inbyggnadsutrymmet har en höjd på 870 mm ska en sats för att höja tvättmaskinen användas. Denna sats kan inhandlas från reservdelsavdelningen. För att respektera gällande säkerhetsföreskrifter är det dessutom nödvändigt att stänga öppningarna fullständigt som kan bildas mellan golvet och maskinens sidostycken när tvättmaskinen placeras i slutet av en rad med köksmö-...
- Page 59 ANKASTRE ÇAMAŞIR MAKİNELERİ İÇİN MONTAJ TALİMATLARI ÖNEMLİ – Bu makine elektrikli cihazlar için geçerli güvenlik düzenlemelerine uy- gundur ve kullanıcının güvenliğini sağlamak için yürürlükteki yasaların gerek- tirdiği şekilde yetkin bir teknisyen tarafından kurulmalıdır. Kabinin asgari boyutları aşağıdaki gibidir: Kabin ebadı Yükseklik x Genişlik Derinlik (mm): 820 x 600 x 584 (Şekil-1) Panelin Takıl- Panel makinenin sol veya sağ...
- Page 60 2) Panelin iç yüzünün şablonunu yerleştirin ve derece ölçeğini kullanarak süpürgeliğin yüksekliğini panelin alçak kenarıyla (Şekil-4) karşılaştırın. Uçlara konul- muş dikey çizgilere bakarak şablonun yatay olarak ortalandığından emin olun. 3) Şablonu doğru şekilde yerleştirdikten sonra, kalemi- nizin ucuyla iterek aşağıdaki deliklerin konumlarını belirleyin: ...
- Page 61 bir dizi mobilyanın ucuna yerleştirildiğinde zeminle taban levhası arasında ve zeminle makinenin yan tarafları arasında kalan her türlü açıklığın tamamen kapatılması gerekir. Kapak, elektrikli parçalara temas edilmesini ola- naksız kılacak şekilde takılmalı ve bunu çıkarmak için alet yardımı şart olmalıdır. Yukarıdaki güvenlik gerekliliklerinin yerine getiril- memesinden doğan arızalar için şirketimiz hiçbir yükümlülük Kabul etmez.
- Page 62 ИНСТРУКЦИИ ПО МОНТАЖУ ВСТРОЕННЫХ СТИРАЛЬНЫХ МАШИН ВАЖНО - Машина отвечает действующим нормам безопасности в области электрического оборудования и должна устанавливаться квалифицированным специалистом по действующим нормам, чтобы избежать опасность для пользователя. Размеры отсека для установки машины должны быть Размеры для следующими: минимальная высота 820 мм, минимальная установки...
- Page 63 Наложите кондуктор на внутреннюю сторону панели и совместите измеренную высоту плинтуса с нижней стороной панели (рис. 4) при помощи градуированной шкалы. Кондуктор должен быть отцентрован также и по горизонтали, ориентируясь по вертикальным линиям по краям. Установив кондуктор в правильное положение, нанесите положение...
- Page 64 сторона машины должна находиться на расстоянии от задней стенки мебели. Если проем для встроенной установки имеет высоту 870 мм, то необходимо использовать комплект для подъема стиральной машины, который можно приобрести в Службе запасных частей. Для обеспечения соответствия нормам безопасности необходимо полностью закрыть проемы, которые могут образоваться...
- Page 65 INSTRUKCJA MONTAŻU PRALEK DO ZABUDOWY WAŻNE - Urządzenie spełnia przepisy bezpieczeństwa obowiązujące w sprzętu elektrycznego musi być zainstalowane przez zakresie wykwalifikowanego technika, zgodnie z obowiązującymi przepisami, aby zapobiec zagrożeniom dla użytkownika. Wymiary wnęki do zabudowy muszą być następujące: Wymiary do minimalna wysokość...
- Page 66 2) Umieścić szablon na wewnętrznej stronie panelu i przy pomocy podziałki dopasować ustaloną wysokość listwy do dolnej części tegoż panelu (rys. 4). Szablon musi być wypośrodkowany również w kierunku poziomym w oparciu o linie pionowe zaznaczone na końcach. 3) Po umieszczeniu szablonu w prawidłowym położeniu wyznaczyć...
- Page 67 pralka została umieszczone na końcu danego ciągu mebli. Osłona musi bezwzględnie zapobiegać stykaniu części instalacji elektrycznej pod napięciem i musi wymagać użycia narzędzi do jej usunięcia. Firma nasza nie ponosi żadnej odpowiedzialności za nieprzestrzeganie powyższych norm bezpieczeństwa. Ciągła listwa zestawu mebli kuchennych musi być wyjmowana Zakładanie celu umożliwienia...
- Page 68 المدمجة الغسالت تركيب تعليمات يتوجب و الكهربائية باألجهزة المتعلقة السالمة مجال في المفعول السارية القوانين مع اآللة تتوافق هامة مالحظة المخاطر الى المستخدم تعرض تجنب لغرض المفعول السارية القوانين بموجب متخصص تقني قبل من يبها ترك لالرتفاع االدنى الحد يلي كما...
- Page 69 القاعدة لوح ارتفاع توافق على العمل يتم بحيث للوح الداخلية الجهة على القالب يوضع وضع يتوجب مدرج مقياس طريق عن الشكل اللوح لنفس السفلية الجهة مع المحدد ً افقي ا ا كمرجع النهايات على المسجلة العمودية الخطوط باتخاذ متمركز بشكل القالب...
- Page 70 للسماح ذلك و مكانه من لإلزالة قابل االثاث باستمرارية الخاص القاعدة لوح يكون ان يجب القاعدة لوح وضع اللزوم عند التصريف مضخة بتنظيف محدود ببساطة لكنه و تواصل م غير المركب االثاث قاعدة لوح يكون الحاالت بعض في الغسالة قاعدة بلوح...
- Page 71 820mm 560mm 596mm 820mm 58mm ca. 82kg 150mm 16mm...
- Page 72 2 2 2 3 - A 2 2 2 8 8 8 1 1 1 7 7 7 3 3 3 3 3 3 9 9 9 4 4 4 11 11 11 6 6 6 1 1 1 5 5 5 6 6 6 1 1 1 2 2 2...
- Page 73 Unterkante Unterkante Lower edge Lower edge Côté inférieur Côté inférieur e e e e e e Lato inferiore Lato inferiore Lado inferior Lado inferior Onderkant Onderkant 16...21mm 16...21mm Нижний край Нижний край Strona dolna Strona dolna 592...595mm 592...595mm e e e e e e Ø...
- Page 74 1 1 1 3 3 3 2 2 2 1 1 1 2 2 2 1 1 1 3 3 3...
- Page 76 GUIDA PROGRAMMI Scomparti cassetto detersivi Opzioni Programmi Temp. Max. Prelavaggio Lavaggio Ammorbid. Prelav. Intensivo Stira Meno Risciacquo Rapido Descrizione programma lavaggio (°C) Centrifuga carico aggiuntivo (giri/m') lavaggio (kg) Cotone e Lavaggio a freddo o 20°C, risciacqui e centrifuga finale alla / 20°...
- Page 77 PROGRAM GUIDE Detergent drawer compartments Options Programs Temp. Max. Spin Max. Prewash Wash Softner Prewash Intensive Easy Iron Extra rinse Rapid Wash program description (°C) (rpm) washing load (kg) Cotton and Delicate coloureds with light dirt / 20° Cold wash or 20°C, rinses and final spin at the selected speed ...
- Page 78 GUIDE DES PROGRAMMES Compartiments bac à détergents Options Programmes Temp. Charge Prélavage Lavage Adoucissant Prélavage Intensif Anti- Rinçage Rapide Description programme de lavage (°C) Essorage maxi. froissement plus (trs/mn) lavage (kg) Coton et Lavage à froid ou 20°C, rinçages et essorage final à la vitesse Linge de couleur délicat peu sale / 20°...
- Page 79 PROGRAMM-LEITFADEN Kammern der Waschmittelschublade Optionen Programme Temp. Max. Max. Vorwäsche Hauptwäsche Weichspüler Vorwäsch Intensiv Bügelleicht Sonder- Schnell Beschreibung des Waschprogramms spülgang (°C) Schleuder- Beladung drehzahl Waschen (U/min) (kg) Baumwoll- und Kaltwäsche oder 20°C, Spülen und Endschleudern mit der Gering verschmutzte nicht farbechte Buntwäsche / 20°...
- Page 80 GUÍA PROGRAMAS Compartimentos cajón detergentes Opciones Programas Temp. Máx. Carga Prelavado Lavado Suavizante Prelavado Intensivo Planchar Enjuague Rápido Descripción programa lavado (°C) Centrífuga máx. menos adicional (r.p.m.) lavado (kg) Algodón y Lavado en frío ou de 20°C, enjuagues y centrifugado final a la Delicadas coloreadas poco sucias / 20°...
- Page 81 LEIDRAAD PROGRAMMA'S Vakjes wasmiddellade Opties Programma's Temp. Max. Max. Voorwas Hoofdwas Wasverzachter Voorwas Intensief Minder Extra Snel Beschrijving wasprogramma (°C) Centrifuge vulgewich strijken spoelbeurt (toeren/mi t (kg) Katoen en bonte Koud wassen of 20°C , spoelen en eindcentrifuge bij Delicate, bonte, weinig vieze was / 20°...
- Page 82 GUIA DE PROGRAMAS Opções Compartimentos da gaveta para detergentes Programas Temp. Centrifuga Carga Pré-lavagem Lavagem Amaciador Pré- Intensiva Engomar Enxagua- Rápida Descrição do programa de lavagem (°C) ção máx. máx. de lavagem fácil mento (rpm) lavagem adicional (kg) Roupas de Lavagem com água fria ou a 20°C, enxaguamentos e Roupas delicadas coloridas pouco sujas / 20°...
- Page 83 PROGRAMTABELL Tvättmedelslådans fack Funktioner Program Temp. Max. Max. Förtvätt Huvud-tvätt Sköljmedel Förtvätt Intensiv Skrynkel- Extra- Snabb Beskrivning av tvättprogram (°C) centrifu- tvättmängd fritt sköljning gering (kg) (varv/minu Vittvätt och Kalltvätt eller 20 °C, sköljning och slutcentrifugering på valt Lätt smutsad fintvätt/kulörtvätt / 20°...
- Page 84 ВЫБОР ПРОГРАММ Отсеки дозатора для моющих средств Дополнительные функции Программы Темп. Макс. Макс. Предварите- Стирка Смягчитель Предвари- Интенсивная Гладьте Дополни- Быстрая Описание программы стирки (°C) отжим загрузка льная стирка тельная меньше тельное (об/мин) для стирка полоскание стирки (кг) Хлопок и Цветные...
Need help?
Do you have a question about the LBI127 and is the answer not in the manual?
Questions and answers