Table of Contents
Advertisement
Quick Links
Advertisement
Table of Contents

Related Manuals for Yamaha W5


Summary of Contents for Yamaha W5
-
Page 2: Special Message Section
SPECIFICATIONS SUBJECT TO CHANGE: The information contained in this manual is believed to be correct at the time of printing. However, Yamaha reserves the right to change or modify any of the specifications without notice or obligation to update existing units. -
Page 3: Important Safety Instructions
IMPORTANT: The louder the sound, the shorter the time period before damage occurs. Some Yamaha products may have benches and / or accessory mounting fixtures that are either supplied as a part of the product or as optional accessories. Some of these items are designed to be dealer assembled or installed. -
Page 4: Table Of Contents
CONTENTS BEFORE YOU BEGIN ...7 FRONT PANEL ...10 REAR PANEL ...15 SYSTEM LOGIC ...17 GETTING STARTED ...43 SETUP & PLAY ...44 LOADING & PLAYING THE DEMO ...52 PROGRAMMING ...56 SAVING & LOADING ...64 INTEGRATING INTO A MIDI SYSTEM ...67 FEATURE REFERENCE...71 SONG MODE ...72 SONG PLAY ...73 SONG MULTI ... - Page 5 STORE MODE...129 STORE MULTI ...129 STORE VOICE ...130 DISK MODE ...131 DISK STATUS ...133 SAVE TO DISK ...134 LOAD FROM DISK ...136 RENAME FILE ...139 DELETE FILE ...140 FORMAT DISK ...141 UTILITY MODE ...142 SONG VOICE MEMORY ...143 INITIALIZE ...144 VOICE BULK DUMP ...144 SYNTHESIZER SETUP ...145 CONTROLLERS ...147...
-
Page 6: How To Use This Manual
16 different instrument sounds simultaneously via the internal song sequencer or an external MIDI source. The W5/W7 is specifically designed with the music composer and performer in mind to give serious musicians all the tools they need to make great sounding music, in one compact, easy-to-use, yet powerful, package. - Page 7 PRECAUTIONS IMPORTANT! PLEASE READ BEFORE PROCEEDING. The W5/W7 is a powerful electronic musical instrument featuring sensitive high technol- ogy. To ensure many years of trouble-free use, please take the important precautions below seriously. LOCATION In order to avoid causing serious damage to the W5/W7, do not expose the instrument to direct sunlight, high tempera- tures, excessive humidity, excessive dust or strong vibration.
- Page 8 No-name brand disks may cause trouble. IMPORTANT NOTE: Yamaha recommends that you regularly save your data onto floppy disks and store the disks in a safe place! Yamaha cannot be held responsible for the accidental loss of important music data.
-
Page 9: Before You Begin
Accessing functions rarely takes more than two or three presses of a button. SONG MULTI The basic Song Play operation mode of the W5/W7, a multi lets you design a complete music production from start to finish and store it as a song in any of the 16 internal song memories. -
Page 10: General Midi
The W5/W7 supports the GM System Level 1 , which is the current minimum MIDI configuration standard recognized by the International MIDI Association. -
Page 11: Digital Effects
76-key (W5) or 61-key (W7) polyphonic keyboard with key velocity sensitivity and aftertouch, plus keyboard splitting, layering and 4-Zone capabilities. The W5/W7 can play a maximum of 32 notes simultaneously. In Song Multi Mode, it can play a maximum of 16 timbres, or voices, simultaneously; in Voice Mode, it can play one timbre at a time. -
Page 12: Front Panel
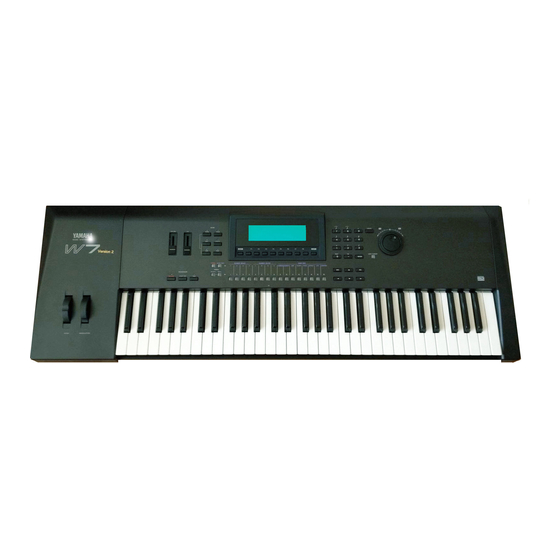
FRONT PANEL DIAGRAM & FEATURES PITCH NOTE: The above diagram is the 61-key W7 Music Synthesizer. The 76-key W5 has precisely the same on-board controls and internal operating systemonly the number of keys on the keyboard is different. MODULATION MODE... - Page 13 EXIT REST VOICE EDIT COMMON ELEMENT FILTER PITCH EFFECT CONTROL CANCEL UTILITY DATA/CURSOR – ENTER...
- Page 14 This is a multiple function controller that can control the parameter you assign to it, including pan, foot control functions, expression, data entry and others. MODE SECTION For choosing the six main operation modes of the W5/W7 Song, Edit, Job, Voice, Utility and Disk. SEQUENCER SECTION For starting and stopping the recording and playback functions of the internal sequencer, and returning the song to the top, or first measure.
- Page 15 VOICE EDIT BUTTON For switching directly into Voice Edit Mode, regardless of whatever mode you re in at the time, to access the voice editing functions and parameters. During the editing operation, pressing VOICE EDIT lets you compare the sound of the voice you re editing to the sound of the original voice you started from.
-
Page 16: Cancel Button
DATA ENTRY KEYPAD For precise, specific entry of data, by punching in a number, then pressing ENTER. The [—] button lets you enter a negative value. In Song Record Mode you can enter music notation values according to the corresponding musical symbols and indica- tions printed above the buttons. -
Page 17: Rear Panel
MIDI device which will control or transmit data to the W5/W7. The MIDI THRU connector simply passes along the data received at the MIDI IN connector, allowing convenient chaining of MIDI devices. The MIDI OUT connector transmits data corresponding to all W5/W7 performance operations, or bulk data when one of the MIDI data transmission functions are activated. - Page 18 FOOT CONTROLLER JACK An optional Yamaha FC7 or FC9 foot controller connected here can be used for amplitude modulation, pitch modulation, frequency modulation, envelope generator bias, and filter cutoff frequency control. FOOT VOLUME JACK An optional FC7 or FC9 foot controller connected here can be used to regulate overall volume.
-
Page 19: System Logic
Through a balance of easy reach, multi-purpose buttons, sliders and controllers, plus a large LCD screen, the W5/W7 allows you to go directly to any function, whether it s voice editing, recording, song editing, or others, in usually the touch of a single button, and rarely more than two or three. -
Page 20: System Overview
SYSTEM OVERVIEW (Volatile RAM) Song Sequencer Disk Drive Controller Keyboard Data entry MIDI IN INPUT SEQUENCER 128 normal + 2 drum Song voice memory (Volatile RAM) 16-song “External” sequencer normal and drum memory voice memory (Optional) 128 normal + 2 drum Internal voice memory (RAM) -
Page 21: Operating Modes
OPERATING MODES The basic operating modes of the W5/W7 are as follows: SONG MODE For performing Song Play, Song Record, Song Edit and Song Job mode opera- tions. (For more information, see Song Mode, page 72.) SONG PLAY - Lets you choose between Song Multi, Song Sequence Play and... - Page 22 SONG JOB - Lets you make changes to the sequence that apply to all the data in one or more entire measures. Song Job operations include song copy, append and clear, track copy, clear and mix, measure copy, erase, create, delete and insert, data thin out, extract and chord sort, plus quantize, move clock, modify gate time, modify velocity, transpose, shift note, and crescendo.
-
Page 23: Disk Mode
Internal/Song voice and song memory. It also lets you perform various disk file management functions like renaming and deleting files and formatting a disk for the W5/W7 operating system. (For details, see Disk Mode, page 131.) UTILITY MODE... -
Page 24: Controller Section
SYSTEM ARCHITECTURE The W5/W7 s overall system is comprised of three distinct sections: the Controller section, the Sequencer section and the Tone Generator section. The MIDI signal, originated externally or from the keyboard and controllers, flows through the sequencer before reaching the tone generator. - Page 25 Song voice bank; multi settings only. A song multi can be stored in any of the 16 song memories in the W5/W7 and saved to floppy disk and loaded back in via the disk drive. And since each song memory also...
- Page 26 MIXER CHANNEL 1~9/11~16 Pitch Bend Range Note Shift Tune System Effect Send 1 Level System Effect Send 2 Level System Effect Send 3 Level Insertion Effect On/Off Pan Position Volume Level INSTRUMENT Assign Voice Edit STEREO VOICE Voice Name Volume Level Insertion Effect Type/Parameter Element Edit Element...
-
Page 27: Voice Banks
VOICE BANKS The W5/W7 has a total of 10 separate voice banks . Eight of these are provided as standard features, while two of them are available as optional ROM memories that you can purchase separately and plug into the W5/W7 s logic board via a special access located on the bottom of the instrument. - Page 28 Additional ROM drum sets available as an option. (NOTE: The ED will not display unless the optional Expansion Wave/Voice Board memory upgrade package is installed.) (For more information about voices and elements, please refer to the W5/W7 Technical Information booklet, supplied separately.)
- Page 29 VOICE CATEGORIES The individual voices are organized into 21 classes of instrument groups, called Voice Categories, for easier access, as follows: — No Assign Piano Chromatic Percussion Organ Guitar Bass Strings/Orchestral Ensemble Brass Reed Pipe The Voice Category for each voice is identified by a two-character prefix, which in Voice Mode will appear to the left of the voice name, and in Song Mode will appear just below the track volume section in the mixer screen.
- Page 30 INSERTION EFFECTS & SYSTEM EFFECTS The W5/W7 has 75 digital effects inside two independent, studio quality DSP stereo effects processors with editable parameters called Insertion Effects and System Effects , which provides for enormous sound processing flexibility and control. Effects include reverb, delay, chorus, auto panning, 3-band EQ, Aural Exciter and many more.
- Page 31 INSERTION EFFECTS - An Insertion Effect can be assigned to an Instru- ment voice. A maximum of three voices may use an Insertion Effect at any one time, one Insertion Effect per voice for a song. A specific Insertion Effect, along with user-assigned parameter settings, can be specified for a voice within Voice Edit Mode.
- Page 32 Speed Delay AWM elements are at the heart of the W5/W7 s rich, dynamic sound quality. One AWM element is capable of making an Instrument voice, but the W5/W7 lets you con- struct voices that contain as many as four elements in order to obtain virtually unlimited sonic and performance potential.
- Page 33 With an instrument such as a violin, on the other hand, the volume, tone, or pitch may be continuously modified by the musician during performance. The W5/W7 provides many ways to control the various aspects of the sound, as follows: ENVELOPE GENERATOR (EG) - The EG produces a fixed pattern of change over time.
- Page 34 LOW FREQUENCY OSCILLATOR (LFO) - The LFO produces various patterns of cyclical change. Applying the LFO to the pitch component produces vibrato; applying it to the filter component produces wah-wah; applying it to the amplifier component produces tremolo. CONTROLLERS - Controllers such as the pitch and modulation wheels, aftertouch, and optional foot controllers can be used to control the sound in a variety of ways.
-
Page 35: Voice Editing
VOICE EDITING In Voice Edit Mode you can edit any and all parameters which make up a voice, including Insertion Effect assignment and parameter settings, as well as controller settings. You can go directly to Voice Edit Mode from any mode and start editing the currently selected voice at any time, even while the sequencer is running. - Page 36 (approximately 100,000 notes) that permits realtime (including overdub and punch-in) and step recording, plus extensive song editing. The W5/W7 s sequencer doesn t record actual sounds, it records note, controller, program change and other MIDI data.˚Regardless of whatever sound you used to record a specific part, you can always change the sound later by assigning a different voice to the track.
- Page 37 Sound mixing doesn t necessarily have to be a final procedure in the music making process using the W5/W7. You can construct your mix as you go along, then fine-tune it at the end. What s more, depending on the sound, you may want to switch into Voice Edit Mode and tweak a few parameters in individual voices in order to make them sit better within the context of the sounds of all tracks.
-
Page 38: Master Volume
The 16-channel sound mixer is made up of various sections, or blocks , devoted to specific functions available in all tracks, including the following: VOICE SELECT The Voice Select block is the first stop in each of the 16 mixer channels, repre- sented graphically by the two-letter Voice Category code of the voice currently assigned to the track. - Page 39 TUNE The Voice Tune block is the eighth stop in each of the 16 mixer channels, repre- sented graphically by a pot. It lets you adjust the fine-tuning of the voice in steps of 1.17 cents. The cursor must be positioned at Voice Tune before you can set the track tuning.
- Page 40 MEMORY ALLOCATION The W5/W7 has large internal ROM and RAM memory capacity, but some RAM data is retained at power off and some is not. Data which is retained at power off includes Internal normal and drum voice banks, and multi settings in the 16 song multi memories.
-
Page 41: Store Multi
Internal voice bank; therefore, the Internal bank is automatically selected as the store destination. NOTE: Multi settings for SMF song data will load into the W5/W7, but will not be retained at power off unless you first store it in a song location. In... - Page 42 Internal/Song voice and song memory. It also lets you perform various disk file management functions like renaming and deleting files and formatting a disk for the W5/W7 operating system. And it permits the saving of songs in Standard MIDI File Format-0, as well as the loading of sequences recorded on other devices and saved in the Standard MIDI File Format-0 and -1, and the Yamaha ESEQ format.
-
Page 43: Data Entry
DATA ENTRY The W5/W7 provides many convenient ways to access and manipulate data. The various multi-purpose buttons, sliders and controllers allow you to go directly to any function, in usually the touch of a single button, and rarely more than two or three. The large LCD screen and other visual indicators give you ample feedback to always let you know exactly where you are and what status the W5/W7 is in. - Page 44 FUNCTION KEYS 1 ~ 8 - The functions of these keys [F1 ~ F8] depend on the selected mode. They are used to engage a function indicated on the display immediately above the key. SHIFT KEY - The SHIFT key is used in conjunction with the function keys to access secondary functions and parameters, as well as to jump directly to main menus and other functions.
-
Page 45: Getting Started
Finally, since this and other sections in this manual use concepts and terms specific to the W5/W7, if you haven t done so already, please take a few moments to go back and read Before You Begin , page 7. -
Page 46: Setup & Play
Do not modify the plug provided with the W5/W7. If the plug will not fit the outlet, have a proper outlet installed by a qualified electrician. Do not use an adapter which defeats the grounding conductor. - Page 47 After the brief startup process, a graphic representation of a 16 track stereo sound mixer will appear on the screen. A brand new W5/W7 (or one that has been reset to its default settings) will start up with Track 1 selected and GM voice #001 Grand Piano assigned to it.
- Page 48 In Song Multi Play Mode, the W5/W7 is set to play a stereo mix of the Instrument voice assigned to the currently selected track in the multi, complete with System Effects and other various parameters applied to the sound through the tone generator mixer.
- Page 49 LCD. The Voice Play screen will appear. This screen indicates that the W5/W7 is in Voice Play Mode. Within this mode you can select the various instrument sounds precisely the same way as in Song Play mode using the JOG, INC/DEC, or the KEYPAD (i.e., punch in a number between 1 and 128...
- Page 50 Voice Edit Mode and then stored in the Internal voice bank RAM (Ran- dom Access Memory) by Store Mode. The W5/W7 has a total of 10 separate voice banks . Eight of these are provided as standard features, while two of them are available as optional ROM memories that you can purchase separately and plug into the W5/W7 s logic board via a special access located on the bottom of the instrument.
- Page 51 (ED) EXTERNAL DRUM VOICE - Additional ROM drum sets available as an option. NOTE: The “ED” will not display unless the optional Expansion Wave/Voice Board memory upgrade package is installed. For more information about voices and elements, please refer to the W5/W7 Technical Information booklet (supplied separately).
-
Page 52: Realtime Control
REALTIME CONTROL The W5/W7 has a number of controllers and control functions that can be used for realtime performance control. Some, such as the pitch bend wheel, have a single function, while others can be set to control a wide range of parameters as you play, including amplitude and pitch modulation, filter modulation, effect parameters like stereo panning, and others. -
Page 53: Keyboard Aftertouch
KEYBOARD VELOCITY SENSITIVITY The W5/W7 s keyboard responds to attack pressure (or speed) as you play, thus permitting control over nuance and expression as you play. (For more informa- tion, see Utility Mode, Velocity function, page 145.) KEYBOARD AFTERTOUCH Keyboard aftertouch response is most frequently used for vibrato control, i.e., the harder you press the keys after the initial attack, the more vibrato is applied. -
Page 54: Loading & Playing The Demo
Factory Set & Demonstration disk provided with the instru- ment. This will give you an idea of the powerful potential of the W5/W7 s program- ming capabilities. It will also give you a brief overview of some of the disk options and song playback features. - Page 55 5. LOAD THE DEMONSTRATION SONGS Press ENTER and the W5/W7 will give you a chance to change your mind, asking Are You Sure? . Press DEC to abort the operation, or press INC and the demon- stration songs will begin loading. As they do, the screen will display the Execut- ing message.
- Page 56 EXPLORING SONG PLAYBACK OPTIONS As the song plays, you might want to explore some of the various playback options like adjusting instrument volumes or stereo panning, soloing instruments, changing the tempo and others. SELECTING TRACKS AND ADJUSTING PARAMETERS After loading the demonstration song data and choosing a demonstration song number in the Song Sequence Play function screen, press [F1] ( Mlt ) to return to the Song Multi Play screen, which displays the sound mixer.
-
Page 57: Changing The Tempo
To isolate one or more Instrument voices as the song plays, press the SOLO button while the sequencer is running. The SOLO button will become red, indicating that the W5/W7 is in Solo Mode. Tracks with sequencer data in them will be either red (solo status), or green (mute status). -
Page 58: Programming
Practically, since you ll be performing the various programming operations according to your needs as you work, and since the W5/W7 s flexibility lets you switch back and forth easily between the different modes, most of the time you re main concern will be with the overall sound . - Page 59 W5/W7 the next time you need it and pick up from precisely where you left off. A lways save multis and other important music data to floppy disk.
- Page 60 EDITING VOICES The process of voice editing may be as simple as shortening the envelope decay for a single-element voice, or as complex as constructing a four-element voice with crossfades between elements and other interesting sonic tricks. Voice editing can be done from within the multi (i.e., in Song Play Mode) or in Voice Play Mode.
- Page 61 Following is the basic normal voice edit screen, along with a brief overview of its various functions and parameters. COMMON - Lets you access those parameters which affect the voice as a whole, including Voice Category, Voice Volume, Voice Name, and Initialize.
- Page 62 Following is the basic drum voice edit screen, along with a brief overview of its various functions and parameters. COMMON - Lets you access those parameters which affect the voice as a whole, including Voice Category, Voice Volume, Voice Name, and Initialize.
- Page 63 With the W5/W7, a sequence is a piece of music inside a song memory with up to 16 different Instrument parts that s as short as you want or as long as internal song memory will allow.
- Page 64 W5/W7 the next time you need it and pick up from where you left off. A lways save important music data to floppy disk.
- Page 65 FINE-TUNING THE STEREO MIX The process of sound mixing may be as simple as slightly increasing a volume level on a single track, or as complex as completely overhauling the sound of a song with different voices and effects and drastic parameter setting changes. Mixing happens within the multi, in Song Multi Play mode.
-
Page 66: Saving & Loading
Save To Disk and press ENTER, or press [F3] ( Save ). If you want to load data from a floppy disk into the W5/W7, position the cursor over Load From Disk and press ENTER, or press [F4] ( Load ). - Page 67 ORGANIZING & MANAGING DATA If you re a prolific composer and/or voice programmer, the number of floppy disks lying around can mount up quickly. It s amazing how easy it is to lose track of what voices, multis and song sequences you ve stored where. To wit, a well-organized data library is essential.
- Page 68 4. CHOOSE VOICE Press the function key [F6] ( Voice ). 5. LOAD THE VOICES Press ENTER to load the voices into the W5/W7. 6. EJECT THE DISK When you re finished with the voice loading operation, press the eject button on the disk drive to eject the disk.
-
Page 69: Integrating Intoa Midi System
With this system only a single MIDI cable is required, with one end plugged into the W5/W7 s MIDI OUT port and the other end plugged into the tone generator s MIDI IN port. Each device s stereo outputs are plugged into the two channels of an external audio mixer, which is in turn plugged into a stereo amp and speakers for monitoring. - Page 70 MIDI SYSTEM COMPONENT The diagram below shows a much more complicated system, configured with a personal computer operating as the main sequencer and system brain , the W5/W7 acting as the master performance input device, and three additional samplers or tone generators also connected.
- Page 71 With this system the drum machine s MIDI OUT is connected to the W5/W7 s MIDI IN, and the W5/W7 s MIDI OUT is connected to the drum machine s MIDI IN. The tone generator s MIDI IN is connected to the drum machine s MIDI THRU. Each device s stereo outputs are plugged into the two channels of an external audio mixer, which is in turn plugged into a stereo amp and speakers for monitoring.
-
Page 74: Song Mode
SONG MODE The W5/W7 s Song Mode is actually made up of four separate operating modes: Song Play, Song Record, Song Edit and Song Job. Jumping back and forth between each requires only the push of a MODE button on the panel, so it is easy to access any feature you need quickly as you work with rarely more than two or three clicks of a function key. -
Page 75: Song Play
In Song Play Mode you can access the functions which let you define a song multi, select and playback a song sequence, or designate various keyboard, MIDI and controller settings. At power on, the W5/W7 always starts up in Song Play Mode, Song Multi function status, ready to play the Instrument... -
Page 76: Song Multi
A song multi can be stored in any of the 16 song memories in the W5/W7 and saved to floppy disk and loaded back in via the disk drive. And since each song memory also contains a... - Page 77 When you ve finished defining a multi, or even if you re in the middle of the process and have to stop, save the multi to floppy disk, so you can load it back into the W5/W7 the next time you need it and pick up working from where you left off.
- Page 78 MOVING AROUND IN THE SONG MULTI The operations you perform in Song Multi Play Mode go hand-in-hand with the sound mixing process, since besides assigning voices, you ll be selecting tracks and accessing the sections, or blocks , on the mixer which contain the parameters volume, pan, System Effect sends, etc.
- Page 79 VOICE VOLUME (0 ~ 127) Voice Volume is the second stop in each of the 16 mixer channels, represented graphically by a fader. It lets you make volume adjustments to the track. To access Voice Select, use the CURSOR-UP or CURSOR-DOWN keys. MASTER VOLUME (0 ~ 127) - When the cursor is positioned at Voice Volume you can access the Master Volume control, by pressing [F8] ( Mst ).
- Page 80 Shift settings affect all songs. NOTE: Multi settings for SMF song data will load into the W5/W7, but will not be retained at power off unless you first store it in a song location. In order to be sure that you don t...
-
Page 81: System Effects
SYSTEM EFFECTS The W5/W7 s three System Effects are powerful, studio quality stereo digital sound processing modules that you assign to a multi in order to provide extra depth and dimension to the overall mix. There are a total of 40 separate effects devices, or effect types , from which you can choose to assign to each of the three System Effect sends of the mixer. -
Page 82: Song Sequence Play
To modify the effect parameters, using CURSOR-UP and CURSOR-DOWN, scroll through the various parameters and select the one you want to adjust. (The inverted black arrow-head to the left of the display indicates that more parameters are on the list, out of view.) (To choose another System Effect whose parameters you also want to adjust, press [F5] ( Type ) and do so from the System Effect Type display, as noted above. - Page 83 1 ~ 8, respectively, and SHIFT plus [F1] ~ [F8] to select songs 9 ~ 16, respectively.) After pressing ENTER, the W5/W7 automatically returns you to the Song Sequence Play function screen. To leave the Song Directory without selecting a different song,...
-
Page 84: Song Setup
Select, Program Change and Control Change messages when these parameters are set to play status. When a parameter is set to ignore status, the W5/W7 will not acknowledge these messages. To select a MIDI Filter parameter, use the CURSOR-UP and CURSOR-DOWN keys. - Page 85 NORMAL MODE - In Normal Mode, the keyboard will play one voice at a time the currently selected track over the entire range of the keyboard. (NOTE: A small + plus sign on the keyboard represents middle C, or C3.) SPLIT MODE - In Split Mode, the keyboard will play two voices at once, one track from the left side (Lower) of the designated split point, and another track from the right side...
- Page 86 MIDI CONTROL (off, on) - For determining whether the W5/W7 will receive/transmit ( on ) or will not receive/transmit ( off ) the following types of MIDI messages: sequencer start, continue, stop reception and transmission;...
-
Page 87: Song Record
W5/W7 the next time you need it and pick up from where you left off. (NOTE: Always save your song sequences to floppy disk before turning off the power. - Page 88 SONG button in the Mode section on the panel, then press RECORD in the Sequencer section. This switches the W5/W7 into record standby mode, indicated by the red LED over the RECORD button, and the Song Sequence Record function screen.
-
Page 89: Realtime Recording
To engage the Punch-in mode of Realtime Record, press [F8] ( Pnch ). NOTE: The W5/W7 s sequencer can play a maximum of 32 notes simultaneously, which is sufficient for most sequencing situations. However, if you build up a large number of parts by overdubbing, you may exceed the 32-note maximum, and therefore some notes will not sound. - Page 90 PREPARING FOR REALTIME RECORDING Before beginning the realtime recording process, first you must choose a song location from within Song Play Mode, by pressing [F2] ( Seq ). Then, press RECORD to enter record standby mode. Next, determine the time signature, quantize factor, tempo value and click status.
-
Page 91: Step Recording
STEP RUN After preparing for step recording, press RUN. The step record input screen will appear, and the W5/W7 will be ready and waiting for you to start inputting data. TRACK NUMBER Indicates the currently selected track. - Page 92 DELETE - To delete all data in the 32nd note area where the position pointer is located, press SHIFT + [F8] ( Del ). (NOTE: The position pointer location will not change.) KEYBOARD VIEW (C-1 ~ B7) The entire keyboard will not fit in the screen, but you can access views of the lower region of the keyboard by pressing [F1] once or more, and the upper region of the keyboard by pressing [F2] once or more.
-
Page 93: Song Edit
SONG EDIT In Song Edit Mode you can view and edit individual note, controller and other MIDI events in each track of the currently selected sequence, through three separate functions: (1) Data Change, which lets you modify the data: (2) Data Insert, which lets you insert new data;... -
Page 94: Sequence/Tempo Track Data Change
SEQUENCE/TEMPO TRACK DATA CHANGE The Sequence Track Data Change function lets you single out individual events and modify them. The display will show the type and numerical values for each event. All data in the selected track will be displayed numerically. You can change the values of existing data, or delete the currently displayed data. -
Page 95: Sequence/Tempo Track Data Insert
TYPES OF DATA THAT CAN BE CHANGED The various types of data which can be changed in Se- quence Track Data Change are as follows: NOTE - Displays the actual note in the location. NOTE NUMBER (C-2 ~ G8) - Displays the actual note event in the location. - Page 96 Value field and use the JOG, INC/DEC or KEYPAD to select a tempo value, then press ENTER. (NOTE: The value will only have an effect if the W5/ W7 s sequencer is synchronized to its own internal...
-
Page 97: Song Job
SONG JOB In Song Job Mode you can make changes to the sequence that apply to all data in one or more measures. Song Job operations include song copy, append and clear, track copy, clear and mix, measure copy, erase, create, delete and insert, data thin out, extract and chord sort, plus quantize, move clock, modify gate time, modify velocity, transpose, shift note, and crescendo. -
Page 98: Song Job 1
SONG JOB 1 Song Job 1 lets you perform Copy Song, Append Song, Clear Song, Copy Track, Clear Track, and Mix Track operations. COPY SONG - Pressing [F1] ( CpyS ) accesses Copy Song, which lets you copy a complete song from one song memory location to another song memory location, includ- ing all multi, sequencer and Song voice data. - Page 99 COPY TRACK - Pressing [F4] ( CpyT ) accesses Copy Track, which lets you copy all data from one or more tracks in one song to the corresponding tracks of another song. SELECT TRACKS (1 ~ 16) - Press the TRACK buttons of the tracks that you wish to copy.
-
Page 100: Song Job 2
SONG JOB 2 Song Job 2 lets you perform Copy Measure, Erase Measure, Create Measure, Delete Measure, Insert Measure, Thin Out, Extract and Chord Sort operations. COPY MEASURE - Pressing [F1] ( Copy ) accesses Copy Measure, which lets you copy the data in the selected tracks of a specified range of measures one or more times and place it into another location in the currently selected song. - Page 101 DELETE MEASURE - Pressing [F4] ( Del ) accesses Delete Measure, which lets you delete a specified range of measures from the currently selected song. Any measures which follow the last measure in the specified range will move forward to fill the gap . MEASURES (001 ~ 999) - Specify the first (left field) and last (right field) measures in the range of measures you wish to delete.
-
Page 102: Song Job 3
CHORD SORT - Pressing [F8] ( Chrd ) accesses Chord Sort, which lets you sort a cluster of notes in a specified range of measures, in either ascending or descending order. SELECT TRACKS (1 ~ 16) - Press the TRACK buttons of the tracks on which you wish to perform the chord sort operation. - Page 103 MOVE CLOCK - Pressing [F2] ( Move ) accesses Move Clock, which lets you move the specified measures of the track forward or backward in time by a specified clock value. SELECT TRACKS (1 ~ 16) - Press the TRACK buttons of the tracks whose clock you wish to move.
- Page 104 MODIFY VELOCITY - Pressing [F4] ( Vel ) accesses Modify Velocity, which lets you modify the note-on velocity values for all note events of selected tracks in a specified range of measures. SELECT TRACKS (1 ~ 16) - Press the TRACK buttons of the tracks whose velocity you wish to modify.
- Page 105 EXECUTE - To execute the operation press ENTER. NOTE: Shift Note is particularly useful when control- ling a drum machine from the W5/W7 s sequencer, since most drum machines play specific sounds for each note. (For example, shifting all D#2 notes to F#2 might change all snare hits to hi-hat hits, depending on the instrument/note table for the drum machine.)
-
Page 106: Awm Tone Generation
8Mbytes of 16-bit linear waveforms sampled at maximum 48kHz sampling frequency. These preset sound elements are the waves which define the fundamental charac- ter of the voice elements which form the building blocks that make up a W5/W7 stereo Instrument voice . - Page 107 The W5/W7 provides many ways to control the various aspects of the sound, as follows: ENVELOPE GENERATOR (EG) - The EG produces a fixed pattern of change over time.
-
Page 108: Voice Mode
VOICE MODE The W5/W7 s Voice Mode has two distinct functions: (1) playing back single voices without system effects or other multi settings applied, and (2) editing voices while compar- ing them to the original voice or initialized status and storing them in Internal voice memory. -
Page 109: Voice Play
VOICE PLAY In Voice Play Mode you can select voice banks and voices for the currently selected track and hear them in their original state, without system effects or other multi parameters applied. In Voice Play Mode, the Insertion Effect which is assigned to voice in Voice Edit Mode is also applied to the selected voice. -
Page 110: Voice Edit
When you are editing a voice, you are operating on the voice which is currently in the voice buffer. The W5/W7 is very flexible, so you can switch back and forth between modes without losing your newly created voice. However, once you call up a different voice, your voice will be cleared from the voice buffer. -
Page 111: Normal Voice Edit Mode
When editing a voice which uses two or more elements it is often necessary to hear only one element at a time, espe- cially the one you re editing. The W5/W7 provides quick access to each element you need to single out, as well as ample visual feedback about element on/off and select status. -
Page 112: Common Parameter
COMMON PARAMETER The common parameter function lets you perform opera- tions which effect all elements or the entire normal voice. ACCESSING COMMON PARAMETERS To access the common parameter function, from within Voice Edit Mode, press [F1] ( Com ) or TRACK [9]. VOLUME - To designate the Voice Category or set the volume for the voice, press [F6] ( Vol ). - Page 113 ELEMENT INITIALIZATION VALUES Element Memory Bank Element Switch Number Volume Note Shift Note Number Frequency Fix Switch Pitch Scaling Random Pitch Element Note Limit Low Limit High Element Velocity Limit Low Limit High Element Volume Low Limit Switch Element PEG Type Attack Decay 1...
- Page 114 ********. These banks are reserved as space for additional Internal and Song elements which may be loaded into the W5/W7 by optional song disks. If Song elements are loaded they will be cleared when the power is turned off.
- Page 115 A setting of 00 is the default EG for the preset voice. (To see a list of the various template types, refer to the W5/W7 Technical Information booklet, provided separately.) NOTE: The template type determines the maximum and minimum range of velocity sensitivity and amplitude level.
- Page 116 AMPLITUDE ENVELOPE GENERATOR - To access the Amplitude envelope generator (AEG) parameters, from within the Amp parameters function, press [F8] ( EG ). ATTACK/HOLD (-63 ~ +63) - Position the cursor over the Attack/Hold value field and use the JOG, INC/DEC or the KEYPAD to determine the attack or hold offset of the AEG.
- Page 117 FILTER The Filter parameters function lets you perform operations which determine the characteristics of the tone. The filter can be used to greatly modify the sound. Filter parameters let you determine the cutoff frequency (i.e., the frequency at which the filter begins to affect the sound), cutoff scaling and settings for the filter envelope generator (FEG).
- Page 118 ACCESSING FILTER PARAMETERS To access the Filter parameters function, from within Voice Edit Mode, press [F4] ( Filt ) or TRACK [12]. TONE - To specify the filter Tone parameters for each element, from within the Filter parameters function, press [F7] ( Tone ). CUTOFF (-127 ~ +127) - Position the cursor over the Cutoff offset field and use the JOG, INC/DEC or the KEYPAD to set the cutoff frequency, or the...
- Page 119 A setting of 00 is the default EG for the preset voice. (To see a list of the various template types, refer to the W5/W7 Technical Information booklet, provided separately.) NOTE: The template type determines the maximum and minimum range.
- Page 120 TUNE - To specify the Tune parameters for each element, from within the Pitch parameters function, press [F5] ( Tune ). RANDOM (0 ~ 7) - Position the cursor over the Random value field and use the JOG, INC/DEC or the KEYPAD to specify the intensity of random pitch shift of the element.
- Page 121 DECAY 2 (-63 ~ +63) - Position the cursor over the Decay 2 offset field and use the JOG, INC/DEC or the KEYPAD to determine the length of time of the second decay of the sound, between Decay 1 and key-off.
- Page 122 NOTE: The accessible parameters depend on the selected Insertion Effect type. For a complete listing of Insertion Effect Types and Parameters, see the W5/W7 Technical Information booklet. NOTE: When a specific parameter is set to be controlled by the Insertion Effect Control (see following), a C mark will display to the right of the parameter.
- Page 123 (tremolo), pitch modulation (vibrato), and filter modulation (wah-wah). The W5/W7 s LFO can produce various types , or shapes, of modula- tion waves, including triangle, square, sine, and assorted sawtooth waves and others, plus sample & hold, which produces a control signal whose level will change randomly at intervals of time which you can determine by speed.
- Page 124 CONTROLLER The Controller parameters function screen lets you perform operations which determine the status of the various control- lers, including pitch bend and modulation wheels, sustain, aftertouch, foot control and MIDI control. ACCESSING CONTROLLER PARAMETERS To access the Controller parameter function, from within Voice Edit Mode, press [F8] ( Ctrl ) or TRACK [16].
- Page 125 MODULATION WHEEL - To specify the Modulation Wheel parameters for each element and Modulation Wheel settings which affect all elements equally, from within the Controller parameters function, press [F5] ( MW ). MODULATION WHEEL (off, on) - Position the cursor over the MW status field and use the JOG or INC/DEC to switch the modulation wheel controller on or off for each element.
-
Page 126: Drum Voice Edit Mode
MIDI CONTROL 1/2 - To specify the status of the two MIDI Control functions for each element, and the MIDI Control settings which affect all elements equally, from within the Controller parameters function, press [F7] ( MC1 ) or [F8] ( MC2 ) . MIDI CONTROL 1/2 (off, on) - Position the cursor over the MC1 (or MC2 ) status field and use the JOG or INC/DEC to switch MIDI Control on... - Page 127 ********. These banks are reserved as space for additional Internal and Song elements which may be loaded into the W5/W7 by optional song disks. If Song elements are loaded they will be cleared when the power is turned off.
- Page 128 ELEMENT NUMBER SELECT - Position the cursor over the element number field and use the JOG, INC/DEC or the KEYPAD to choose the desired element. NOTE: Key Select, Element Bank Select, and Element Number Select can be performed within any Key Parameter function.
- Page 129 NOTE: The accessible parameters depend on the selected Insertion Effect type. For a complete listing of Insertion Effect Types and Parameters, see the W5/W7 Technical Information booklet. INSERTION EFFECT CONTROL - To specify the Insertion Effect Control parameters for the voice, from within the Effect parameters function, press [F8] ( Ctrl ).
- Page 130 Special conditions regarding the Insertion Effect include the following: RECORDING - Any Insertion Effect on/off changes you make during recording will not be recorded by the sequencer. VOICE PLAY MODE - Entering Voice Play Mode will always switch the Insertion Effect for the selected voice on.
-
Page 131: Store Mode
Are You Sure? Press INC to store the song or multi, or press DEC to abort the operation. NOTE: Multi settings for SMF song data will load into the W5/ W7, but will not be retained at power off unless you first store it in a song location. -
Page 132: Store Voice
Internal voice bank location (001 ~ 128) to store the current voice into, use JOG, INC/DEC or the KEYPAD. STORING THE VOICE - Press ENTER, and the W5/ W7 will give you a chance to change your mind, asking Are You Sure? Press INC to store the voice, or press... -
Page 133: Disk Mode
Data saved by the W5/W7 using the Standard MIDI File Format will be saved as Format-0. The W5/W7 is capable of loading data saved in either of these formats, so long as the floppy disk the data is on is a 2DD type disk formatted in 9 sectors, 720 kilobytes.) - Page 134 File Directory. File types are as follows: ALL D A TA (.A1A) - A W5/W7 All Data type data file contains all data in the W5/W7 multi, including the 16 songs (sequencer and/or multi data) plus accompanying Song voice banks.
-
Page 135: Disk Status
[F8] ( Dir ) from within any of the Voice type file subfunctions. NOTE: The .A1V appearing after the file name is the W5/ W7 operating system code delineating a voice type of file. DISK STATUS The Disk Status function lets you review how many and what types of files are saved on a floppy disk. -
Page 136: Save To Disk
W5/W7 will ask you Overwrite?. Be careful not to delete or overwrite an important data file, since deleted or overwritten files will be erased from the disk. - Page 137 Completed! NOTE: If the currently selected song contains Song voices, the W5/W7 automatically saves them in the file. If the selected song does not contain Song voices, the W5/W7 automatically copies the Internal voice bank to the Song voice bank and saves them.
-
Page 138: Load From Disk
LOAD FROM DISK The Load From Disk function lets you designate which file on a floppy disk to load into the W5/W7 and, depending on the file type, where to load it. ACCESSING LOAD FROM DISK To access the Load From Disk submenu of functions, from... - Page 139 When finished, the message will change to Completed! NOTE: Loading a 1 Song type file into a W5/W7 song multi location will erase any Song voice data already in the song multi memory.
- Page 140 NOTE: The File Directory will show all file names even if they arent specifically W5/W7, ESEQ or SMF files. You can select the ESEQ and SMF type files to load into the W5/W7, but attempt- ing to load files from other operating systems will cause the Illegal file! message to appear on the display, and you will not be able to load an illegal file.
-
Page 141: Rename File
Name screen and change the name. After giving the file a new name, press ENTER to rename the file. After pressing ENTER, the W5/W7 will give you an opportunity to change your mind by asking Are You Sure? Press DEC to abort the operation, or press INC to rename the file on the floppy disk. -
Page 142: Delete File
You may initiate the deleting operation from either the Delete File screen or from within the File Directory, by pressing ENTER. The W5/W7 will give you an opportunity to change your mind by asking Are You Sure? Press DEC to abort the operation, or press INC to Delete the file on the floppy disk. -
Page 143: Format Disk
Mode main menu screen, position the cursor over Format Disk and press ENTER, or simply press [F7] ( Format ). INSERT DISK - The W5/W7 will ask you to insert a blank disk and to press ENTER. DISK FORMAT - The W5/W7 will give you a chance... -
Page 144: Utility Mode
Utility Mode lets you manage Song voices, initialize the Internal voice bank, determine various MIDI settings and transmit bulk MIDI data, set master tuning and keyboard velocity parameters, and access other functions which affect the W5/W7 s overall system. ENTERING UTILITY MODE To enter Utility Mode, press the UTILITY button in the Mode section on the panel. -
Page 145: Song Voice Memory
W5/W7 s keyboard is played, or if incoming MIDI note messages are being received by the particular track. -
Page 146: Initialize
VOICE BULK DUMP The Voice Bulk Dump function lets you transmit the entire bank of Internal 128 normal voices and 2 drum voices currently stored in the W5/W7 to another W5/W7 or to external MIDI devices. ACCESSING VOICE BULK DUMP... -
Page 147: Synthesizer Setup
( Synth ). The Synthesizer Setup screen will appear. MASTER TUNE (-63 ~ + 63) - For adjusting the overall fine tuning of the W5/W7 in steps of 1.17 cents. The master tune setting affects only the W5/W7 s internal tone generator, and has no effect on the note numbers transmitted from MIDI OUT. - Page 148 Output Key velocity CONTROLLER (hold, reset) - For determining how the W5/W7 responds to various controller data. HOLD - Prevents the resetting of modulation and other parameters affected by foot switch and other controllers and incoming MIDI data. (NOTE: When receiving GM data, the Controller must be set to hold .)
-
Page 149: Controllers
The Controllers function lets you set the continuous slider (CS) assignment, the foot volume assignment, and the foot controller initial value. The W5/W7 s various controllers can send MIDI control change information, including continuous type and on/off type control, as defined by the MIDI specification. -
Page 150: Midi Setup
O N - When set to on the W5/W7 keyboard will play the internal tone generator O F F - When set to off , the W5/W7 s tone genera- tor will produce sound only in response to messages from MIDI IN; however, messages will be transmit- ted from MIDI OUT when you play the keyboard or move the various controllers. -
Page 151: Other Setup
[F8] ( Msg ). The Greeting Message screen will appear. EDIT CONFIRM (off, on) - When Edit Confirm is turned on, the W5/W7 will give you an opportunity to change your mind before executing an edit operation, asking Are You Sure? Yes[INC]/No[DEC] after you press ENTER. -
Page 154: Error Messages
Data is corrupted. Fixed ! Since the data is corrupted, the internal memory has been replaced by the factory-set status. SMF illegal timebase ! The tempo data created by another SMF device is not compatible with the W5/W7 s tempo track. 1 5 2... -
Page 155: Troubleshooting
(e.g., caused by bad connections, or the amplifier, etc.). 1. LISTEN VIA HEADPHONES Plug a pair of headphones into the W5/W7 s PHONES jack, turn the volume up, and play. If the headphone sound is OK, then the problem is external, which means the connections are not properly made, or a cable is bad, or you need to check the amplifier or mixer settings. - Page 156 ¥ Are the connection cables shorted, open, or otherwise faulty? Try replacing cables. ¥ Is the W5/W7 connected to a high-sensitivity microphone or instrument input on your amplifier or mixer? Try turning the W5/W7 output level down to avoid over loading the amplifier/mixer inputs.
-
Page 157: Mounting The Expansion Board
MOUNTING THE EXPANSION BOARD The optional W5/W7 Expansion Wave/Voice Board allows you to increase the amount of voices and AWM elements by an additional 4Mbytes. (NOTE: For information about the types of boards available, please consult your nearest Yamaha dealer.) IMPORTANT NOTE: Caution! Mounting the Expansion Wave/Voice Board may erase the internal memory. -
Page 158: Specifications
Maximum simultaneous timbres: 1 (Voice Mode), 16 (Song Multi Play Mode) Note assignment: Last note priority KEYBOARD W5: 76 notes, key velocity sensitivity, aftertouch W7: 61 notes, key velocity sensitivity, aftertouch DSP EFFECTS Insertion Effects modules (35 effects): Stereo in/out module, Mono in/Stereo out module,... - Page 159 Yamaha Corp. reserves the right to change or modify products or specifications at any time without prior notice. Since specifications, equipment or options may not be the same in every locale, please check with your Yamaha dealer. 1 5 7...
-
Page 160: Index
INDEX AEG, see amplitude envelope generator AFTERTOUCH, description of keyboard aftertouch control, 51, element controller, 122, insert aftertouch data, 94 AFTERTOUCH PITCH BEND RANGE, pitch bend controller, 122 ALL TRACKS, description, 87, realtime recording, 88 ALTERNATE GROUP, drum voice key parameter, 126 AMD, see amplitude modulation depth AMP, see amplitude AMP LEVEL, element amplitude edit, 113... - Page 161 CONTROLS, sequencer controls, 61 COPY MEASURE, song job 2, 98 COPY SONG, song job 1, 96 COPY TRACK, song job 1, 97 CREATE MEASURE, song job 2, 98 CRESCENDO, song job 3, 103 CS, see continuous slider CS ASSIGN, utility mode controllers, 147 CURSOR, cursor position at power on, 46, front panel diagram description, 14, how to use, 42, location when selecting tracks and functions, 46...
- Page 162 ELEMENT, accessing filter parameters, 116, accessing normal voice element parameters, 112, amplitude envelope generator, 114, amplitude velocity sensitivity, 113, amplitude, 113, description and diagram, 104, diagram, 30, drum voice element bank select, 125, drum voice element number select, 126, drum voice key element assign, 125, element display, 109, element pitch sensitivity, 118, filter envelope generator, 116, filter, 115, LFO, 121, normal voice edit mode, 112, normal voice element assign, 112, normal voice...
- Page 163 HIGH LIMIT, keyboard 4-zone mode, 83 HOLD, synthesizer setup controller, 145 HOW TO USE THIS MANUAL, 4 HPF (HIGH PASS FILTER), filter, 115 INC/DEC BUTTONS, front panel diagram description, 14 INC/DEC BUTTONS, how to use, 42 INITIAL VALUE, foot controller, 147 INITIALIZE, drum voice common parameter, 125, normal voice common parameter, 110, utility mode, 144 INITIALIZATION VALUES, normal voice common initialization values,...
- Page 164 MEZZO FORTE, step recording velocity value, 90 MIDI, about the GM system level, 8, controlling other devices, 67, device number, 148, drum voice track and GM, 45, integrating the W5/W7 into a midi system, 67, keyboard local on/off, 148, MIDI channel/...
- Page 165 PITCH, accessing pitch parameters, 117, envelope generator, 118, normal voice edit mode, 117, scale, 117, sensitivity, 118, template type, 117, tune, 118 PITCH BEND, element controller, 122, insert pitch bend data, 94, song multi screen, 37 PITCH BEND RANGE, how to access, 78, pitch bend controller, 122, song multi screen, 37 PITCH ENVELOPE GENERATOR, 118 PITCH MODULATION DEPTH, 121...
- Page 166 SONG, selecting a song from within the song directory, 81, song select, 80, song setup, 82 SONG DIRECTORY, how to access, 81, selecting a song from within, 81 SONG EDIT MODE, entering and exiting song edit mode, 91, feature reference, 91, operating modes description, 19, overview, 72, sequence track graph, 91 SONG JOB 1, append song, 96, clear song, 96, clear track, 97, copy song, 96, copy track, 97, feature reference, 96, mix track, 97...
- Page 167 TEMPLATE, element amplitude template type, 113, filter template type, 116, LFO template type, 121, pitch template type, 117 TEMPLATE TYPE, element amplitude edit, 113, filter, 116, LFO, 121, pitch, 117 TEMPO, changing the tempo, 55, data change tempo track, 93, data insert tempo track, 94, tempo change, 94, tempo select, 80, tempo select, 86 TEMPO CHANGE, data insert tempo track, 94...
- Page 168 VOICE PLAY MODE, accessing voice play functions, 107, entering and exiting voice play mode, 107, feature reference, 107, operating modes description, 20 VOICE SELECT, song multi screen, 36 VOICE SEND LEVEL, how to access, 80 VOICE VOLUME, song multi screen, 36 VOLUME, drum voice common parameter, 125, drum voice key volume level, 126, foot volume control, 50, master volume, 77, normal voice common parameter, 110, selecting and adjusting voice volume, 54,...
- Page 169 FOR RADIO NOISE EMISSIONS FROM DIGITAL APPARATUS SET OUT IN THE RADIO INTERFERENCE REGULATION OF THE CANADIAN DEPART- MENT OF COMMUNICATIONS. • This applies only to products distributed by Yamaha Canada Music LTD. LE PRESENT APPAREIL NUMERIQUE N'EMET PAS DE BRUITS RADIOELECTRIQUES DEPASSANT LES LIMITES APPLICABLES AUX APPAREILS NUMERIQUES DE LA "CLASSE B"...
- Page 170 If these corrective measures do not produce satisfactory results, please contact the your local retailer authorized to distribute this type of product. If you can not locate the appropriate retailer, please contact Yamaha Corporation of America, Electronic Service Division, 6600 Orangethorpe Ave, Buena Park, CA 90620 The above statements apply ONLY to those products distributed by Yamaha Corporation of America or its subsidiaries.