Table of Contents
Advertisement
Available languages
Available languages
Quick Links
Cave à vin
Cave à vin
. Avant la première utilisation . . . . . . . . . . . . . . . .
. Important . . . . . . . . . . . . . . . . . . . . . . . .
. Position et Installation . . . . . . . . . . . . . . . . .
. Description de l'appareil . . . . . . . . . . . . . . .
. Thermostat . . . . . . . . . . . . . . . . . . .
. Nettoyage et Entretien . . . . . . . . . . . . . . . .
. Résolution des problèmes . . . . . . . . . . . . . . . . .
AVERTISSEMENT:
Lisez et suivez toutes les consignes de sécurité et
d'utilisation avant d'utiliser ce produit.
2
3
4
5
5
7
8
Advertisement
Chapters
Table of Contents

Subscribe to Our Youtube Channel
Related Manuals for La Sommeliere CVD50


Summary of Contents for La Sommeliere CVD50
-
Page 1: Table Of Contents
Cave à vin Cave à vin . Avant la première utilisation ....Important ...... - Page 3 Cave à vin Merci d'avoir choisi cet appareil. Nous espérons que ce produit vous satisfera pendant de nombreuses années. CONSERVEZ CE MANUEL Avant la première utilisation ..Montage de la poignée Économiser de l'énergie Important .
-
Page 4: Avant La Première Utilisation
Avant la première utilisation Avant de brancher l'appareil à l'alimentation · Montage de la poignée électrique, laisser reposer pendant environ 4 heures Afin de réduire le volume et éviter tout dommage afin de réduire la possibilité de défaillances dans le à... -
Page 5: Important
Important Si vous avez acheté cet appareil pour N'utilisez aucun appareil électrique à l'intérieur de · · remplacer un autre équipé d'une fermeture la cave à vin, sauf les appareils agréés par le qui ne peut pas être débloquée de l'intérieur, fabricant. -
Page 6: Position Et Installation
Position et Installation CHOISIR LE BON ENDROIT AVERTISSEMENT Cet appareil est prévu de fonctionner dans une Consignes pour écarter tout risque de feu, température ambiante de la classe climatique "N". décharge électrique, ou dommage corporel. Mettez l'appareil dans un lieu sec et bien aéré. LA MISE A TERRE Ne placez jamais l'appareil près d'un dispositif qui émet de la chaleur (par ex. -
Page 7: Description De L'appareil
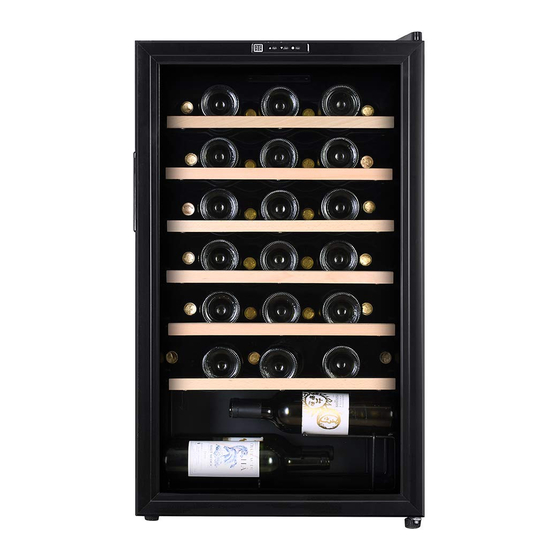
Description de l'appareil Clayettes réglables Les clayettes peuvent être placées sur différents niveaux à l'intérieur de l'appareil. Sortie d'eau de dégivrage L'intérieur de l'appareil est refroidit par le moyen d'une plaque réfrigérante montée sur le paroi du fond. En bas de cette plaque se trouvent une rainure et une sortie d'eau de dégivrage. -
Page 8: Thermostat
PERSONNALISER LA TEMPERATURE: La température de la cave peut être réglée entre 4℃à 18℃, vers le haut en appuyant sur le bouton ▲ ou vers le bas en appuyant sur ▼: (1) Appuyez sur le bouton SET (régler) jusqu'à ce que vous entendiez un "bip" (environ 2 secondes). (2) Appuyez sur les boutons ▲▼... - Page 9 Entretien & Nettoyage Dégivrage automatique de Éteignez l'appareil quand il ne sert pas l'appareil Vous n'avez pas besoin de dégivrer votre Si vous n'utilisez pas l'appareil pendant longtemps, appareil car la glace qui s'accumule sur le paroi débranchez l'alimentation électrique, déchargez arrière est dégivrée automatiquement.
-
Page 10: Résolution Des Problèmes
Résolution des problèmes Parfois vous allez rencontrer des petits problèmes La paroi arrière intérieure qui peuvent être facilement résolus sans faire appel est couverte de glace à un réparateur. Ces problèmes pourront être dus à une mauvaise manipulation et/ou installation de Le dégivrage automatique fonctionnera tant l'appareil. - Page 11 Vérifiez que les accessoires intérieurs de l'appareil sont à leurs places; vérifiez aussi que De l'eau fuit de l'appareil toute bouteille, boîte métallique et autre De l'eau fuira de l'appareil si la sortie ou la récipient ne se touchent pas afin d'éliminer rainure de dégivrage est bouchée.
- Page 13 Wine Cooler Wine Cooler . Before Putting Into Use ....Important ......
- Page 15 Wine Cooler Thank you for buying this appliance. We hope it will successfully serve your requirements for many years. SAVE THESE INSTRUCTIONS Before Putting Into Use ... . To Assemble Door Handle Tips for Energy Savings Important .
-
Page 16: Before Putting Into Use
Before Putting Into Use Before connecting the appliance to electrical · To Assemble Door Handle power supply, leave it to stand for about 4 hours, To save shipping space and avoid damage of which will reduce the possibility of malfunctions the unit during transportation, the door handle in the cooling system due to transport handling. -
Page 17: Important
Important If you have bought this appliance to replace Do not use electrical appliance inside the · · an old one equipped with a door lock that food storage compartments of the appliance, cannot be opened from the inside (lock, bolt), unless they of the type recommended by the make sure that the lock is removed, disabled manufacturer. -
Page 18: Placing And Installation
Placing and Installation CHOOSING THE RIGHT PLACE WARNING This appliance is intended to be used in the Instructions to avoid to the risk of fire , ambient temperature of climate class "N". electric shock , or injury to persons. Place the appliance in a dry and regularly WIRING INSTRUCTIONS ventilated room. -
Page 19: Description Of The Appliance
Description of the appliance Adjustable Wire Shelves Shelves can be optionally placed on the guides inside the appliance where appropriate. Defrost Water Outlet The interior of the appliance is cooled with a cooling plate mounted in the rear wall. Under the plate there is a channel and an outlet for defrost water. - Page 20 MANUAL TEMPERATURE SETTING: The temperature of the wine cooler can be set anywhere between 4℃ to 18℃ by the temperature up ▲ and temperature down ▼pads as follows: (1) Press the [SET] pad until you hear a "beep" sound (approximately 2 seconds). (2) Press the ▲▼...
-
Page 21: Maintenance And Cleaning
Maintenance and Cleaning Automatic Defrosting of the Switch Off the Appliance When Not In Use Appliance There is no need to defrost the cooler , because If you do not intend to use the appliance for long ice depositing on the inner back wall is defrosted periods of time, disconnect the power supply, automatically. -
Page 22: Trouble Shooting Guide
Trouble-Shooting Guide Sometimes you may come across minor problems Ice Formation on the Inner that in most cases do not require a service call Rear Wall and can be easily eliminated. The problem may As long as the defrost water runs to the have resulted from improper handling and / or installation of the appliance. - Page 23 Check the accessories on the interior of the Water is Leaking From the appliance, they should be placed correctly in Appliance their positions; also check bottles, tins, and If the discharge water outlet is clogged, or the other vessels are not touching each other defrost water drips over the channel, water will causing rattling and/or vibrations.
- Page 25 Weinkühler Weinkühler . Vor der ersten Benutzung ....Wichtig ......
- Page 27 Weinkühler Wir bedanken Ihnen, dieses Gerät gewählt zu haben Wir hoffen, dass dieses Produkt Ihnen während zahlreicher Jahre zufriedenstellen wird. BEHALTEN SIE DIESE BEDIENUNGSANLEITUNG Vor der ersten Benutzung ... Griffeinbau Energieeinsparung Wichtig .
- Page 28 Vor der ersten Benutzung Bevor das Gerät an das Netzteil anzuschliessen, · Griffeinbau lassen Sie während ungefähr 4 Stunden ausruhen, um Um das Volumen zu vermindern und jeden die Möglichkeit von Ausfälle im Külhsystem wegen Schaden auf dem Gerät während des Transportes des Handlings zu vermindern.
- Page 29 Wichtig Wenn Sie dieses Gerät gekauft haben, um ein Benutzen Sie keines Elektrogerät im Inneren des · · mit einer Schliessung ausgerüsteten Gerät zu Weinkühlers, ausser den vom Hersteller ersetzen, und wenn diese Schliessung nicht zugelassenen Geräten. vom Inneren gelockert werden kann, bemühen Sie sich, die Schliessung wegzunehmen oder Bei Beschädigung des Netzteilkabels lassen Sie es ·...
- Page 30 Stelle und Anlage WARNUNG DIE RICHTIGE STELLE WÄHLEN Dieses Gerät ist vorgesehen, um bei einer Anweisungen, um jedes Risiko von Feuer, Raumtemperatur des "N" Klimatyp zu funktionieren. Stromstoss, oder Körperverletzung zu vermeiden. Stellen Sie das Gerät in einer trockenen und gut gelüfteten Stelle.
-
Page 31: Thermostat Und Anzeige
Beschreibung des Geräts Regelbare Traggitter Die Traggitter können auf verschiedene Stufen im Inneren des Geräts gestellt werden. Ausgang des Entfrostungswassers Das Innere des Geräts wird durch einer Kühlplatte abgekühlt, die auf die Innenwand des Grundes montiert ist. Unten von dieser Platte befinden sich eine Nut und eine Ausgang für Entfrostungswasser. -
Page 32: Die Temperatur Personalisieren
DIE TEMPERATUR PERSONALISIEREN: Die Temperatur des Weinkühlers kann zwischen 4°C und 18°C, eingestellt werden, nach oben beim Andrücken auf den Schalter ▲ oder nach unten beim Andrücken auf den Schalter ▼: (1) Drücken Sie auf den Schalter SET (einstellen) an, bis Sie einen Piepton hören (ungefähr 2 Sekunden). (2) Drücken Sie auf den Schalter ▲▼... -
Page 33: Automatische Entfrostung Des Geräts
Wartung & Reinigung Automatische Entfrostung Schalten Sie das Gerät aus, wenn es nicht benützt wird des Geräts Sie benötigen nicht, Ihres Gerät zu entfrosten Wenn Sie das Gerät nicht benutzen während einer denn das Eis, das sich auf die Hinterinnenwand langen Zeit, schalten Sie die Stromzufuhr ab, laden ansammelt, wird automatisch entfrostet. - Page 34 Problemlösung Manchmal werden Sie kleine Probleme treffen, die Die Hinterinnenwand ist mit leicht gelöst werden können, ohne an einem Eis bedeckt Reparateur appellieren. Diese Probleme können Die automatische Entfrostung wird funktionieren von einer schlechten Bedienung und/oder Aufstellung des Geräts verursacht werden. Bitte soweit das Entfrostungswasser in die Nut und durch den Ausgang nach dem Behälter über schauen Sie den folgenden Problemlösungleitfaden,...
- Page 35 Das Gerät soll nivelliert und auf einem solider und stabiler Grund eingerichtet werden. Das Gerät soll die Wand und die Küchenmöbel nicht berühren. Nota: Die in diesem Dokument angegebene Erkundigungen und Zeichnungen sind unter Vorbehalt und verpflichten nicht die Verantwortlichkeit der Firma LA SOMMELIERE.
Need help?
Do you have a question about the CVD50 and is the answer not in the manual?
Questions and answers