
Related Manuals for Omega VRT380 Series


Summary of Contents for Omega VRT380 Series
- Page 1 INSTRUCTION MANUAL Eat well, drink well and live well with Omega www.omegajuicers.com VRT370/380 SERIES Product Contents English, November 2013 PLEASE READ THESE INSTRUCTIONS CAREFULLY BEFORE USE...
- Page 2 IMPORTANT SAFEGUARDS Please read carefully before using. Follow instructions to avoid injury. • To protect against risk of electrical shock or fire, do not put motor base, cord, or plug in water and keep them dry at all times. • Do not disassemble the base. All repairs should be made only by authorized personnel.
- Page 3 IMPORTANT SAFEGUARDS Additional usage precautions: • Do not pre-operate before inputting food. Doing so may cause a squeaking noise. • Do not attempt to juice any hard materials, large seeds (seeds which can not be swallowed or chewed), pits, ice or frozen foods.
-
Page 4: Table Of Contents
Omega Juicer Manual For Household Use (Warranty Included) 1. Read “Precautions for safe use (Page 4)” carefully and use the appliance properly. 2. Save these instructions. 3. Check if the voltage indicated on the base of the appliance corresponds to the local voltage before you connect the appliance. -
Page 5: Dear Omega Customers
With the Omega Slow Squeezing System and Juice Cap mixing feature, you can easily make personalized juice rich in taste, flavor and full of valuable nutrients. 1. More Nutrients and Taste: Your own personalized juice Mixed juice Enjoy single ingredient juice or mixed juice. -
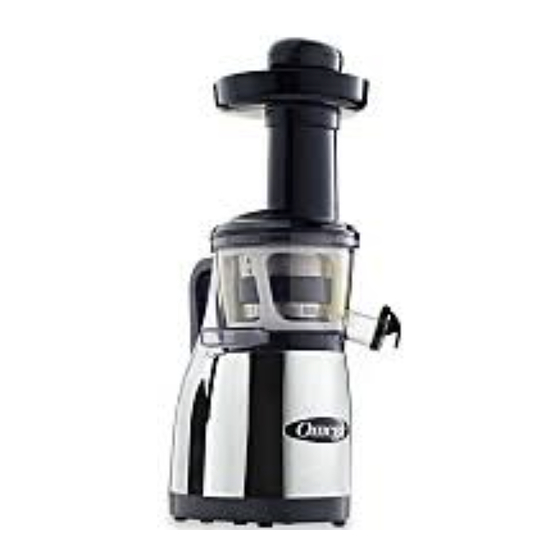
Page 6: General Description And Parts Names
GENERAL DESCRIPTION AND PARTS NAMES HOPPER PULP CONTAINER SQUEEZING SCREW SCREW JUICE CONTAINER COARSE STRAINER STRAINER (OPTIOnAL) nAL) FINE STRAINER CLEANING BRUSH SPINNING BRUSH BRUSH SMALL CLEANING BRUSH BOWL BASE PUSHER... -
Page 7: Specific Terms For Parts
SPECIFIC TERMS FOR PARTS <FRONT> <BACK> 4. Hopper 1. Hopper front rear part triangle 2. Bowl triangle 5. Operating switch 6. Juice outlet 3. Pulp outlet 7. Juice cap 8. Power cord 9. Grip STRAINER* COARSE STRAINER (Optional) The bigger holes in the strainer produce thicker juice when tender and soft fruits are extracted such as strawberries, kiwis and tomatoes. -
Page 8: Precautions For Safe Use
PRECAUTIONS FOR SAFE USE WARNING Hazards or unsafe practices which could result in serious personal injury or death. CAUTION Hazards or unsafe practices which could result in minor personal injury or appliance damage. SIGN EXAMPLES The sign indicates contents that may cause risk of a fire or an electrical shock. Specific warnings are written in the sign. -
Page 9: Warnings And Cautions
WARNINGS AND CAUTIONS WARNING Hazards or unsafe practices which could result in serious personal injury or death. DO NOT PLUG IN OR UNPLUG WITH WET HANDS. It may cause an electric shock or an injury. DO NOT USE WITH OTHER THAN RATED VOLTAGE. It may cause an electric shock, a fire or abnormal performance. - Page 10 WARNINGS AND CAUTIONS NEVER DISASSEMBLE BOWL SET DURING OPERATION OR INSERT FINGERS, FOREIGN OBJECTS SUCH AS FORKS, SPOONS ETC. INTO FEEDING TUBE OR JUICE OUTLET. It may cause an injury, an accident or a failure. THIS APPLIANCE IS NOT INTENDED FOR USE BY PERSONS (INCLUDING CHILDREN) WITH REDUCED PHYSICAL, SENSORY OR MENTAL CAPABILITIES, OR LACK OF EXPERIENCE AND KNOWLEDGE, UNLESS THEY HAVE BEEN GIVEN SUPERVISION OR INSTRUCTION CONCERNING USE OF THE APPLIANCE BY...
- Page 11 WARNINGS AND CAUTIONS WHEN USING THE APPLIANCE, BE CAREFUL WHILE WEARING A NECKTIE, LONG NECKLACE, SCARF ETC. THAT THEY DO NOT BECOME ENTANGLED IN THE FEEDING TUBE. It may cause an injury, a failure or a breakage. PLACE THE APPLIANCE ON A FLAT AND STABLE SURFACE. Failure to do so may cause an injury or a failure.
-
Page 12: Slow Juicer Assembly
SLOW JUICER ASSEMBLY Make sure to press the screw down into the strainer as in STEP 2. The hopper does not close properly when the screw does not fit in completely. Assemble the parts as following order : Bowl > Spinning Brush >... -
Page 13: Slow Juicer Assembly In Detail
SLOW JUICER ASSEMBLY IN DETAIL Align the hopper rear part with base completely as in below. The hopper will not close properly when the parts are not assembled correctly. Hopper rear part Assemble the parts in the order of bowl > spinning brush > strainer > squeezing screw > hopper (or assemble the spinning brush into the bowl then fit strainer bump in the bowl inner groove). -
Page 14: How To Use The Appliance
HOW TO USE THE APPLIANCE BACK VIEW Wash the fruits and/or vegetables and cut them in to pieces that fit in to the feeding tube. Place the suitable pieces into feeding tube slowly and press with a pusher. Use fresh fruits and vegetables for juicing as they contain more juice. -
Page 15: Juice Cap And Extraction Packing
JUICE CAP AND EXTRACTION PACKING JUICE CAP This is the cap of juice outlet in the bowl. Close the juice cap and fill up with juice in the bowl with various ingredients. You can easily make mixed juices. Juice cap Close juice cap and press [On] button to start. -
Page 16: When The Screw Is Stopped During Operation
WHEN THE SCREW IS STOPPED DURING OPERATION (REVERSE/REV BUTTON) Click [ Reverse/REV ] button and stop the appliance. Stop Press [ Reverse/REV ] button in operating switches for 3~5 seconds and release it. Repeat this process 2~3 times. Reverse is the button pushing ingredients upward. -
Page 17: Important Safeguards For Use
IMPORTANT SAFEGUARDS IN USE • Fruits with pits, hard seeds such as nectarines, peaches, mangos, apricots, plums and cherries must be pitted before juicing. • Cut fibrous ingredients (water parsleys etc.) in small size like 3~4cm (1.5inch) and place to the feeding tube. •... -
Page 18: Disassembly, Cleaning And Care
DISASSEMBLY, CLEANING AND CARE FIGURE IN ORDER Juice outlet... - Page 19 DISASSEMBLY, CLEANING AND CARE 1. Ensure the motor stops completely and unplug the power cord. When unplugging the power cord, hold the head part of the power cord and unplug it. Do not touch the power cord with wet hands. 2.
-
Page 20: Bowl Disassembly And Washing
BOWL DISASSEMBLY AND WASH Juice cap packing Bowl packing Remove Juice Cap packing and bowl packing. Open juice cap first. Hold the bowl and juice cap with one hand and remove juice cap packing with the other hand. When removing it, be careful not to drop the juice cap and bowl. It may cause damage to the juice cap. Remove the bowl packing by pinching and twisting it with two fingers. -
Page 21: Sterilization And Easy Cleaning System
STERILIZATION AND EASY CLEANING SYSTEM STERILIZATION For sterilization, use baking soda or natural wash-up liquids only. You can thoroughly wash parts by immersing in water diluted with one or two drops of baking soda or natural wash-up liquids for about 30 minutes. EASY CLEANING SYSTEM After closing the juice cap, pour the water into After a while, open the juice cap... -
Page 22: Spinning Brush Disassembly And Washing
SPINNING BRUSH DISASSEMBLY AND WASH Remove the spinning brush from strainer. Detach the silicone brush from spinning brush. Spinning brush Silicone brush As shown to the left, hold the outer part of silicone brush with your fingers an pull it out to the arrow direction. It is recommended to remove it according to the above method. -
Page 23: Spinning Brush Assembly
SPINNING BRUSH ASSEMBLY Check the groove of the spinning SPINNING BRUSH SILICONE BRUSH brush and the direction of silicone Inner wing brush. (longer part) There are grooves to insert silicone brush in the spinning brush. Silicone brush has inner wing and outer wing. -
Page 24: Bowl Packing Assembly
BOWL PACKING ASSEMBLY Hold the bowl packing like pinching. As shown to the left in a dotted circle, let the protrusion part on the bowl packing face upward and hold it like pinching with your thumb and index finger. Bowl packing Insert the bowl packing into the bowl hole. -
Page 25: Juice Cap Packing Assembly
TROUBLESHOOTING Check the details below before contacting Technical Support for repair or service. If you need information or if you have a problem, please contact the local Customer Care Center. When applying for after sales service, check the manufacturer’s serial number or bar code. THE APPLIANCE DOES NOT WORK. -
Page 26: Appliance Specifications
APPLIANCE SPECIFICATIONS APPLIANCE STANDARDS PRODUCT NAME Omega Slow Squeeze Juicer MODEL NAME VR T370/T380 Series RATED VOLTAGE 120 V RATED FREQUENCY 60 Hz RATED POWER CONSUMPTION 150 W RPM (REVOLUTIONS PER MINUTE) 80 RPM CORD LENGTH 1.4 m MOTOR Single-phase... - Page 28 OMEGA PRODUCTS, INC. 6291 LYSTER LANE HARRISBURG, PA 17111-4523 U.S.A. PHONE: 1.800.633.3401 FAX: 717.561.1298...
Need help?
Do you have a question about the VRT380 Series and is the answer not in the manual?
Questions and answers