Table of Contents
Advertisement
Quick Links
Advertisement
Table of Contents

Related Manuals for Viking VCWB301RSS


Summary of Contents for Viking VCWB301RSS
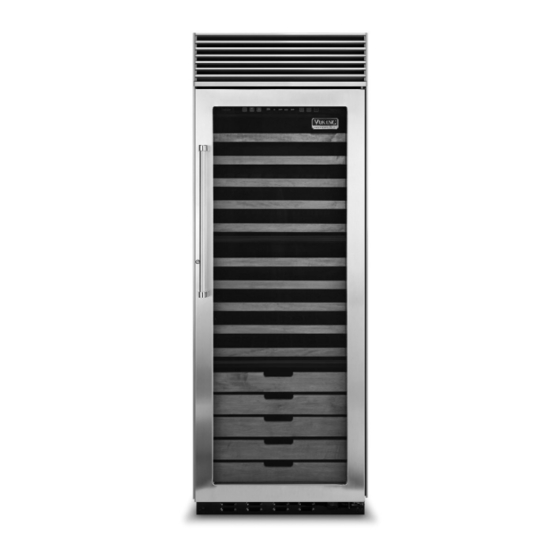
- Page 1 Installation Built-in Full Height Wine Cellar VCWB301...
-
Page 2: Table Of Contents
Table of Contents Warnings & Important Information _ _ _ _ _ _ _ _ _ _ _ _ _ _ _ _ _ _ _ _ _ _ _ _ _ _ _ _ _ _ _ _ _ _ _ _ _ _ _ _ _ _ _ _ _ _ _ _ _ _ _ _ _ _ _ _ _ _ _ _ 3 Dimensions _ _ _ _ _ _ _ _ _ _ _ _ _ _ _ _ _ _ _ _ _ _ _ _ _ _ _ _ _ _ _ _ _ _ _ _ _ _ _ _ _ _ _ _ _ _ _ _ _ _ _ _ _ _ _ _ _ _ _ _ _ _ _ _ _ _ _ _ _ _ _ _ _ _ _ _ _ _ _ _ _ 5 Specifications _ _ _ _ _ _ _ _ _ _ _ _ _ _ _ _ _ _ _ _ _ _ _ _ _ _ _ _ _ _ _ _ _ _ _ _ _ _ _ _ _ _ _ _ _ _ _ _ _ _ _ _ _ _ _ _ _ _ _ _ _ _ _ _ _ _ _ _ _ _ _ _ _ _ _ _ _ _ _ 6 Cutout Dimensions _ _ _ _ _ _ _ _ _ _ _ _ _ _ _ _ _ _ _ _ _ _ _ _ _ _ _ _ _ _ _ _ _ _ _ _ _ _ _ _ _ _ _ _ _ _ _ _ _ _ _ _ _ _ _ _ _ _ _ _ _ _ _ _ _ _ _ _ _ _ _ _ _ _ 7... -
Page 3: Warnings & Important Information
IMPORTANT–Please Read and Follow! • Make sure that incoming voltage is the same as Your safety and the safety of others is unit rating. An electric rating plate specifying very important. voltage, frequency, wattage, amperage, and phase is attached to the product. We have provided many important safety messages in this manual and on your appliance. - Page 4 • The required use of a GFI is normally related to the location of a receptacle with respect to any significant sources of water or moisture. • Viking Range Corporation will NOT warranty any problems resulting from GFI outlets which are not installed properly or do not meet the requirements below.
-
Page 5: Dimensions
Dimensions 30” Professional ( 7 3 ” . 7 c 9 - 5 / 1 6 ( 2 3 ” ( 7 6 ” ( 1 7 ” 7 . 5 - 7 / ( 2 1 8 ” 0 . 5 - 1 / ( 2 1 3 . -
Page 6: Specifications
Specifications Description VCWB301/Standard Mount VCWB301/Flush Mount Overall width 30” (76.2 cm) Overall height from bottom 82-3/4” (210.2 cm) min. to 84-1/16” (213.5 cm) max. Overall depth from rear To rear edge of side trim: 22-3/16” (56.4 cm) 23-13/16” (60.5 cm) To front of door: 24-1/32”... -
Page 7: Cutout Dimensions
Cutout Dimensions 2” x 4” Mounting Board [1-1/2” (3.8 cm) x 3-1/2” (8.9 cm)] Attached to anti-tip mounting bracket Note: If unit is installed deeper than 24” (61.0 cm), then shim behind anti-tip bracket thickness by the same amount 1-1/2” 1-1/2”... -
Page 8: Cabinet Information
Cabinet Information Professional models fit “semi-flush” in standard 24” (61.0 cm) deep cabinet openings. The door face protrudes 2-1/16” (5.2 cm) from the cabinet face. The handle protrudes an additional 2-1/2” (6.4 cm) into the room. Wall 1-13/16” 3/4” (4.6 cm) (1.9 cm) full end panel... - Page 9 Cabinet Information Professional models fit “semi-flush” in standard 24” (61.0 cm) deep cabinet openings. The door face protrudes 2-1/16” (5.2 cm) from the cabinet face. The handle protrudes an additional 2-1/2” (6.4 cm) into the room. Wall 1-13/16” (4.6 cm) 3/4”...
- Page 10 Cabinet Information Wall 1-13/16” 3/4” (4.6 cm) (1.9 cm) space if 24” 24” full end (61.0 cm) (61.0 cm) panel standard cabinet TOP VIEW standard depth is used cabinet depth 2-1/16” (5.2 cm) Partial overlay Door offset cabinet door...
-
Page 11: Cabinet Information (W/Flush Mount Trim)
Cabinet Information (with Flush Mount Trim) Professional models with Flush Mount Trim fit “flush” in standard 24” (61.0 cm) deep cabinet openings with no protrusion into the room except 2-1/2” (6.3 cm) handle depth. Wall 1” 3/4” (2.5 cm) (1.9 cm) full end panel 25”... - Page 12 Cabinet Information (with Flush Mount Trim) Professional models with Flush Mount Trim fit “flush” in standard 24” (61.0 cm) deep cabinet openings with no protrusion into the room except 2-1/2” (6.3 cm) handle depth. 1” (2.5 cm) space if 25” Wall (63.5 cm) cabinet depth is used 3/4”...
- Page 13 Cabinet Information (with Flush Mount Trim) Wall 3/4” (1.9 cm) space if 24” (61.0 cm) standard cabinet depth is used 24” (61.0 cm) TOP VIEW standard cabinet depth 24-3/4” (62.9 cm) Door Wine cellar and Cabinet door cabinet door flush...
-
Page 14: Custom Side Panel Dimensions (Standard Mount)
Custom Side Panel Dimensions (Standard Mount) TOP VIEW 3/16” 3/4” (0.5 cm) (1.9 cm) thick back thick end filler panel panel 8 ” - 3 / 6 ” ( 1 5 ( 5 7 5/32” (0.4 cm) 8 ” - 3 / ( 5 7 ( 2 1 - 7 /... -
Page 15: Custom Side Panel Dimensions (W/Fush Mount Trim)
Custom Side Panel Dimensions (with Flush Mount Trim) NOTE: Adding a 3/4” (1.9 cm) side panel adds an additional 3/4” (1.9 cm) to the TOP VIEW overall width of the product for each side panel used. 1” Z-Bracket 3/4” (2.5 cm) 1/4”... -
Page 16: General Information
Electrical Requirements The anti-tip boards should be fastened IMPORTANT: If the power cord is damaged, it into position prior to moving the unit into must be replaced by a Viking qualified the opening. technician or a Viking Range Corporation WARNING... -
Page 17: Unpacking & Moving
General Information • Most of the unit’s weight is at the top. Extra WARNING care is needed when moving the unit to prevent tipping. TIP OVER HAZARD Appliance is top heavy • Do not remove protective film until unit is in and tips easily when operating position. -
Page 18: Home Security System Connection
Home Security System Connection NOTE: Contact a qualified electrician or authorized agent from alarm company to connect your home security system to the wine cellar. Home security system connection must be hooked up before the unit is installed. 1. Remove the four mounting screws attaching the unit compartment cover to the cabinet. (2 per side) 2. -
Page 19: Securing Your Wine Cellar
Securing Your Wine Cellar (3 options) WARNING ELECTRICAL SHOCK HAZARD Disconnect power at breaker or turn power disconnect switch to OFF position before performing any installation procedure. Failure to do so can result in death or electrical shock. OPTION 1 If a solid soffit is 1”... - Page 20 Securing Your Wine Cellar Before moving the wine cellar in place, confirm the finished dimensions, electrical location, minimum door and shelf clearances, and door panel instructions. 1. Position wine cellar in front of cutout. 2. Verify operation by plugging power cord in receptacle.
-
Page 21: Kickplate Installation
Kickplate Installation The kickplate consists of a two (2) part assembly: one top louvered panel and one bottom solid panel. Install the kickplate with louvered section on the top. Flooring must allow the kickplate to be removed. To install: 1. Insert the bottom (solid) panel into the open end of the top (louvered) panel. The holes in the bottom panel should line up with the slots in the top panel. -
Page 22: Door Stop/Hinge Adjustment
Door Stop/Hinge Adjustment DOOR STOP 1. Using a 3/16” Allen wrench, remove door stop pin located in bottom hinge. 2. The pin is factory set 110°. For 120° swing, move the pin to the utmost forward stop hole. For 90° swing, move the pin to the utmost rear stop hole. -
Page 23: Performance Checklist
• Name of dealer from whom purchased Clearly describe the problem that you are having. If you are unable to obtain the name of an authorized service agency, or if you continue to have service problems, contact Viking Range, LLC at 1- 888-845-4641 or write to:... - Page 24 Viking Range, LLC 111 Front Street Greenwood, Mississippi 38930 USA (662) 455-1200 For product information, call 1-888-845-4641 or visit the Viking Web site at vikingrange.com F20904E EN (091520)
Need help?
Do you have a question about the VCWB301RSS and is the answer not in the manual?
Questions and answers