
Related Manuals for ProSoft Technology ILX34-MBS485


Summary of Contents for ProSoft Technology ILX34-MBS485
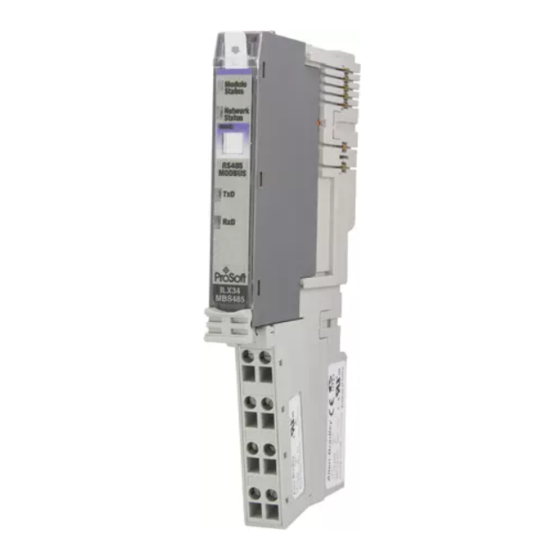
- Page 1 ILX34-MBS User Manual ® Modbus Serial Module for CompactLogix™ L1 and Point I/O Adapters January 6, 2022 USER MANUAL...
-
Page 2: Your Feedback Please
+1 (661) 716-5100 +1 (661) 716-5101 (Fax) www.prosoft-technology.com support@prosoft-technology.com Copyright © 2022 ProSoft Technology, Inc. All rights reserved. ILX34-MBS User Manual January 6, 2022 For professional users in the European Union If you wish to discard electrical and electronic equipment (EEE), please contact your dealer or supplier for further information. -
Page 3: Table Of Contents
Module Status ....................26 General Features & Specifications General Specifications ..................27 Hardware Specifications .................. 28 Agency Approvals .................... 28 Support, Service & Warranty Contacting Technical Support ................29 Warranty Information ..................29 ProSoft Technology, Inc. Page 3 of 29... -
Page 4: Start Here
Note: The Hardware and Operating System requirements in this list are the minimum recommended to install and run software provided by ProSoft Technology. Other third party applications may have different minimum requirements. Refer to the documentation for any third party applications for system requirements. -
Page 5: Installing The Adapter
(and any module immediately to the right) and use a small blade screwdriver to rotate the DIN rail locking screw to a vertical position. This releases the locking mechanism. Lift straight up to remove the mounting base. Repeat this procedure for the next mounting base assembly. ProSoft Technology, Inc. Page 5 of 29... -
Page 6: Installing An I/O Module
Make certain the DIN-rail locking screw is in the horizontal position. You cannot insert the module if the locking mechanism is unlocked. Insert the module straight down into the mounting base and press to secure. The module locks into place. ProSoft Technology, Inc. Page 6 of 29... -
Page 7: Installing The Removable Terminal Block
Be sure that power is removed or the area is non-hazardous before proceeding. Rotate the terminal block into the mounting base until it locks itself in place. If an I/O module is installed, snap the RTB handle into place on the module. ProSoft Technology, Inc. Page 7 of 29... -
Page 8: Removing A Mounting Base
Use a small screwdriver to rotate the orange DIN-rail locking screw on the mounting base to a vertical position. This releases the locking mechanism. Lift the mounting base and remove. ProSoft Technology, Inc. Page 8 of 29... -
Page 9: Connecting Power
The VDC+ should be jumped to the FP+, and the VDC- should be jumped to the FP- as shown below. It uses isolated circuits and does not require a NEC Class 2 rated unit. VDC+ to FP+ VDC- to FP- ProSoft Technology, Inc. Page 9 of 29... -
Page 10: Module Terminations
Warning: If you connect or disconnect wiring while the field-side power is on, an electrical arc can occur. This could cause an explosion in hazardous location installations. Be sure that power is removed or the area is nonhazardous before proceeding. ProSoft Technology, Inc. Page 10 of 29... -
Page 11: Configuration
Refer to Create Module I/O Configuration on page 14 to configure the ILX34- MBS module for this adapter. Schedule the ControlNet as described in the 1734-ACNR documentation. 1769-L16ER-BB1B, L18ER-BB1B, and L18ERM-BB1B Please see the instructions in the following Sample Configuration section. ProSoft Technology, Inc. Page 11 of 29... -
Page 12: Sample Configuration Procedure
Open Studio 5000 and click Create New Project. Expand CompactLogix 5370 Controller. Select the appropriate processor from the list: 1769-L16ER-BB1B 1769-L18ER-BB1B 1769-L18ERM-BB1B Enter a Name for the project. Click Next to open the Project Configuration dialog. ProSoft Technology, Inc. Page 12 of 29... - Page 13 Select the Expansion I/O module number. If the modules present do not match the modules specified in the Project, unexpected control may occur. The Expansion I/O setting must match the actual number of modules. Click Finish. The following window opens. ProSoft Technology, Inc. Page 13 of 29...
-
Page 14: Create Module I/O Configuration
3.4.1 Create Module I/O Configuration Right-click on Expansion I/O and select New Module. The Select Module Type dialog opens. Locate 1734-MODULE (Generic 1734 Module) by scrolling the list or using the Search filter. ProSoft Technology, Inc. Page 14 of 29... - Page 15 Ensure that the Comm Format is set to Data-SINT and that the Slot field matches the Slot Number that the module will reside in. Configuration for a Block Transfer size of 36 is shown below. Click OK. The Module Properties Report dialog opens. ProSoft Technology, Inc. Page 15 of 29...
- Page 16 ILX34-MBS User Manual Configuration Set the RPI time to a value larger than 50 ms. Click Apply then click OK. The module now appears under Expansion Module in the tree. ProSoft Technology, Inc. Page 16 of 29...
-
Page 17: Importing The Add-On Instruction (Aoi)
ILX34-MBS User Manual Configuration 3.4.2 Importing the Add-On Instruction (AOI) Under Tasks, expand Main Task > Main Program. Double-click on the Main Routine icon. ProSoft Technology, Inc. Page 17 of 29... - Page 18 In the Import Rung dialog, navigate to the .L5X file location of the appropriate Add-On rung according to your block transfer size (8, 24, or 36), configured in Connection Parameters. Example: ILX34-MBS36_AddOn_Rung_v1_1.L5X Click Import. The Import Configuration dialog opens. ProSoft Technology, Inc. Page 18 of 29...
- Page 19 In the Final Name column, edit (map) the 3 imported AENT tag names to reflect the location of the ILX34-MBS in the rack. Also, make sure to enter the correct slot number reference. Example A: ILX34-MBS in slot 1 of a local rack. ProSoft Technology, Inc. Page 19 of 29...
- Page 20 ILX34-MBS User Manual Configuration Example B: ILX34-MBS in slot 4 of remote rack ExRemote network. Click OK. The Add-On rung appears in the Main Routine. ProSoft Technology, Inc. Page 20 of 29...
-
Page 21: Configuring The Ilx34-Mbs Modbus Serial Port
5 = 38400 Serial Comm 0 = 7N2 4 = 8N2 1 = 7E1 5 = 8E1 2 = 7O1 6 = 8O1 3 = 8N1 Protocol 0 = ASCII 1 = RTU ProSoft Technology, Inc. Page 21 of 29... - Page 22 Add-On instruction. Valid ranges are: 00001 to 00576, 10001 to 10576, 30001 to 30501 and 40001 to 40501. Coldboot Bit - If parameters change after initial configuration, use the Coldboot bit to initiate the changes. ProSoft Technology, Inc. Page 22 of 29...
-
Page 23: Downloading The Sample Program To The Processor
Confirmation dialog box. If the key switch is in the REM position, click OK to switch the processor from PROGRAM mode to RUN mode. Note: If you receive an error message during these steps, refer to the Rockwell Automation documentation to interpret and correct the error. ProSoft Technology, Inc. Page 23 of 29... -
Page 24: Master Command Structure
3 = Bytes – The bytes in each word are swapped. The words should be swapped only when using an even number of words. Trigger 1 = Trigger the message. Can be triggered anytime the command is enabled. ProSoft Technology, Inc. Page 24 of 29... -
Page 25: Data Handling
OutputRegister Outgoing register data for address ranges 3x and 4x from other devices. Functions 3 and 4 when device is configured as a Slave. Functions 6 and 16 when configured as a Master. ProSoft Technology, Inc. Page 25 of 29... -
Page 26: Module Status
2 = Invalid Address 3 = Invalid Data 20 = Checksum Error 21 = Modbus Invalid Message 22 = Modbus Timeout 26 = Float Word Swap Uneven Word Count -47 = Parity Error ProSoft Technology, Inc. Page 26 of 29... -
Page 27: General Features & Specifications
4: Read Input Registers 5: Force (Write) Single Coil 6: Preset (Write) Single Holding Register 8: Diagnostics (Slave Only. Responds to Sub-function 00) 15: Force (Write) Multiple Coils 16: Preset (Write) Multiple Holding Registers ProSoft Technology, Inc. Page 27 of 29... -
Page 28: Hardware Specifications
30g Peak acceleration (operating) 50g Peak acceleration (non-operating) Vibration Tested 5g @ 10 to 500 Hz ESD Immunity 6 kV contact discharges 8 kV air discharges Agency Approvals Please visit our website: www.prosoft-technology.com ProSoft Technology, Inc. Page 28 of 29... -
Page 29: Support, Service & Warranty
Support, Service & Warranty Support, Service & Warranty Contacting Technical Support ProSoft Technology, Inc. is committed to providing the most efficient and effective support possible. Before calling, please gather the following information to assist in expediting this process: Product Version Number...
Need help?
Do you have a question about the ILX34-MBS485 and is the answer not in the manual?
Questions and answers