Table of Contents
Advertisement
Quick Links
Advertisement
Table of Contents

Subscribe to Our Youtube Channel
Summary of Contents for Idis Direct IP DR-8364
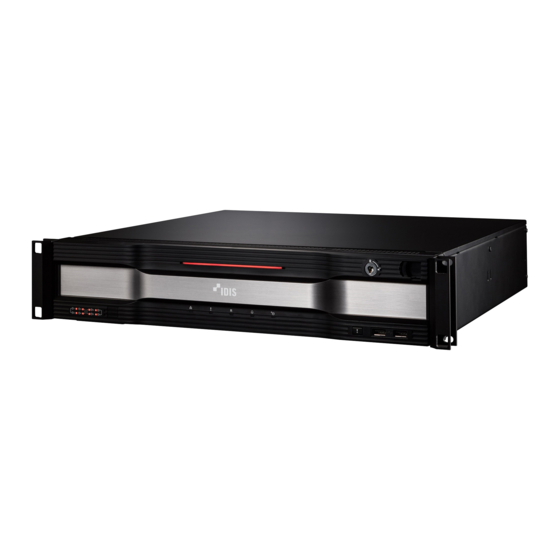
- Page 1 Network Video Recorder Quick Guide DR-8364 DR-8364D Powered by...
-
Page 2: Safety Precautions
Safety Precautions Important Safeguards B. If liquid is spilled, or objects have fallen into the equipment. C. If the equipment has been exposed to rain or water. 1. Read Instructions D. If the equipment does not operate normally by following the operating All the safety and operating instructions should be read before the instructions, adjust only those controls that are covered by the operating appliance is operated. -
Page 3: Fcc Compliance Statement
IDIS Co., Ltd. reserves all rights concerning this document. Use or duplication of this document in part or whole without the prior consent of IDIS Co., Ltd. is strictly prohibited. Contents of this document are subject to change without prior notice for reasons such as functionality enhancements. - Page 4 Accessories Upon unpackaging the product, check the contents inside to ensure that all the following accessories are included. Item Network Video Recorder Power Cable Quick Guide Manual and IDIS Center Program CD Optical USB Mouse IR Remote Control Overview Dimensions...
-
Page 5: Front Panel
Front Panel Panic Recording SATA LED Status LEDs USB Ports Button Power LED Front Door Lock Rack Mount Ears For more details on front panel buttons, refer to the manual. Rear Panel DR-8364 DR-8364D Power In Port Video In Ports - SFP (1~2) / RJ45 (3~5) Network Port eSATA Ports USB 3.0 Ports... -
Page 6: Remote Control
Connections on the Rear Panel Power Network Camera DirectIP™ Gigabit PoE Switch Network eSATA Storage Camera Microphone Device Network Sensor IDIS Center Remote Monitoring Speaker Alarm Keyboard VGA Monitor HDMI Monitor Remote Control ID Button Panic Button Camera Buttons Status Button PTZ Control... -
Page 7: Getting Started
Network Setup Wizard Getting Started After exiting from Quick Wizard, the network with Network Wizard will start automatically. Setup Wizard ● Start the Network Setup Wizard • Setup Wizard only appears during initial booting. ● Internet When you login as an administrator account after Connection initial booting, you can use Wizard to go to Live menu and select Wizard. -
Page 8: Camera Registration
Camera Registration - Mode: Select the scan mode. - Advanced Setup: If the camera is networked but Once Network Setup Wizard is complete, live mode screen not scanned, use this setup. This setup allows you to appears. While in live mode, right-click on the mouse and change the network setting of the NVR’s VIDEO IN select Camera Registration to run the Camera Registration port which is camera’s network environment. -
Page 9: Apply/Cancel Buttons
Apply/Cancel Buttons Basic Feature While in Camera Registration mode, select Apply to register all changes. Select Cancel to exit Camera Registration mode without Live Mode applying the changes. Once Camera Registration is complete, the system will enter It is not possible to register a camera that has already Live Mode. -
Page 10: Audio Recording
FEN server upon login) remote control. Contact your network administrator for the IP address of the NVR you wish to connect to and the IDIS Web All Channel Playback port number. Press the Menu button while in Live mode. -
Page 11: System Requirements
When IDIS Center software is installed, IDIS Center and IDIS Center Run as administrator shortcut icons will be created on the desktop. Run IDIS Center software by double-clicking on IDIS Center or IDIS Center Run as administrator shortcut icon. If a removable eSATA HDD or... -
Page 12: Device Registration
Device Registration This program does not have a password set by default. To use the functions provided by IDIS Center, you must first Leaving the admin account unassigned with a password register a device and add the device to a device group. -
Page 13: Live Video Mode
Live Video Mode When user authentication window appears, enter the User ID and Password set up on each device, and then select OK for remote access. In the Site List, make sure that the device has been added to the device group. In the panel tabs, click the Live tab. -
Page 14: Specifications
This service requires heavy data traffic, and using a Wi-Fi connection is recommended. Using wireless Enter IDIS Mobile in the search filed of the App Store. internet (3G, LTE) may result in excessive data charges. Install IDIS Mobile program and open it. - Page 15 In ) x 2 Transmission Speed 400Mbps / 500Mbps(BRP Mode) Email (attach clip (.cbf ) .MP4), Callback Event Notification to Remote S/W, Push notification (IDIS Mobile), SNS (Twitter) INTERFACE Local(NVR) : 1 RCA / 1RCA + 1HDMI Audio In / Out...
- Page 16 IDIS Co., Ltd. For more information, please visit at www.idisglobal.com...


Need help?
Do you have a question about the Direct IP DR-8364 and is the answer not in the manual?
Questions and answers